
What's on this page
- What a material estimate is
- The general method: measure, convert, cover, waste, round
- Building materials estimating for a construction project
- The material takeoff, explained
- Estimating by area: paint, flooring, sod, and pavers
- Estimating by volume: concrete, gravel, sand, and soil
- Converting volume to weight and tons
- The waste factor: the step people skip
- Typical waste factors by material
- Estimating count-based materials: bricks, blocks, and studs
- Unit conversions that trip people up
- What steps do you follow to check your arithmetic when estimating material quantities
- Running the arithmetic check on the slab example
- Reading the error: what the size of a discrepancy tells you
- How do you calculate how much material you need
- How do I estimate concrete, gravel, and sand for a slab
- A project material order: base plus waste
- Matching your quantity to how the supplier sells it
- Using a yardage calculator and estimating tools
- Estimating the small consumables people forget
- The materials estimating workflow, trade by trade
- Common material estimation mistakes
- The bottom line
A material estimate is a quantity, not a price: the amount of each material a job needs, settled before you order. Material estimation, also called material estimating, is how to estimate materials for a project: measure the area or volume you need to cover or fill, apply the coverage or density of the material you are buying, add a waste factor of 5 to 15 percent for cuts and spillage, then round up to whole order units. That single method covers almost everything you will buy, from paint to concrete, and building materials estimating on a full construction job is the same method run once per line.
This manual is the definitive walk through material estimation: what it is, the general method that works for every material, how to estimate by area and by volume, how to convert volume to weight, the waste factor that keeps you from running short, the six-step check you run on your own arithmetic before ordering, and a full worked example that estimates concrete, gravel, and sand for a small slab. You can run your own numbers in about a minute with our material coverage estimator, and the companion below recalculates every section against your figures as you read. It stops at the quantities on purpose: if what you need is a price rather than an amount, with labor, overhead, and profit on top, that is our manual on how to write a contractor estimate.
Key takeaways
- A material estimate is a quantity, not a price, and material estimation is one method: measure the area or volume, apply coverage or density, add a waste factor, and round up to whole order units.
- Estimate flat materials by area (square feet divided by coverage) and bulk materials by volume (cubic yards, length times width times depth divided by 27).
- Convert volume to weight by multiplying cubic yards by a density in tons per cubic yard, because gravel, sand, and soil are often sold by weight.
- Add a waste factor of about 5 to 15 percent, lower for bulk materials and higher for tile and patterned layouts, because it is the step people most often skip.
- Check every line before ordering: re-derive it with the units written out, test the order of magnitude, reverse the calculation, match the supplier's sell unit, and confirm the waste factor was applied once.
What a material estimate is
A material estimate is a quantity, not a price: the amount of each material a job needs, worked out before you order and written in the units your supplier actually sells in. Material estimation, also called material estimating, is the process that produces that number, and a materials estimate on a larger job is many of those quantities listed together, one line per material.
Building materials estimating on a construction job runs the identical mechanics on a longer sheet. Whether the work is one wall or one house, each material gets its own measurement, its own coverage or density figure, its own waste allowance, and its own round-up, and the finished lines are added. The arithmetic does not scale with the job; only the number of lines does, which is why learning the single calculation once is worth far more than memorising any particular material.
Material estimation is the bridge between a measurement and a shopping list: the tape says the patio is 12 feet by 10 feet, and the estimate turns that into a firm number of bags, boxes, or cubic yards to buy. Every trade does it, from the painter working out gallons to the concrete crew booking a truck.
The reason it deserves a method rather than a guess is that both errors cost money. Estimate too little and the job stops for a second trip, with the added risk of a batch that does not quite match what you already installed. Estimate too much and you have paid for material that now has to be stored, returned, or thrown away. Good material estimation threads that needle: enough to finish without interruption, plus a small deliberate cushion, and not much more.
What makes it learnable is that the underlying calculation barely changes from one material to the next. Whether you are buying paint, tile, gravel, or concrete, you measure, you apply a coverage or density figure, you add a waste allowance, and you round up. The rest of this manual is that method, applied carefully to the materials people estimate most, plus the arithmetic check that tells you whether any given line came out right.
The general method: measure, convert, cover, waste, round
Nearly every material estimate follows the same five steps, and once you have them the specific material is just a matter of which coverage figure you plug in.
First, measure the space or surface accurately, and measure twice, because an error here multiplies through the whole estimate. For an irregular yard, driveway, or lot, our land area measurement guide shows how to break an odd footprint into rectangles and triangles you can measure and add, which is the input every estimate below depends on. Second, convert the measurement into the quantity that matters: an area in square feet for flat materials, a volume in cubic yards for bulk materials, a length for linear materials, or a raw area for count materials. Third, apply the coverage or density: divide the area by the coverage one unit provides, or multiply the volume by density to reach weight. Fourth, add a waste factor for the offcuts, breakage, and spillage that real work always produces. Fifth, round up to whole order units, because materials are sold in whole cans, boxes, and loads.

That five-step shape, measure, convert, cover, waste, round, is the entire framework. Everything that follows is an application of it, and the material coverage estimator runs the arithmetic for you once you supply the inputs that actually matter.
Building materials estimating for a construction project
Building materials estimating on a whole project is just several materials estimated one at a time and added up. The trick contractors use is to break the job into its materials first, then run each through the same calculation, so nothing is forgotten and nothing is doubled up. A small slab, for instance, splits into a gravel base, a layer of bedding sand, and the concrete itself, each estimated separately.
For each material, decide which kind of quantity it needs. Flat, surface materials need an area; bulk, space-filling materials need a volume; edge materials like trim need a length; and unit materials like bricks need a count. Measure that quantity, divide by the coverage or capacity of one unit, or multiply a volume by density for weight, then add the material’s own waste factor and round up. The result is a firm quantity for that line.
Do that for every material, and the collected list is your order and your budget at once. Our manual on how to calculate cubic yards is the hub for the volume side of this, since concrete, gravel, sand, and soil all pass through the same length-times-width-times-depth-divided-by-27 line. The area side, paint and flooring, uses coverage instead of density. The discipline that ties a construction estimate together is treating each material as its own small calculation rather than trying to eyeball the whole job at once.
The material takeoff, explained
A material takeoff is the formal name for that line-by-line list: every material a project needs, with a quantity beside each, taken off the plans or the measured site. The word takeoff comes from the act of taking the quantities off a drawing. On a large job it is a detailed document; on a small one it can be a few lines on a notepad, but the logic is identical.
The value of a takeoff is that it forces completeness. By listing every material before ordering, you catch the ones that are easy to forget, the bedding sand under a paver patio, the fasteners, the second coat of paint, and you avoid ordering the same thing twice. Each line gets estimated with the coverage-or-density method and its own waste factor, so the takeoff is not a guess but a stack of small, honest calculations. When the takeoff is done, it becomes the order sheet and the budget, and later the record you check the delivery against. Doing even a rough takeoff before a project turns a chaotic series of hardware-store trips into one planned order.
Estimating by area: paint, flooring, sod, and pavers
Flat materials that cover a surface are estimated by area. The method is to calculate the square footage you need to cover, then divide by the coverage each unit provides, add a waste factor, and round up to whole units. The coverage figure is the key, and it is almost always printed on the packaging, though our material coverage reference collects the typical figures in one place for when the label is missing or you are estimating before you shop.
Paint is the classic case, with one twist people forget: multiply the wall area by the number of coats before dividing by the coverage per can, since a two-coat job needs twice the paint. Our note on how much paint you need walks a room through the coats step and the openings. Flooring and tile are sold by the box, and each box states its square footage, so you divide the floor area by the box coverage. Sod is sold by the roll or the pallet, each covering a stated area, so lawn area divided by roll coverage gives the count.
Pavers sit between area and count: you can estimate them by dividing the patio area by the coverage of one paver, and most suppliers publish a pavers-per-square-foot figure that does the same job. In every area-based estimate the discipline is the same, buy by coverage rather than by unit count, because two boxes of the same nominal product can cover different areas depending on the piece size. Read the coverage number, divide, add waste, and round up.
Estimating by volume: concrete, gravel, sand, and soil
Materials that fill a space rather than cover a surface are estimated by volume, and in North America that volume is almost always cubic yards. The formula is length times width times depth, with every measurement in feet, then divide by 27 to convert cubic feet into cubic yards. The one step that trips people is depth, which is usually thought of in inches, so divide the inch depth by 12 to get feet before you multiply.
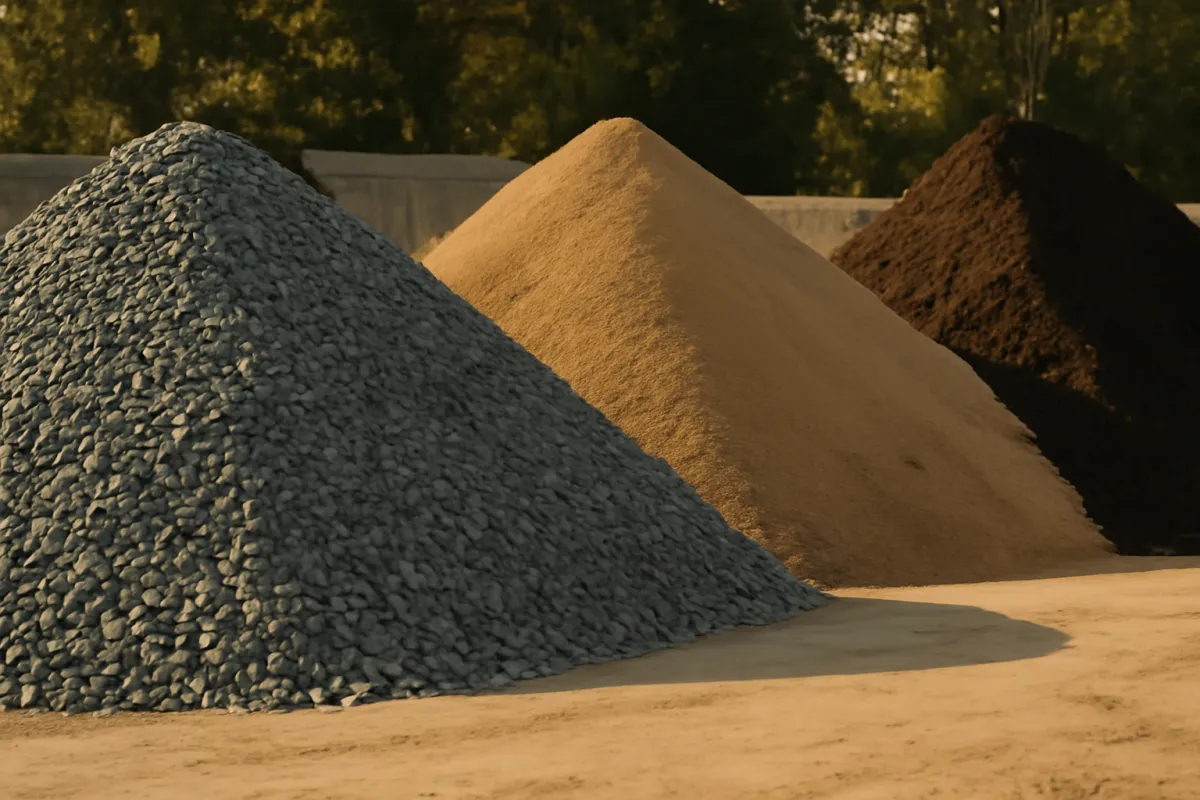
The same line serves every bulk material; only the depth and the waste allowance differ. Gravel goes down in layers, so a driveway might want a 4 inch surface course over a deeper base, each its own calculation, and our manual on how much gravel you need carries a driveway from measurement to order. Sand for a paver base or a sandbox runs shallower, covered in how much sand you need. Topsoil for a bed settles noticeably, so it leans toward a higher overage, as our note on how much topsoil you need explains. Concrete follows the same volume line but is ordered by the yard and punishes under-ordering, so it earns extra rounding. The unifying idea is that volume, not area, is what you are buying, and the depth is the dimension that most often goes wrong.
Converting volume to weight and tons
Concrete is ordered by the cubic yard, but gravel, sand, and soil are frequently sold and hauled by weight, which means the cubic yards you calculate often need a second conversion into tons. This is a multiplication, not a change of method: multiply the volume in cubic yards by the material’s density in tons per cubic yard. The volume always comes first, and the tonnage is layered on top of a number you have already worked out.
Densities vary with material and moisture, but figures commonly cited put crushed gravel near 1.4 tons per cubic yard, dry sand around 1.35, and dry topsoil close to 1.1, with wet material heavier. So five cubic yards of gravel at roughly 1.4 tons per yard is about 7 tons. Never try to guess tonnage directly, because weight is even harder to eyeball than volume. Our tons-to-cubic-yards conversion note lists typical densities and runs the math in both directions, which is what you want when a yard quotes in tons and your plan is in yards.
Weight matters for more than ordering; it decides how the material moves. A pickup that safely carries about half a ton will need several trips for a load that a single delivery handles in one, which is why our manual on how much a yard of gravel weighs frames tonnage as a hauling decision, not just an ordering one. Calculate the volume, convert to tons with the density, and you can judge both the order and the logistics.
The waste factor: the step people skip
Here is the step people most often leave out, and skipping it is the single most common cause of running short. No project uses every scrap of material perfectly. Cuts create offcuts you cannot always reuse, some pieces break, mistakes happen, ground is uneven, and material spills off the truck and the wheelbarrow. The waste factor is the extra percentage you add to cover all of that, and it is not padding, it is an honest acknowledgment that real work is not perfectly efficient.
How much to add depends on the material and how much cutting the job involves. Bulk materials like concrete and gravel commonly use about 5 to 10 percent, mostly for uneven ground and spillage rather than cuts. Flat materials like paint and straight-laid flooring sit near 10 percent. Tile rises to around 12 percent because of edge cuts, and diagonal or patterned layouts can need 15 percent or more, since every angled cut leaves a triangle you often cannot use elsewhere.
The waste factor is also your defense against batch mismatches. Many materials, paint, tile, flooring, vary slightly in shade between manufacturing batches, so buying enough at once, waste included, avoids a later top-up from a different batch that does not quite match. Adding the factor and rounding up is cheap insurance: a modest surplus costs a little money, while a shortfall costs a second trip and sometimes a visible mismatch in finished work.
Typical waste factors by material
How much to add tracks how much cutting the job demands and how forgiving the material is. These are typical illustrative starting points, not rules, and your own records will refine them over time.
Typical waste factor by material
Extra percentage added on top of the base quantity. Illustrative starting points.
The more cutting a layout demands, the higher the waste factor, because each cut can create an offcut too small to reuse. Bulk materials waste least; diagonal and patterned layouts waste most.
The pattern is simple: bulk materials that pour or spread waste very little, while cut materials waste more the more complex the layout. A concrete pour loses almost nothing to cuts, so its small overage is really for ground and spillage. A diagonal tile floor with many fixtures wastes a great deal, which is exactly where shortfalls happen most and where the standard 10 percent is too low.
Estimating count-based materials: bricks, blocks, and studs
Some materials are counted rather than covered or filled, and they use a variation of the same method: instead of dividing area by coverage, you divide area (or length) by the size of one piece. Bricks, blocks, and tiles are estimated per square foot of wall or floor; studs, joists, and fence pickets are estimated per linear foot of run at a set spacing.
For bricks and blocks, the supplier usually publishes a units-per-square-foot figure, so you multiply the wall area by that figure and add a waste factor for cuts and breakage. A standard modular brick runs around seven units per square foot of wall face, though it varies by brick size and joint width, so the published figure for your specific brick is the one to use. Blocks are larger, so fewer per square foot, but the logic is unchanged, and our manual on how many concrete blocks you need works a block wall from its dimensions to a firm count.
For framing, count the pieces along the run at their spacing. Studs at 16 inches on center work out to roughly one stud per 1.33 feet of wall, plus extras for corners, openings, and plates. Fence pickets divide the fence length by the picket width plus any gap. In every count-based estimate the waste factor covers breakage and the cuts at ends and openings, and you still round up to whole pieces, because half a block is no use. The method is the same shape as area and volume estimating, just with a count as the unit.
Unit conversions that trip people up
A surprising share of bad estimates trace back not to the method but to a units slip somewhere in it. The most common is depth left in inches when the volume formula wants feet, which inflates a cubic-yard answer twelvefold. Always divide an inch depth by 12 before you multiply, so a 4 inch layer is 0.333 feet, not 4.
The second classic error is dividing cubic feet by 3 instead of 27 to reach cubic yards. A cubic yard is a 3-foot cube, so it holds 3 times 3 times 3, which is 27 cubic feet, not 3. Dividing by 3 over-orders by roughly nine times. Our manual on how to calculate cubic yards explains the 27 in full, because it is worth understanding rather than memorizing.
Other traps: trying to convert square feet directly to cubic yards without supplying a depth, which is impossible, since area cannot become volume until you say how deep; squaring the diameter of a circle instead of the radius, which quadruples the area; and forgetting to multiply paint area by the number of coats. None of these is a failure of the method. They are all failures to keep units consistent, which is why the single most valuable habit in material estimation is to put every measurement into the same unit before you multiply. The second most valuable habit is checking the answer afterwards, and that check has a fixed sequence rather than a vague instruction to look for anything absurd.
What steps do you follow to check your arithmetic when estimating material quantities
The steps are these, in this order: re-derive the answer with the units written out, test its order of magnitude against a coverage figure you already trust, reverse the calculation back to a dimension you measured, cross-check with a second method that shares no arithmetic with the first, translate the result into the unit your supplier sells in, and confirm the waste factor was applied once and only once. Six steps, perhaps three minutes a line, and between them they catch the errors a re-read never will.
The reason a re-read fails is that reading your own working replays the same assumption that produced the mistake. If you left a depth in inches the first time, your eye will accept inches the second time, because the number looks like the number you meant. Every step below approaches the answer from a direction the original calculation did not use, which is the only way a check can be independent. Estimating errors are also unusually punishing here: they arrive as factors of 9, 12, or 27 rather than as a few percent, so an unchecked slip does not cost a little money, it buys the wrong job entirely.
Step 1: re-derive the answer with the units written out. Rewrite the calculation from the measurement, not from your earlier working, and put the unit beside every number as you go: 10 ft times 8 ft times 0.333 ft is 26.7 cubic feet. Written that way, the units multiply out on their own and tell you what kind of quantity you are holding. Feet times feet times feet can only be cubic feet, and cubic feet divided by 27 cubic feet per cubic yard can only be cubic yards. If the units do not cancel into the answer you expected, stop, because the error sits upstream of any arithmetic. This step alone catches the depth-in-inches slip, since 10 ft times 8 ft times 4 in is not a legal multiplication and writing it out makes that plain.
Step 2: test the order of magnitude against a coverage figure you already trust. Before you look at the digits, ask whether the answer is the right size. Anchor it to something you know: one cubic yard spread four inches deep covers roughly 81 square feet, since 27 divided by 0.333 is about 81. If an 80 square foot patio needs about a cubic yard of gravel at that depth, the answer is the right size. If it needs 12 cubic yards, it is wrong, and you can say so without recalculating anything. Our material coverage reference exists partly to give you anchors like this one, because a rough figure you trust is worth more as a check than a precise figure you do not.
Step 3: reverse the calculation back to a dimension you measured. Take the answer and work backwards to recover one of the inputs. From 0.99 cubic yards: multiply by 27 for 26.7 cubic feet, divide by the 80 square foot footprint for 0.334 feet, multiply by 12 for 4.0 inches. That is the depth you specified, so the chain held. Reversing is powerful because it runs every operation in the opposite direction, and a division done wrong the first time will not undo itself cleanly the second. When the reversed dimension comes back wrong, the size of the mismatch usually names the error outright, which is what the next section is for.
Step 4: cross-check with a second method that shares no arithmetic with the first. Two routes to the same number, with no shared step, is the strongest check available. The first route was volume: length times width times depth, divided by 27. The second route is coverage: look up how much area one cubic yard covers at your depth, and divide the footprint by it. Eighty square feet divided by about 81 square feet per yard is 0.99 yards, the same answer reached without ever computing a volume. For a count material, estimate by units per square foot, then again by dividing the wall dimensions by the piece dimensions. Agreement between two independent methods is evidence; agreement between one method and itself is not.
Step 5: translate the result into the unit your supplier sells in and look again. A number can be arithmetically perfect and still be nonsense as an order. Convert it into bags, boxes, yards, tons, or pallets and see whether it still looks like the job in front of you. A quarter of a cubic yard of bedding sand is a few bags, so a conversion that says 40 bags means something upstream is wrong. This step also catches the unit-family errors that survive everything before it, such as a tonnage that borrowed a density from a different material, and our tons to cubic yards note is where to confirm which density belongs to which material. Confirm the figure with the yard as well, since their material, its moisture, and their own increments decide what lands on the delivery note.
Step 6: confirm the waste factor was applied once, and applied last. The waste factor is the step people most often skip and the second most often double. Apply it to the settled base quantity, after every conversion is finished, and record the base and the with-waste figure as two separate numbers so you can always see which one you are holding. Double application is easy to do without noticing: you add ten percent, round up to a whole order unit, then a helpful supplier rounds again to their own increment, and the order is now well past anything anyone planned. One waste factor, applied last, then one round-up to the supplier’s unit, and nothing else.
Run those six on every line of a takeoff, not only the expensive ones, because a forgotten tube of adhesive stops a job as effectively as a short concrete pour. The sequence is quicker than it reads once the habit is set, and our material coverage estimator handles the arithmetic behind steps one and two for you, which leaves the judgment steps, the ones no tool can run on your behalf.
Running the arithmetic check on the slab example
The sequence is easier to trust when you watch it interrogate a real number, so here it is on the gravel base of the slab worked below: a 10 foot by 8 foot footprint, 4 inches deep, first estimated at about 1 cubic yard before waste.
Units written out. Ten feet times eight feet is 80 square feet. Four inches divided by 12 is 0.333 feet. Eighty square feet times 0.333 feet is 26.7 cubic feet. Divided by 27 cubic feet per cubic yard, that is 0.99 cubic yards. Every unit cancels into the next, and the final unit is cubic yards, which is what a bulk yard quotes in.
Order of magnitude. One cubic yard spread four inches deep covers about 81 square feet. The footprint is 80 square feet, so one yard is almost exactly right. Any answer near 10 yards or near 0.1 yards would have been wrong by a factor visible without arithmetic.
Reversed. Take 0.99 cubic yards back the other way: times 27 is 26.7 cubic feet, divided by 80 square feet is 0.334 feet, times 12 is 4.0 inches. The depth returns, so the chain is sound.
Second method. The coverage route never computes a volume at all: 80 square feet divided by about 81 square feet per cubic yard at that depth is 0.99 cubic yards. Two independent paths, one answer.
Supplier’s unit. The yard sells bulk gravel by the cubic yard and quotes tonnage near 1.4 tons per cubic yard. Just under a yard of gravel is a small delivery or a couple of careful pickup loads, which matches the size of the job. Had the conversion come back at 15 tons, that would be a full truck for a patio-sized base, and the mismatch would be the tell.
Waste, once. The base is 0.99 cubic yards. An 8 percent allowance for scatter and compaction takes it to about 1.07, which the order sheet rounds to about 1.1 cubic yards, or roughly 1.5 tons at that density. That 1.1 already contains the waste. Do not add 8 percent again because the yard rounds up to its own half-yard increment; the increment is the supplier’s rounding, not a second waste factor.
The same six steps applied to the sand layer catch something different. One inch is 0.083 feet, so 80 times 0.083 is 6.7 cubic feet, or 0.25 cubic yards. The order-of-magnitude check is the useful one here: a quarter of a cubic yard is a small heap rather than a delivery, so the sensible order is bags, and the supplier-unit step is what surfaces that. The concrete layer runs identically to the gravel and lands near 1.1 cubic yards with its overage, which is a short load worth discussing with the plant rather than a full truck. Three materials, one footprint, one method, and one check run three times.
Reading the error: what the size of a discrepancy tells you
When a check fails, the gap between the two answers is not only a warning, it is a diagnosis. Material estimating errors come from a short list of unit slips, and each leaves a distinctive ratio behind. Divide the suspect answer by the one you trust, or by your sanity anchor, and read the factor.
- Off by about 12. A depth left in inches when the volume formula wanted feet. Four inches treated as 4 feet is twelve times too much material.
- Off by about 9. Cubic feet divided by 3 instead of 27, or square yards confused with square feet, since a square yard is 9 square feet. Two different mistakes, one ratio.
- Off by 27. Cubic feet never converted to cubic yards at all, or a cubic yard treated as a cubic foot somewhere in the chain.
- Off by exactly 4 on a round shape. The diameter used where the radius belongs, since area depends on the radius squared and doubling it quadruples the answer.
- Short by half on paint. The coats forgotten. A two-coat job needs twice the wall area run through the spread rate on the can.
- Off by roughly 43,560. Acres and square feet mixed, which our land area measurement guide untangles for anyone estimating across a whole lot.
- Off by 10 or 15 percent. The waste factor applied twice, or applied by hand after a calculator already included it. This is the only entry small enough to slip through unnoticed, which is exactly why step six exists.
- Off by an untidy amount with no clean factor. Usually a measurement problem rather than an arithmetic one. Remeasure before you recalculate.
The pattern worth noticing is that almost every large error is a clean multiple, because unit conversions are clean multiples. That is good news: a failed check is nearly always solvable in seconds rather than by starting over. Compute the ratio, match it to the list, and you know which line to look at. Our manual on how to calculate cubic yards is where the 27 and the 12 come from, and it is worth reading once so those factors stop feeling arbitrary.
The messy last case deserves respect. A discrepancy of 18 percent with no clean explanation usually means the two methods were fed different measurements, not that one of them computed wrong. Go back to the dimensions, confirm both readings came from the same measuring session, and confirm both methods used the same depth. Errors that survive a factor check are almost always measurement errors wearing an arithmetic disguise, and the companion below is the fastest way to re-run the whole line from clean inputs once you have them. When the quantity is finally settled and the next question is what it costs, that is a separate job, handled in our manual on how to write a contractor estimate.
How do you calculate how much material you need
Estimating the quantity of materials comes down to working from the measurement toward the unit the supplier sells in, and never skipping the steps between. Start with the raw dimension: an area for flat materials, a volume for bulk ones, a length for linear ones, a count area for units. That raw quantity is the number the rest of the estimate is built on, which is why measuring carefully, and twice, pays off more than anything else you do.
From the raw quantity, apply the coverage or density that translates it into units. Area divided by coverage per unit gives a count of cans, boxes, or rolls. Volume divided by 27 gives cubic yards, and volume times density gives tons. A length divided by piece size gives a count. This translation step is where the coverage number on the packaging earns its keep, because the same area can need a different number of units depending on which product you choose.
Watch it run end to end on a floor. Measure the room: 12 feet by 15 feet is 180 square feet. Read the coverage: a box of flooring covers 20 square feet. Divide: 180 divided by 20 is 9 boxes before waste. Add about 10 percent for a straight lay, which takes the area to 198 square feet, or 10 boxes. Round up, and buy 10.
The same sequence works for a volume material with density swapped in for coverage. Say you need gravel for a 200 square foot area, 4 inches deep. Volume is 200 times 0.333, about 67 cubic feet, or 2.5 cubic yards. Add 10 percent for scatter and compaction, about 2.7 cubic yards. If the yard sells by weight, multiply by 1.4 tons per yard for roughly 3.8 tons. That is the order.
Notice that the calculation never changed shape: quantity, divided by coverage or multiplied by density, plus waste, rounded up. How much material you need is not a matter of experience or luck; it is this sequence run once with the right numbers, and when people get it wrong the cause is almost always a skipped waste factor or a units slip rather than a flaw in the method. The material coverage estimator does the division and the rounding, so your attention can stay on the two inputs that actually decide the answer, an accurate measurement and a sensible waste factor.
How do I estimate concrete, gravel, and sand for a slab
The method is easiest to trust when you watch it estimate a real project with several materials, so here is a small slab from bare ground to an order sheet. Say the slab is 10 feet by 8 feet, with a 4 inch gravel base, a 1 inch sand bedding layer, and a 4 inch concrete pour on top. The footprint area is 10 times 8, which is 80 square feet, and every material shares it.
Gravel base, 4 inches deep: 80 times 0.333 is about 27 cubic feet, or 1 cubic yard. Add 8 percent for scatter, round to about 1.1 cubic yards, or roughly 1.5 tons if the yard sells by weight. Sand bedding, 1 inch deep: 80 times 0.083 is about 6.7 cubic feet, or 0.25 cubic yards, so a quarter yard or a stack of bags. Concrete, 4 inches deep: 80 times 0.333 is about 27 cubic feet, or 1 cubic yard; concrete under-orders badly, so add a bit and plan on about 1.1 cubic yards, or discuss a short load with the supplier. For the full concrete walk, see our manual on how much concrete you need.
The order sheet reads: about 1.1 cubic yards of gravel (or 1.5 tons), a quarter yard of sand, and about 1.1 cubic yards of concrete. Three materials, one footprint, one method run three times. That is a material takeoff in miniature, and it is exactly how a contractor would price the same slab.
A project material order: base plus waste
It helps to see where a well-estimated order actually goes, because the number you calculate and the number you buy are not the same. The calculated quantity is the bare need; the order adds a planned waste factor and a round-up to the supplier’s increment.
A project material order: base plus waste
Illustrative split of a single material order built from its base quantity.
The base quantity is only part of the order. A waste factor covers the material you cannot use perfectly, and suppliers round bulk orders up to their own increment, so the final order sits comfortably above the bare calculation.
The chart makes the point that an order is a base quantity plus a deliberate cushion, not a single tidy figure. The aim is to keep that cushion small and planned rather than large and accidental: enough waste factor to cover real losses, enough round-up to reach a whole unit, and not a garage full of leftovers. An accurate estimate with the right waste factor buys most of what it uses, plans for the waste it cannot avoid, and leaves only a little behind for future repairs.
Matching your quantity to how the supplier sells it
A calculated quantity is not yet an order, because suppliers sell in their own units and increments, and the last step of any estimate is translating your number into theirs. The same cubic yard of concrete is a short load from a ready-mix truck, a stack of bags from a builders merchant, or a rented mixer run several times over, and each of those routes rounds differently. Work out the quantity first, then ask how the yard actually sells it, rather than letting the packaging decide your arithmetic.
Bagged against bulk is the most common fork. Bags state a yield, so the count is your volume divided by that yield, rounded up, and our manual on how many bags of concrete works that division for a slab. Bulk material is sold by the cubic yard or by weight, so the same volume may need a density conversion before it can be ordered, which our note on tons to cubic yards handles in both directions. Boxed goods such as tile and flooring are sold by box coverage, so your area rounds up to whole boxes whatever the leftover, and pallets round again on top of that.
Then there are the increments and minimums a supplier applies regardless of your calculation. Bulk yards often deliver in half-yard or full-yard steps, ready-mix carries a short-load charge below a certain volume, and some materials come only by the pallet. None of these change the quantity the job needs, but all of them change what lands on the delivery note, and it is better to see the rounding while you are estimating than after the truck is booked. If a minimum load pushes you well past your calculated figure, that is worth knowing early, because it sometimes makes a slightly larger scope better value per unit than the one you measured.
Lead time is the quiet one. A quantity that is right but late is still a stopped job, so ask what is in stock and what is special order while you are confirming coverage figures, especially for anything with a batch or a shade to match. Order the whole quantity at once where batch consistency matters, and check the supplier’s policy on returning unopened stock, since that is what makes rounding up cheap. Matching the quantity to the order unit is what turns a correct calculation into an order the yard can actually fill.
Using a yardage calculator and estimating tools
The coverage-and-density method is simple enough for a tape measure and a notepad, but a calculator makes it faster and less error-prone, especially on larger or repeated jobs. A good yardage calculator applies the coverage division, the divide-by-27 volume step, and the waste factor for you once you enter your measurements, removing the arithmetic slips that creep into hand calculations and letting you test different waste factors quickly.
The value of a tool is not that it knows something you do not; the method is the same either way. The value is speed and consistency: it does the multiplication, the unit conversion, and the rounding reliably every time, so your attention stays on the inputs that actually matter, an accurate measurement and a sensible waste factor. Enter good numbers and a tool turns them into an order in seconds; enter a careless depth left in inches and no tool will save you, which is why measuring remains the step to slow down for.
Our material coverage estimator is built around exactly this method, taking your dimensions and returning an area, a volume in cubic yards, and a with-waste total you can order from. Used well, a calculator is simply the fastest way to apply a method you already understand, and understanding the method is what lets you tell a reasonable result from a nonsensical one when a number looks off.
Estimating the small consumables people forget
The materials that stop a job are rarely the big ones, because nobody forgets the concrete or the flooring; they forget the small consumables that every material quietly depends on. Adhesives, fasteners, screws, mortar, grout, sealer, form-release oil, expansion-joint strip, and the second coat of primer are all real lines on a real order, and each has its own coverage figure the same way a can of paint does. Left off the takeoff, any one of them turns a planned single order into a mid-job trip to the store.
Estimate them the same way as everything else, by coverage rather than by feel. A tube of construction adhesive states the linear feet it bonds; a box of screws states a count; a bag of thinset or grout states the square footage it covers at a given trowel notch or joint width. Divide the quantity your job needs by the coverage one unit provides, add a small waste allowance, and round up, exactly the sequence the rest of this manual uses. The only difference is that these items are easy to overlook precisely because they are cheap.
The habit that catches them is reading the installation instructions of the main material before ordering, because the consumables it requires are listed there. A flooring box names the underlayment and the adhesive; a tile calls out the thinset coverage and the grout; a fastener schedule sits on the framing plan. Add each named consumable as its own line with its own quantity, and the order that arrives is the order that finishes the job, without the second trip that a forgotten tube of adhesive forces on an otherwise well-estimated project.
The materials estimating workflow, trade by trade
Materials estimating works best as a fixed workflow you run the same way on every job, because a routine catches the forgotten line that a mental checklist misses. The workflow has five stops. First, list every material the project touches, large and small, before you calculate anything: the flooring and the underlayment beneath it, the concrete and the gravel base under that, the paint and the primer it needs first. Second, measure the site once, carefully, and write the dimensions down, so every line works from the same verified numbers rather than a fresh reading of the tape each time. Third, run each material through the core calculation, area divided by coverage or volume through the divide-by-27 line, using the figures printed on the exact products you plan to buy. Fourth, apply a waste factor line by line, matched to the material rather than one blanket percentage, since concrete and diagonal tile do not waste alike. Fifth, round every line up to the supplier’s order unit.
The order of those stops matters more than it looks. Listing before calculating forces completeness, which is where most jobs actually fail; measuring once and recording it prevents the quiet error of re-measuring mid-estimate and getting a slightly different number on a later line. The finish is a read-back: walk the project in your head and ask what the job touches that the list does not. That sixty-second check is the cheapest quality control in materials estimating, and it is what surfaces the grout, the fasteners, and the second coat before they surface themselves mid-job.
The workflow is also what a contractor runs, just more formally, and completeness is the reason it exists, because a forgotten material stops a job as surely as an under-order. Two professional habits are worth borrowing. The first is lead time, confirming that special-order materials will arrive before they are needed, since an accurate quantity that shows up late is its own kind of shortfall. The second is the record: contractors track what they estimated against what the job actually used, and over many projects that record becomes more accurate for their work than any general figure. Note what you calculated, bought, and used, and your next estimate starts from proven numbers rather than a fresh guess.
Only two things change from trade to trade, the coverage figure and the typical waste allowance, which is why the workflow is worth learning once. A painter measures wall area, multiplies by coats, divides by the spread rate on the can, and adds about 10 percent. A tiler divides floor area by the box coverage and adds 12 to 15 percent, because cuts around edges and fixtures waste more. A mason multiplies wall face by a units-per-square-foot figure for the brick or block, then adds for breakage. A concrete crew divides volume by 27 and adds a small overage. A landscaper converts bed area and depth to cubic yards or tons and allows for settling and scatter. A framer counts studs and joists along a run at a set spacing, then adds for plates, corners, and openings. Drywall, insulation, roofing, and fencing slot into the same frame, since sheets, bags, squares, and panels are each just another coverage figure to divide by.
Where this workflow stops is the moment a quantity needs a price. Turning the finished list into a number you can hand a client, with labor, equipment, overhead, and profit on top, is a separate job covered in our manual on how to write a contractor estimate. Keep the two apart in your own work as well: quantities are measured, prices are quoted, and blurring them is how an estimate ends up neither accurate nor defensible.
Common material estimation mistakes
A handful of errors account for most bad estimates, and recognizing them protects both your budget and your timeline.
- Skipping the waste factor. Ordering the exact area or volume with no cushion is the most common cause of running short, and the easiest to avoid.
- Buying by unit count, not coverage. Ignoring what each box, can, or load actually covers leads to surprises in both directions.
- Leaving depth in inches. In any volume estimate, an un-converted inch depth inflates the answer twelvefold; divide by 12 first.
- Dividing by 3 instead of 27. A cubic yard is 27 cubic feet, so dividing by 3 over-orders by roughly nine times.
- Forgetting extra coats or layers. Paint especially catches people out when a second coat doubles the need.
- Planning to top up later. Counting on buying more mid-job risks a batch mismatch that ruins the finished look.
Every one of these traces back to treating material estimation as a guess rather than the reliable calculation it actually is. The method is measure, translate through coverage or density, add waste, and round up; the mistakes are all shortcuts around one of those steps. Slow down at the measurement, keep your units consistent, and never leave out the waste factor, and the great majority of estimating errors simply never happen.
The bottom line
Material estimation is not a guess; it is a method. Measure the area or volume you need, apply the coverage or density of the material you are buying, add a waste factor matched to how much cutting the job demands, and round up to whole order units. That single sequence estimates paint, flooring, gravel, sand, concrete, bricks, and everything else, and it is exactly how a contractor turns a set of plans into a material takeoff. Bulk materials waste little and want a small overage; cut and patterned materials waste more and want a generous one. Keep your units consistent, convert volume to tons with density when the yard sells by weight, and never skip the waste factor, because it is the piece people leave out and the piece that saves the job. Estimate it once, estimate it right, and buy with confidence. Run your own numbers through our material coverage estimator and let it do the arithmetic.
Read these pages as bench notes meant to teach the method, not an order you can sign without checking. The coverage figures, densities, waste factors, and splits shown here are typical illustrative values, and the real numbers shift with the material, its moisture, the layout, and the supplier. Measure your own space, run it through the method, confirm the coverage or density printed on the exact product you are buying, and verify every quantity before you place the order.
Frequently asked questions
How do you estimate materials for a project?
Material estimation follows one repeatable method: measure the area or volume you need to cover or fill, apply the coverage or density of the material you are buying, add a waste factor for cuts and spillage, then round up to whole order units. Flat materials like paint and flooring are estimated by area divided by coverage. Bulk materials like concrete and gravel are estimated by volume, usually in cubic yards. The waste factor, commonly 5 to 15 percent, is the step that keeps you from running short.
What is material estimation?
Material estimation is the process of quantifying how much of each material a project needs before you buy or order it. It turns a measurement into a shopping list: so many gallons of paint, so many boxes of tile, so many cubic yards of gravel. The method is always measure, then apply a coverage or density figure, then add a waste allowance. Done well, it leaves you with enough material to finish plus a small deliberate cushion, rather than a shortfall or a pile of costly leftovers.
How do you calculate materials for a construction project?
You break the project into materials, then estimate each one with the same shape of calculation. Measure the relevant dimension, an area for flat materials, a volume for bulk materials, a length for linear ones, or a count for units. Divide the amount you need by the coverage or capacity of one unit, or multiply a volume by density to get weight. Add a waste factor suited to the material and layout, then round up. A formal version of this, item by item, is called a material takeoff.
What steps do you follow to check your arithmetic when estimating material quantities?
Run a fixed six-step check on every line before you order. Re-derive the answer with the units written out beside each figure, so feet, inches, square feet and cubic feet cannot be silently mixed. Test the order of magnitude against a coverage figure you already trust. Reverse the calculation from the answer back to a dimension you measured and see whether it returns. Cross-check with a second method that shares no arithmetic with the first. Translate the result into the unit your supplier actually sells in. Last, confirm the waste factor was applied once and only once, after the base quantity is settled.
How do I estimate concrete, gravel, and sand?
All three are volume materials, so estimate them the same way: length times width times depth in feet, divided by 27, gives cubic yards. Convert the depth from inches to feet first by dividing by 12, because that single step causes most wrong answers. Concrete is ordered by the cubic yard, while gravel and sand are often sold by weight, so you may multiply the cubic yards by a density near 1.4 tons per yard to get tons. Add a small overage and round up, since bulk materials punish under-ordering.
What is a material takeoff?
A material takeoff is a line-by-line list of every material a project needs, with a quantity for each, taken off the plans or the measured site. Contractors build one before ordering so nothing is forgotten and nothing is doubled up. Each line is estimated with the same coverage-or-density method, then a waste factor is added per material. The takeoff becomes the order and the budget at once. For a small job you can do an informal takeoff on a notepad using exactly the same logic.
What waste factor should I add?
The waste factor depends on the material and how much cutting the job involves. Bulk materials like concrete and gravel commonly use around 5 to 10 percent for uneven ground and spillage. Flat materials like paint and straight-laid flooring sit near 10 percent. Tile rises to about 12 percent, and diagonal or patterned layouts can need 15 percent or more, because each angled cut leaves an offcut you cannot reuse. These are illustrative starting points, not rules, and your own records will refine them over time.
How do you convert material volume to tons?
Multiply the volume in cubic yards by the material's density in tons per cubic yard. Densities vary with material and moisture, but figures commonly cited put crushed gravel near 1.4 tons per cubic yard, dry sand around 1.35, and dry topsoil close to 1.1, with wet material heavier. So four cubic yards of gravel at 1.4 is about 5.6 tons. Always calculate the volume first, then apply the density, because tonnage cannot be judged by eye. Confirm the density with the yard, since their material may differ.
What is materials estimating?
Materials estimating is the same discipline as material estimation: working out how much of each material a job needs before you order it. The plural phrasing is common in the trades, where an estimator quantifies many materials at once, but the method does not change. You list the materials the project touches, measure the site, apply a coverage or density figure to each line, add a waste factor per material, and round up to whole order units. Whether you call it material estimation or materials estimating, the output is the same line-by-line list you can order from and budget against.