What's on this page
- The square feet calculation formula
- Before you start: what you need to measure square footage
- Step 1: Measure the length and width
- Step 2: Convert inches to decimal feet
- Step 3: Multiply length by width for a rectangle
- Step 4: Break an irregular room into rectangles
- Step 5: Handle triangles and circles
- Step 6: Subtract cutouts for the net square footage
- Step 7: Convert the total into other area units
- A worked example: an L-shaped living room
- How to calculate the square footage of a room
- How to calculate the square footage of a house
- Calculating gross square footage versus net square footage
- Floor area versus wall area
- Who decides what counts as finished square footage
- Measuring from inside the walls or outside them
- Common square footage mistakes
- Troubleshooting: odd angles, curves, and mixed units
- Square feet, square yards, and square meters compared
- Square footage on land: acres and large areas
- A quick square footage reference table
- Where your square footage goes next
- Your square footage checklist
- The bottom line
Short answer: To calculate square footage, measure the length and the width in feet and multiply them, so a 12 by 10 foot room is 120 square feet. Convert inches to decimal feet first by dividing by 12. For an irregular room, split it into rectangles, triangles and circles, work each one with its formula, add the pieces, then subtract any cutouts to get the net figure.
How to calculate square footage comes down to one line: measure the length and the width in feet and multiply them. That line is the square feet calculation formula, and everything else in square footage calculations is a way of getting a room that is not a plain rectangle back to it, the ones with alcoves, angled walls, bay windows, and a hearth in the middle of the floor. Some numbers you can look up, and some you have to measure, and this is firmly the second kind: no reference table knows the size of your room, only a tape measure and that formula do.
This manual is the arithmetic, laid out so you can check every line. It covers measuring cleanly, converting inch readings to decimal feet before you multiply, the rectangle formula, splitting an irregular room into pieces, the triangle and circle formulas, subtracting cutouts to get a net figure, adding rooms into a whole-house number, and the fixed conversions to square yards, square meters, and acres. It also draws the line between floor area and wall area, which is the distinction that quietly ruins more paint orders than any other. The companion below recalculates the worked example against your own dimensions as you read.
Key takeaways
- Square footage is length times width in feet for any rectangle. A 12 by 10 foot room is 120 square feet, and that one line does most of the work.
- Turn inches into a decimal foot before you multiply by dividing by 12, so 12 feet 6 inches is 12.5 feet, not 12.6. This is the single most common square footage error.
- Irregular rooms are not special: split them into rectangles, triangles, and circles that tile the floor with no gaps and no overlaps, then add the pieces.
- Triangle area is one half times base times perpendicular height; circle area is pi times the radius squared, with the radius half the diameter.
- Gross area is the whole shape, net area is what is left after the deductions you name. Floor area and wall area are different numbers measured from different faces.
The square feet calculation formula
Before any of the measuring, here are the formulas themselves, stated bare, because most of the time that is the whole question. Every one of them takes measurements already converted to feet, and every one of them returns square feet, written sq ft on a plan, an order, or a listing.
- Rectangle or square: area equals length times width. A 12 by 10 foot room is 12 times 10, which is 120 square feet.
- Triangle: area equals one half times the base times the perpendicular height. A 6 foot base with a 4 foot height is 0.5 times 6 times 4, which is 12 square feet.
- Circle: area equals pi times the radius squared, with the radius half the diameter and pi about 3.14159. A 10 foot circle has a 5 foot radius, so it is 3.14159 times 25, about 78.5 square feet.
- Half circle: half of the circle figure, so the same 10 foot bay is about 39.3 square feet.
- The composite rule: any shape that is none of the above is the sum of pieces that are. Split it, work each piece with the formula that fits, add the areas, then subtract anything the figure should exclude.
Written as one line, the composite rule is the method this whole manual runs on: net area equals the sum of the piece areas minus the sum of the cutout areas. On the L-shaped room worked through below, that reads 180 plus 56 minus 12, which is 224 square feet. Nothing more elaborate than addition and subtraction sits on top of the three formulas above.
Two conditions make the formulas behave. The first is unit consistency: every reading has to be in the same unit before you multiply, which in practice means turning feet and inches into decimal feet, and that is Step 2. The second is that the pieces have to tile the shape with no gaps and no overlaps, which is Step 4. Get those two right and the arithmetic cannot go wrong, because it is only multiplication and addition. Get either one wrong and the formulas will still return a confident number that happens to be false. The companion below runs the composite rule on your own dimensions as you read.
Before you start: what you need to measure square footage
Calculating square footage is a short job with a long tail of small mistakes, so the setup is worth a minute. You are producing a number that other decisions will rest on, and the difference between a good number and a bad one is almost always in the measuring rather than the arithmetic. Gather the few things you need and decide how you will record the pieces before you start pulling tape.
What to have on hand before the first measurement:
- A tape measure or a laser measure. A 25 foot tape covers most rooms. A laser measure is faster and steadier for long runs and awkward spans where a tape sags across the middle. Either is fine, the point is a real reading rather than a pace count.
- A pad and pencil, or a notes app. Sketch the room roughly to scale and write each length on the wall it belongs to. An irregular room is a set of pieces, and you want somewhere to record each piece so nothing gets counted twice or missed entirely.
- A calculator. The multiplications are simple, but running five of them in your head is how a room comes out wrong. A phone calculator is plenty, or the companion below does the whole chain.
- One unit, chosen up front. Decide that everything is in feet, or everything is in meters, and hold to it. Mixed units, feet on one wall and inches on another, produce a number that looks plausible and is meaningless.
- A little time. A plain rectangular room is a two minute job. A chopped-up room with bays and an angled corner might take ten. Neither is hard, but rushing the sketch is where errors hide.
One habit is worth adopting before anything else: write down the raw reading exactly as the tape gives it, feet and inches, and convert in a second column. If you convert in your head as you go, a wrong conversion is invisible afterwards because the original reading is gone. Two columns on a scrap of paper make every step checkable, which matters when the total looks off and you have to find out where.
Step 1: Measure the length and width
Start with the two dimensions the formula needs: the length and the width of the space, both taken along the surface you are measuring. Pull the tape along one wall from corner to corner for the length, then along an adjoining wall for the width, reading each measurement at the far corner rather than eyeballing where the room ends. Write each number on your sketch as you go, on the wall it came from, so a five-sided room does not turn into a memory test.
Measure to the surface the number is about. For a floor, that is wall to wall along the floor itself, tight into the corners, not the distance between baseboard faces and not the edge of the existing carpet. For a wall, it is the true width and height of the wall face. Measuring the wrong reference, the top of the baseboard instead of the floor line, is a quiet way to come up a few percent short on every wall in the room, and the error compounds because it repeats.
Take the width twice, once at each end of the room, whenever the room might not be square. Older houses in particular are rarely rectangular to the inch, and a wall that is 11 feet 6 inches at the door and 11 feet 9 inches at the window is common. Which reading you use depends on what the number is for: for a surface that has to reach every corner, the larger reading is the safe one; for a record of the space, an average is more honest. Note both readings rather than silently picking one, because the discrepancy itself is information about the room.
Step 2: Convert inches to decimal feet
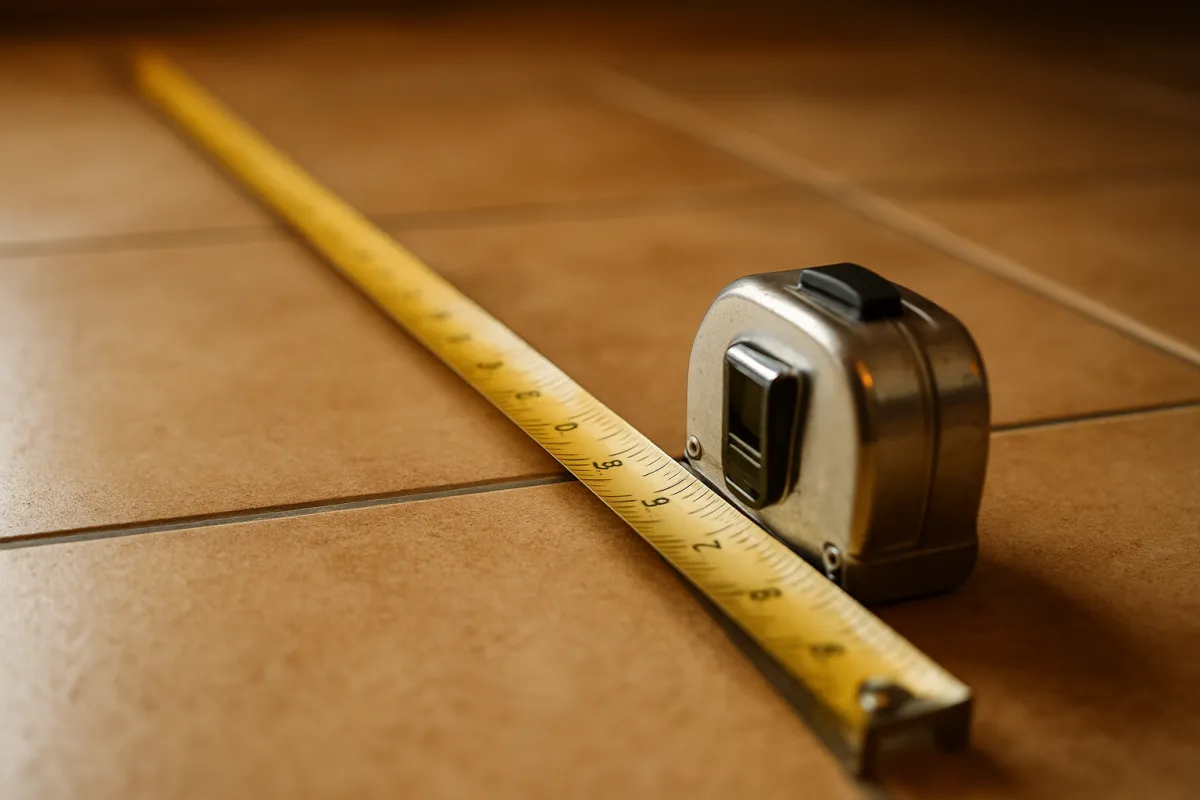
Walls almost never measure a whole number of feet, so this step is where most wrong square footages are born. A tape reads 12 feet 6 inches, and the temptation is to write 12.6 and carry on. That is wrong, because a foot has 12 inches rather than 10, so 6 inches is half a foot: 12.5, not 12.6. Divide the inches by 12 to get the decimal part, then add it to the whole feet, and every formula downstream behaves.
The conversions worth knowing by sight, because they come up constantly:
- 1 inch is 1 divided by 12, about 0.083 feet
- 2 inches is 0.167 feet
- 3 inches is 0.25 feet
- 4 inches is 0.333 feet
- 6 inches is 0.5 feet
- 8 inches is 0.667 feet
- 9 inches is 0.75 feet
- 10 inches is 0.833 feet
Work the running example. Say a room reads 14 feet 3 inches on the long wall and 11 feet 6 inches on the short wall. Convert first: 3 inches is 3 divided by 12, or 0.25 feet, so the length is 14.25 feet. Six inches is 0.5 feet, so the width is 11.5 feet. Multiply those and you get 14.25 times 11.5, which is about 163.9 square feet. Write 14.3 by 11.6 instead and you get 165.9, an error of two square feet on a small room from two careless decimal points.
The error grows with the room and with the number of pieces. Mistaking 9 inches for 0.9 feet instead of 0.75 overstates that one reading by 0.15 feet, which sounds like nothing until you multiply it: 0.15 feet across a 40 foot width is 6 square feet of floor that is not there. If you would rather avoid decimals entirely, the alternative is to work in inches throughout, multiply for square inches, then divide the result by 144 at the end, because a square foot is 12 by 12 inches. That route is arithmetically identical and some people find it easier to check.
Step 3: Multiply length by width for a rectangle
With both dimensions in decimal feet, this step is the heart of the method: multiply them, and the result is the square footage. Area equals length times width, and because it is a multiplication the order does not matter, so 14.25 times 11.5 gives the same answer as 11.5 times 14.25. What does matter is that both numbers carry the same unit. Feet times feet produces square feet, which is exactly the unit you want.
For a perfect square the two dimensions are equal, so a 12 by 12 foot room is 12 times 12, exactly 144 square feet. That is the entire calculation for any rectangular space, and most rooms, walls, patios, and slabs are rectangles or can be treated as a small set of them. Everything else in this manual is a way of getting an odd shape back to this one line.
Two confusions are worth heading off here. The first is perimeter: adding the four wall lengths gives the distance around the room, which is what you need for baseboard and trim, not the floor area. Square footage is always a multiplication of two dimensions, never a sum of four. The second is the number 9, which is the area cousin of the 27 in volume work. A square yard is a 3 foot by 3 foot square, so it holds 3 times 3, which is 9 square feet. That is why converting square feet to square yards later means dividing by 9 rather than by 3.
Square footage of common room sizes
Length times width for a range of rectangular rooms, each bar scaled to the largest.
Each bar is length times width, scaled against the largest room at 500 square feet. Because area multiplies two dimensions, a room that is only a little larger on each wall covers a lot more floor: 15 by 20 is three times the 10 by 10, not one and a half.
Step 4: Break an irregular room into rectangles
Real rooms are rarely tidy rectangles, and the reliable way to handle an odd shape is not a clever single formula but a simple habit: divide the room into pieces you can calculate, work each one, and add the areas. An L-shaped room is two rectangles. A room with a bump-out or an alcove is a main rectangle plus a smaller one. A hallway that doglegs is a run of rectangles laid end to end. Draw the dividing lines on your sketch and the impossible shape becomes a handful of easy ones.
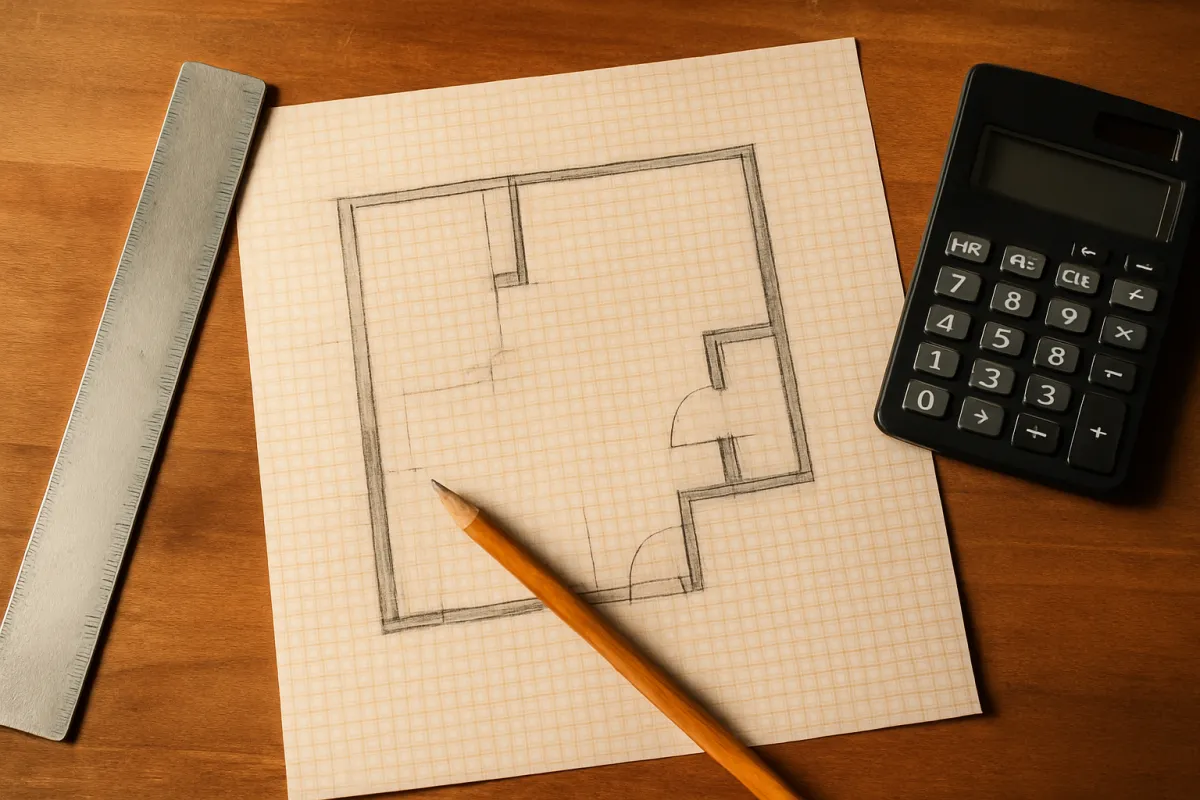
Take an L-shaped living room. Draw one line to split it into a large rectangle and a smaller one. Say the large piece measures 15 feet by 12 feet, which is 180 square feet, and the ell that wraps around it measures 8 feet by 7 feet, which is 56 square feet. Add them: 180 plus 56 is 236 square feet. The line you drew is imaginary, so the two rectangles share an edge and never overlap, and their areas add cleanly. Measure each rectangle as if the other did not exist and the total is exact rather than approximate.
The rule that keeps this honest is that your pieces must tile the room with no gaps and no overlaps. A common slip is to measure two rectangles that share a strip of floor, counting that strip twice, or to leave a sliver between them that never gets measured at all. Draw the pieces so their edges meet exactly on the dividing lines, then check that every square foot of real floor sits inside exactly one piece. The other classic error is measuring the bounding box of an L-shape as though it were a rectangle, which counts the missing corner as floor you do not have. Avoiding exactly that is the reason for splitting in the first place.
Step 5: Handle triangles and circles
Not every piece is a rectangle. Rooms have angled walls, patios have curved edges, and the occasional space is a genuine triangle or a circle. Two more formulas cover almost all of it. A triangle’s area is one half times the base times the height, where the height is measured straight out from the base to the opposite point at a right angle, not along a slanted side. A circle’s area is pi times the radius squared, where the radius is half the diameter and pi is about 3.14159.
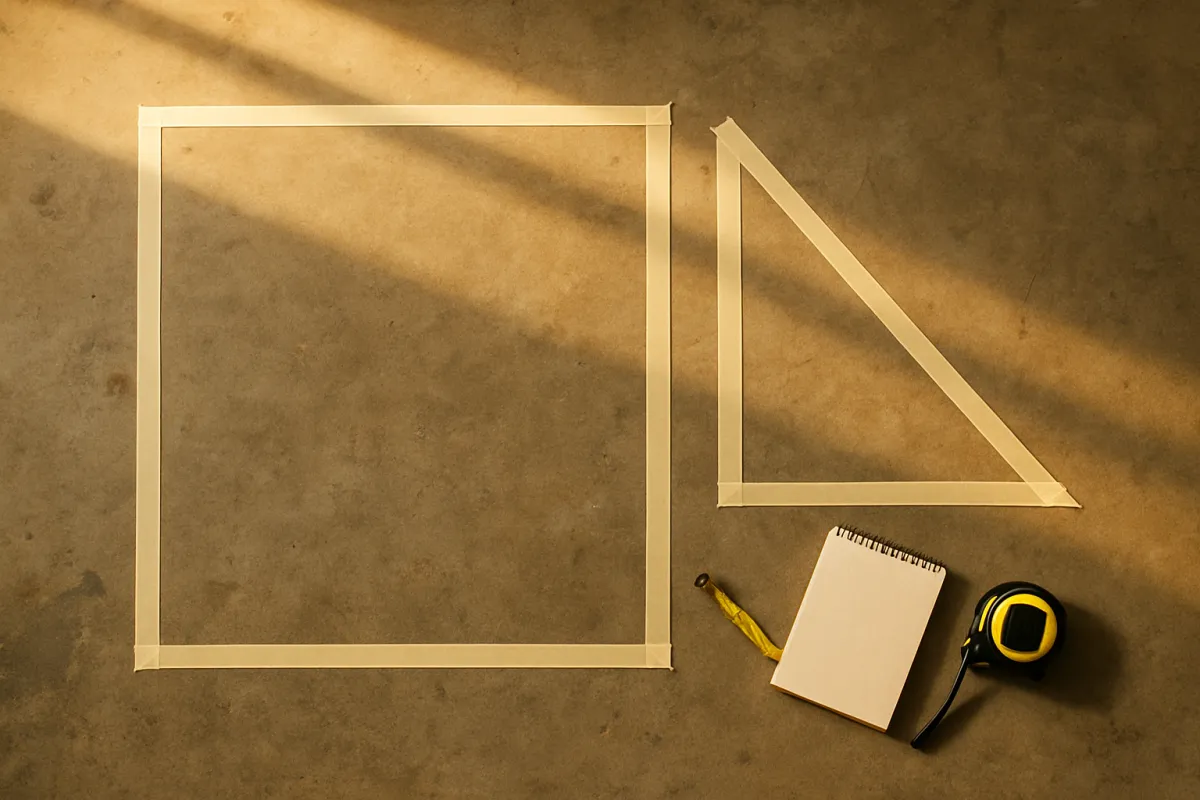
Work each with a number. For a triangular corner where an angled wall cuts across the room, say the base along one wall is 6 feet and the height straight out to the point is 4 feet. The area is one half times 6 times 4, which is 12 square feet. For a rounded bay 10 feet across, the radius is half of 10, or 5 feet, so a full circle would be 3.14159 times 5 squared, about 78.5 square feet, and a half-round bay is half of that, about 39.3 square feet. Add whichever pieces your room actually has to the rectangles from Step 4.
The traps here are specific and worth naming. For triangles, use the perpendicular height rather than the length of the sloping wall, because the slope is always longer than the true height and inflates the area. For circles, square the radius rather than the diameter: squaring the full diameter quadruples the answer, which is a large error to make quietly. Always halve the diameter first, then square. For an angled wall that does not form a clean right triangle, split the shape into a rectangle plus a right triangle and measure each, which keeps you on the two formulas you already trust instead of reaching for trigonometry you do not need.
Step 6: Subtract cutouts for the net square footage
Once you have the gross square footage, subtract the parts of it your number is not meant to include. A floor may have permanent features the number should exclude, such as a hearth, a stair opening, a fixed island footprint, or a built-in cabinet run. A wall you are pricing has door and window openings. The net figure is the gross shape minus these cutouts, and the subtraction is the same divide-and-add habit run in reverse.
Calculate the area of each cutout as its own simple shape, then take it off the gross total. On the running L-shape, the hearth occupies a 4 foot by 3 foot footprint, which is 12 square feet, so the gross 236 becomes a net 224 square feet. On a wall, a door opening of roughly 3 feet by 7 feet is about 21 square feet, and a window of 4 feet by 3 feet is 12 square feet, both of which come off the wall’s gross area. The arithmetic is trivial; the judgment is in deciding what belongs in the deduction list.
That judgment deserves care, because there is no universal rule about which cutouts count. Small penetrations such as a floor vent or a doorway threshold are commonly left in, since the difference is fractional and the trades that use the number expect it. Large voids such as a stair opening are commonly taken out, since nobody wants to be told a floor is 12 percent larger than the floor. Whichever way you go, write the deductions on your sketch so anyone reading the number later can see what it does and does not include. A net figure with no stated deductions is not really a net figure, it is a number with a missing footnote.
Step 7: Convert the total into other area units
The last step turns your square feet into whatever unit the next person wants and adds every piece into one total. Some materials and records use square yards, some use square meters, and land uses acres. The conversions are fixed constants applied once at the end. There are 9 square feet in a square yard, so divide square feet by 9. One square foot is about 0.0929 square meters, the factor listed in NIST’s SP 811 conversion factor table, so multiply square feet by 0.0929, or multiply square meters by about 10.764 to go the other way. One acre is 43,560 square feet, and that figure, along with the 9 square feet in a square yard, is fixed in NIST Handbook 44, Appendix C.
Total first, then convert. Add the rectangles from Step 4 and any triangles or circles from Step 5, subtract the cutouts from Step 6, and you have one net figure. Only then convert that single number, rather than converting each piece and letting rounding drift accumulate across five conversions. On the running L-shape, the net 224 square feet is about 24.9 square yards or roughly 20.8 square meters, and both of those come from one division and one multiplication on one number.
The direction of a conversion is the only way these fixed constants go wrong, so build in a sanity check. Square yards must always be a smaller number than square feet, because a yard is longer than a foot and you divided. Square meters must also be smaller, because a meter is longer than a foot. If your square meter figure comes out larger than your square foot figure, you multiplied by 10.764 when you meant to multiply by 0.0929, and the fix is one keystroke. The companion below reports all three at once so the direction is never in question.
A worked example: an L-shaped living room
Pull the seven steps together on one realistic room and watch the arithmetic run end to end. This is the kind of room that looks impossible to measure and turns out to be three easy pieces and one subtraction.
Step 1, measure. The main body of the room reads 15 feet by 12 feet on the tape, and the ell that wraps around the chimney breast reads 8 feet by 7 feet. There is a hearth in front of the fireplace with a 4 foot by 3 foot footprint. Step 2, convert. All four readings landed on whole feet, which is convenient and unusual; had the main body read 15 feet 3 inches, it would become 15.25 feet before anything else happened. Step 3, multiply. The main body is 15 times 12, which is 180 square feet.
Step 4, the second rectangle. The ell is 8 times 7, which is 56 square feet, and 180 plus 56 is a gross 236 square feet. Step 5, shapes. This room has no angled corner, so nothing is added here and the gross stays at 236. Had a wall cut across it forming a right triangle with a 6 foot base and a 4 foot height, that piece would be one half times 6 times 4, or 12 square feet, and the gross would have read 248 instead. Step 6, subtract. The hearth is 4 times 3, or 12 square feet, so 236 minus 12 is a net 224 square feet. Step 7, convert. That 224 is about 24.9 square yards or roughly 20.8 square meters.
The value of writing it out this way is that every line is checkable and every line moves predictably. Widen the ell from 8 by 7 to 8 by 10 and the gross rises by 24 square feet, because you added 8 times 3. Drop the hearth from the deductions and the net returns to 236. Take the room’s long wall from 15 feet to 15 feet 6 inches and the main rectangle goes from 180 to 186, because 0.5 extra feet times a 12 foot width is 6 square feet. Run your own dimensions through the companion below and the same four lines recompute against your numbers.
How to calculate the square footage of a room
A single room is the most common version of this question, and it is worth walking on its own because the practical details differ from an abstract rectangle. Measure wall to wall along the floor, taking the length on one wall and the width on the adjoining wall. Push the tape tight into the corner rather than starting at the baseboard face, because the baseboard sits proud of the wall and stealing half an inch from each end of every wall adds up across a whole house.
Convert before you multiply. A bedroom reading 13 feet 4 inches by 11 feet 8 inches becomes 13.33 feet by 11.67 feet, because 4 inches is 0.333 of a foot and 8 inches is 0.667. Multiply those and you get about 155.6 square feet. Round the answer, not the inputs: rounding 13.33 to 13 and 11.67 to 12 gives 156, which lands close here only because the two roundings went in opposite directions and cancelled, and next time they will not.
Three room-specific details catch people out. Closets that open into the room are usually measured as their own small rectangles and added, so a 5 foot by 2 foot reach-in closet adds 10 square feet. A bay window is the room rectangle plus the bay, which you can approximate as a trapezoid or split into a rectangle and two triangles depending on how the walls run. And an attached bathroom or a passage that opens off the room without a door is a judgment call: measure it separately and label it, so the room figure can be quoted with or without it. Naming the pieces is what makes the number reusable rather than a single opaque total.
How to calculate the square footage of a house
Scaling from one room to a whole house is addition, not a new formula, but it forces a decision you can duck at room scale: are you measuring the inside of the house or the outside of it? Both are legitimate, they produce different numbers, and quoting one while thinking of the other is the source of most whole-house square footage arguments.
Measuring room by room from the inside is the more useful method for anything to do with the surfaces inside the house. Work through each space, multiply length by width, and add the totals. An illustrative single story might come out like this:
| Space | Dimensions | Square feet |
|---|---|---|
| Living room | 18 x 14 ft | 252 sq ft |
| Kitchen | 12 x 11 ft | 132 sq ft |
| Bedroom 1 | 13 x 12 ft | 156 sq ft |
| Bedroom 2 | 11 x 10 ft | 110 sq ft |
| Bathroom | 8 x 6 ft | 48 sq ft |
| Hall | 20 x 3.5 ft | 70 sq ft |
| Total measured room area | 768 sq ft |
Measuring the same house from outside is faster, because it is one perimeter rather than six rooms. If the exterior footprint runs 34 feet by 27 feet, that is 918 square feet. The gap between 918 and 768 is 150 square feet, and it is not an error: it is the thickness of the exterior walls, the interior partitions, and the closets and stair that the room list did not include. Roughly 84 percent of that exterior footprint shows up as measured room area in this illustration, and that ratio is what the next chart makes visible.
Exterior footprint versus measured room area
Illustrative breakdown of a 918 square foot single-story exterior footprint.
These illustrative shares sum to 100 percent of the 918 square foot exterior footprint, and 768 plus 90 plus 60 returns 918. The split varies with wall thickness and how chopped up the plan is, which is why an exterior measurement and a room-by-room measurement of the same house never match.
For a house with more than one story, measure each story separately and add them, and keep the stories listed rather than merged so the number can be broken back down. Stairwells need a decision too, because the opening on the upper floor is floor area on the lower one, and counting the same footprint on both levels double counts it. Write your convention down next to the total.
Calculating gross square footage versus net square footage
Calculating gross square footage is the same multiplication with nothing taken out: measure the whole shape, add every piece, and stop before the deductions. Net square footage is that gross figure minus whatever the number is not supposed to include. Net and gross are the two words that cause the most confusion in area work, partly because they are used at two different scales. At room scale, gross is the whole shape before deductions and net is what remains after you subtract the cutouts, so the L-shape in this manual is 236 gross and 224 net once the hearth comes out. At building scale, gross usually describes the overall footprint and net describes the usable area inside the walls, which is the 918 against 768 in the house example above.
Both usages share one idea: gross is the outline, net is the outline minus something. What they do not share is a fixed list of what that something is. Different trades and different measuring standards deduct different things, and a net figure quoted without its deduction list is not comparable to anyone else’s. Two people can measure the same floor honestly and correctly and hand you two different net figures because one of them subtracted the stair opening and the other did not.
The practical fix is a habit rather than a rule. Whenever you write down a net figure, write the gross next to it and list what came out in between. On the running example that reads: gross 236 square feet, less hearth 12 square feet, net 224 square feet. Anyone who disagrees with your deduction can now redo the one line they disagree with instead of remeasuring the room. That single extra line is what turns a private calculation into a number someone else can use.
Floor area versus wall area
Floor area and wall area are both square footage, they are both length times width, and they are completely different numbers. Floor area uses the room’s length and width, taken across the floor. Wall area uses each wall’s width and the ceiling height, taken vertically. Confusing them is easy because both come out in square feet, and the confusion is expensive because wall area is usually much larger than floor area.
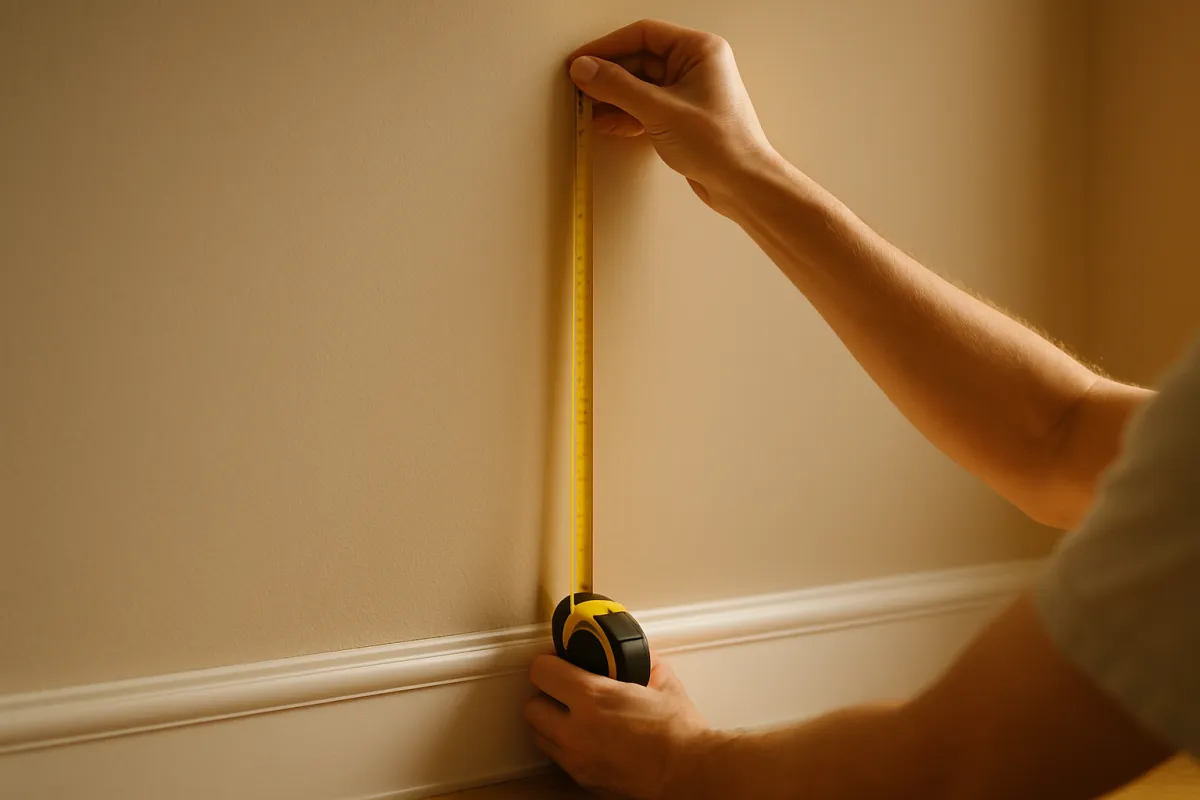
Run the numbers on a 12 by 10 foot room with an 8 foot ceiling. The floor is 12 times 10, which is 120 square feet. The walls are two at 12 by 8, which is 96 square feet each, and two at 10 by 8, which is 80 square feet each: 96 plus 96 plus 80 plus 80 is 352 square feet of wall, before any deduction for the door and windows. That is nearly three times the floor area of the same room. Anyone who orders wall material against a floor figure, or the reverse, is off by a factor that no waste allowance will cover.
The quick way to keep them straight is to notice what the second dimension is. If the second number is a horizontal width, you are computing floor area. If it is the ceiling height, you are computing wall area. Ceilings, incidentally, are the same figure as the floor for a flat ceiling in a rectangular room, which is why ceiling area rarely needs its own measurement. Wall area is the input behind coverage questions like how much paint do I need and how many sheets of drywall do I need, while floor area feeds questions like how many tiles do I need.
Who decides what counts as finished square footage
At some point a square footage stops being arithmetic and becomes a definition, and that is where this manual stops asserting and starts pointing. Whether a finished basement, a converted attic, an enclosed porch, a garage bay, a bonus room over a garage, or a space under a sloped ceiling counts toward a house’s finished square footage is not a fact you can derive from a tape measure. It is set by whichever measuring standard is being applied and by local practice, and it genuinely differs between them.
That is why the same house can carry several different square footages at once, all of them defensible. An appraisal may follow a published measuring standard that treats below-grade space separately from above-grade space. A county or municipal assessor keeps its own record for taxation, built to its own rules. A listing may be prepared against a real estate body’s measurement guidance. A building department’s records reflect what was permitted rather than what was measured last week. None of these is lying; they answer different questions and count different spaces.
So when the number has to be authoritative rather than useful, ask the body whose number it is. For an appraised figure, ask the appraiser which measuring standard they applied and how they treated the space in question. For a tax record, ask your county or municipal assessor how they classify it. For a listing, ask the agent or broker which measurement guidance they follow. For anything touching permits, occupancy, ceiling height, or egress, ask your local building department before you assume. The arithmetic in this manual gives you a correct area for any space you can measure; only those offices can tell you whether that area counts toward a defined figure in your jurisdiction.
Measuring from inside the walls or outside them
The inside-or-outside question deserves its own note because it moves the answer by far more than a rounding error, about 16 percent in the house illustration above, and nothing about the calculation flags which one you did. Interior measurement is taken wall face to wall face inside each room, and it describes the space you can stand in. Exterior measurement is taken around the outside of the building, and it describes the footprint the building occupies. The difference is the wall thickness plus every interior partition.
Interior measurement is the right choice when the number is about surfaces or space inside the house: floors, ceilings, walls, furniture layout, heating and cooling loads. Exterior measurement is faster, requires no access to the inside, and is the usual basis for footprint questions such as how much of a lot a building covers. Neither is more correct in the abstract, which is exactly why the number should always carry a note saying which it is.
Where a shape makes exterior measurement awkward, such as a bump-out, a porch, or an attached garage, split the perimeter into rectangles the same way you split an irregular room and add the pieces. Where an interior measurement has to cross a doorway or an archway, decide once whether the opening belongs to one room or is measured separately, and apply the same decision everywhere. Consistency across the whole house matters more than which convention you pick, because an inconsistent total cannot be checked by anyone, including you.
Common square footage mistakes
A handful of errors account for nearly every wrong square footage, and all of them are easy to catch once you know to look.
- Mixing feet and inches. Reading 12 feet 6 inches and writing 12.6 instead of 12.5 corrupts every calculation that number touches. Divide the inches by 12 first, always, and keep the raw reading next to the converted one.
- Measuring the bounding box of an L-shape. Treating an irregular room as one big rectangle counts the missing corner as floor you do not have. Split it into rectangles and add the real pieces instead.
- Confusing perimeter with area. Adding the four wall lengths gives the distance around the room, which is trim footage. Square footage is a multiplication of two dimensions, never a sum of four.
- Squaring the diameter of a circle. Halve the diameter to the radius first, then square it. Squaring the full diameter quadruples the area, and the answer will look plausible enough to survive a glance.
- Using the slope instead of the height on a triangle. The perpendicular height, straight out from the base, is shorter than the sloping wall. Measure the true height or the triangle comes out too large.
- Overlapping pieces or leaving gaps. Two rectangles that share a strip of floor count that strip twice. Check that every square foot of the room sits inside exactly one piece.
- Quoting a net figure with no deduction list. A net number that does not say what was subtracted cannot be compared to anyone else’s. Write the gross, the deductions, and the net on one line.
- Confusing floor area with wall area. They are both square feet and they are not interchangeable. Floor area uses two horizontal dimensions; wall area uses a width and the ceiling height.
Every one of these is a units error, a geometry error, or a labeling error, which is why the discipline of converting inches first, splitting odd rooms into simple shapes, and writing down what a figure includes prevents almost all of them.
Troubleshooting: odd angles, curves, and mixed units
Real rooms rarely behave like the tidy example, so here is how to handle the situations that complicate a square footage.
What if a wall meets at an odd angle that is not a right triangle? Split the awkward shape into a rectangle plus a right triangle and measure each, which keeps you on the length-times-width and half-base-times-height formulas. Draw the perpendicular line separating the clean rectangle from the triangular offcut, measure the rectangle normally, then measure the triangle’s base along one edge and its height straight out to the point. Two easy pieces beat one hard one, and you never need to reach for angles.
What if the edge is a genuine curve rather than a segment of a circle? Approximate it with a series of narrow rectangles, sometimes called strips. Measure across the shape at regular intervals, say every 2 feet, treat each interval as a rectangle 2 feet wide by the measured depth, and add them. More intervals means a closer approximation. This is how surveyors handle irregular boundaries and it works just as well on a patio with a wavy edge.
What if the area is sloped, like a driveway on a grade or a pitched roof? Decide first which area you want. The plan area, seen from above, is the footprint the space occupies. The surface area, measured along the slope, is the actual surface. For anything that covers the surface you want the sloped measurement, and for a roof in particular the pitch makes the true surface noticeably larger than the building’s footprint. Our manuals on roof pitch and shingle quantities carry that conversion.
What if my measurements are in a mix of units? Pick one unit and convert everything to it before you multiply, never partway through. If most of the room is in feet, convert stray meter readings to feet first by multiplying by about 3.281, then calculate in square feet as usual. Mixing units inside a single multiplication produces a number that is meaningless, and it is the kind of error that looks entirely plausible on the page, so the fix is discipline at the measuring stage rather than a catch at the end.
Square feet, square yards, and square meters compared
Because area gets quoted in several units, it helps to see the three side by side and know the fixed factors between them. Square feet is the working unit for most home projects in the United States, square yards appears in some flooring and bulk work, and square meters is standard almost everywhere else and on many product spec sheets. Converting between them is always a single multiplication or division by a fixed constant, applied to one final total.
The factors are worth committing to memory. One square yard is 9 square feet, because a yard is 3 feet and 3 squared is 9, so square feet to square yards divides by 9. One square meter is about 10.764 square feet, so square meters to square feet multiplies by 10.764, and the reverse, square feet to square meters, multiplies by 0.0929. As illustrative round numbers, a 200 square foot room is about 22.2 square yards or roughly 18.6 square meters, and a 20 square meter room is about 215 square feet.
The reason the square-yard factor is 9 rather than 3 is the same reason cubic yards divide by 27 rather than 3: area works in two dimensions and volume in three, so a linear factor of 3 becomes 3 squared for area and 3 cubed for volume. Keep that pattern and the conversions stop being something to memorize and become something you can derive on the spot. Our cubic yards manual works the volume side of the same idea, and the front page calculator runs a length, width, and depth straight through to a yardage figure.
Square footage on land: acres and large areas
Land uses the same arithmetic at a larger scale, with one extra constant. An acre is 43,560 square feet, which is also 4,840 square yards, since 4,840 times 9 returns 43,560. To convert a measured area to acres, divide the square feet by 43,560. A lot measuring 100 feet by 150 feet is 15,000 square feet, which is 15,000 divided by 43,560, or about 0.34 acres.
The awkward part of the constant is that 43,560 is not a round number and there is no intuitive shape behind it, so it has to be looked up or memorized rather than derived. A useful anchor is that an acre is roughly a square 209 feet on a side, since 209 squared is about 43,681, which is close enough for a mental check. If a lot is around 200 by 200 feet, it is around an acre. If a parcel measures a quarter mile by a quarter mile, it is far larger than an acre and you are into different units entirely.
Irregular parcels get the same divide-and-add treatment as an irregular room, though the pieces are larger and the strip method from the troubleshooting section earns its keep on a curved boundary such as a creek or a road frontage. Our land area measurement guide works through acres, square miles, and the other units that appear on deeds and plats. As always, a measured area is your own figure; a recorded parcel area comes from the survey and the local records office, and those are the numbers that govern.
A quick square footage reference table
For quick sizing before you reach for a tape, it helps to have a few common room dimensions and their square footage written down. These are exact figures for rectangular rooms, all following the same length-times-width method, useful as a sanity check against your own measurement.
| Room size | Square feet | Square yards | Square meters |
|---|---|---|---|
| 8 x 10 ft | 80 sq ft | ~8.9 sq yd | ~7.4 sq m |
| 10 x 12 ft | 120 sq ft | ~13.3 sq yd | ~11.1 sq m |
| 12 x 14 ft | 168 sq ft | ~18.7 sq yd | ~15.6 sq m |
| 14 x 16 ft | 224 sq ft | ~24.9 sq yd | ~20.8 sq m |
| 16 x 20 ft | 320 sq ft | ~35.6 sq yd | ~29.7 sq m |
Every row is length times width for the square feet, then divided by 9 for square yards and multiplied by 0.0929 for square meters. The 14 by 16 row matches the net figure from the worked example, which is a reminder that an L-shaped room of 224 square feet covers exactly as much floor as a rectangle of the same area, however different it looks on a plan. Because area multiplies two dimensions, it grows faster than the walls do: the 16 by 20 room is four times the floor of the 8 by 10 even though each wall is only doubled. Use the table as a sanity check rather than a substitute for measuring your own space.
Where your square footage goes next
A square footage is an input, not a destination, and it is worth knowing what happens to it downstream so you can stop this manual at the right point. Once you have a net area you trust, the next question is always a different one. Material quantity, coverage per unit, waste allowance, and pricing are all separate steps with their own rules, and they live in their own manuals rather than here.
For turning an area into a quantity of material, including how much extra to allow for cuts and offcuts, our manual on how to estimate materials for a project runs the takeoff sequence, and the material coverage reference collects the coverage and yield figures that turn an area into a unit count. For putting numbers and a price in front of a client, how to write a contractor estimate covers materials, labor, and margin. For anything that fills a space rather than covering a surface, the missing dimension is depth, and our cubic yards manual adds it, as does the front page calculator once you feed it a depth alongside your length and width.
The one thing worth doing before you hand the number on is measuring once, carefully, and reusing that figure everywhere rather than remeasuring loosely for each material. A 5 percent measuring error becomes a 5 percent error in every quantity that descends from it, all at once and all in the same direction. One good sketch with each piece labeled, one gross figure, a stated deduction list, and one net total is the entire discipline, and it is the difference between a number you can defend and a number you can only repeat.
Your square footage checklist
Before you rely on a square footage for anything, run down this compact list.
- Chosen one unit, feet or meters, and used it for every reading.
- Recorded each raw tape reading and its converted decimal-foot value in separate columns.
- Divided every inch reading by 12, so 6 inches is 0.5 and 3 inches is 0.25.
- Measured wall to wall along the surface itself, into the corners, not to the baseboard face.
- Taken a second width reading at the far end of any room that might not be square.
- Sketched the space and labeled each length on the wall it belongs to.
- Split any irregular room into rectangles, triangles, and part circles that tile it with no gaps and no overlaps.
- Calculated each rectangle as length times width, each triangle as one half base times height, each circle as pi times radius squared.
- Added the pieces for a gross figure and written it down before subtracting anything.
- Listed the cutouts you deducted, then recorded the net figure beside the gross.
- Noted whether the figure is interior or exterior, and whether it is floor area or wall area.
- Converted the single final total to square yards, square meters, or acres only at the end, and checked the direction.
Work top to bottom and the square footage you hand to anyone is one you can defend line by line. The companion below runs your own dimensions through the pieces, the deduction, and the unit conversions so you can check the arithmetic against your sketch.
The bottom line
Calculating square footage is one formula worn several ways: length times width in feet for a rectangle, one half base times height for a triangle, pi times radius squared for a circle, and the habit of splitting any odd room into those shapes and adding the pieces. Convert every inch reading to a decimal foot before you multiply, because 6 inches is 0.5 feet and not 0.6, and that one slip causes more wrong areas than every other mistake combined. Write down the gross, list what you deducted, and record the net beside it, so the figure carries its own explanation. Keep floor area and wall area apart, since a 12 by 10 room with an 8 foot ceiling has 120 square feet of floor and 352 square feet of wall. Convert the single final total, never the pieces. And when the question turns from how large the space is to whether that space counts toward a defined figure, that is a question for your appraiser, your assessor, or your building department, not for a tape measure.
Treat this manual as bench notes on the arithmetic, not as a definitive figure for any official purpose. The dimensions, ratios, and worked totals here are illustrative, and your own numbers will differ with the room, the walls, and the conventions you apply. Measure your own space in a single consistent unit, record what your net figure includes and excludes, and take any question about whether a space counts toward a defined or recorded square footage to your appraiser, your local assessor, or your building department.
Frequently asked questions
How do you calculate square footage?
Measure the length and the width of the area in feet, then multiply them together, because square footage is length times width for any rectangle. A room that is 12 feet long and 10 feet wide is 12 times 10, which is 120 square feet. If the space is not a clean rectangle, break it into rectangles, triangles, and circles you can measure separately, work out each one, and add the areas together. The rule that holds the whole method up is unit consistency: turn every inch reading into a decimal foot before you multiply, and the answer comes out in honest square feet.
What is the formula for square footage?
For a rectangle or a square, square footage equals length times width, with both measurements in feet. For a triangle it is one half times the base times the perpendicular height. For a circle it is pi times the radius squared, where the radius is half the diameter and pi is about 3.14159. Those three formulas cover nearly every shape you will meet, because irregular spaces get split into combinations of them. Measure everything in feet first and the products land in square feet with no further conversion.
How do I calculate the square footage of a room?
Measure the room wall to wall along the floor, in feet, taking the length on one wall and the width on the adjoining wall, then multiply the two. Convert the inches first: a room reading 13 feet 4 inches by 11 feet 8 inches becomes 13.33 by 11.67 feet, which multiplies out to about 155.6 square feet. Measure into the corners rather than to the face of the baseboard, take a second reading at the far end of the room in case the walls are not parallel, and use the larger of the two if they differ. Alcoves, bays, and closets that open into the room are separate rectangles you add on.
How do I calculate the square footage of an irregular room?
Split the irregular room into simple shapes you can measure, usually a set of rectangles plus the occasional triangle or half circle, work out the square footage of each piece on its own, then add them for the total. An L-shaped room is two rectangles. A room with an angled wall is a rectangle plus a right triangle. A bay window is a rectangle plus a shape you can approximate. Draw the dividing lines on a sketch so the pieces tile the floor with no gaps and no overlaps, and the areas add cleanly. This divide-and-add habit beats judging an odd shape by eye every time.
How do I calculate the square footage of a house?
Measure each room individually, wall to wall in feet, multiply length by width for each, and add the room totals together. An illustrative single story with a 252 square foot living room, a 132 square foot kitchen, two bedrooms at 156 and 110, a 48 square foot bathroom, and a 70 square foot hall adds to 768 square feet of measured room area. Measuring the outside of the house instead gives a larger number, because the exterior footprint includes the wall thickness and the interior partitions. The two numbers are both correct and they answer different questions, so record which one you took.
What is the difference between net and gross square footage?
Gross square footage is the area of the overall shape before anything is taken out, and net square footage is what is left after you subtract the parts the number is not supposed to include. On a floor that usually means subtracting permanent cutouts like a stair opening or a hearth, so an L-shaped room measuring 236 square feet gross with a 12 square foot hearth is 224 square feet net. At building scale the same words describe the gap between an exterior footprint and the usable area inside the walls. Because the terms are used differently by different trades and standards, always say which deductions your net figure includes.
How many square feet are in a square yard?
There are 9 square feet in a square yard, because a square yard is a square measuring 3 feet on each side and 3 times 3 is 9. To convert square feet to square yards you divide by 9, so 224 square feet is 224 divided by 9, which is about 24.9 square yards. The factor is 9 rather than 3 for the same reason that cubic yards use 27: a linear factor of 3 becomes 3 squared for area and 3 cubed for volume. Getting that exponent right is the difference between a sensible conversion and one that is off by a factor of three.
How do I convert square feet to square meters?
Multiply square feet by 0.0929 to get square meters, because one square foot is about 0.0929 square meters. Going the other way, multiply square meters by about 10.764 to get square feet. So 224 square feet is 224 times 0.0929, roughly 20.8 square meters, and a 15 square meter room is about 161 square feet. These are fixed conversion constants rather than estimates, so the only way to get them wrong is to multiply when you should divide. Sanity check the direction: a figure in square meters is always the smaller number, because a meter is longer than a foot.
What is the difference between square footage and cubic footage?
Square footage measures area, a flat two-dimensional surface, and it is length times width in feet. Cubic footage measures volume, a three-dimensional space, and it is length times width times depth in feet. Area answers questions about anything that covers a surface, and volume answers questions about anything that fills a space. The bridge between the two is depth, so a square footage becomes a cubic footage only once you multiply it by how deep the material goes. Our manual on calculating cubic yards carries that depth step through to a volume figure.