What's on this page
- Why a deck order splits into two lists
- Before you start: what to gather and what to settle
- Step 1: Measure the deck footprint and settle the shape
- Step 2: Choose the board width, the gap, and the direction of run
- Step 3: Convert the deck area into linear feet of decking
- Step 4: Count the rows and solve the gap instead of ripping a board
- Step 5: Choose board lengths that kill the butt joints
- Step 6: Add the waste factor and the diagonal penalty
- Step 7: Set the joist spacing from the decking you chose
- Step 8: Count the joists from length over spacing plus one
- Step 9: Work the beam, posts, and footings from the framing plan
- Step 10: Count the fasteners, hangers, and hidden clips
- Nominal versus actual, and why a 6 inch board is 5.5 inches
- What a joist span actually is, and why this manual will not give you one
- Linear feet, square feet, and board feet on one deck
- Wood, composite, and what changes in the count
- Picture framing, borders, and stair treads
- Railing posts and what they do to the frame
- A worked example: a 16 by 12 deck end to end
- Common deck estimating mistakes
- Troubleshooting the awkward decks
- Your deck material checklist
- The bottom line
A deck estimate looks like one calculation and is really two, stacked, with different units and different failure modes. The top half is a covering problem: turn an area into linear feet of board, decide where the gaps go, and pick lengths that do not litter the job with butt joints. The bottom half is a framing problem: decide how far apart the joists sit, count them, then carry that load down through a beam, some posts and a hole full of concrete. People do the top half well, because it is arithmetic they can see, and then guess the bottom half, because it involves a span table they do not have.
This manual works both halves in order, from a tape on the ground to a list you can read at a counter. It converts the deck area into linear feet of decking, counts the rows and solves the gap so the last board is not a ripped sliver, prices the diagonal layout honestly in both waste and joist count, then derives the joist count from the same length over spacing plus one rule our fence materials manual uses for posts. It stops short of telling you a span, because nobody writing an article can know your species, your grade or your code. Run your dimensions through the material coverage estimator, and the companion below recalculates every section on your own deck as you read.
Key takeaways
- Linear feet of decking is area times 12 divided by the board width plus the gap, both in inches. A 192 square foot deck with 5.5 inch boards and a quarter inch gap wants about 401 linear feet.
- Count rows as the number of whole boards that fit, then solve the gap from what is left over. Fixing the gap first is what produces a ripped final board.
- Joists are length divided by spacing, rounded up, plus one. Sixteen feet at 16 inches on center is 12 bays and 13 joists, and the plus one is the joist everyone drops.
- Decking laid at 45 degrees costs twice: waste rises from about 5 percent to about 15, and the joists have to tighten by a factor of 1.414, taking 13 joists to 17.
- No article can tell you an allowable joist span. It depends on species, grade, size, spacing, wet service and your adopted code, and it comes from the local building department or an approved span table.
Why a deck order splits into two lists
Keeping the decking and the framing as two separate take-offs is not tidiness, it is error control. The two lists use different units, they respond to different decisions, and they are bought at different moments. Decking is measured in linear feet of a face width, and it is governed by the board you chose and the gap you want. Framing is measured in counted pieces of a section, and it is governed by spacing, span and load. Mixing them produces the classic deck error, which is ordering enough square footage of board to cover a deck that the frame underneath cannot actually carry.
There is a sequencing reason too. The decking decision comes first and drives the framing decision, not the other way around. The board you pick has a maximum unsupported span, and that maximum sets the joist spacing, and the joist spacing sets the joist count, the hanger count, the blocking count and the fastener count. Choose the decking last and you will have already framed at a spacing the board cannot use.
The third reason is that only one of the two lists is fully yours to decide. Board width, gap, direction, length and pattern are aesthetic and practical choices with no wrong answer. Joist size, spacing, beam size, post size and footing depth are structural, they are governed by code, and on almost every deck they are inspected. Splitting the estimate keeps the choices you own separate from the ones you have to confirm, which is the difference between a plan and a hope. The same discipline our materials estimating manual applies to a whole project applies inside this one item.
Before you start: what to gather and what to settle
None of the arithmetic below works without these, so collect them before you pick up a pencil. It is about twenty minutes of measuring and an hour of calculation for a rectangular deck, and rather longer if the shape has a bump out or the ground falls away.
- A long tape, a pencil, graph paper, and something to square the corners with. A 3 by 4 by 5 triangle laid out with the tape does the job.
- The exact deck footprint you intend to build: the width along the house and the depth out from it, in feet and inches, not rounded.
- The decking product you intend to buy, with its actual face width and its published maximum span for both perpendicular and diagonal installation. Those two numbers come from the installation instruction, not from a chart.
- The gap you want between boards, or a willingness to let the arithmetic choose it for you, which is the better habit.
- The height from the finished deck surface down to grade, which sets the post length and decides whether a railing and stairs are in scope.
- Your local frost depth and footing requirement, and confirmation of whether the deck needs a permit. Both come from the local building department, and on decks the answer is usually yes.
- The span table your jurisdiction actually uses, or a plan reviewer willing to tell you which one applies. This is the piece people skip.
Difficulty is moderate: the measuring is easy, the row and gap arithmetic is fussy, and the framing side is not a place for improvisation. If the deck is attached to the house, the ledger connection is the one detail where a mistake is catastrophic rather than expensive, and it belongs to the plan reviewer.
Step 1: Measure the deck footprint and settle the shape
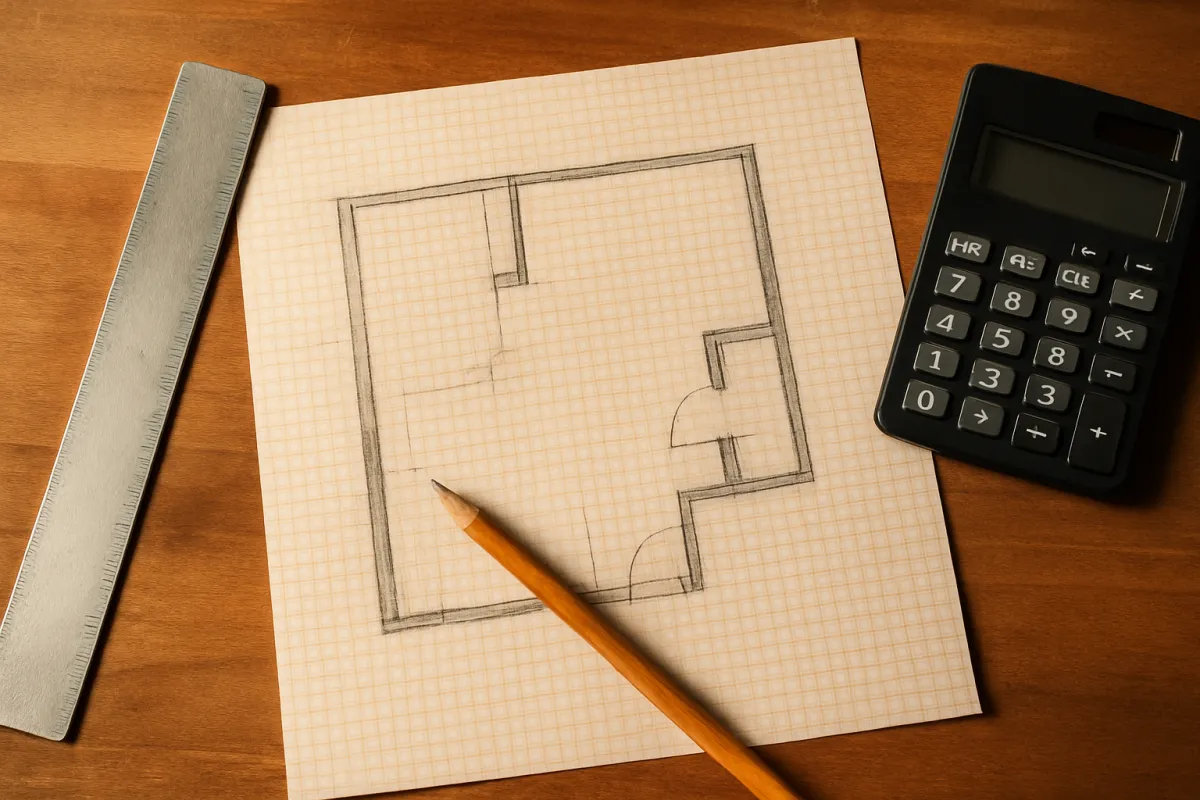
Measure the two dimensions that define the deck surface: the width along the house and the depth out from it. Take both at the finished surface, meaning the outside face of the outermost board, not the frame, and record them in feet and inches rather than rounding to the nearest foot. Half an inch of rounding on a 12 foot run is a third of a board row, and it is the sort of error that only surfaces when the last row will not fit.
Square the corners before you trust the numbers. Measure both diagonals of the rectangle and compare: on a true rectangle they are identical, and on a 16 by 12 deck each diagonal should read 20 feet exactly, because 16 squared plus 12 squared is 400 and the square root of 400 is 20. If the two diagonals differ, one of the four sides is out of square and the decking will show it as a widening gap along the house.
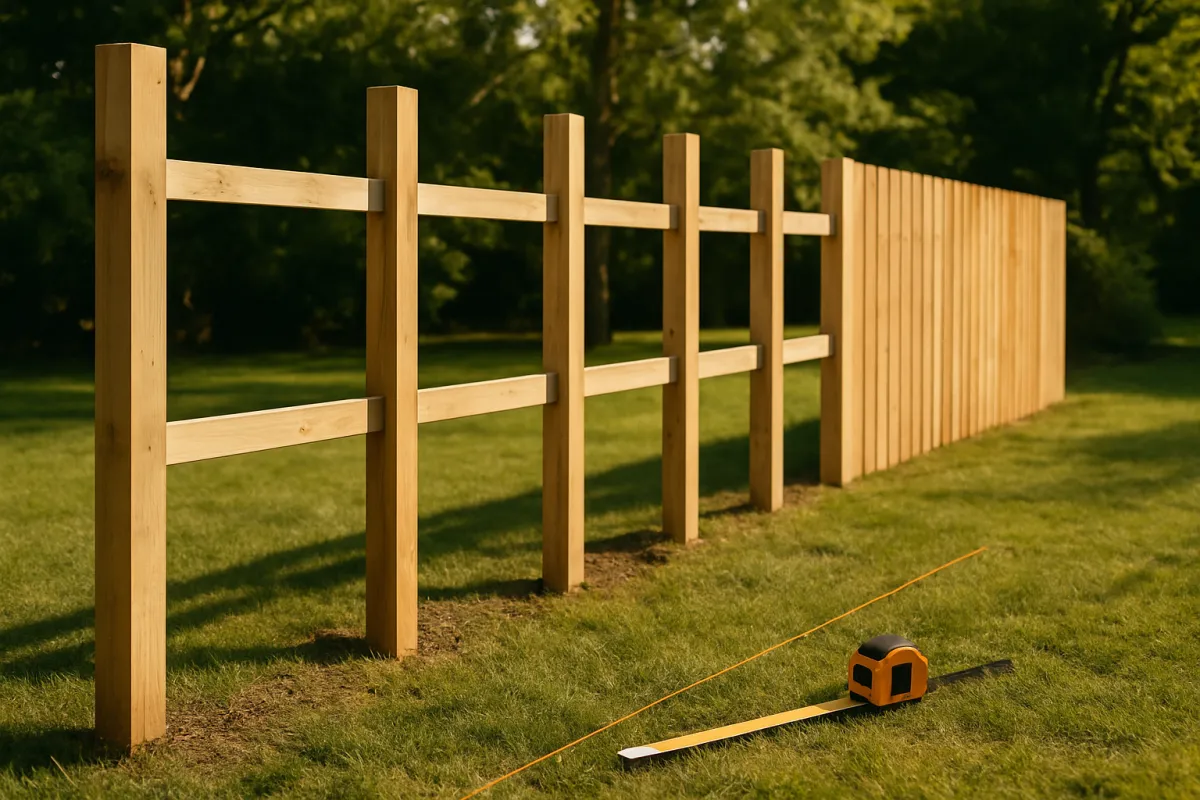
The illustrative deck this manual returns to is 16 feet wide along the house and 12 feet out from it, standing about 3 feet above grade, with the decking running parallel to the house and the joists running out from it. That is 16 times 12, or 192 square feet.
Watch out for the shapes that are not rectangles. An L shaped deck is two rectangles, and the honest method is to split it, calculate each piece separately, and add the results, exactly as our square footage manual handles a room with a bump out. Do not average an irregular deck into a rectangle: the decking count will be near enough and the joist count will be wrong, because the joists in the short leg are a different length and often a different spacing.
Step 2: Choose the board width, the gap, and the direction of run
Three decisions, made together, because each one changes the other two. Start with the board. Decking is sold by a nominal size and installed at an actual size, and the actual face width is what covers ground. A board sold as a nominal 6 inch is commonly 5.5 inches across the face, and a nominal 4 inch is commonly 3.5 inches. Measure the sample at the yard rather than trusting the label, because face widths vary between products and a sixteenth of an inch compounds across 25 rows into more than an inch of error.
Next the gap. The gap exists so water drains and so the board can move without crushing its neighbour, and its size depends on the material and on how wet the board is when you lay it. Wood decking installed green or wet shrinks, so it goes down tighter; wood installed dry expands, so it goes down with a wider gap. Composite and PVC boards move with temperature rather than moisture and carry their own published gap, both between boards and at the ends. Read the installation instruction; on a warranted product the gap is a condition, not a preference.
Then the direction. Decking must run across the joists, so choosing the board direction chooses the joist direction. Boards parallel to the house mean joists running out from the house, which is the common arrangement because the ledger then carries the joist ends. Boards running out from the house mean joists parallel to it, which needs a different framing layout.
The example uses a 5.5 inch face with a quarter inch gap, boards parallel to the house. Covered width per board, which is the number every later step uses, is 5.5 plus 0.25, or 5.75 inches.
Step 3: Convert the deck area into linear feet of decking
Decking is bought by the linear foot of a particular board, not by the square foot, so the first conversion is out of area and into length. The formula is short: linear feet equals area in square feet times 12, divided by the covered width per board in inches. The 12 converts feet to inches so the units cancel, and what comes out the other side is the total length of board you need laid end to end.
Run it on the example. The area is 192 square feet. Multiply by 12 to get 2,304, then divide by the 5.75 inch covered width, and the answer is 400.7 linear feet of decking. Round it to 401 and hold it, because the next two steps will produce the same number by a different route, and a number that only exists once has never been tested.
Two things make this formula behave. First, the covered width includes the gap, because a gap covers ground just as effectively as a board does even though you are not paying for it. Leaving the gap out inflates the order: dividing 2,304 by 5.5 instead gives 419 linear feet, which is 18 feet of board you do not need. Second, the answer is in linear feet of that specific board, so it is meaningless once you change board width. A 3.5 inch face with the same quarter inch gap has a 3.75 inch covered width, and 2,304 divided by 3.75 is 614 linear feet, half again as much board for the same deck.
Watch out for the sales unit. Decking is quoted per linear foot in some yards and per board in others, and the two only agree once you fix a board length. Convert to boards yourself before comparing prices, so you are comparing the same thing.
Step 4: Count the rows and solve the gap instead of ripping a board
This is where most deck layouts go wrong, and the fix is to reverse the order of the arithmetic. The instinct is to fix the gap at a quarter inch and divide the run by 5.75 to get the row count. On the example that gives 144 inches divided by 5.75, or 25.04 rows, which rounds up to 26 and leaves the last board ripped down to about an inch wide. Nobody wants a one inch sliver along the house.
The honest count is the number of whole boards that fit, because the run has one fewer gap than it has boards. Written out, n boards and n minus 1 gaps must fit the run, so n times 5.5 plus n minus 1 times 0.25 is at most 144. That simplifies to 5.75n minus 0.25 at most 144, so n is at most 25.087, and n is 25. Twenty five whole boards fit, not 26.
Now solve the gap from what is left. Twenty five boards at 5.5 inches use 137.5 inches, leaving 6.5 inches to distribute across 24 gaps, which is 0.271 inches each. That is a hair over a quarter inch and entirely ordinary. The run ends on a full board, every gap is identical, and nothing was ripped.
Cross check against Step 3. Twenty five rows at 16 feet each is 400 linear feet of decking, against the 400.7 the area formula gave. The two agree to within a foot, and they should, because the area formula divides by the covered width and therefore quietly assumes a gap after the final board that does not exist. When the two disagree by more than a board, one of them has the wrong face width in it.
Watch out for the case where the leftover is large. If the arithmetic leaves more than about half an inch per gap you have gone past what the material tolerates, and the answer is to add a row and rip the last board to a sensible width rather than to open every gap. Compare both before committing, exactly the trade our tile quantity manual works when a floor ends on a narrow cut.
Step 5: Choose board lengths that kill the butt joints
A butt joint is where two boards meet end to end in the same row, and every one of them is a cost. It has to land on a joist, that joist has to be doubled or blocked so both board ends have something to sit on, both ends need their own fasteners, and the joint is where water will sit and where the deck will look its age first. The cheapest butt joint is the one that does not exist.
So choose lengths against the run rather than against the price per foot. The example deck is 16 feet wide and the boards run parallel to the house, so a 16 foot board covers a row in one piece. Twenty five rows means 25 boards, 400 linear feet, and zero butt joints. The offcut is nothing.
Now price the alternative. Buy 12 foot boards for the same 16 foot run and each row needs a 12 plus a 4. Three rows take 48 feet, which is exactly four 12 foot boards with no offcut at all, so the material waste is genuinely zero. The cost lands somewhere else: 25 rows now carry 25 butt joints, each needing doubled blocking under it and its own fasteners, and unless you stagger them deliberately the joints line up into a seam across the deck. Cheaper board, more labour, more blocking, worse deck.
Watch out for the length that nearly fits. A 16 foot board on a 16 foot 4 inch deck is the worst case, because every row needs a 4 inch patch, and 25 four inch patches is both ugly and slow. If the deck dimension lands just past a stock length, either pull the frame in to the stock length while it is still on paper, or plan a deliberate staggered pattern from the start with the joints falling on a rhythm rather than wherever the board ran out.
Joists needed across a 16 foot wide deck, by on center spacing
Bays are 192 inches divided by the spacing and rounded up; joists are that bay count plus one.
Every bar width is that row's joist count divided by the largest, 17, times 100. Tightening from 16 inches to 12 adds 4 joists, 4 hangers, 4 more blocking bays and about a hundred more fasteners on a deck this size, which is why the decking product's span rating is an expensive decision rather than a detail.
Step 6: Add the waste factor and the diagonal penalty
Waste on a deck is not one percentage, it is a consequence of how well the board length matches the run, plus an allowance for the boards that arrive unusable. Treat it as two separate additions and it stops being a guess.
The unusable allowance is the easy half. Every bundle contains boards with a crook, a split end, a large loose knot or a twist that no amount of persuasion fixes, and on a length matched layout that is essentially the whole allowance. Five percent is the usual planning figure, so the example’s 25 rows become 26.25 boards and the order is 27, or 432 linear feet. Two spare boards on a deck this size is cheap insurance against a Saturday afternoon trip.
The cutting half depends on the layout. Length matched runs waste nothing. Boards cut to length with reusable offcuts waste little. Boards cut to length with offcuts too short to use anywhere waste a lot, and 10 percent is the more common figure there.
Then the diagonal. Laying decking at 45 degrees is a genuinely good looking option that charges twice. The first charge is cutting waste: every board has two mitred ends, the boards near the corners are short triangles, and the offcuts rarely fit anywhere else, so the planning allowance rises to roughly 15 percent. On the example that takes 401 linear feet to about 461 rather than the 421 a perpendicular layout at 5 percent would need, an extra 40 feet of board.
The second charge is the one people miss, and it lands on the frame. A board crossing joists at 45 degrees does not span the joist spacing, it spans the diagonal of the bay, which is the spacing times the square root of two. Sixteen inch on center framing presents a 22.6 inch unsupported span to a diagonal board. If the decking is rated for 16 inches, the joists have to come in to 16 divided by 1.414, about 11.3 inches, which in practice means 12 inches on center. That takes the example from 13 joists to 17.
Step 7: Set the joist spacing from the decking you chose
Joist spacing is not a habit, it is a number the decking hands you. The board has a maximum unsupported span, published by whoever makes it, and the joist spacing has to be at or below that span. Everything else about the framing follows from this one figure, so it is worth getting from the right source rather than from memory.
The pattern across products is broadly consistent even though the specifics are not. Thinner boards want tighter support and thicker boards tolerate more. Solid wood decking of the thickness commonly used for residential decks is usually installed at 16 inches on center when laid perpendicular. Heavier wood decking sections can sometimes go wider. Many composite and PVC boards are also specified at 16 inches perpendicular, but some require 12, and stair treads made from the same board almost always require tighter support than the field. Every one of those is a claim about a specific product, so read the installation instruction for the board in your hand.
Two adjustments apply on top of whatever the instruction says. Diagonal installation divides the allowable spacing by 1.414, as Step 6 derived. Stair treads and any area carrying a concentrated load, such as a hot tub or a heavy planter run, are separate questions entirely and are not solved by the field spacing.
Watch out for treating the manufacturer’s maximum as a target. It is a ceiling, and a deck framed exactly at the ceiling has no margin for a joist that crowns, a bay that opens up during framing, or a board that turns out to be a sixteenth thin. Where the difference is a few joists, framing one step tighter than the maximum is usually money well spent.

Step 8: Count the joists from length over spacing plus one
With the spacing fixed, the count is arithmetic. Take the length the joists are spaced along, which on the example deck is the 16 foot width, convert it to inches, divide by the on center spacing, round up to get whole bays, and add one for the joist at the far end.
Run it. Sixteen feet is 192 inches. Divided by 16 inches on center that is exactly 12 bays. Twelve bays plus one is 13 joists. Each joist runs the 12 foot depth of the deck, so the joist order is 13 pieces at 12 feet, or 156 linear feet.
The plus one deserves the same demonstration it gets in fencing, because everyone nods at it and then loses it on paper. Joists do not fill bays, they bound them. One bay has a joist on each side, so one bay takes two joists. Add a second bay and it needs a joist on its far side only, because its near side reuses the one already there: two bays, three joists. The pattern is joist, bay, joist, bay, joist, and it never breaks, so n bays always take n plus 1 joists. The lost one is always the joist at the far end, which has no bay after it to justify its existence in a length divided by spacing calculation.
Round up before adding one, never after. A 15 foot wide deck at 16 inches on center is 180 divided by 16, or 11.25 bays, which rounds to 12 bays and 13 joists at an actual spacing of 15 inches. Rounding down instead would stretch the spacing past the maximum, which is the one direction the number may not move.
Two extras attach here. Blocking or bridging between joists is counted by the bay, so 12 bays is 12 pieces per row of blocking, each about 14.5 inches long at 16 inch spacing. And the two outermost joists are usually the outside joists rather than field joists, which changes what they are made of but not the count.
Step 9: Work the beam, posts, and footings from the framing plan
Joists have to land on something at both ends. At the house that is the ledger, bolted through to the structure, and at the open end it is a beam carried on posts standing on footings. Each of those is counted from the plan, and each of them is structural rather than decorative.
Start with the beam position, because it sets the joist span. A drop beam set back from the outer edge lets the joists cantilever past it, which shortens the span the joists actually work over. On the example, a beam set 2 feet back from the outer edge gives a 10 foot span from the ledger to the beam plus a 2 foot cantilever, while the joists are still ordered at 12 feet. The permitted cantilever is a fraction of the backspan and is set by code, so it is a number to confirm rather than to choose.
Posts come off the beam by the same plus one rule. With an illustrative maximum post spacing of 8 feet, a 16 foot beam divides into 2 bays and takes 3 posts. Standing about 3 feet above grade on footings, they are ordered at 4 feet each to allow for trimming, or 12 linear feet of post stock.
Footings are cylinders, so the volume is radius squared times pi times depth. A 12 inch diameter footing 3.5 feet deep holds 0.5 times 0.5 times 3.1416 times 3.5, about 2.75 cubic feet. Three of them is 8.2 cubic feet. At a typical 0.6 cubic foot yield for an 80 pound bag that is 14 bags, and a margin of 2 for holes that always run larger than the tube makes 16. Our bags of concrete manual works the yields in detail, and the technique in our post setting tutorial transfers directly.
Watch out for footing depth. It is set by local frost depth and soil, not by the diameter, and it is inspected. Get the requirement from the building department before you dig, and call the utility locate service, reached in the United States on 811, before anything breaks ground.

Step 10: Count the fasteners, hangers, and hidden clips
Fasteners are counted from crossings, and a crossing is one board meeting one joist. That single definition handles face screws, hidden clips and everything in between, and it stops the guessing that turns a deck order into three trips.
Count the crossings first. Twenty five rows crossing 13 joists is 325 crossings. Face screwed at two screws per crossing, which is standard so the board cannot pivot, that is 650 screws. Order against the board order rather than the row count and add for drops and strip outs, so a box covering 700 or 750 is the sensible buy. Hidden clips run one per crossing, so 325, and again round up.
Now the trap with clips. Boxes are labelled by the square footage they cover, and that coverage assumes a joist spacing. The same 192 square feet needs about 325 clips at 16 inches on center and about 425 at 12 inches, a 31 percent difference that the square footage on the box does not know about. If you framed tighter than the box assumed, the coverage figure is wrong for your deck. Count your own crossings and treat the label as a cross check.
Hangers are counted per joist end that hangs rather than bears. On the example the 13 joists hang off the ledger and sit on top of the drop beam, so that is 13 hangers, each taking the specific nails or screws the hanger manufacturer specifies. Substituting fasteners in a hanger is not a saving, it voids the rating the hanger was chosen for.
The ledger fasteners are the one line on this list that is not yours to calculate. The size, the type, the spacing and the stagger pattern of the ledger connection, along with the separate lateral load connection, are set by code and by the connector manufacturer, and a failed ledger is how attached decks come off houses. Get that detail from the plan reviewer.
Nominal versus actual, and why a 6 inch board is 5.5 inches
Every dimension in a lumber yard has two values, and using the wrong one is the quietest way to be wrong by a foot. The nominal size is the trade name, assigned to the rough green section before drying and surfacing. The actual size is what you measure on the board you carry out. Softwood dimensional lumber is commonly a half inch narrower than nominal in the smaller sizes, so a nominal 6 inch face measures 5.5, and the gap widens in the deeper sections.
For decking, only the actual face width matters, because that is what covers ground. Using 6 inches instead of 5.5 in the example drops the linear feet from 401 to 368, which is 33 feet of board short, or two full rows. That is an entire second trip caused by a naming convention.
For joists, the nominal depth is the label you look up in a span table and the actual depth is what the hanger has to fit. Both matter, in different places, which is why the two numbers persist.
Hardwoods and rough sawn stock behave differently again, and are sold by a volume measure rather than by the piece. Our board feet manual works that system, including the quarter thickness notation, and it is the right tool when the decking is a hardwood bought rough rather than a dimensioned softwood.
Measure the sample yourself. Face widths differ between products and between mills, and a sixteenth of an inch across 25 rows is more than an inch of accumulated error, which is enough to change whether the last row fits.
What a joist span actually is, and why this manual will not give you one
Span is the single most misused word in deck estimating, so start with the definition. A joist’s span is the clear horizontal distance between the supports it bears on, measured support to support. It is not the depth of the deck, and it is not the length of the joist. On the example the joists are 12 feet long, but they bear on the ledger and on a beam set 2 feet back, so the span is 10 feet and the remaining 2 feet is cantilever, which behaves differently and is governed separately.
Now the part people want and this manual will not fake. Whether a given section can carry a given span depends on the species of the timber, the grade stamped on that particular piece, the section size, the on center spacing, the wet service conditions that an outdoor deck imposes, and the live and dead loads your adopted code assigns. Change any one and the allowable span changes. There is no honest single answer, and an article that prints one is guessing on your behalf about a structural member.
What can be said is the direction of every relationship, which is enough to plan with. A deeper section spans further than a shallower one of the same species and grade. Tighter on center spacing lets a given section span further, because each joist carries less floor. A higher grade of the same species spans further than a lower one. Exterior wet service and heavier assumed loads both shorten the span. Cantilevers are limited to a fraction of the backspan.
Get the actual number from the span table in the code adopted where you build, or from an approved prescriptive deck construction document your jurisdiction accepts, and check it against the grade stamp on the lumber you are actually buying rather than on the lumber you assumed. Your local building department will tell you which document governs, and on a deck they will usually also want a permit, a plan and an inspection. That conversation costs nothing and is the cheapest structural engineering you will ever buy.
Linear feet, square feet, and board feet on one deck
Three units show up on a single deck order and they measure different things, so a number carried from one to another without converting is a mistake waiting to be delivered.
Square feet measures the surface. It is what you use to describe the deck, to compare stain coverage, and to sanity check a quote. The example deck is 192 square feet, and that figure never appears in a lumber order.
Linear feet measures length of a specific board. It is what decking is priced and ordered in, and it is meaningless without naming the board, because 401 linear feet of a 5.5 inch board and 614 linear feet of a 3.5 inch board cover the same deck. Framing is often counted the same way for pricing while being ordered as pieces of a length.
Board feet measures volume, at 144 cubic inches, and it is how rough hardwood and thicker stock are sold. It is the right unit when the deck uses a hardwood bought by the volume rather than by the piece, and the wrong one for dimensioned softwood sold by the stick.
Keep them separate on the sheet. Write the deck as 192 square feet, the decking as 401 linear feet of 5.5 inch board plus allowance, and the framing as counted pieces at named lengths, and the order can be read aloud without translation. Our coverage reference collects the conversions for the other materials that show up on the same weekend.
Wood, composite, and what changes in the count
Swapping the decking material changes surprisingly little of the arithmetic and quite a lot of the constraints, and knowing which is which saves recalculating things that did not move.
What does not change: area, the linear feet formula, the row count method, the plus one joist rule, the crossing count. Those are geometry, and geometry does not care what the board is made of.
What does change: the actual face width, which differs between products and moves the linear feet total; the required gap, both between boards and at the ends, which composite and PVC boards publish as a condition of the warranty; the maximum span, which sets the joist spacing and can differ from wood in either direction; the fastening method, since many composites use a hidden clip system with its own count and its own starting and finishing pieces; and the end gap allowance where boards meet a wall or a post, which thermal movement makes non optional on synthetic boards.
There is also a behaviour difference worth planning around. Wood moves with moisture, so a wet board laid tight opens up as it dries and a dry board laid tight can crush its neighbour after a wet spell. Composite and PVC move with temperature instead, mostly along their length, which is why the end gaps are specified and why the installation instruction often ties the gap to the temperature on the day.
The estimating consequence is that the material decision has to be made before the frame is built, not after. Framing at 16 inches and then choosing a board that needs 12 means either a new board or a new frame.
Where the lumber goes on a 16 by 12 deck, by linear feet
Shares of 646.5 total linear feet: decking, joists, ledger and rim, beam, and posts with blocking.
Shares are each group's linear feet over the 646.5 total: decking 400 feet is 61.9 percent, joists 156 feet is 24.1, ledger and rim 32 feet is 4.9, the doubled beam 32 feet is 4.9, and posts with blocking 26.5 feet is 4.1. Rounded to whole percents they read 62, 24, 5, 5 and 4, which sum to 100. Nearly two thirds of the timber is the surface you can see, which is why the decking decision drives the order and the framing decision drives the risk.
Picture framing, borders, and stair treads
A picture frame border, meaning a band of decking run around the perimeter with the field boards mitred or butted into it, is the most common way a deck estimate quietly goes 10 percent over. It adds three separate costs, and none of them appear in the area formula.
The first is the border board itself, counted as perimeter rather than area. The example deck has a 16 plus 12 plus 16 plus 12 perimeter of 56 feet, so a single width border is about 56 linear feet plus corner waste, and a double width border is double that. The second is the extra framing: a border board runs across the ends of the field boards, so it needs continuous support underneath it, which means a doubled rim or a run of blocking around the whole perimeter. The third is cutting: every field board now has a mitred or square cut end at both ends instead of running to the edge, and the offcuts are short.
Stair treads are their own line and their own arithmetic. Treads are counted by the step, with each step taking however many boards the tread depth requires, and the stringers are counted by the flight. Tread support is usually tighter than the field spacing, because a stair carries a concentrated load in a small area.
None of this is a reason to skip a border or a stair. It is a reason to count them separately rather than hoping the waste percentage absorbs them, because it will not.
Railing posts and what they do to the frame
Railing is where the estimate crosses back into structure, because a railing post is not decoration. It has to resist someone falling against it, which means it is anchored into the frame rather than into the decking, and that anchoring changes the framing count.
Count the posts by the run. Posts go at the corners, at the ends of each run, at either side of every stair opening, and at a maximum spacing along the run, so the count is the same bays plus one arithmetic as everything else: divide each run by the maximum spacing, round up, add one, and add the stair posts separately. On the example, if the railing runs along the two 12 foot sides and the 16 foot open end, that is three runs to count separately rather than one 40 foot division.
The framing consequence is blocking. Each post typically needs solid blocking behind it, bolted rather than nailed, so every post adds a piece of blocking and a set of through bolts to the order. Where posts land mid bay rather than on a joist, the blocking has to be added specifically for them, which is easiest to do while the frame is open.
The decking consequence is notching. If the posts stand inside the deck edge, every board that meets a post is notched around it, which is slow and produces short offcuts. If the posts mount outside the rim, the decking runs clean but the rim has to carry the load.
Post height, spacing and the required strength of the connection are all governed by code, and railing is one of the details an inspector looks at closely, so it is another number to confirm rather than choose.
A worked example: a 16 by 12 deck end to end
Pull the whole chain through one deck. The deck is 16 feet along the house by 12 feet out from it, 192 square feet, standing about 3 feet above grade. Decking is a 5.5 inch face board laid parallel to the house with a quarter inch nominal gap. Framing is at 16 inches on center, joists running out from the house, hung off a ledger at the house and bearing on a drop beam set 2 feet back from the outer edge.
Decking. Area 192 square feet times 12 is 2,304, divided by the 5.75 inch covered width is 400.7 linear feet. Rows: 25 whole boards fit the 144 inch depth, using 137.5 inches of face, leaving 6.5 inches across 24 gaps, or 0.271 inches per gap. Twenty five rows at 16 feet is 400 linear feet, which agrees with the area formula. Add 5 percent for splits and defects and the order is 27 boards of 16 feet, or 432 linear feet, with no butt joints anywhere on the deck.
Framing. The 16 foot width is 192 inches, divided by 16 inches on center is 12 bays, plus one is 13 joists at 12 feet, or 156 linear feet. Ledger 16 feet, rim 16 feet. Blocking is one piece per bay, so 12 pieces at about 14.5 inches, roughly 14.5 linear feet. The beam is doubled and 16 feet long, so 32 linear feet.
Substructure. At an illustrative 8 foot maximum post spacing the 16 foot beam is 2 bays and 3 posts, ordered at 4 feet each. Three 12 inch footings 3.5 feet deep hold 2.75 cubic feet each, or 8.2 cubic feet total, which at a 0.6 cubic foot bag yield is 14 bags plus 2 margin, so 16 bags of 80 pound mix.
Fasteners. Crossings are 25 rows times 13 joists, or 325. Face screwed at two per crossing that is 650 screws, so a 700 count box. Hidden clips would be 325 plus spares. Hangers are 13, one per joist at the ledger, with the manufacturer’s own nails.
Totals. About 646.5 linear feet of lumber, 16 bags of mix, 13 hangers, and one ledger detail that comes from the plan reviewer rather than from this arithmetic. Now switch the decking to a 45 degree layout and watch it move: waste rises to about 15 percent, so 401 linear feet becomes about 461; the joists tighten to 12 inches on center, so 13 becomes 17 and the joist lumber goes from 156 to 204 linear feet; hangers go from 13 to 17; blocking bays go from 12 to 16; and crossings rise to roughly 440. The pattern costs about 40 extra feet of decking, 48 extra feet of joist, 4 more hangers and about 115 more fasteners, which is the honest price of the diagonal.
Common deck estimating mistakes
Five errors account for most of the second trips, and every one of them is avoidable on paper.
- Dropping the last joist. Dividing the width by the spacing and buying that many joists is short by one on every framed section, because joists bound bays rather than fill them. Twelve bays need 13 joists.
- Leaving the gap out of the covered width. Dividing the area by the bare 5.5 inch face instead of the 5.75 inch covered width inflates the example order by 18 linear feet. The gap covers ground even though you are not paying for it.
- Fixing the gap before counting the rows. A fixed quarter inch gap on the example run produces 25.04 rows and a one inch sliver along the house. Count whole boards first, then solve the gap from the remainder.
- Using nominal dimensions. A nominal 6 inch board measures 5.5, and using 6 in the formula leaves the example two full rows short. Measure the sample rather than reading the label.
- Framing at 16 inches and then choosing the decking. If the board or the pattern needs 12 inch support, the frame is already wrong, and it is far more expensive to add joists to a built frame than to draw them on a plan.
- Treating a span rule of thumb as an answer. Span depends on species, grade, size, spacing, service conditions and code. A remembered ratio is fine for guessing which section to look up and useless as the number you build to.
Troubleshooting the awkward decks
What if the deck is not a rectangle? Split it into rectangles, calculate each separately, and add. An L shaped deck is two decks that share an edge, and the joists in each leg usually run in a different direction, so the decking count adds cleanly and the joist count does not. Count each leg’s joists from its own width.
What if the ground falls away steeply? The deck plan does not change but the posts do, because each row of posts is a different length and the footings may sit at different elevations. Count the posts as usual, then price them at the longest length and cut to a laser or a string line. Taller posts also usually mean bracing, which is a separate count and a code question.
What if the deck is freestanding rather than attached? There is no ledger, so there are two beams instead of one, twice the posts and footings, and the joists bear on top of both rather than hanging at one end. The decking arithmetic is untouched; the framing count roughly doubles on the substructure side.
What if you are replacing boards on an existing frame? Measure the actual joist spacing on the deck rather than assuming it, because older decks are framed to whatever was used then, and check that the new board’s span rating tolerates it. If it does not, sistering or adding joists comes before any board order.
What if the run is slightly longer than a stock board? Decide between a deliberate staggered joint pattern and pulling the frame in to the stock length. On a deck still on paper, pulling in a few inches is free. On a built frame it is not, and the stagger is the answer.
What if the deck will carry a hot tub or a heavy planter run? Stop estimating and get a designer involved. Concentrated loads are not what a general deck frame is sized for, and no field spacing rule covers them.
Your deck material checklist
Work through this in order and the order that arrives is the deck the yard needs.
- Measured the width and the depth at the finished surface in feet and inches, and checked both diagonals for square.
- Split any non rectangular shape into rectangles and calculated each piece separately.
- Measured the actual face width of the board being bought rather than using the nominal size.
- Read the board’s installation instruction for the required gap and the maximum span, perpendicular and diagonal.
- Chose the board direction and therefore the joist direction, and fixed both on the sketch.
- Converted area to linear feet as area times 12 divided by face width plus gap.
- Counted whole rows first, then solved the gap from the remainder so the run ends on a full board.
- Cross checked rows times run length against the area formula and reconciled any difference over one board.
- Chose a board length that matches the run, or planned a deliberate staggered joint pattern with blocking under every joint.
- Applied a 5 percent allowance for a length matched layout, 10 for cut to length, or about 15 for a diagonal.
- Set the joist spacing from the decking’s span rating, divided by 1.414 if the boards run diagonally.
- Counted joists as width over spacing rounded up plus one, and counted blocking by the bay.
- Positioned the beam, counted the posts as bays plus one, and computed footing volume as radius squared times pi times depth.
- Counted crossings as rows times joists, then fasteners or clips off the crossings rather than off the box label.
- Counted railing posts by the run and added the blocking and bolts each one needs.
- Confirmed footing depth, joist span, ledger detail, lateral connection, railing requirements and permit status with the local building department.
- Called the utility locate service and waited for the marks before digging.
Everything on that list is a number you can defend at the counter or in front of an inspector, which is the point. The companion below runs the same chain on your own deck so the hand math has something to argue with.
The bottom line
A deck material list is two calculations that have to be done in the right order. The decking half is honest arithmetic you own: area times 12 over the face width plus the gap gives the linear feet, whole rows come first and the gap is solved from the remainder, board length beats price per foot because every butt joint you avoid is blocking you do not buy, and the diagonal layout costs about 15 percent in waste before it costs anything in framing. The framing half is arithmetic plus a lookup: joists are width over spacing rounded up plus one, blocking is counted by the bay, posts are bays plus one along the beam, footings are cylinders, and fasteners are crossings. What the framing half will not give you is a span, because span belongs to your species, your grade, your spacing, your service conditions and your adopted code, and the only correct source is the span table your jurisdiction uses and the plan reviewer who applies it. Run your own footprint through the material coverage estimator, lean on our cubic yards manual if the same weekend involves a concrete pour, and settle the ledger, the footings and the permit with the building department before a single board is cut.
Treat this manual as estimating method and workshop arithmetic, not as a deck design, a structural calculation, or a statement of what is permitted where you build. Board widths, gaps, spacings, waste percentages, footing sizes, bag yields, post spacings and the 16 by 12 example itself are illustrative figures chosen so the worked numbers follow cleanly, and every one of them moves with your product, your lumber, your soil and your climate. Allowable joist and beam spans, cantilever limits, footing depth, ledger and lateral load connections, railing strength and guard height are structural matters set by the code adopted in your jurisdiction and by the connector manufacturer, and nothing here substitutes for the span table your building department applies. Confirm the permit and inspection position before you build, contact the utility locate service and wait for the marks before you dig, follow the decking manufacturer’s installation instruction where it differs from anything above, and bring in a qualified designer or engineer for freestanding, elevated, or heavily loaded decks and for any deck attached to a structure whose framing you cannot verify.
Frequently asked questions
How many deck boards do I need for a 16 by 12 foot deck?
Convert the area to linear feet first, then decide the board length. A 16 by 12 deck is 192 square feet, and with a 5.5 inch board and a quarter inch gap the covered width per board is 5.75 inches, so 192 times 12 divided by 5.75 is about 401 linear feet of decking. If the boards run parallel to the house across the 16 foot dimension, that is 25 rows of 16 foot board, and adding a 5 percent allowance for splits and defects makes the order 27 boards. Change the board width or the gap and every one of those numbers moves, so run the division on the board you actually intend to buy.
What is the formula for the number of joists?
Divide the length the joists are spaced along by the on center spacing, round up, and add one. For a deck 16 feet wide framed at 16 inches on center, 16 feet is 192 inches, 192 divided by 16 is 12 bays, and 12 plus 1 is 13 joists. The plus one is the joist at the far end, which has no bay after it to remind you it exists, and dropping it is the single most common framing miscount. It is the same arithmetic that gives fence posts as sections plus one, and it fails the same way if you divide the total length across separate framed sections instead of counting each one.
How much waste should I add to a deck board order?
Waste on a deck is mostly a function of how well the board length matches the run, not a fixed percentage. When the boards run the full width in one piece there is nothing to cut off, so an allowance near 5 percent covers splits, crooks and the odd unusable board. When boards have to be cut to length and the offcuts are too short to reuse, 10 percent is the more common allowance. Decking laid at 45 degrees is the expensive case, because every board has two angled ends and the corner offcuts are triangles, so an allowance closer to 15 percent is the usual planning figure.
Does diagonal decking need closer joist spacing?
Yes, and the reason is geometry rather than opinion. A board crossing joists at 45 degrees spans the diagonal of the bay, which is the joist spacing multiplied by the square root of two, so 16 inch on center framing presents a 22.6 inch unsupported span to a diagonal board. If the decking product is rated for a 16 inch span, the joists have to come in to 16 divided by 1.414, or about 11.3 inches, which in practice means 12 inches on center. That change alone takes a 16 foot wide deck from 13 joists to 17, and it also raises the hanger, blocking and fastener counts.
How do I know what span my deck joists can carry?
You look it up for your exact lumber and your exact jurisdiction, because span is not a general fact. Allowable span depends on the species, the grade stamped on the board, the section size, the on center spacing, the wet service conditions of an outdoor deck, and the live and dead loads your adopted code assigns, and any one of those changes the answer. The direction of each relationship is predictable, in that deeper sections, tighter spacing and higher grades all buy span, but the actual number comes from the span table in the code adopted where you live. Confirm it with your local building department before you buy a single joist, and expect a deck to need a permit and an inspection.
Should deck boards run parallel or perpendicular to the house?
The decking has to run across the joists, so the real decision is which way the joists run, and the two questions are answered together. Boards parallel to the house mean joists running out from the house, which is the common arrangement because the ledger then supports the joist ends directly. Boards running out from the house mean joists parallel to it, which usually means more beams or a different framing layout. Length matching often settles it in practice, because running the boards along the dimension that matches an available stock length removes butt joints entirely.
How do I calculate the gap between deck boards?
Do not fix the gap first, solve for it. Take the run you are covering in inches, subtract the total width of the whole boards that fit, and divide what is left by the number of gaps, which is one fewer than the number of boards. On a 12 foot run with 5.5 inch boards, 25 boards use 137.5 inches, leaving 6.5 inches to share across 24 gaps, or about 0.27 inches each, which is a hair over a quarter inch and perfectly ordinary. That approach ends the run on a full board instead of a ripped sliver, which is what a fixed gap almost always produces.
How many screws or hidden clips does a deck take?
Count the crossings, because every fastener is one board meeting one joist. Twenty five rows crossing 13 joists is 325 crossings, which is 325 hidden clips or 650 face screws at two per crossing, before any allowance for drops and strip outs. The trap with hidden clips is that boxes are labelled by the square footage they cover at an assumed joist spacing, so a deck framed tighter than that assumption runs short: the same 192 square feet needs about 325 clips at 16 inches on center and about 425 at 12 inches. Count the crossings yourself and treat the coverage on the box as a cross check, not as the answer.