What's on this page
- What the drywall question is really asking
- Sheet sizes, and what each one covers
- Measuring wall area the reliable way
- Measuring the ceiling, and why it is easy to forget
- Openings: what to deduct and what to leave in
- Where the sensible deduction cutoff sits
- Which openings genuinely come out of the count
- Sheet length, butt joints, and the real reason pros order long
- Counting butt joints before you buy
- Horizontal or vertical: how orientation changes the seam count
- Thickness, and what each one is commonly used for
- Board types by location, and who actually decides
- Ceilings: sag, spacing, and the thickness question
- The waste allowance, and what moves it
- Worked example: a 14 by 12 bedroom
- Cross-checking the sheet count a second way
- The same room in 12 foot sheets
- Joint tape, counted by the roll
- Joint compound, counted by the gallon
- Screws: deriving the count from the spacing
- Screws by the pound, and which length to buy
- Corner bead, counted in linear feet
- Weight, delivery, and getting sheets into the room
- Estimating a whole house rather than one room
- Where drywall estimates go wrong
- The pre-order checklist
- The bottom line
The awkward thing about a drywall order is that the number you need is not the number anyone quotes at you. Suppliers talk in sheets, framers talk in square feet, and the finisher talks in linear feet of joint. All three are describing the same room, and converting between them is the whole job. Get it wrong and you either stack four unopened sheets in the garage for a decade or, far worse, discover at four in the afternoon that the last wall is a sheet and a half short.
The arithmetic underneath is short: measure the wall and ceiling area, decide which openings come out, divide by the area of one sheet, add a waste allowance, and round up. What makes drywall trickier than most material takeoffs is that the sheet you pick changes more than the count. A longer sheet covers more area per unit, but it also removes butt joints, and butt joints are where finishing time actually goes. This manual works the whole chain, then adds the four items people forget to order: compound, tape, screws, and corner bead. It sits alongside our square footage manual, which handles the measuring underneath step one, and our paint coverage manual, which runs the same wall area through a different rate. To put your own room through the chain as you read, our estimator does the multiplication.
Key takeaways
- Board area is wall perimeter times ceiling height, plus the ceiling itself; a 14 by 12 room with 8 foot ceilings is 416 square feet of wall plus 168 of ceiling, or 584 gross.
- Sheet area is just its two dimensions multiplied: 32 square feet for a 4 by 8, 48 for a 4 by 12, 64 for a 4 by 16. Nothing about thickness or type changes that.
- Small openings usually stay in the count. A commonly used cutoff is the area of one sheet, roughly 32 square feet, because anything smaller yields scrap you cannot reuse.
- Longer sheets are ordered to kill butt joints, not to save sheets: the example room drops from about 12 butt joints on 4 by 8 sheets to about four on 4 by 12.
- The forgotten items are all derivable: compound by the gallon against board area, tape at roughly 377 linear feet per 1,000 square feet, screws at about one per square foot, bead by the outside corner.
What the drywall question is really asking
“How many sheets” is a request for a unit conversion, and it hides three separate decisions. The first is what surface area you are covering, which is a measuring problem. The second is what counts as covered, which is the opening deduction question and is more a matter of convention than of geometry. The third is what sheet you are buying, which sets the divisor and, less obviously, sets how much taping the job will need.
Only the first of those is arithmetic in the strict sense. The other two are judgment calls that experienced estimators make almost without thinking, and they are the ones that make published sheet counts disagree with each other. Two people can measure the same bedroom, both be right, and come out three sheets apart because one deducted every window and the other deducted none. Neither is wrong, exactly, but only one of them will have enough board when a sheet gets snapped in the wrong place.
The approach in this manual is to make each decision explicit and then hold it consistent all the way through, so that the sheet count, the compound, the tape, and the screws all describe the same room. That consistency is what turns an estimate into an order. Our materials estimating method frames the same discipline for other materials, and the coverage-plus-waste pattern behind it is identical here.
Sheet sizes, and what each one covers
Every dimension you need is on the label, and the coverage follows from multiplication rather than from a table you have to trust. Standard board is four feet wide, and the common lengths run 8, 9, 10, 12, 14, and 16 feet. Multiply and you get 32, 36, 40, 48, 56, and 64 square feet respectively. That is the entire sheet size reference, and you can rebuild it on a phone in ten seconds, which is exactly why it is worth deriving instead of memorising.
Thickness does not enter the area calculation at all. A 5/8 inch fire rated 4 by 12 sheet covers the same 48 square feet as a half inch regular 4 by 12, weighs considerably more, and costs more, but the divisor in your sheet count is unchanged. The same goes for moisture resistant and abuse resistant boards. Board type changes what you buy, not how much surface it covers.
| Sheet size | Coverage | Sheets for 584 sq ft (bare) | With 10% waste |
|---|---|---|---|
| 4 by 8 ft | 32 sq ft | 18.25 | 21 |
| 4 by 9 ft | 36 sq ft | 16.22 | 18 |
| 4 by 10 ft | 40 sq ft | 14.60 | 17 |
| 4 by 12 ft | 48 sq ft | 12.17 | 14 |
| 4 by 14 ft | 56 sq ft | 10.43 | 12 |
| 4 by 16 ft | 64 sq ft | 9.13 | 11 |
The right hand columns are the worked example room from later in this manual, run at each sheet size, so you can see the trade in one glance. Availability is the practical limit rather than the arithmetic: 8, 10, and 12 foot lengths are widely stocked, while 14 and 16 foot sheets are frequently a special order and are difficult to get through a normal doorway. Confirm what your supplier actually carries before you build a plan around a length you cannot buy.
Measuring wall area the reliable way
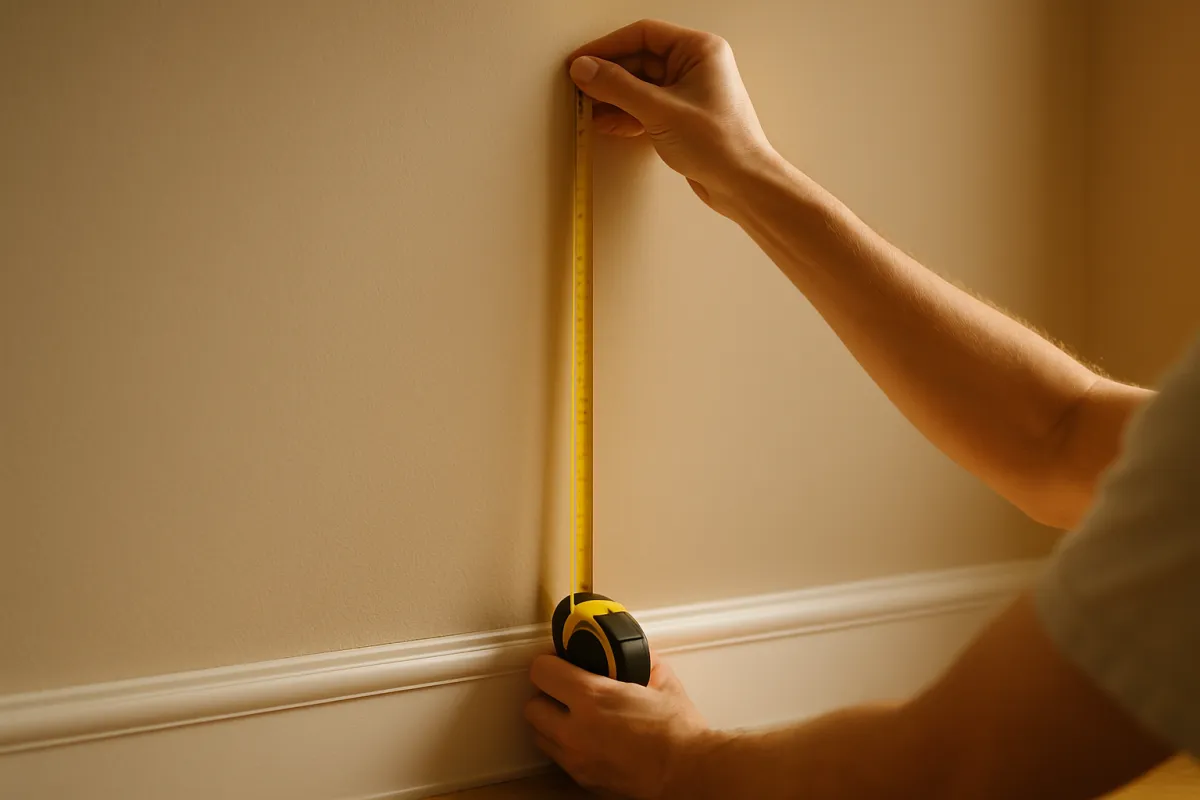
The reliable method for a rectangular room is perimeter times height, and it is reliable precisely because it does not ask you to measure four walls separately and add them up. Walk the room with a tape and record the length and the width, add the two together, double it, and you have the perimeter. A 14 by 12 room gives 14 plus 12, doubled, or 52 linear feet. Multiply by the ceiling height and you have the wall area: 52 times 8 is 416 square feet.
That shortcut works because the walls of a closed rectangle form a single continuous band, and the area of a band is its length times its height. It also survives most complications. An L shaped room still has a perimeter, and you can walk it and add the segments. A room with a chimney chase or a boxed column has extra perimeter that the shortcut catches automatically, provided you trace around the obstruction rather than across it. What the shortcut does not survive is a change in ceiling height, so a room with a raised section, a tray, or a slope needs to be split into parts and each part measured with its own height.
Measure the height at more than one point. Floors settle, ceilings are rarely dead flat, and if the height varies between 7 feet 11 inches and 8 feet 2 inches you want to know that before you cut sheets to a single length. Take the largest reading for material purposes, since board can be trimmed but not stretched. For rooms with a genuinely awkward outline, our square footage manual covers the decompose-into-rectangles habit in detail.
Measuring the ceiling, and why it is easy to forget
The ceiling is the single most commonly omitted surface in a homeowner drywall estimate, and it is not a small omission. In the example room it is 168 square feet against 416 of wall, which is nearly 29 percent of the total board. Order the walls and forget the ceiling and you are short by more than a quarter of the job.
Ceiling area is the room’s floor area: length times width, 14 times 12, or 168 square feet. That is true even though the ceiling is the surface you cannot easily put a tape against, because a flat ceiling and the floor beneath it are the same rectangle. Sloped and cathedral ceilings are the exception and need their own treatment, since the sloped surface is larger than the footprint beneath it by a factor set by the pitch, exactly as it is on a roof. Our shingle manual derives that pitch multiplier in full, and the same square root of 144 plus rise squared, divided by 12, applies to a cathedral ceiling.
Add the two surfaces and you have gross board area: 416 plus 168 is 584 square feet. Hold that number, because everything downstream keys off it, including the compound, the tape, and the screw count. Closets get counted as their own small rooms with their own perimeter and ceiling, and they are worth measuring separately rather than eyeballed, since a walk in closet can carry more board than you would guess from its floor area.
Openings: what to deduct and what to leave in
Here is where estimates diverge, and the honest answer is that the convention exists for a practical reason rather than a mathematical one. When you hang a sheet across a window opening, you do not cut the window out first. You hang the sheet whole, screw it off, and then cut the opening out with a router or a keyhole saw against the framing. The piece that comes out is a rectangle roughly the size of the window, and it lands on the floor as offcut.
That offcut is theoretically usable. In practice it is usually not, because it is the wrong size for anything remaining, has no factory tapered edges on the cut sides, and has been handled and dinged. So the material was consumed whether or not the opening exists, and deducting the opening from your order means buying less board than the job actually eats.
The other half of the reason is finishing. Hanging a sheet whole across an opening and cutting after keeps the sheet joints away from the corners of the opening, which is exactly where cracks like to start. A seam that lands on the corner of a door header is a crack waiting for the first season of humidity change. Hangers deliberately span openings for this reason, which means the material is being used as if the opening were not there.
Where the sensible deduction cutoff sits
A widely used working rule is to deduct nothing smaller than the area of a single sheet, which for 4 by 8 board is 32 square feet. Below that threshold the offcut is scrap; above it, you are cutting a genuinely reusable piece out and the deduction is real. That rule is a convention, not a code requirement, and estimators set it differently. Some deduct half the area of every opening as a compromise. Some deduct nothing at all below a full 100 square feet on the grounds that waste and breakage will absorb it.
Run the example room both ways and the size of the argument becomes clear. The door is 3 feet by 6 feet 8 inches, or 20 square feet. Each of the two windows is 3 by 4, or 12 square feet, for 24 between them. Total openings are 44 square feet out of 584, which is 7.5 percent of the board. Deduct all of it and the net area is 540 square feet, giving 16.88 bare sheets and, with the same 10 percent allowance, 19 sheets instead of 21.
Two sheets is the whole disagreement, and it is worth noticing that it is roughly the same size as the waste allowance itself. That is the real reason the no-deduction convention persists: on a room with ordinary openings, the material saved by deducting is roughly the material lost to cutting, so leaving openings in and adding a modest waste factor lands you in the right place without needing to be clever. Genuinely large openings are a different case entirely, and those do come out.
Which openings genuinely come out of the count
The cases where a deduction is not optional share a common feature: the opening is large enough that whole sheets, or large usable parts of sheets, would otherwise be ordered to cover nothing. A sliding patio door or a wide multi panel door assembly can easily exceed 40 square feet. A garage door opening in a garage you are boarding runs well past 100. A cased opening between two rooms that spans most of a wall, a large fixed picture window, a fireplace surround finished in stone or tile, and a stairwell void in a ceiling are all in the same category.
The test worth applying is not really about square footage, it is about whether entire sheets would be bought and never hung. If you can look at the wall and see that a full sheet plus part of another would sit inside the opening outline, deduct it. If the opening would only ever be cut out of a sheet you were hanging anyway, leave it in.
Full height tiled areas are a related case with a twist. A tub or shower enclosure typically gets a purpose made tile backer rather than paper faced drywall, so that area comes out of the drywall count and goes into a separate backer board count. It is not a deduction so much as a substitution, and the two orders have to be tracked separately because the boards are different products with different sheet sizes. The same logic applies to any wall section finished in something other than drywall.
Sheet length, butt joints, and the real reason pros order long
This is the part most sheet count calculators leave out, and it is the part that actually explains professional buying habits. Drywall sheets have tapered long edges, meaning the factory has thinned the board slightly along both 4 foot wide sides. When two tapered edges meet, they form a shallow trough. Tape and compound fill that trough and finish flush with the surrounding board, which is why a tapered seam is easy to hide.
The short ends of a sheet are cut square with no taper. When two of those meet, you get a butt joint, and there is no trough for the tape to sit in. The tape and the compound over it sit proud of the surface, so the only way to hide the joint is to feather the compound out very wide, sometimes 16 to 24 inches on each side, building a long gentle hump that the eye cannot catch under raking light. It takes more compound, more coats, more sanding, and more skill than any tapered seam.
So the reason a hanger reaches for 12 foot board on a 12 foot wall is not efficiency in sheet count. It is that a single sheet spanning the wall produces zero butt joints on that course. Every butt joint avoided is one of the hardest pieces of finishing work removed from the job. Sheet count savings are the side effect, not the point.
Counting butt joints before you buy
You can count butt joints in advance from nothing more than the wall lengths, and it is worth doing because it will often change your order. Hang horizontally on an 8 foot wall and each wall takes two courses of 4 foot wide board. Divide each wall length by the sheet length and any remainder is a butt joint in that course.
Take the example room with 4 by 8 sheets. The two 14 foot walls each need 8 feet plus 6 feet per course, which is one butt joint per course, two courses, so two butt joints per wall and four across both. The two 12 foot walls each need 8 plus 4, again one butt joint per course, another four. That is eight butt joints on the walls. The ceiling, hung in 4 foot wide rows across the 14 foot dimension, gives four rows, each 12 feet long and therefore made of an 8 and a 4, adding four more. Twelve butt joints in a single bedroom.
Now run 4 by 12 sheets. The 12 foot walls take exactly one sheet per course with nothing left over, so zero butt joints on those two walls. The 14 foot walls still need 12 plus 2, giving two butt joints each, or four. The ceiling rows are 12 feet long and a 4 by 12 sheet spans each one exactly, so zero there. Total: four butt joints instead of twelve. The order also drops from 21 sheets to 14. That is the trade in full, and it is why the sheet length question deserves more thought than the sheet count question.
Sheets to order for the same 584 square foot room
Gross board area divided by each sheet's coverage, with a 10 percent waste allowance, rounded up to whole sheets.
Bar widths are each count divided by the 21 sheet maximum. The board area bought barely moves across the whole range, since a sheet is a sheet: what moves is how many pieces you carry, lift, and join.
Horizontal or vertical: how orientation changes the seam count
On residential walls with 8 foot ceilings, horizontal hanging is the common choice, and the reason is seam length. Hang 4 foot wide board horizontally and two courses fill the height exactly, leaving one continuous horizontal seam at 4 feet above the floor. Around the example room that seam runs the full 52 foot perimeter, and it sits at a convenient working height where a taper can reach the whole run standing on the floor.
Hang the same board vertically and you get a seam every 4 feet around the perimeter instead. Fifty two feet of perimeter divided by 4 gives thirteen sheet widths, so roughly thirteen vertical seams, each 8 feet tall, for something near 104 linear feet of field seam. That is roughly double the seam length of the horizontal layout, all of it vertical, all of it requiring the taper to work up and down rather than along.
Horizontal hanging has a second advantage that matters more than the seam count on older framing: it ties across the studs, so a bowed or twisted stud is averaged out across the sheet rather than telegraphing through a vertical seam sitting right on it. Vertical hanging still has its place, mainly on walls taller than 8 feet where a horizontal layout would create a third course and an extra seam, and in commercial work on metal framing where vertical is often the specified method. For a standard room, horizontal wins on both seam length and flatness.
Thickness, and what each one is commonly used for
Thickness is a specification question rather than an estimating one, but it changes what you carry and sometimes what the code requires, so it belongs in the order. Half inch board is the common residential wall thickness and the default most people should assume unless something says otherwise. Five eighths inch board is heavier and stiffer, and it appears on ceilings for sag resistance and in fire rated assemblies, where the fire rated version is designated Type X.
Three eighths inch board shows up mainly in double layer applications and in resurfacing work over an existing wall, and quarter inch is a specialty product for curved surfaces, where two thin layers bent around a radius do what one thick sheet cannot. Neither is a general purpose wall board. There are also sag resistant half inch ceiling boards formulated specifically so that half inch thickness can span wider framing without drooping over time.
The thing worth saying clearly is that none of this is a decision a website should make for you. Required thickness and board type in a given assembly are set by the building code your jurisdiction has adopted, by the tested assembly the design relies on, and by the manufacturer’s own installation instructions. Those three sources agree with each other and disagree with generic advice on the internet. Confirm your thickness with the local building authority before you order, especially for anything that separates a garage from living space.
Board types by location, and who actually decides
The common board types map to conditions rather than to rooms. Regular board goes in ordinary dry interior spaces. Moisture resistant and mold resistant boards are commonly used in bathrooms, laundry rooms, and basements, where humidity is elevated but the surface does not get directly wet. Purpose made tile backer, rather than any paper faced drywall, is what goes inside a tub or shower enclosure that will be tiled, because paper facing and standing water are a bad combination regardless of what the board is called.
Fire rated Type X board appears wherever a rated assembly is specified. The classic residential case is the wall and ceiling separating an attached garage from the house, and another is the enclosure around a stairway or a furnace room in some designs. Abuse resistant and impact resistant boards exist for corridors and high traffic areas and are more common in commercial work than in homes.
Every one of those is described here as commonly used, and that phrasing is deliberate. The authority on what your specific assembly requires is your local building department, working from the code edition your jurisdiction has adopted, together with the installation instructions printed by whoever made the board. A rated assembly is only rated if it is built exactly as tested, right down to the fastener spacing and the joint treatment, so a summary is never a substitute for the actual specification. Ask before you buy, not after you hang.
Ceilings: sag, spacing, and the thickness question
Ceilings deserve their own paragraph because gravity works on them differently. A ceiling board is supported only at its fasteners and is pulled down continuously between them, and over years, especially with humidity cycling or insulation weight above, it can develop a visible sag between joists. The two variables are board stiffness and framing spacing.
At 16 inch framing spacing, half inch board is commonly used on ceilings without issue. At 24 inch spacing, the unsupported span is half again as long and ordinary half inch board is more prone to sagging, so either 5/8 inch board or a purpose made sag resistant half inch product is commonly specified instead. Blown insulation applied over a ceiling before the board has fully dried out, or a water based texture sprayed onto thin board, are both known contributors to sag, which is why the manufacturer’s instructions cover them explicitly.
Ceilings also take tighter fastener spacing than walls, commonly 12 inches in the field against 16 on walls, which is why the screw count per ceiling sheet is higher. And they are the reason a drywall lift is worth renting for anything past a small room: a 4 by 12 sheet of 5/8 inch board weighs on the order of 100 pounds, and holding that overhead while driving screws is how people injure their shoulders. Confirm the required thickness for your ceiling framing spacing with the local authority, since this is one of the places where the requirement genuinely varies.
The waste allowance, and what moves it
Waste in drywall is not spillage. It is the offcuts that cannot be reused, the sheets snapped in the wrong place, the pieces damaged in handling, and the awkward filler strips that get cut from a full sheet because nothing smaller was left. It scales with the number of cuts the room forces, which is why complexity rather than size drives the percentage.
Around 10 percent is a reasonable starting allowance for a plain rectangular room with a door and a couple of windows, and that is the figure used throughout the worked example here. A large open rectangle with long uninterrupted walls, few openings, and 12 foot board can sometimes run closer to 5 percent, because most sheets go up whole. A cut up space pushes the other way: closets, soffits, bulkheads, angled walls, a stairwell, a room with three doors and a pass through, or anything with a curved wall can justify 15 percent or more. All of those are illustrative starting points rather than rules.
There is an asymmetry worth weighing. Surplus drywall is bulky and awkward to store, and full unopened sheets are commonly returnable if you have kept the receipt and not bent them. A shortfall, on the other hand, stops the job at the worst point: the hanging is nearly done, the taper is booked, and you are making a supply run for two sheets. Round generously and buy the whole room in one delivery.
Worked example: a 14 by 12 bedroom
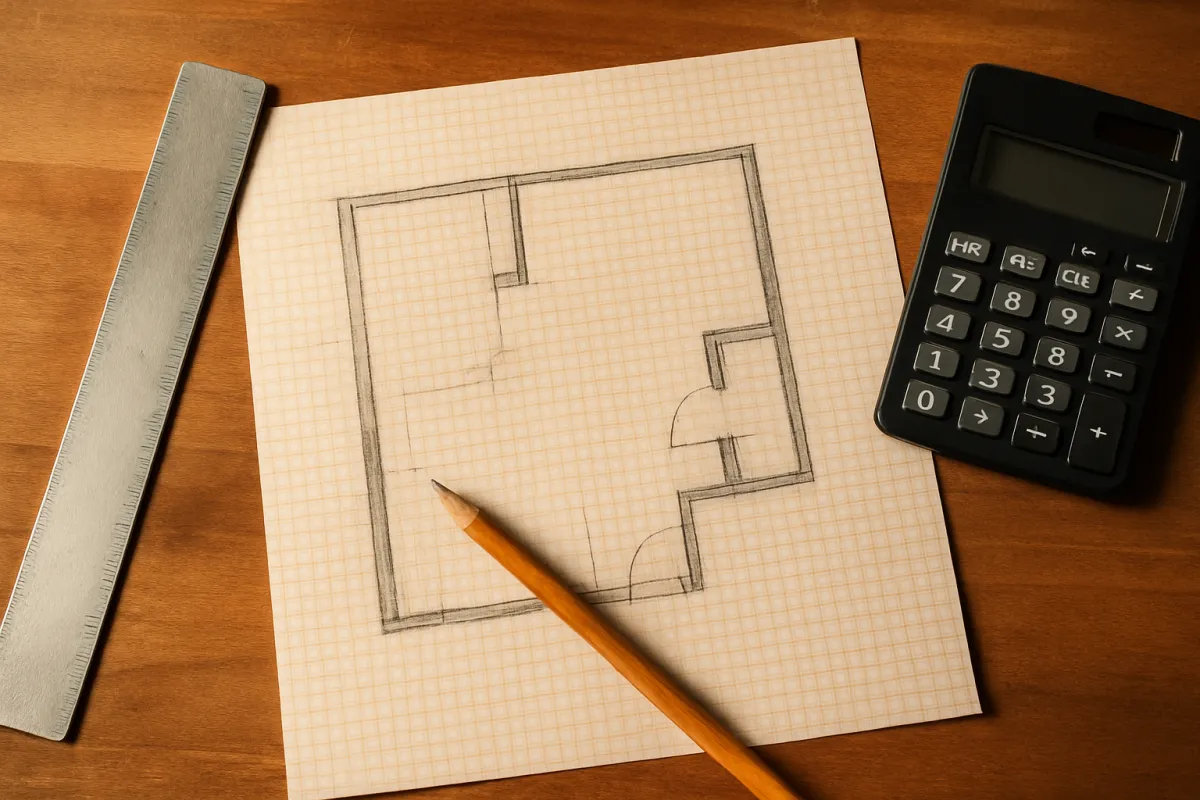
Run one all the way through, because the worked version exposes the decisions the formula hides. The subject: a rectangular bedroom, 14 feet by 12 feet, 8 foot flat ceiling, one interior door 3 feet by 6 feet 8 inches, two windows each 3 feet by 4 feet, no closet, framing at 16 inches on center, half inch board on walls and ceiling, hung horizontally with 4 by 8 sheets.
Wall area first. The perimeter is 2 times 14 plus 12, which is 52 linear feet. Times the 8 foot height gives 416 square feet of wall. The ceiling is 14 times 12, or 168 square feet. Gross board area is 584 square feet.
Openings next. The door is 20 square feet, each window is 12, and the three together are 44 square feet. Applying the one sheet cutoff, none of them reaches 32 square feet, so nothing is deducted and the net area stays at 584.
Sheets. A 4 by 8 sheet covers 32 square feet, so 584 divided by 32 is 18.25 sheets bare. Add the 10 percent waste allowance: 18.25 times 1.10 is 20.08, which rounds up to 21 sheets to order. Those 21 sheets carry 672 square feet of coverage, leaving 88 square feet in hand, which is a comfortable margin of two and three quarter sheets against breakage and bad cuts. Put your own room dimensions into our estimator and it runs this same chain on your numbers.
Cross-checking the sheet count a second way
An area division is easy to get wrong in a way that looks right, so check it physically, sheet by sheet, against the actual walls. This is the step that catches a forgotten ceiling or a mistyped dimension.
Start with the two 14 foot walls. Hung horizontally, each takes two courses of 4 foot board to fill the 8 foot height, and each course needs 14 feet of length, which is 1.75 sheets. Two courses make 3.5 sheets per wall, and there are two such walls, so 7 sheets. The two 12 foot walls each need 1.5 sheets per course, or 3 sheets per wall, and two walls make 6. Walls total 13 sheets, which at 32 square feet each is exactly 416 square feet. That matches the perimeter calculation.
Now the ceiling. Rows of 4 foot wide board laid across the 14 foot dimension give 3.5 rows, and each row spans 12 feet, which is 1.5 sheets. Multiply and the ceiling is 5.25 sheets, or 168 square feet. That matches too. Add 13 and 5.25 and the physical count is 18.25 sheets, identical to the 584 divided by 32 you got from area. Two independent routes to the same number is the strongest confirmation an estimate can have, and when they disagree, one of them contains the mistake you were going to pay for.
The same room in 12 foot sheets
Rerun the identical room with 4 by 12 board and watch what moves. Gross area is unchanged at 584 square feet, because the room did not change. Sheet coverage rises to 48 square feet, so the bare count is 584 divided by 48, or 12.17 sheets. With the same 10 percent allowance that becomes 13.38, rounding up to 14 sheets.
Check it physically as before. The two 12 foot walls take one 4 by 12 sheet per course, two courses each, or 2 sheets per wall and 4 across both, with no offcut and no butt joint. The two 14 foot walls take a full sheet plus a 2 foot piece per course, which is 1.17 sheets per course and 2.33 per wall, or 4.67 across both. Walls total 8.67 sheets. The ceiling rows are 12 feet long and each takes exactly one sheet, across 3.5 rows, so 3.5 sheets. Total is 12.17, matching the area division again.
Here is the detail that ties the two orders together: 21 sheets of 4 by 8 board carry 672 square feet, and 14 sheets of 4 by 12 carry 672 square feet as well. Identical coverage, identical weight, seven fewer pieces to carry, and eight fewer butt joints to finish. The only arguments against the longer sheet are handling and access, and they are real ones: a 12 foot sheet does not turn a tight stairwell corner and needs two people.
Where the taping goes in the example room
220 linear feet of joint in the 14 by 12 bedroom with 4 by 8 board, split by joint type.
Each share is that joint type's length divided by the 220 foot total, rounded to whole percentage points. Butt joints are only 22 percent of the length and easily half the difficulty, which is the whole case for longer sheets.
Joint tape, counted by the roll
Tape is bought by the roll in linear feet, so the estimate has to be a length rather than an area, and the honest way to get there is to inventory the joints. Do it for the example room with 4 by 8 board and the list is short.
The horizontal tapered seam at 4 feet above the floor runs the full 52 foot perimeter. The eight wall butt joints are each 4 feet tall, adding 32 feet. The four inside vertical corners are 8 feet each, another 32. The wall to ceiling corner runs the perimeter again, 52 feet. On the ceiling, three seams run between the 4 foot rows at 12 feet each, giving 36 feet, and the four ceiling butt joints add 16. Add them: 52 plus 32 plus 32 plus 52 plus 36 plus 16 is 220 linear feet of joint.
That figure is worth converting to a rate, because it travels. Two hundred twenty feet across 584 square feet of board is about 377 linear feet of tape per 1,000 square feet, which lands within a few percent of the coverage figure commonly cited for planning purposes. Deriving it yourself rather than trusting the rule of thumb means you know when the rule does not apply, and it does not apply to rooms with unusual proportions. Add roughly 10 percent for overlaps and mistakes and this room wants about 240 feet, so a single 250 foot roll would just barely do it and a 300 or 500 foot roll is the comfortable buy.
Joint compound, counted by the gallon
Compound is the item most likely to be under bought, partly because it is heavy and nobody wants to carry a spare bucket, and partly because the amount depends heavily on the finish level you are aiming for. The commonly cited planning figure for a standard taped and three coat finish is roughly one gallon of ready mixed all purpose compound per 100 square feet of board, and that is the rate used here.
At that rate, the 584 square foot example room needs about 5.8 gallons. The large ready mixed buckets are commonly sold at around 4.5 gallons, covering roughly 450 square feet at this rate, so this room is a shade over one bucket and needs two containers. Buying one large bucket plus a smaller pail is usually cheaper than two large buckets, and compound keeps reasonably well sealed if you smooth the surface and cover it.
The finish level moves this number substantially. A rough finish behind cabinets or in a garage might need less. A level five finish, meaning a thin skim coat of compound across the entire surface rather than only over the joints, can roughly double the requirement. Textured finishes have their own rates entirely. Setting type compound, which comes as a powder and is mixed with water, is quoted by weight rather than volume, so its coverage has to be read off the bag rather than converted from the gallon figure. Treat one gallon per 100 square feet as a planning start and check the container.
Screws: deriving the count from the spacing
The screw count is genuinely derivable, and deriving it takes about a minute. The two inputs are the framing spacing and the fastener spacing, and both are known before you start.
Take a 4 by 8 sheet hung horizontally on wall studs at 16 inches on center. The sheet is 96 inches long, and 96 divided by 16 is 6, so it crosses stud lines at 0, 16, 32, 48, 64, 80, and 96 inches: seven lines. Along each of those lines the sheet is 48 inches tall, and at 16 inch field spacing the screws land near the top edge, at 16, at 32, and near the bottom edge: four screws. Seven lines times four screws is 28 screws per wall sheet.
Ceilings tighten the field spacing, commonly to 12 inches. The same seven joist lines now take screws at roughly 0, 12, 24, 36, and 48 inches across the 48 inch width, which is five per line, or 35 screws per ceiling sheet. Apply those to the example room: 13 wall sheets at 28 screws is 364, and 5.25 ceiling sheets at 35 is about 184. The total is 548 screws, call it 550.
Divide 548 by the 584 square feet of board and you get 0.94, which is the useful sanity check hiding in all of this: on 16 inch framing you need roughly one screw per square foot of drywall. Note that fastener spacing in a fire rated assembly is part of the tested specification and is not yours to adjust, so confirm the required pattern rather than assuming the general case.
Screws by the pound, and which length to buy
Drywall screws are sold by weight, not by count, which means one more conversion. A commonly cited figure for 1 1/4 inch coarse thread drywall screws is somewhere near 300 to the pound, though the exact count varies by manufacturer, thread type, and head style, and the box usually states an approximate count. At that rate, the 550 screws for the example room work out to a little under two pounds.
That makes the buying decision easy: a single 5 pound box covers this room comfortably with plenty spare for the next one, while two 1 pound boxes would be cutting it fine with nothing left for mistakes. Screws are cheap relative to the annoyance of running out mid ceiling, and they keep indefinitely.
Length follows thickness and substrate. For half inch board on wood framing, 1 1/4 inch screws are the common choice, giving roughly three quarters of an inch of penetration into the stud. For 5/8 inch board on wood, 1 5/8 inch screws are common. Coarse thread screws are made for wood framing and fine thread for steel studs, and using the wrong one is a reliable way to strip out or fail to draw the sheet tight. Set each screw so the head dimples the paper slightly without tearing it, since a torn face has lost most of its holding power and a proud head will telegraph through the finish.
Corner bead, counted in linear feet
Corner bead protects every outside corner, and it is counted the way any linear item is counted: one length per corner, sized to the corner’s height. Bead is commonly stocked in 8 and 10 foot lengths, and running a corner in one continuous piece is far better than splicing, so buy the length that spans the corner in one go.
The example bedroom as described is a plain rectangle with a wood jamb and casing on its door and wood trim at its windows, so it has no outside drywall corners at all and needs no bead. That is worth stating because it is the common case for a simple room and it surprises people who assume every room needs bead.
Change one detail and the count appears. If the windows are finished with drywall returns instead of wood, each 3 by 4 opening carries three outside corners: two jambs at 4 feet and a head at 3 feet, or 11 linear feet per window. Two windows make 22 feet, which is three 8 foot lengths. A boxed chimney chase in the corner of a room adds four vertical corners at 8 feet each, or 32 feet, another four lengths. A soffit over a run of cabinets adds two long horizontal corners for its full length plus the returns at each end. Count corners on your sketch, write the height beside each one, and add them up. Our materials estimate walkthrough uses the same corner by corner habit for other trim items.
Weight, delivery, and getting sheets into the room
Drywall is heavy in a way that catches people out, and the weight follows directly from the area. Half inch regular board is commonly cited at somewhere near 1.6 pounds per square foot, so a 4 by 8 sheet is around 51 pounds and a 4 by 12 around 77. Lightweight half inch formulations run lower, nearer 1.2 pounds per square foot. Five eighths inch Type X is commonly cited nearer 2.2 pounds per square foot, which puts a 4 by 8 around 70 pounds and a 4 by 12 around 106.
Apply that to the example order. Either version of it, 21 sheets of 4 by 8 or 14 sheets of 4 by 12, carries 672 square feet of half inch board, and at roughly 1.6 pounds per square foot that is about 1,075 pounds. More than half a ton of material for one ordinary bedroom, which is why delivery is worth paying for and why upstairs deliveries are quoted separately.
Access is the constraint that most often decides sheet length in practice. A 12 foot sheet needs a straight path with enough diagonal clearance to turn, and a tight stair with a landing halfway will simply not accept one. Measure the route before you order the long board, not after it is on the truck. Where the sheets get stacked matters too: flat on the floor or standing on edge against a wall, never leaning at a shallow angle where the bottom edge takes the whole weight and crushes. Damaged edges become damaged joints.
Estimating a whole house rather than one room
Scaling up changes the bookkeeping more than the method. Work room by room, keeping each room’s wall area, ceiling area, and openings on its own line, then total the areas rather than the sheet counts. Totalling areas first and dividing once is more accurate, because rounding up to whole sheets in every room separately accumulates a surplus you did not intend.
Hallways and stairwells need care. A hallway has a large amount of wall for very little floor area, since its perimeter is dominated by two long walls, and it is easy to under count by thinking of it as small. Stairwells are the opposite problem: the wall alongside a stair is tall, awkwardly shaped, and often needs a 12 foot sheet stood on end, and the ceiling above the stairwell may be at two different heights. Both deserve their own sketch.

Also track board types separately from the beginning. A whole house order commonly contains regular board for bedrooms and living space, moisture resistant board for bathrooms and the laundry, Type X for the garage separation assembly if your local code requires it, and tile backer for the shower. Those are four different products with four different counts, and mixing them into one total makes the delivery unusable. Our coverage reference collects the same kind of per unit rates for other materials, and the discipline of separating product types applies across all of them.
Where drywall estimates go wrong
The failure modes repeat, and every one of them is avoidable with a sketch. Forgetting the ceiling is the biggest, and in a typical room it is more than a quarter of the board. Measuring only the four walls you can see and missing a closet interior is the next. Using the room’s finished dimensions when the walls have not been built yet, or the framing dimensions when they have, produces a small error in the same direction every time.
Deducting every opening and adding no waste is a reliable way to come up short, because both corrections point the same way. So is buying sheets in two separate deliveries, since board from different production runs can differ slightly in thickness and edge profile, which shows up as a visible line at the joint between them.
The subtler errors are about the finish rather than the board. Ordering the right number of sheets and no corner bead. Buying 1 1/4 inch screws for 5/8 inch board. Buying one bucket of compound for a room that needs two, discovering it on the third coat, and then trying to match a partly dried batch to a fresh one. And ordering exactly the calculated number of sheets with no allowance at all, which works right up until the first sheet snaps across the middle while being carried through a doorway.
The pre-order checklist
The whole manual, compressed to the sheet worth taking to the supplier.
- Sketch every room from above. Write each wall length on the drawing, mark ceiling height, and note every closet, soffit, and change of level.
- Wall area is perimeter times height. Add the length and width, double it, multiply by ceiling height. Split the room if the height varies.
- Add the ceiling. Length times width, and treat a sloped ceiling with a pitch multiplier rather than its footprint.
- Leave small openings in. A commonly used cutoff is one sheet’s area, roughly 32 square feet. Deduct only genuinely large openings.
- Pick the sheet length by counting butt joints, not sheets. Divide each wall length by each candidate sheet length and count the remainders.
- Divide gross area by the sheet’s coverage. 32 square feet for a 4 by 8, 48 for a 4 by 12, and so on, then add waste and round up.
- Add roughly 10 percent waste for a plain room, more for anything cut up, less for a large open rectangle with long walls.
- Cross-check the count physically, wall by wall and row by row, and reconcile it against the area division before you order.
- Order the finishing items in the same pass. Compound by the gallon against total area, tape by the roll, screws by the pound, bead by the corner.
- Confirm thickness and board type locally. Ceiling spans, wet areas, and any rated assembly are decided by your building authority and the manufacturer’s instructions.
- Check the delivery route before committing to long sheets, and get the whole job in one delivery.
Work the list top to bottom and the delivery becomes the dull kind: one stack, the right count, and nothing discovered on a Sunday afternoon.
The bottom line
The drywall question resolves into one area calculation and two judgment calls. The area is perimeter times height plus the ceiling, which for a 14 by 12 room with 8 foot ceilings is 584 square feet. The first judgment call is what to deduct, and the working convention that leaves anything under one sheet’s area in the count is convention for a good reason: the material gets cut out and thrown away either way. The second is which sheet to buy, and that question is really about butt joints rather than sheet count, because a 12 foot sheet on a 12 foot wall removes a seam that would otherwise take three coats and a wide feather to hide.
Everything after that is multiplication you can check. Divide by 32 or 48, add 10 percent, round up. Compound at roughly a gallon per 100 square feet, tape at roughly 377 feet per 1,000 square feet, screws at roughly one per square foot, bead by the corner. Then cross-check the sheet count physically against the walls, because two routes to the same number is the only proof an estimate can offer. Run your own dimensions through our estimator, read the square footage manual if the room outline is awkward, and confirm thickness and board type with the people who inspect the work. The math is the easy half. Carrying it up the stairs is the other one.
This is estimating arithmetic worked from the bench, not a building specification and not a substitute for advice from a qualified contractor or your local building official. Every sheet count, coverage rate, waste percentage, screw count, tape length, and weight figure above is an illustrative worked number, and the product you buy, the manufacturer’s printed installation instructions, and the code edition your jurisdiction has adopted will each move the real answer. Board thickness, board type, fastener pattern, and joint treatment in fire rated or moisture exposed assemblies are governed by tested specifications that cannot be summarised safely, so confirm each one locally before ordering. Lifting sheets overhead and working from ladders carry real injury risk, and a rented lift and a second pair of hands are worth more than the time they appear to cost.
Frequently asked questions
How many sheets of drywall do I need for a 12 by 14 room?
With 8 foot ceilings, the wall perimeter is 52 feet, so the walls are 416 square feet and the ceiling adds 168, for 584 square feet of board. A 4 by 8 sheet covers 32 square feet, so the bare count is 18.25 sheets, and a 10 percent waste allowance takes that to 21 sheets to order. Switch to 4 by 12 sheets and the same room needs 14 of them, because each sheet covers 48 square feet instead of 32. Every figure there is illustrative arithmetic you can rerun on your own dimensions in about a minute.
Do you subtract windows and doors when calculating drywall?
Small openings are commonly left in the count rather than deducted, because the piece cut out of a sheet for a window or a standard door is scrap that rarely fits anywhere else. A widely used working cutoff is the area of one sheet, so anything under roughly 32 square feet stays in the gross area. Genuinely large openings do get deducted: a wide patio door assembly, a garage door opening, a stairwell, or a cased opening that runs most of a wall. In the 584 square foot example room, deducting the door and both windows would save only about two sheets, and it would leave nothing spare for the pieces you ruin.
How many square feet is a sheet of drywall?
Multiply the two dimensions and you have it, since sheets are simple rectangles four feet wide. A 4 by 8 sheet is 32 square feet, a 4 by 9 is 36, a 4 by 10 is 40, a 4 by 12 is 48, a 4 by 14 is 56, and a 4 by 16 is 64. Nothing about that changes with thickness or board type, so a 5/8 inch fire rated 4 by 12 covers exactly the same 48 square feet as a half inch regular one. Availability of the longer lengths varies by supplier, so confirm what is actually stocked before you plan around a 16 foot sheet.
Why do professionals use 12 foot drywall sheets?
Not to save on sheet count, but to cut the number of butt joints, which are the seams where two square cut ends meet with no factory taper. A tapered edge gives you a shallow trough that compound and tape can fill without leaving a hump, while a butt joint has no trough at all and has to be feathered wide to hide. In the 14 by 12 example room, 4 by 8 sheets produce about 12 butt joints and 4 by 12 sheets produce about four, so the longer sheet removes two thirds of the hardest finishing work. That is worth far more than the handful of sheets saved.
How many screws are in a sheet of drywall?
Derive it from the spacing rather than memorising a number. A 4 by 8 sheet hung horizontally on studs at 16 inches on center crosses seven stud lines across its 96 inch length, and at 16 inch field spacing each of those lines takes four screws down the 48 inch height, for 28 screws per sheet. A ceiling sheet on joists at the same spacing usually gets tighter field spacing of 12 inches, giving five screws on each of seven lines, or 35 per sheet. Across a whole room this works out near one screw per square foot of board, which is a fast sanity check on any count.
How much joint compound do I need per sheet of drywall?
Compound is easier to estimate against total board area than per sheet, and a commonly cited planning figure for a standard taped three coat finish is roughly one gallon of ready mixed all purpose compound per 100 square feet of board. On the 584 square foot example room that is about 5.8 gallons, so two of the usual large buckets rather than one. A smooth level five skim coat across the whole surface can roughly double that, and a textured finish changes it again. Treat the rate as a starting point and check the coverage statement on the container you actually buy.
What thickness of drywall should I use?
Half inch board is the common choice for residential walls, and 5/8 inch is commonly used on ceilings for sag resistance and wherever a fire rated assembly is specified. Thinner 1/4 and 3/8 inch boards exist mainly for curved surfaces, double layer work, and resurfacing over an existing wall. Moisture and mold resistant boards are commonly used in bathrooms, with a purpose made tile backer rather than paper faced board inside a tub or shower enclosure. Thickness and board type in garage separation walls, ceilings, and any rated assembly are set by code, so the local building authority and the manufacturer's instructions are the sources that actually decide, not a table on a website.
How much waste should I add to a drywall order?
Around 10 percent is a reasonable starting allowance for a plain rectangular room with a door and a couple of windows, which is what the worked example in this manual uses. A cut up space with closets, soffits, angled walls, or a stairwell can justify 15 percent or more, because every extra corner forces a cut whose offcut is the wrong shape for anywhere else. A large open rectangle with long uninterrupted walls can sometimes run nearer 5 percent. All three figures are illustrative, and the direction of the error matters: a spare sheet leans in the garage, while a shortfall stops the taping.