What's on this page
- What a siding takeoff actually measures
- Before you start: what to have in hand
- The five numbers a siding order rests on
- Step 1: Sketch the house and number every wall
- Step 2: Measure each wall as a rectangle
- Step 3: Add the gable triangles
- Step 4: Deduct the openings
- Step 5: Add a waste factor set by complexity
- Step 6: Convert square feet into squares and boxes
- Worked example: a 40 by 28 gable ranch
- Why a square is 100 square feet here too
- Reading the coverage figure on your own box
- Dormers, bays, and shapes the rectangle misses
- Two storey walls and the band between floors
- Trim and accessories, counted in linear feet
- Corners, and why they are their own order
- The exposure question, and why the same panel covers different area
- Ordering from one production run
- Common mistakes that put the count wrong
- Troubleshooting a count that will not reconcile
- How siding compares with the other wall quantities
- Your siding takeoff checklist
- The bottom line
Siding is the material where the wall you can see and the wall you have to cover are two different numbers, and the gap between them is where orders go wrong. A house presents itself as four flat faces, but the takeoff has to account for the triangle above each gable end wall, the openings you may or may not deduct, the offcuts that every corner and every window edge produce, and a conversion at the end into whatever unit the product actually ships in. None of those steps is hard. All of them are easy to skip, and the cost of skipping one is a partial delivery discovered halfway up the second elevation.
The arithmetic here is completely reliable, so this manual shows all of it: rectangles by height times width, gables by half the base times the height, openings deducted at full size above a threshold you choose, a waste percentage set by how cut-up the elevation is, and a final conversion into squares of 100 square feet and into boxes at whatever coverage your own packaging states. What this manual will not do is tell you how many square feet are in your box, because that varies by product and profile and the box itself is the authority. Run your own dimensions through our estimator as you read, and the six steps below become one pass round the house with a tape.
Key takeaways
- Siding area is rectangles plus triangles: every wall is height times width, and every gable is half its base times its vertical height, which the roof pitch gives you without a ladder.
- Deduct openings above a threshold you choose and apply consistently, commonly around 10 square feet, and let the waste factor cover the trimming around the small ones.
- A square is 100 square feet of wall coverage, so dividing by 100 converts your total into the unit quotes are written in.
- Boxes are not squares. Divide your with-waste square footage by the coverage figure printed on your own product's packaging, never by a number you remember.
- Starter, corner posts, and J-channel are linear-foot items ordered separately, and none of them comes out of the square footage you just calculated.
What a siding takeoff actually measures
A siding takeoff measures the area of the building envelope that the cladding has to cover, which is not the floor area, not the footprint, and not the perimeter. It is the sum of every vertical face the panels will run across, from the starter course at the bottom to the point where the wall meets the soffit or the roof line. That distinction sounds obvious written down and it is the single most common reason a first estimate is wrong, because the number most homeowners have at hand is the floor area from a listing or a tax record, and that number describes something else entirely.
The relationship between floor area and wall area is not fixed, either, so no multiplier converts one to the other. A long, narrow single storey has far more wall per square foot of floor than a compact two storey of the same total floor area, because wall area scales with perimeter and height while floor area scales with the enclosed rectangle. Add a walkout basement wall, a bump-out, or a steep roof with tall gables and the ratio moves again. The only path to a number you can order from is measuring the walls themselves, which is why every step below is about walls and none of them mentions the floor.
Before you start: what to have in hand
Four things make this a one-hour job instead of a three-visit job. A long tape, ideally 25 feet or more, because the reach across a wall matters more than precision to the sixteenth. A sheet of paper on a clipboard, with the house sketched from above so you can label the walls before you measure them. A pencil, not a phone, because you will be writing beside a sketch and a phone keyboard makes that miserable. And a helper, or a nail and a loop of string, for the far end of the tape on any run longer than you can hold.
Two pieces of information are worth collecting before you go outside. The first is the roof pitch, which turns the gable question from a ladder problem into an arithmetic problem, and which our roof pitch manual covers three ways including one you can do from inside the attic. The second is the coverage figure for whatever product you intend to buy, taken from the packaging or the manufacturer’s own product data rather than from memory or a forum post. You do not need it until the last step, but knowing it in advance stops the whole exercise from stalling at the end.
The five numbers a siding order rests on
Strip out every detail and a siding order comes down to five figures. The first is total rectangular wall area, which is height times width summed across every wall. The second is total gable area, the triangles that sit above the eave line on any wall that runs up under a sloped roof. The third is the area of the openings you decide to deduct. The fourth is the waste percentage. The fifth is the coverage per box or per panel of the specific product you are buying.
Holding that list in mind tells you where accuracy pays. The wall rectangles are the bulk of the number and deserve careful measuring, since a foot of error on a long wall is nine or ten square feet gone missing. The gables matter more than people expect on a steep roof and less than expected on a shallow one. The opening deduction is a policy decision more than a measurement, and reasonable estimators differ. The waste percentage is a judgement about the elevation, not a fact about the material. And the coverage figure is the one number in the chain you must not invent, because it is the only one that is set by the product rather than by geometry.
Step 1: Sketch the house and number every wall
Draw the house from above, as a plan outline, before you touch the tape. A rectangle for a plain house, an L for a house with a wing, and separate rectangles for a projecting garage, a porch, or an addition. Then walk round the sketch and label each wall face with a letter or a number, A through however many you have, so that every face has an identity you can write measurements against. On an L-shaped house that is six faces, not four, and the two extra ones are precisely the walls that a hurried estimate forgets.
Mark on the sketch which walls carry a gable above them and which run under an eave, because that determines whether the wall gets a triangle later. Mark which walls have a different height, such as a single-storey wing against a two-storey main body, since those cannot share one height figure. Mark the outside corners with a circle and the inside corners with a square, because those two get different trim and you will want the counts. Our square footage manual covers the general discipline of decomposing an outline into pieces you can multiply, and the same habit applies here in the vertical plane rather than the horizontal one.
The sketch is not decoration. It is the record that lets you re-check a total three days later without re-measuring, it is what you hand a supplier when the order looks odd, and it is what stops the same wall being counted twice. Ten minutes of drawing saves an hour of doubt.
Step 2: Measure each wall as a rectangle
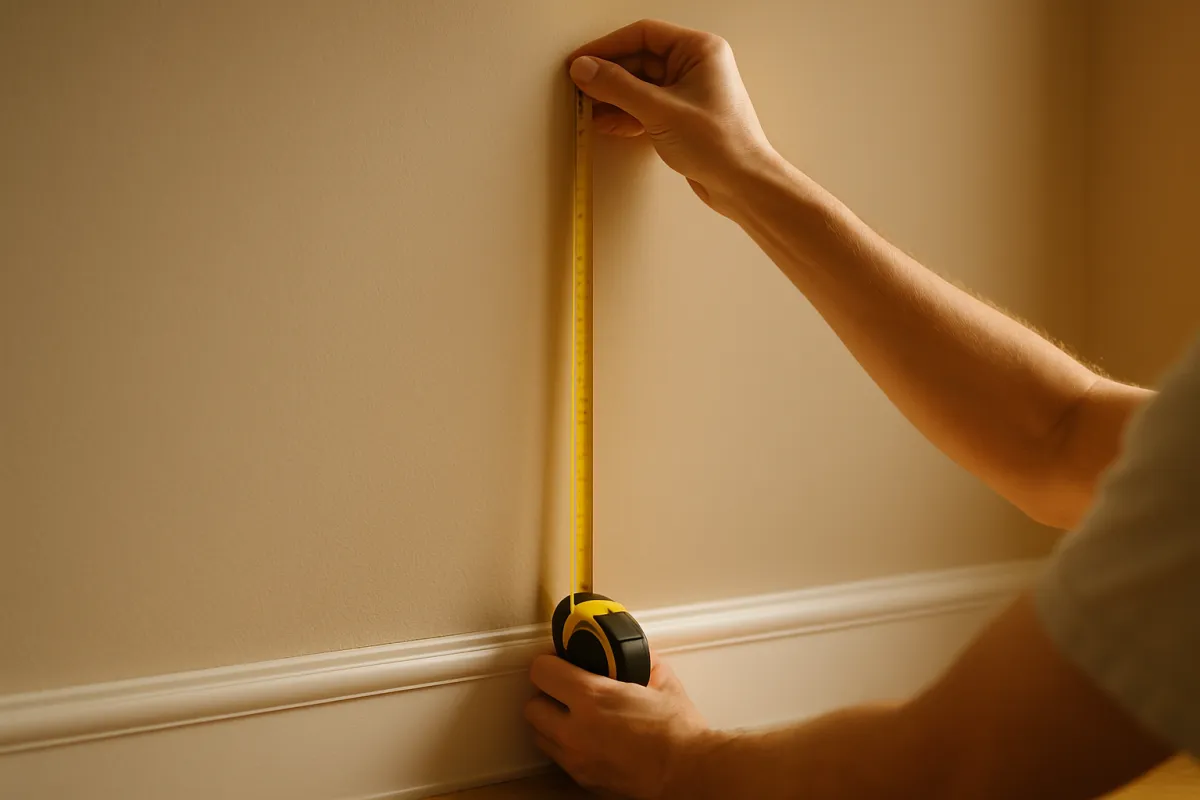
Work wall by wall in the order you labelled them. For each one, measure the width along the ground and the height from the bottom of where the siding will start up to the soffit, or up to the eave line where the wall meets the roof. Multiply the two and write the product beside the letter on your sketch, with the units written out so that a 40 and a 9 do not later get confused about which was which.
Two decisions need making once and then holding. The first is where the siding starts at the bottom: typically a few inches below the top of the foundation so that the starter strip laps the joint, but on a house with an exposed foundation wall or a walkout the start line can be well below floor level. Measure to where the material will actually begin, not to a convenient line. The second is what happens at the top on a wall under an eave: measure to the underside of the soffit, since the soffit itself is a separate material and a separate order.
Where a wall is not a plain rectangle, cut it into rectangles. A wall with a bump-out is the main plane plus the two returns plus the face of the bump-out. A wall with a section that steps down is two rectangles of different heights. A wall interrupted by a porch roof is the area above the roof line plus the area below it, and the two need separate measurements because the roof line crosses at an angle. Keep every piece on the sketch with its own label. On the worked example later, four plain walls at 40 by 9 and 28 by 9 sum to 1,224 square feet at this stage, and that figure is the backbone of the whole order.
Step 3: Add the gable triangles
A gable is the triangle of wall between the top of the rectangular section and the peak of the roof, and on a house with two gable ends it is often a tenth to a seventh of the total siding area. The formula is the ordinary one for a triangle: half the base times the height. The base is the full width of the wall at the eave line. The height is the vertical rise from that line straight up to the peak, measured plumb, not the sloped distance along the rake.
You almost never need to measure that height directly, because roof pitch gives it to you. Pitch is written as rise per 12 of run, and the run from the eave to the peak on a symmetrical gable is half the wall width. So the gable height equals half the width times the rise divided by 12. On a 28 foot wide end wall under a 6 in 12 roof: half of 28 is 14, times 6 divided by 12 is 7 feet of rise. The triangle is then half of 28 times 7, which is 98 square feet. Two such gables add 196 square feet, and if you left them out you would be roughly fourteen percent short on the whole house.

Asymmetric and unusual gables follow the same logic with more pieces. A saltbox or an offset ridge gives a triangle whose peak is not at the centre, so measure the two horizontal runs separately and treat it as two right triangles side by side, each half its own base times the shared height. A hip roof has no gable at all on the hipped faces, so those walls stop at the eave and get no triangle. A gambrel or a mansard end has two slopes and becomes a lower trapezoid plus an upper triangle. A dormer face is a small rectangle plus its own small gable, and each dormer’s cheeks are two more small triangles.
The chart below shows how much a single gable on a 28 foot wide end wall changes with roof pitch, and it is worth a look before you assume the gable is a rounding error.
Gable area on a 28 foot wide end wall, by roof pitch
Half the base times the height, where the height is 14 feet of run times the rise divided by 12.
Each bar width is that gable's area divided by the 196 square foot maximum at 12 in 12. The relationship is exactly linear in the rise, unlike the roof area multiplier, because the gable height rises in direct proportion to the pitch. A steep gable on a narrow house can carry more siding than a whole end wall on a shallow one.
Step 4: Deduct the openings
Now subtract the holes. Measure each window and each door at the rough opening, or near enough at the outside of the frame, multiply height by width, and total them. A 3 by 4 foot window is 12 square feet. A standard entry door at 3 feet by 6 feet 8 inches is about 20 square feet. A double garage door can be 140 square feet or more on its own and is never a rounding error.
The question is which of them to deduct, and there is no single correct answer, only a policy you should choose deliberately and then apply everywhere. The most common working rule is to deduct openings of roughly 10 square feet or more at full size and to ignore anything smaller. The reasoning is practical: the cut-offs from around a small window are short awkward pieces that generally do not go back into the wall, so leaving that area in the count quietly funds the waste it creates. A stricter approach deducts everything measurable. A more generous one deducts nothing on a house with few openings and lets the waste factor absorb the whole thing, which produces surplus rather than shortfall.
Whatever you choose, write it on the sketch in words. “Deducted all openings over 10 sq ft at full size” is a sentence that lets you or anyone else reconstruct the total later. In the worked example, six windows on the long walls at 12 square feet each, four more on the end walls, and two doors at 20 square feet each come to 160 square feet deducted, taking 1,420 gross down to 1,260 net. That deduction is worth about eight boxes of headroom or shortfall depending on which way you get it wrong, which is why it deserves a policy rather than a guess.
Step 5: Add a waste factor set by complexity
Waste on a siding job is geometry, not clumsiness. Panels arrive as long rectangles and walls are full of edges that are not parallel to them: every gable rake is a diagonal cut, every window and door is four cuts, every corner ends a course, and every course that does not divide evenly into the wall length leaves a piece. The offcut from a rake cut is a wedge, and a wedge fits nothing except the mirrored rake on the far side of the same gable, which is the one place a careful installer can genuinely reuse it.

Illustrative starting allowances, all of them judgement calls rather than published constants: around 10 percent on a plain rectangular house with two simple gables and a modest number of openings; around 12 percent once dormers, bays, or a busy window layout enter the picture; 15 percent or more on an elevation with multiple gables, changes of wall plane, and a lot of trimmed openings. Long walls that exceed the panel length add a little because every course then carries a joint that has to be staggered. Very short wall sections between openings add a lot, because almost every piece is cut on both ends.
The direction of the error argues for generosity. Surplus boxes are storable, are often returnable if unopened, and give you the spare pieces that make a later repair invisible. A shortfall means a stalled job, a second delivery charge, and the real risk that the replacement material comes from a different production run. Our material estimating manual makes the same argument for every material on a site: the coverage-plus-waste habit is what separates an order from a wish.
Step 6: Convert square feet into squares and boxes
You now have a with-waste square footage. Two conversions turn it into something you can order. The first is squares: divide by 100, because a square is 100 square feet of wall coverage, exactly as it is on a roof. In the worked example, 1,260 net times 1.10 gives 1,386 square feet, which is 13.86 squares. A supplier hearing “about fourteen squares” knows precisely what you mean.
The second conversion is into boxes, cartons, or panels, and this is the one you must not do from memory. Divide the with-waste square footage by the coverage figure printed on the packaging of the specific product you are buying. If that box states 200 square feet, then 1,386 divided by 200 is 6.93 boxes, which rounds up to seven, and those seven carry 1,400 square feet, leaving about 14 square feet in hand over the with-waste figure. Change the product and that arithmetic changes with it, which is why the coverage number is an input to our estimator rather than a constant baked into it.
If you would rather count individual panels, the same division works with a different divisor. A panel’s coverage is its length times its exposure, meaning the visible height of each course after the next panel laps over it. A 12 foot panel with an 8 inch exposure covers 12 times two thirds of a foot, or 8 square feet, so 1,386 square feet is about 174 panels. Both the length and the exposure are product facts printed on the packaging or in the product literature, so read them there rather than assuming a profile from a photograph.
Worked example: a 40 by 28 gable ranch
Run one all the way through, because the worked version exposes every decision the formula hides. The subject: a single-storey house, 40 feet long by 28 feet wide, walls 9 feet from the siding start line up to the soffit, a simple gable roof at 6 in 12 with a gable on each 28 foot end, six windows on the long walls and four on the ends at 3 by 4 feet each, and two doors at 3 feet by 6 feet 8 inches.
Rectangles first. The two long walls are 40 by 9, or 360 square feet each, giving 720. The two end walls below the eave line are 28 by 9, or 252 square feet each, giving 504. Rectangular total: 1,224 square feet.
Gables next. Half of 28 is 14 feet of run, and at 6 in 12 that is 14 times 6 divided by 12, or 7 feet of rise. Each gable is half of 28 times 7, which is 98 square feet, and the pair adds 196. Gross wall area: 1,224 plus 196, or 1,420 square feet.
Openings. Ten windows at 12 square feet each is 120. Two doors at 3 times 6.67 feet, call it 20 square feet each, is 40. Total 160 square feet, all of it above the 10 square foot threshold, so all of it is deducted. Net wall area: 1,260 square feet.
Waste. This is a plain rectangular house with two gables and a normal window count, so 10 percent is reasonable. 1,260 times 1.10 is 1,386 square feet, or 13.86 squares. At a stated 200 square feet per box that is 6.93 boxes, so seven boxes go on the order and about 14 square feet of coverage sits spare. Put your own dimensions into our estimator and it runs this exact chain on your numbers.
Where the 1,386 square feet on the worked example goes
The ordered square footage split by source: long walls net of openings 648, end wall rectangles net 416, gable triangles 196, waste allowance 126.
Each share is that component divided by the 1,386 square foot total, rounded to whole percentage points. The two gables alone are larger than the entire waste allowance, which is the argument for measuring them rather than guessing at them.
Why a square is 100 square feet here too
The square is borrowed from roofing and means the same thing on a wall: exactly 100 square feet of coverage. It exists because wall areas run into the thousands of square feet and quoting them in full is slow and error-prone. Saying fourteen squares takes a second, and every party to the conversation knows it means 1,400 square feet of coverage.
The unit trips people up in two ways. The first is thinking a square is a shape, when it is a fixed quantity of area in the same way that a dozen is a fixed quantity of eggs. The second, and more expensive, is assuming that one square equals one box. There is no such rule. Some products are packaged around two squares to a carton and others are nothing like it, so the only safe move is to read the coverage on your own packaging. Our shingle manual walks the same unit through the roofing side of the same house, where bundles rather than boxes are the physical package.
Reading the coverage figure on your own box
The coverage statement on siding packaging is the single number in this whole exercise that geometry cannot supply, and it is worth understanding why it varies so much. Coverage equals panel length times exposure times the number of panels in the carton. Change any of those three and the carton covers a different area. A longer panel raises it. A wider exposure raises it. A heavier product often comes fewer panels to the carton, which lowers it. Two products of similar appearance can sit meaningfully apart on square feet per box.
So do this at the supplier rather than at home: find the actual product, read the coverage printed on the carton or in the product data sheet, and write it down. Then divide your with-waste total by it and round up. If you are comparing two products on price, compare cost per square foot of coverage rather than cost per box, because box price alone tells you nothing when the boxes cover different areas. Our coverage reference collects the same reasoning for other materials, where a bag, a roll, or a pallet plays the part the box plays here.
One more caution. Coverage figures usually describe the material only. They do not include starter, corners, channel, or fasteners, and they assume the exposure the manufacturer specifies rather than whatever an installer chooses on the day.
Dormers, bays, and shapes the rectangle misses
Most houses have at least one feature that is neither a plain rectangle nor a simple gable, and the fix is always the same: cut it into shapes you can compute and label each piece on the sketch.
A gabled dormer is a small rectangle for the face below its eave line, a small triangle above, and two cheek walls that are usually right triangles or trapezoids depending on how the dormer meets the main roof. A shed dormer is a rectangle plus two triangular cheeks. A bay window is three narrow faces plus whatever apron sits below the sill, and each face is its own rectangle. A cantilevered bump-out adds a face and two returns. A porch that ties into the wall subtracts the area behind its roof if that area is not clad, or does not, if it is.
Two rules keep this honest. First, if a feature adds visible wall you can stand in front of, it adds siding, and a projection has sides as well as a face. Second, if a feature covers wall, it does not necessarily remove siding, because material often runs behind a porch roof or a deck ledger anyway. When you cannot decide, count it in. On any elevation with more than a couple of these features, push the waste percentage up as well, since each one brings its own set of angled cuts.
Two storey walls and the band between floors
A two-storey wall is one measurement if the siding runs continuously and two if it does not. Continuous runs are simpler: measure from the start line at the bottom straight up to the soffit and treat the whole thing as one rectangle, typically somewhere near 18 to 20 feet on a house with 9 foot walls plus the floor structure between them.
The complication arrives when the elevation changes material or plane between floors. A band board, a water table, or a change from one cladding to another at the first floor line splits the wall into two rectangles with a horizontal trim run between them, and that trim is a linear-foot item you must count separately along the full width of every wall it crosses. A jettied or offset upper floor does the same thing and adds a small soffit return. A gable end on a two-storey house sits on top of the upper rectangle, so the triangle formula still applies unchanged, using the width of the upper wall as the base.
Height also changes the job rather than just the arithmetic. Wall area above the first storey means scaffold or ladders, longer material handling, and a genuine fall risk, and it is the point at which many people reasonably decide the job belongs to an insured installer. The measuring can still be done from the ground with a sketch and pitch arithmetic, which is the argument for the method in Step 3.
Trim and accessories, counted in linear feet
Here is the order most people forget, and it is the one that stops a job rather than merely embarrassing it. The panels cover the field of the wall. Everything at the edges of the field is a separate family of products sold and measured in linear feet.
Starter strip runs along the bottom of every wall and sets the angle of every course above it, so its length is the full perimeter of the siding, which on the worked example is 2 times 40 plus 28, or 136 linear feet. Outside corner posts run the full height at each outside corner: four corners at 9 feet is 36 linear feet, plus more if the corners are two storeys. Inside corners take their own trim. J-channel runs around every window and door, so total the perimeter of each opening: ten windows at 2 times 3 plus 4, or 14 feet each, is 140 feet, and two doors at about 19.3 feet each adds roughly 39, for about 179 linear feet before anything else. J-channel or a rake trim also runs up each gable rake, and each rake on the worked example is the hypotenuse of a 14 by 7 triangle, about 15.7 feet, so four rakes add roughly 63 linear feet.
Then there is undersill or utility trim where the top course tucks under the soffit or a sill, soffit and fascia if you are replacing them, and fasteners in a quantity that depends on the fastening pattern the manufacturer specifies. Confirm packaged lengths and per-piece coverage for every accessory with your supplier, since those vary by system, and confirm anything that touches flashing, water management, or structural attachment with the manufacturer’s instructions and your local building department rather than with an estimating formula.
Corners, and why they are their own order
Corners deserve their own paragraph because they are counted by a different method from everything else and because they are frequently the long-lead item on a delivery. You count corners by number and by height, not by area. Walk the sketch and count the circles you drew at the outside corners and the squares at the inside ones, then multiply each count by the wall height at that corner.
Corner posts are commonly stocked in specific lengths, and a two-storey corner may need either a longer post or two posts with a lap joint, which is a detail worth deciding before delivery rather than on the wall. An L-shaped house has more corners than a rectangle, obviously, but it also has at least one inside corner, and inside corner trim is a different product that is easy to leave off an order written from a rectangle in your head. Bump-outs and bays multiply corners quickly: a single bay window can add four outside corners of its own.
The practical instruction is to write the corner schedule as a small table on your sketch: corner identifier, inside or outside, height. Total the outside heights and the inside heights separately. That table is what you read out to the supplier, and it is immune to the arithmetic errors that creep in when corners are estimated as a fraction of something else.
The exposure question, and why the same panel covers different area
Exposure is the amount of each panel that remains visible once the course above laps over it, and it is the hidden variable in every coverage figure. A panel is always physically larger than the area it covers, because part of it is buried under the next course and part of it is the nailing hem. Two products with the same physical dimensions can cover different areas if their intended exposures differ.
This matters in three ways. First, it explains why coverage per box is a product fact rather than a geometry fact. Second, it means any panel-count arithmetic has to use exposure, not panel width: length times exposure is the covered area of one panel. Third, on products where the installer has some latitude in setting the exposure, changing it changes the material quantity, so a decision made for appearance has a cost attached. If you plan to run a different exposure than the manufacturer’s stated one, recompute your coverage from length times your chosen exposure and check first whether the manufacturer permits it at all, since exposure often relates to weather performance and warranty terms.
The safe posture is to estimate at the manufacturer’s stated exposure, order to that, and treat any change as a fresh calculation rather than an adjustment.
Ordering from one production run
Order the whole house at once. Colour on manufactured cladding can vary subtly between production runs, and a wall finished from two different runs can show a visible band in raking light that no amount of care during installation will hide. The extra box you buy on purpose today is cheaper than the mismatched box you have to buy in a hurry next week.
That argument compounds with the waste discussion. If your calculation lands at 6.93 boxes, seven is the order, and if it lands at 7.02, order eight rather than gambling that your waste estimate was pessimistic. The rounding-up rule costs one box and buys you the offcut allowance you did not know you needed, plus a spare panel or two for the repair that follows the first storm with debris in it. Keep the spares flat, dry, out of sun, and labelled with the product and the date, because in five years nobody remembers what went on the house.
Ask the supplier two questions when you order: whether unopened boxes are returnable and on what terms, and what the lead time is for a top-up from the same run. The answers change how much rounding-up insurance is worth buying.
Common mistakes that put the count wrong
The mistakes cluster, and every one of them is avoidable with the sketch from Step 1.
Using floor area instead of wall area is the biggest, and it can be wrong by a factor of two in either direction. Forgetting the gables comes second, and on the worked example that is 196 square feet, or a full box. Measuring wall height to the ceiling instead of to the soffit misses the floor structure and the band above it. Measuring width wall-to-wall on the inside rather than outside understates every face. Deducting every window including the small ones, then also applying a full waste factor, double-counts the same allowance and leaves you short.
Then the ordering-stage errors. Converting squares to boxes with a remembered coverage figure rather than the printed one. Rounding down because the fraction looked small. Forgetting that the trim is a separate order entirely. Counting corner posts by the linear foot of wall rather than by corner and height. And splitting the order across two deliveries or two suppliers, which reintroduces the production-run problem for no benefit. Our material estimate manual sets out the same failure modes in a general form, and the pattern is always that the item measured in a different unit is the item that escapes the estimate.
Troubleshooting a count that will not reconcile
If two passes at the same house produce different totals, work through this sequence rather than starting over.
Compare wall counts first. An L-shaped or bumped-out house has more faces than the outline suggests, and a missing face is the usual cause of a large discrepancy. Compare heights next: one wall measured to the eave and another to the ceiling produces a gap of a foot or more on that wall alone. Then compare the opening policy, because one pass that deducted all openings and another that deducted only the large ones will differ by exactly the small-opening area, which is a clean and identifiable number.
If the difference is close to the gable total, one pass omitted the triangles or used the sloped rake length instead of the vertical height. Using the rake length overstates the gable by the ratio of hypotenuse to run, which at 6 in 12 is about 12 percent on that triangle. If the difference is a neat percentage of the whole, someone applied the waste factor twice, or applied it before the deductions instead of after.
When the totals reconcile but the box count still feels wrong, check the coverage figure and the units on it. Square feet per box and squares per box differ by a factor of 100, and a misread there produces an answer that is absurd rather than merely wrong, which at least makes it easy to catch.
How siding compares with the other wall quantities
Siding sits in a family of wall takeoffs that all start from the same rectangles, and knowing the family makes each one faster. Our brick manual starts from the same wall area and then divides by the coverage of a single unit including its mortar joint, which is the masonry equivalent of coverage per box. Our drywall manual works the inside face of the same walls and divides by a sheet area instead. Our stud manual counts the framing behind both of them by spacing along the wall length rather than by area.
The differences are instructive. Masonry and drywall are counted in whole units of fixed size, so the rounding happens per wall. Siding is counted in coverage and then packaged, so the rounding happens once at the end. Framing is counted in linear spacing, so wall length matters and wall height barely does. And materials like concrete and steel in our concrete manual and rebar manual move into volume and linear feet respectively. Recognising which unit a material really lives in is most of estimating, and it is the reason a siding order needs both a square footage and a schedule of linear feet.
Your siding takeoff checklist
- Sketch the house from above and label every wall face, including the ones an L or a bump-out adds.
- Mark on the sketch which walls carry a gable, which run under an eave, and which differ in height.
- Measure each wall from the siding start line to the soffit, times its width, and record it against its label.
- Compute each gable as half its base times its vertical height, deriving the height from half the width times the rise over 12.
- Measure every window and door, write down your deduction policy in words, and apply it to every wall.
- Subtract the deducted openings from the gross area to get the net wall area.
- Add a waste allowance sized to how cut-up the elevation is, illustratively 10 percent plain and 15 percent or more articulated.
- Divide by 100 for squares, and by the coverage printed on your own product's packaging for boxes, then round up.
- Count starter along the whole perimeter, corner posts by corner and height, and J-channel around every opening and rake.
- Order the whole house in one go, ask about returns and lead times, and keep the spare pieces flat, dry, and labelled.
- Confirm anything structural, fastening-related, or code-related with the manufacturer's instructions and your building department.
The bottom line
A siding takeoff is rectangles plus triangles, minus holes, plus a percentage, divided by a coverage figure. Measure each wall as height times width and sum them. Add each gable as half its base times its vertical height, taking that height from half the wall width times the roof rise over 12, which keeps you off a ladder. Subtract the openings you have decided are large enough to deduct, using one policy written on the sketch rather than a judgement made afresh at each window. Add a waste percentage that reflects how many angled cuts the elevation forces, from around 10 percent on a plain house upward. Divide by 100 to speak in squares, and by the coverage printed on your own box to arrive at a count you can actually order. Then do the separate pass for starter, corners, and channel, because none of that is in the square footage and all of it is needed on day one. Put your own dimensions through our estimator, read the coverage off the real carton, and the delivery becomes the dull kind: one drop, the right count, and nothing discovered at the top of a ladder.
Everything above is estimating education worked from ordinary geometry, not a specification for any product, house, or installation. Every dimension, area, waste percentage, coverage figure, box count, and linear-foot total used here was chosen to demonstrate the arithmetic and is illustrative rather than a quotation. Coverage per box, panel length, exposure, accessory pack lengths, and fastening patterns are all set by the individual product, so read them from your own packaging or the manufacturer’s published product data before ordering anything. Water management, flashing, weather barriers, attachment, and clearances are governed by the manufacturer’s installation instructions and by the code adopted where you build, so confirm those with the manufacturer and your local building department rather than with an estimating manual. Work above the first storey carries a real risk of serious injury, and handing that portion to an insured installer is often the sound decision.
Frequently asked questions
How do I work out how much siding I need?
Measure every wall as a rectangle, height times width, and add the totals. Add each gable as a triangle, half the base times its vertical height. Subtract the openings you have decided are big enough to deduct, then add a waste percentage for the cuts. Finally divide by 100 to express the answer in squares, and divide by the coverage figure printed on your own product's packaging to get boxes or panels. On the worked example in this manual, 1,224 square feet of rectangles plus 196 square feet of gable triangles comes to 1,420 gross, less 160 square feet of openings for 1,260 net, plus 10 percent waste for 1,386 square feet ordered.
How many square feet is a square of siding?
One square is 100 square feet of wall coverage, the same unit roofers use, and it is how siding is commonly quoted and priced even though it is physically sold in boxes or cartons. A wall area of 1,386 square feet is 13.86 squares, which most suppliers would call fourteen squares once you round up to something they can actually sell. Converting is only ever moving the decimal two places, so the unit costs you nothing to learn and it makes quotes readable. Do not confuse a square with a square yard or a square metre, and do not assume a square equals one box, because that depends entirely on the product.
How much siding does one box cover?
That figure is product-specific and it is printed on the box, which is the only source worth trusting for your own order. Coverage varies with the profile, the panel length, and above all the exposure, meaning how much of each panel stays visible after the next one laps over it. Two products that look similar on a display board can differ meaningfully in square feet per carton. Read the stated coverage on the packaging or the manufacturer's own product data, then divide your with-waste square footage by it. In the worked example, a stated 200 square feet per box turns 1,386 square feet into 6.93 boxes, which rounds up to seven.
Do I subtract windows and doors from the siding calculation?
Subtract the large ones and leave the small ones in as free waste cover. A common working rule is to deduct any opening of roughly 10 square feet or more at its full size, and to ignore anything smaller, because the offcuts around a small window rarely go back into the wall anyway. Some estimators deduct nothing at all on a house with few openings and rely on the waste factor to absorb it, which is defensible and slightly generous. What matters is that you pick one policy and apply it to every wall, then write it on the sketch, so that a later re-check produces the same number rather than a mystery.
How do I calculate the siding area of a gable?
Treat the gable as a triangle and use half the base times the height. The base is the width of the wall at the top of the rectangular section, and the height is the vertical distance from that line straight up to the peak, not the sloped length along the rake. If you know the roof pitch you can derive the height without climbing: half the width times the rise divided by 12. A 28 foot wide end wall under a 6 in 12 roof rises 14 times 6 divided by 12, which is 7 feet, so the gable is half of 28 times 7, or 98 square feet.
What waste factor should I use for siding?
Roughly 10 percent is a reasonable starting allowance on a plain rectangular house with straightforward walls and a modest number of openings. Complexity pushes it up, because every angled cut produces an offcut that usually fits nowhere else: a house with dormers, bays, multiple gables, or a lot of windows commonly justifies 12 to 15 percent, and a heavily articulated elevation can justify more. These are illustrative planning figures rather than rules, and an experienced installer looking at your specific elevations may reasonably choose differently. Round up to whole boxes afterwards, since no supplier splits one.
How much siding do I need for a 1,500 square foot house?
Less than you would guess from that number, because 1,500 square feet describes floor area and siding covers walls. A single-storey 40 by 28 footprint is 1,120 square feet of floor but only about 1,420 square feet of gross wall including two gables, and after opening deductions and waste it lands near 1,386 square feet of ordered siding. A two-storey house with the same 1,500 square feet of floor has roughly half the footprint and twice the wall height, so its wall area is broadly similar while its footprint is much smaller. The only honest route is to measure the walls themselves.
Does the trim come out of my siding square footage?
No, and this is where siding orders most often come up short. Starter strip, outside and inside corner posts, J-channel around openings and along the rakes, and undersill or utility trim are all counted in linear feet, not square feet, and none of them is included in the panel coverage you just calculated. On the worked example the starter alone runs the 136 foot perimeter, the four corners need about 36 linear feet of post, and the four gable rakes add roughly 63 linear feet of channel before a single window is trimmed. Measure those runs separately and confirm each accessory's packaged length with your supplier.