What's on this page
- Before you start: what to measure and what to settle
- Step 1: Measure the floor or the wall in feet
- Step 2: Decide which openings to subtract
- Step 3: Turn the tile size into coverage per tile
- Nominal tile size versus the size your tape reads
- Step 4: Divide the area by the coverage for the bare count
- Step 5: Set the waste factor from the layout
- Why cut waste tracks the perimeter, not the area
- Floor tile versus wall tile: same math, different order
- Measuring an irregular room by decomposition
- Step 6: Convert tiles into boxes and round up
- The box is the real unit of purchase
- Pattern repeat, shade variation, and buying one lot
- Step 7: Add attic stock before you place the order
- Step 8: Calculate the thinset and the grout
- Trim, bullnose, and the pieces counted in linear feet
- Step 9: Write the order the way a yard reads it
- A worked example: a bathroom floor and a shower surround
- Common tile estimating mistakes
- Troubleshooting the awkward cases
- Your tile order checklist
- The bottom line
Every tile order that goes wrong goes wrong at the same joint: someone works out the area, remembers roughly how many tiles fit in a square foot, and buys a number of boxes that feels about right. Tile sizes range from a 2 inch mosaic chip to a 24 inch slab, a factor of 144 in face area, so a remembered rate is not close to right and a box count that feels about right is a guess wearing a hard hat. The count itself is not difficult. It is one division that comes off the tile, one multiplication that comes off the room, and one judgement call about how much you will cut and throw away.
This manual walks a tile order end to end in nine steps, for floors and for walls, which use the same arithmetic in a different order. It measures the surface, decides which openings to subtract, derives coverage per tile from the tile’s own face, sets the waste factor from the layout you have chosen rather than from a round number, rounds the result into whole boxes, adds attic stock, and finishes with the thinset, grout and trim that ride alongside the tile. For the area work underneath all of it, our square footage manual carries the measuring in full. Run your own room through the material coverage estimator as you read, and the companion above recalculates every step on your dimensions.
The short answer: coverage per tile equals the tile’s length times its width in inches divided by 144. Divide your area by that figure for the bare count, multiply by 1.05 to 1.20 for the layout’s cut waste, then round up to whole boxes. An 80 square foot floor in 12 by 24 inch tile is 40 tiles bare, 44 with a 10 percent allowance, and 6 boxes at 16 square feet each.
Key takeaways
- Coverage per tile is a division, not a lookup: length times width in inches, divided by 144. A 12 by 24 inch tile covers exactly 2 square feet.
- Subtract wall openings over roughly 10 square feet and permanent floor obstructions over the same size. Leave everything smaller in, because the cuts around it eat the saving.
- Layout moves the waste, not the field count. Straight set runs near 10 percent, a 45 degree diagonal near 15, herringbone near 20, all illustrative.
- The box is the unit of purchase, so work in square feet, divide by the box coverage, and round up. The rounding frequently supplies your attic stock at no extra cost.
- Thinset is sized by trowel notch and grout by joint geometry, and grout is far smaller than people expect: joints are commonly one to two percent of the surface.
Before you start: what to measure and what to settle
The arithmetic in this manual takes about thirty to forty five minutes for a room with a floor and a wall in it, and almost all of the difficulty sits in the inputs rather than in the multiplication. Four things need to be settled before you total anything.
What to gather and decide:
- A tape measure and a written sketch. Not mental arithmetic. The errors that wreck tile orders are transcription errors and forgotten alcoves, and both are caught by a sketch with every dimension written on it.
- The tile’s real face dimensions in inches. From the product page, the sample, or the box label. Nominal and actual can differ, and the next few steps depend on knowing which one you have.
- The box coverage in square feet. Printed on every box and quoted on every product page. Piece count is secondary, because boxes are packed to coverage rather than to a round number of tiles.
- The layout, decided before you order. Straight, offset, diagonal or herringbone changes the waste allowance by a factor of four, and it is the one input you cannot fix after delivery.
Difficulty is low and the skill is honesty rather than mathematics. If tile is one line among several on a larger job, our manual on estimating materials for a project frames the takeoff as a whole. Settle those four inputs and the nine steps below are careful repetition.
Step 1: Measure the floor or the wall in feet
Start with a sketch of the surface, not with the calculator. Draw the room or the wall roughly to shape, then walk it with a tape and write every dimension on the drawing as you take it. Measure at floor level for floors and along the actual tiled band for walls, because a room’s width at waist height and its width at the baseboard are not always the same number.
For a plain rectangle the area is length times width and there is nothing more to say. The running example this manual returns to is a bathroom floor measuring 8 feet by 10 feet, which is 80 square feet, and a shower surround of three walls, a 5 foot back wall and two 3 foot returns, tiled to 7 feet high. That surround is 5 plus 3 plus 3, or 11 linear feet of wall, times 7 feet of height, which is 77 square feet.
Record inches as decimals of a foot rather than as fractions, because mixing units mid calculation is the single most common arithmetic error in a takeoff. An 8 foot 6 inch wall is 8.5 feet, a 7 foot 3 inch wall is 7.25 feet, and 4 inches is 0.333 feet. Write the decimal next to the tape reading on your sketch so the conversion happens once.
Watch out for measuring the room you can see rather than the surface you will tile. A floor that continues under a doorway threshold into a hall, a wall that stops at a soffit, and a surround that runs up over a curb all have real edges that differ from the room’s nominal size. Measure to where the tile stops.
Step 2: Decide which openings to subtract
This is the step people either skip entirely or overdo, and both mistakes cost money. The rule that survives contact with real rooms is a size threshold: subtract an opening or an obstruction when it is bigger than roughly 10 square feet, and leave it in the gross area when it is smaller.
The reasoning is about cuts. A large opening is a genuine hole in the tiled surface, and paying for 20 square feet of tile to fill a doorway you will never tile is straightforwardly wasteful. A small opening is different, because tiling around it generates a ring of cut pieces whose offcuts mostly cannot be reused, and that cutting consumes roughly what the subtraction saved. Subtracting small openings therefore makes the order too tight, which is the expensive direction to be wrong in.
Work an example. A full height bathroom wall 10 feet wide by 8 feet high is 80 square feet gross. It carries a door opening 3 feet by 6 feet 8 inches, which is 3 times 6.667, or 20 square feet, and a window 3 feet by 4 feet, which is 12 square feet. Both clear the threshold, so subtract both: 80 minus 20 minus 12 leaves 48 square feet of net tiled wall. Two electrical outlets and a switch, at roughly a tenth of a square foot each, stay in the gross figure.
On floors the same threshold applies to permanent obstructions only. Subtract a built in cabinet run or a tub footprint you will genuinely not tile under, but never subtract a freestanding appliance, an island on legs, or furniture. The reason is resale of your own decision: tile under the dishwasher and the day it is replaced you are not staring at bare subfloor.
Watch out for one asymmetry. A shower niche subtracts its opening from the wall and then adds back its own interior faces, which are usually more area than the hole. Measure the niche’s back, sides, top and bottom separately and add them, or accept the gross wall figure and let the waste allowance carry it.
Step 3: Turn the tile size into coverage per tile
Here is the division that replaces every memorised rate. A square foot is 12 inches by 12 inches, which is 144 square inches. A tile’s face covers some number of those square inches. Divide the face area by 144 and you have the tile’s coverage in square feet. Divide 144 by the face area instead and you have tiles per square foot. Same relationship, two directions, and you will want both.
Run it across the sizes you are likely to meet. A 2 by 2 inch mosaic chip has a 4 square inch face, so it covers 0.028 square feet and takes 36 per square foot. A 3 by 6 inch subway tile is 18 square inches, covering 0.125 square feet at 8 per square foot. A 6 by 6 inch is 36 square inches, covering 0.25 at 4 per square foot. A 6 by 12 inch is 72 square inches, covering 0.5 at 2 per square foot. An 8 by 8 inch is 64 square inches, covering 0.444 at 2.25 per square foot.
The larger sizes are where the intuition breaks. A 12 by 12 inch tile is 144 square inches, so it covers exactly 1 square foot and takes exactly 1 per square foot, which is the only size where the two numbers agree. A 12 by 24 inch is 288 square inches, covering exactly 2 square feet at 0.5 per square foot. A 24 by 24 inch is 576 square inches, covering 4 square feet at 0.25 per square foot. Between the mosaic chip and the 24 inch slab there is a factor of 144 in coverage, which is why a remembered rate is worthless.
Keep the decimals. On a small bathroom the difference between 0.444 and 0.44 is invisible, but on a 600 square foot floor a rounded rate drifts by several tiles, and several tiles is a box. Our material coverage reference keeps the same derive it rather than look it up posture across the other materials on a job.
Nominal tile size versus the size your tape reads
There is a wrinkle worth understanding before you trust the division, and it is the same wrinkle that shows up in brick and block work. Many tiles are sold under a nominal size that is slightly larger than the piece you can measure. A tile described as 12 by 24 inches may measure closer to 11.8 by 23.6, because it is a metric size given an imperial name, and a pressed tile described as 4 by 4 may measure a little under with the joint width making up the difference.
Which size belongs in the calculation depends on how the difference arises. If the tile is undersized because the nominal figure includes an intended joint, use the nominal size, because that is the space one tile occupies on the finished surface. If the tile is a metric size wearing an imperial label, use the actual measured size plus the joint width you intend to use, because in that case the nominal name is marketing rather than geometry.
Work the difference on the running example. The nominal 12 by 24 gives 288 square inches and coverage of 2.0 square feet. An actual 11.8 by 23.6 with a 1/8 inch joint gives 11.925 by 23.725, which is 282.9 square inches, or 1.964 square feet of coverage. On 80 square feet that moves the bare count from 40 tiles to 40.7, so 41. One tile, on a small floor, which the waste allowance absorbs without noticing.
The honest conclusion is that this distinction matters on large jobs and not on small ones. On a bathroom, use the nominal size and move on. On a 1,200 square foot open plan floor, measure a real tile, add your joint, and let the extra precision earn its keep. The most reliable check of all, if you have samples, is to lay ten tiles in a row with your intended spacers, measure the run, and divide by ten.
Step 4: Divide the area by the coverage for the bare count
With the area from step 2 and the coverage from step 3, the bare count is one division: net area in square feet divided by coverage per tile in square feet. It is the number of tiles that would cover the surface if every one of them went down whole and nothing broke, which never happens, and that is what the next step is for.
The bathroom floor is 80 square feet in a tile covering 2.0 square feet each, so the bare count is 80 divided by 2, which is 40 tiles. The shower surround is 77 square feet in a 3 by 6 inch subway covering 0.125 square feet each, so 77 divided by 0.125 is 616 tiles. The same arithmetic done the other way gives the same answer: 80 times 0.5 tiles per square foot is 40, and 77 times 8 tiles per square foot is 616.
Do the multiplication and the division both ways as a habit, because they catch different slips. Dividing by coverage catches a decimal error in the coverage. Multiplying by tiles per square foot catches an inverted rate, which is the classic tile mistake: using 0.5 where 2 belongs turns a 40 tile order into a 160 tile order, and the two numbers are close enough in feel that neither looks obviously absurd on a receipt.
Watch out for rooms tiled in more than one size. A floor with a 12 by 24 field and a 2 by 2 mosaic band is two calculations, not one, because they have different coverage and different waste behaviour. Work out the area of each region, run each through its own coverage, and keep the two counts separate all the way to the order.
Step 5: Set the waste factor from the layout
The waste factor is the only judgement call in the whole calculation, which is why it deserves a step of its own rather than a reflexive 10 percent. It represents tile you buy, cut, and do not install: the offcut halves that do not fit anywhere, the pieces that break on the wet saw, and the couple you chip carrying a box up the stairs.
Layout is the dominant driver. A straight set in a square room meets each wall squarely, so a tile cut to fill a 5 inch gap at one end leaves an offcut that frequently fits the gap at the other end of the same row, which halves the loss. A 45 degree diagonal meets every wall at an angle, so each perimeter tile becomes a triangle and its mate is the wrong triangle for the next gap. Herringbone is worse still, because the perimeter alternates between two different cut shapes and the field itself starts with a diagonal setting line.
Waste allowance by layout
Illustrative planning allowances, expressed as the percentage added to the net tiled area before rounding to boxes.
Every bar width is the value divided by the largest allowance, 20 percent, times 100. These are planning figures for a first pass, not guarantees, and an out of square room or a first time tiler pushes each row upward.
Three things raise your row on that chart regardless of pattern. Rooms that are out of square force a tapered cut down one whole wall, and a tapered offcut is never reusable. Large format tile wastes more per cut simply because each discarded piece is bigger. And a first tiling job wastes more than a tenth job, honestly and predictably, so add to the allowance rather than pretending otherwise.
Watch out for treating the allowance as the attic stock. It is not. The waste factor covers material consumed during the install; the reserve you keep for future repairs is a separate line, added in step 7. Rolling them together is how people end up with a beautiful floor and nothing in the garage when a tile cracks.
Why cut waste tracks the perimeter, not the area
There is a geometric reason narrow rooms punish you, and it is worth seeing once because it explains why a single percentage cannot fit every job. Cutting happens along the boundary of the tiled surface. The boundary is a perimeter, measured in linear feet, while the tile you buy is an area, measured in square feet, and those two quantities do not scale together.
Compare two floors of the same area. A 10 foot by 10 foot square room is 100 square feet with a perimeter of 40 feet. A 4 foot by 25 foot hallway is also 100 square feet, but its perimeter is 58 feet. The hallway therefore has 45 percent more cut length for exactly the same amount of tile, and every foot of that cut length is where offcuts are generated. The same tile, the same layout, and a materially higher waste percentage.
The effect compounds with tile size. A cut band one tile deep runs all the way around the perimeter, so with a 24 inch tile that band is 2 feet wide and with a 4 inch tile it is 4 inches wide. On the hallway above, a 2 foot cut band covers a large share of the total floor, which is why large format tile in narrow spaces is the combination that most often blows an order. Our paver count manual works the same perimeter logic outdoors, where narrow walkways behave exactly like narrow hallways.
The practical move is to split mixed jobs rather than blending them. If a project covers a wide open floor and a narrow hall, calculate each separately, give the hall the higher allowance, and add the results. Blending them into one area with one percentage systematically under-orders the hall and over-orders the room.
Floor tile versus wall tile: same math, different order
Floors and walls use identical arithmetic, and the differences that matter show up in the inputs and in the sequencing rather than in the formula. Both are area divided by coverage per tile, times a waste factor, rounded to boxes.
The first difference is which dimension you measure. A floor is length by width. A wall is run by height, and the run is measured along the wall surface rather than across the room, which matters at corners. A three sided shower surround is not 5 by 3 feet, it is 11 linear feet of run by whatever height you tile to. People who measure a surround as a room footprint under-order it badly.
The second difference is what gets subtracted. Walls have doors and windows, which clear the 10 square foot threshold routinely, so wall takeoffs almost always involve subtraction and floor takeoffs rarely do. Walls also have interior returns at niches and window reveals that add area back, which floors have no equivalent of.
The third difference is trim. Floors mostly end at a wall or a threshold, both of which are handled by other trades or by a separate transition strip. Walls end in the open, at the top of a wainscot or the outside corner of a surround, and those edges need bullnose, a metal profile, or a mitre. Trim is counted in linear feet, not square feet, and it is the line item most often forgotten entirely. Our paint coverage manual works the same wall measuring discipline for a material sold by the gallon rather than the box.
Measuring an irregular room by decomposition
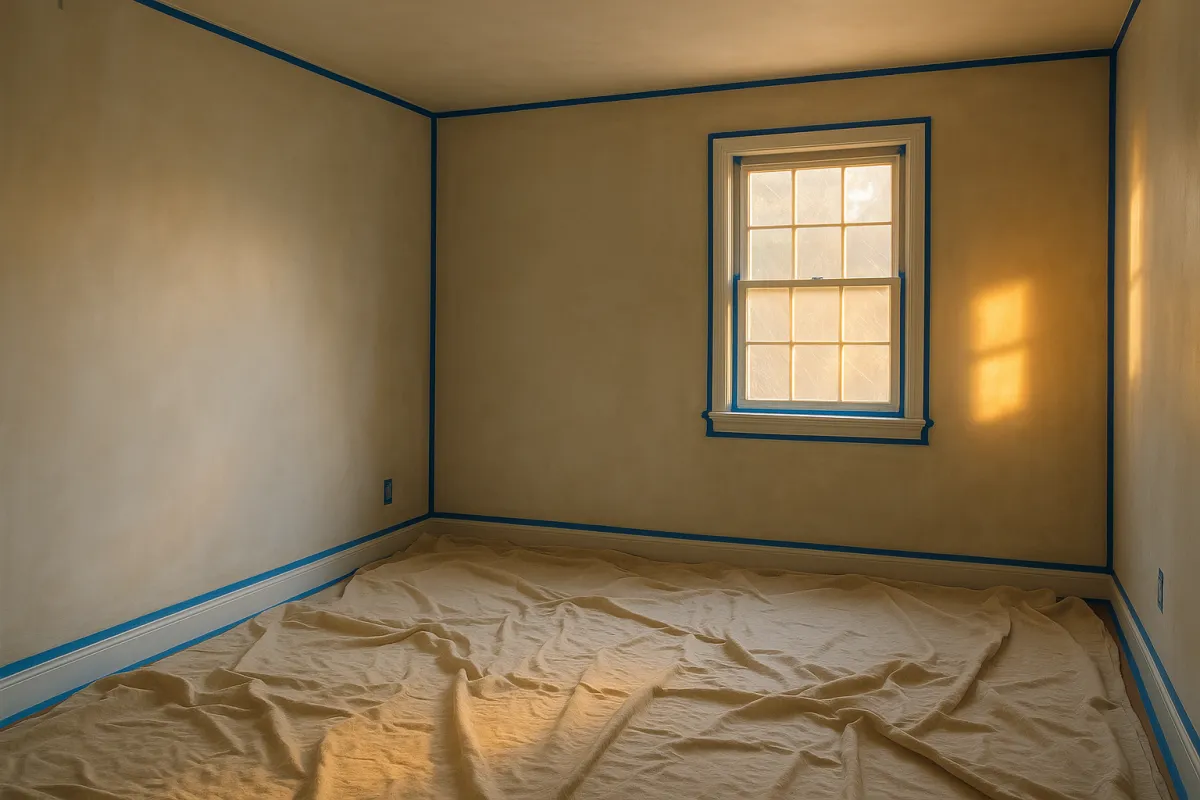
Real rooms have chimney breasts, bay windows, door recesses and returns around a corner, and none of those have a formula. The method that handles all of them is decomposition: break the footprint into rectangles and triangles, calculate each area, and sum them. It is slower than a single multiplication and it is the reason experienced estimators rarely get an area wrong.
An L shaped room is two rectangles. Draw the outline, pick a line that splits it, measure both pieces, and add: a 12 by 10 foot main area plus a 6 by 8 foot return is 120 plus 48, or 168 square feet. A room with an angled corner is a rectangle minus a triangle, and a triangle’s area is half its base times its height, so a corner clipped 4 feet by 3 feet removes 6 square feet. A bay window is usually a rectangle plus two triangles, measured the same way.
Curved edges are the one case with no exact hand method worth using. Treat the curve as a straight line drawn through its midpoint, which errs slightly high on a convex curve and slightly low on a concave one, then let the waste allowance carry the difference. Tiling a curve generates so many custom cuts that the allowance should be at the top of its range regardless.
Two habits pay for themselves. Write every dimension on the sketch as you measure rather than remembering it to the next room, and take one overall check dimension across the whole space so the pieces have to add up to something. If your decomposed pieces total 168 square feet but the overall check says the room cannot be more than 160, one of the pieces is wrong and you know before you order.
Step 6: Convert tiles into boxes and round up
Tile is not sold by the piece at any volume that matters, so the count from step 5 is an intermediate result rather than an order. The unit of purchase is the box, and boxes are packed to a convenient coverage rather than to a convenient piece count, which is why the number to work with is square feet.
The conversion is: square feet to buy, divided by box coverage in square feet, rounded up to a whole number. Take the bathroom floor. The net area is 80 square feet and the layout allowance is 10 percent, so the square feet to buy is 80 times 1.10, which is 88. At an illustrative box coverage of 16 square feet, 88 divided by 16 is 5.5 boxes, so you order 6. Six boxes at 16 square feet is 96 square feet, or 48 tiles at 2 square feet each.
The shower surround runs the same way. Net area 77 square feet, allowance 10 percent, so 84.7 square feet to buy. At an illustrative box coverage of 12.5 square feet, that is 6.78 boxes, so 7. Seven boxes is 87.5 square feet, which at 0.125 square feet per tile is 700 tiles.
Notice what rounding did to the floor. You needed 88 square feet and you are buying 96, so the rounding added 8 square feet, which is another 10 percent of the net area, on top of the 10 percent allowance. That is not a problem, it is a windfall, and step 7 explains why. Watch out for the reverse case, where a job lands at 6.04 boxes and rounding to 7 feels wasteful. Round up anyway. A box you did not need costs a box; a box you needed and cannot match costs a floor.
The box is the real unit of purchase
Box coverage is the number to read on the label, and it is the number most product listings bury under the piece count. There is no standard box size across the industry, no standard piece count, and no reliable relationship between the two, because packing is a compromise between weight, breakage and shelf space rather than a tidy rule.
Read both numbers and cross check them. If a box lists 8 pieces of 12 by 24 inch tile and 15.5 square feet of coverage, those agree closely enough: 8 times 2.0 is 16, and the 15.5 is a conservative published figure. If a box lists 8 pieces and 8 square feet, one of the two figures is wrong or the tile is not the size you think it is, and finding that out on the product page costs nothing while finding it out on delivery day costs a week.
Weight is worth a glance at the same time. Porcelain is heavy, and a floor’s worth of it arrives as a pallet rather than as something you carry. Knowing the box weight tells you whether this is a car trip or a delivery, and whether the delivery needs to reach the room or only the driveway.
One more box level detail decides whether your order works at all: the lot. Boxes carry a shade or batch code and often a caliber code, and tiles from different lots can differ visibly in colour and slightly in size. Order all the boxes for one continuous surface from a single lot, ask the supplier to confirm they can supply the full quantity from that lot before you pay, and keep the boxes together rather than opening them one at a time from different pallets.
Pattern repeat, shade variation, and buying one lot
Beyond the count, there is a quantity question that catches people out on printed tile in particular: how many distinct faces the product actually has. Wood look plank tile, stone look porcelain and most patterned tile are printed, and the printing cycles through a fixed number of different faces. If a run has few distinct faces and you lay them straight out of the box in box order, the repeat becomes visible as a regular pattern across the floor, which is the one flaw people notice from the doorway.
The fix is a mixing rule rather than an extra quantity: open several boxes at once and pull from all of them in rotation, so the repeat is scattered rather than aligned. It costs nothing, and it is worth planning for because it means you need multiple boxes open and staged before you start rather than working through them one at a time.
Shade variation is the related property, and most manufacturers publish a variation rating for each product on a low to high scale. A product rated as having substantial variation is designed to look that way, so a sample chip tells you almost nothing about how the finished floor will read, and the sensible move is to lay out a dozen loose tiles on the floor before any thinset comes out of the bag. That dry lay is also the cheapest possible check on your count, because a dozen tiles across the room’s width will show you immediately whether the cut at the far wall is going to be a sliver.
A sliver cut at a wall is worth engineering out at this stage. If the field lands with a 1 inch strip at one edge, shifting the starting line by half a tile turns that into two comfortable half tiles at opposite ends, which look deliberate and cut without shattering. This changes nothing about the total count and everything about the result.
Step 7: Add attic stock before you place the order
Attic stock is the reserve you keep after the job is finished, and it is separate from the waste allowance because it serves a different purpose. The allowance covers material consumed during installation. Attic stock covers a tile cracked by a dropped pan three years from now, when the product has been discontinued or the current batch no longer matches.
A common practice is to keep 5 to 10 percent of the installed area in reserve, and there is a good argument for the top of that range on a floor. Tile is fired in batches, and shade and caliber drift between runs, so a replacement bought later will rarely blend even under the same product name and the same colour name. The fix costs a few square feet now and is essentially impossible later.
Check the rounding before you add a box, because it often supplies the reserve for free. The bathroom floor needed 88 square feet and rounding to whole boxes bought 96, leaving 8 square feet spare. Eight square feet is exactly 10 percent of the 80 square foot floor, so the attic stock is already paid for and no extra box is needed. The shower surround is the opposite case: 84.7 needed, 87.5 bought, leaving 2.8 square feet, which is under 4 percent of the 77 square foot wall. That is thin for a surround you will never match again, so an eighth box is a defensible call.
Watch out for storing spares badly, which wastes the whole exercise. Keep them flat rather than on edge, dry rather than in a damp garage corner, and labelled with the room and the date. A box of unidentified tile found in a loft eight years later is not attic stock, it is landfill with a story.
Where the tile in the bathroom floor order actually goes
Illustrative split of the 96 square feet bought for the 80 square foot floor in this manual's worked example.
Six boxes at 16 square feet is 96 square feet. Eighty of that goes down as finished floor, 8 is consumed by the 10 percent cut allowance, and the remaining 8 falls out of rounding to whole boxes and becomes the attic stock. The three shares are 80, 8 and 8 divided by 96, which sum to 100.
Step 8: Calculate the thinset and the grout
Two materials ride under and between the tile, and they are sized by completely different logic, which is why lumping them together as a rough guess goes wrong so often.
Thinset is sized by trowel notch, not by tile count, because the notch determines how thick the mortar bed is before the tile flattens it. Bigger tiles need bigger notches, because a large rigid tile has to bridge more substrate variation. As illustrative planning figures, a 50 pound bag of modified thinset often covers somewhere in the region of 85 to 95 square feet with a quarter by quarter inch square notch, 60 to 70 square feet with a quarter by three eighths, and 40 to 50 square feet with a half by half inch notch used under large format tile. The number printed on your own bag is the one that counts.
On the running example, the 80 square foot floor in 12 by 24 inch tile calls for a half by half inch notch, so at an illustrative 45 square feet per bag it takes 80 divided by 45, which is 1.8, so 2 bags. The 77 square foot surround in 3 by 6 subway takes a quarter by quarter notch, so at an illustrative 90 square feet per bag it is 0.86 bags, so 1. Three bags total, and a fourth on the shelf is cheap insurance against a bag that goes off while you are cutting.
Grout is geometry, and the honest headline is that it is a far smaller quantity than people expect. The joint volume per square foot is 144 times the joint depth times the joint width times the sum of the tile’s two dimensions divided by their product, all in inches. On the floor, with a 12 by 24 tile, a 1/8 inch joint and a 5/16 inch depth, that is 144 times 0.3125 times 0.125 times 36 over 288, which is 0.703 cubic inches per square foot, or 56 cubic inches across the whole 80 square feet.
The surround has smaller tiles and therefore far more joint per square foot, which is the pattern to remember: joint quantity scales with how many tiles there are, not with how big the room is. A 3 by 6 tile with a 1/16 inch joint at the same 5/16 depth gives 144 times 0.3125 times 0.0625 times 9 over 18, which is 1.406 cubic inches per square foot, or 108 cubic inches across 77 square feet. Floor and wall together come to 164 cubic inches, which is under a tenth of a cubic foot.
Watch out for turning that geometric volume straight into bags. It is a floor, not an order, because a real job loses grout in the bucket, on the sponge, and in joints that are not filled perfectly flush. Manufacturers’ coverage charts build in that margin, so read the chart on the bag you intend to buy and use the geometry as a sanity check on it rather than as a replacement for it. Grout is one of the cheapest lines on the job, and buying one bag more than you need is the correct error to make.
Trim, bullnose, and the pieces counted in linear feet
Every tiled surface that ends in the open needs a finished edge, and that edge is counted in linear feet rather than square feet, which is why it slips off spreadsheets built around area. Forgetting it is not a small oversight, because trim pieces are frequently a different lead time from the field tile and a fortnight of waiting is a real cost.
Walk the surface and list every edge that does not die into a wall, a floor, or a ceiling. On the shower surround in the running example, that is the two vertical outside corners where the surround meets the room, each 7 feet tall, plus the horizontal top edge running across all three walls, which is 11 feet. Two times 7 is 14, plus 11 is 25 linear feet. Add roughly 10 percent for cuts and mitres and order 28 linear feet.
Trim comes in several forms and the choice affects the count. Bullnose tile is a field tile with one or two finished edges, sold by the piece, so convert your linear feet by dividing by the piece length: 28 linear feet of 6 inch bullnose is 56 pieces. Metal or PVC profiles are sold in sticks of a fixed length, commonly around 8 feet, so 28 linear feet is 4 sticks. A mitred edge uses field tile and needs no trim at all, at the cost of considerably more cutting skill.
Watch out for the pieces that are neither field nor trim. Inside corner caps, outside corner pieces for metal profile systems, and the transition strip where a tiled floor meets carpet or wood are each counted individually and each has a habit of being remembered on the day it is needed. Add them to the sketch as you walk the edges, not afterwards from memory.
Step 9: Write the order the way a yard reads it
An order is not a number, it is a list, and writing it the way a supplier reads it removes an entire category of misunderstanding. The supplier thinks in products, lots, boxes and lead times. If you hand over a total square footage, someone at the counter will convert it to boxes using assumptions you cannot see.
Write each product on its own line with five things: the product name and size, the square feet you need, the number of boxes that represents at that product’s box coverage, the lot requirement, and the piece count as a cross check. For the running example, line one is the 12 by 24 inch floor porcelain, 88 square feet needed, 6 boxes at 16 square feet, all one lot, 48 pieces. Line two is the 3 by 6 inch wall tile, 84.7 square feet needed, 7 boxes at 12.5 square feet, all one lot, 700 pieces.
Then add the lines that are not tile: thinset by bag count and type, grout by colour and bag count, trim by linear feet with the form specified, and the sundries that are easy to forget, which are spacers, a suitable substrate membrane if the installation calls for one, and edge profile corner pieces. Our manual on making a materials estimate covers assembling this kind of list across a whole job rather than a single trade.
Ask two questions before you pay. First, can the full quantity come from one lot, and if not, which line is short. Second, what is the return policy on unopened boxes, since that policy is what makes rounding up cheap or expensive and it varies a great deal between suppliers. Run the final numbers through the material coverage estimator once more with your real box coverage entered, and the list you hand over will match what you actually need.
A worked example: a bathroom floor and a shower surround
Pull the whole thing together on one room. The bathroom floor measures 8 feet by 10 feet, which is 80 square feet. A vanity 2 feet by 5 feet sits against one wall, a 10 square foot footprint, and it is being tiled under, so nothing is subtracted. The floor tile is a 12 by 24 inch porcelain, so the face is 288 square inches and the coverage is 288 divided by 144, exactly 2.0 square feet per tile. The bare count is 80 divided by 2, which is 40 tiles.
The layout is a straight set with a one third offset in a room that is close to square, so the allowance is 10 percent. Eighty times 1.10 is 88 square feet to buy, which is 44 tiles. At an illustrative box coverage of 16 square feet, 88 divided by 16 is 5.5, so 6 boxes. Six boxes is 96 square feet, or 48 tiles, leaving 8 square feet spare after the allowance is consumed, which is 10 percent of the floor and covers the attic stock with nothing extra to buy.
The shower surround is three walls, a 5 foot back and two 3 foot returns, tiled to 7 feet. That is 11 linear feet of run times 7 feet, or 77 square feet, with no opening large enough to subtract. The tile is a 3 by 6 inch subway with an 18 square inch face, so coverage is 0.125 square feet and the bare count is 77 divided by 0.125, which is 616 tiles. A running bond with a half offset carries a 10 percent allowance, so 84.7 square feet to buy, or 678 tiles. At an illustrative 12.5 square feet per box that is 6.78 boxes, so 7 boxes, 87.5 square feet, 700 tiles.
The materials underneath follow. Thinset: 2 bags for the floor at a half by half inch notch and 1 for the wall at a quarter by quarter, so 3 bags plus a spare. Grout joint volume: 56 cubic inches on the floor and 108 on the wall, 164 in total, under a tenth of a cubic foot, so a single bag of each colour is comfortable once the bag’s own coverage chart is checked. Trim: 25 linear feet of edge on the surround, ordered as 28 with the cut allowance.
The finished order is therefore 6 boxes of floor tile, 7 boxes of wall tile, 4 bags of thinset, 2 bags of grout in the two colours, and 28 linear feet of edge profile, with both tile lines specified as single lot. That is a list a counter can price in two minutes, and every number in it traces back to a measurement or a division you can show.
Common tile estimating mistakes
The failure modes repeat across jobs, and knowing them is worth more than any extra precision in the arithmetic.
- Inverting the rate. Multiplying by coverage per tile when you meant to divide, or using tiles per square foot where coverage belongs. On a 12 by 24 tile this turns 40 into 160 and neither number looks obviously wrong. Do the calculation both directions and check they agree.
- Subtracting every small opening. Taking out each window, outlet and cabinet under 10 square feet makes the order tight, because the cuts around them consume roughly what the subtraction saved.
- Applying one waste percentage to a mixed job. A wide room and a narrow hall have different perimeter to area ratios and need separate allowances. Blending them under-orders the hall every time.
- Treating the waste allowance as attic stock. They serve different purposes and are added at different points. Rolling them together leaves nothing in reserve.
- Ordering across lots. Splitting one continuous surface across two batch codes produces a visible shade change that no amount of skill at the wet saw fixes.
- Forgetting trim entirely. Edge profiles and bullnose are counted in linear feet, sit outside the area calculation, and frequently carry their own lead time.
- Rounding down to save a box. The saving is one box. The cost, if you run short and the lot is gone, is the surface.
Troubleshooting the awkward cases
What if the room is badly out of square? Measure both opposite pairs of walls and both diagonals. If the diagonals differ by more than an inch or so, the room is out of square enough that one wall will carry a tapered cut for its whole length. Add to the waste allowance rather than to the count, and set out from the most visible edge so the taper lands where nobody looks.
What if the tile is a metric size with an imperial name? Measure a real tile, add your intended joint width to each dimension, and use that for coverage. On a small room the difference is a tile or two. On a large floor it is worth the five minutes.
What if I am mixing two tile sizes in one room? Two separate calculations, all the way through to two separate box counts. Each size has its own coverage, its own box coverage, its own lot, and often its own waste behaviour, since a mosaic band cut into a large format field wastes more than either does alone.
What if I need a specific number of full tiles for a pattern? Work the layout on graph paper at the tile’s real module before you order, because patterns like a basketweave or a picture frame border have a repeat that has to divide into the space. The count that comes out of a drawn layout beats the count that comes out of an area calculation whenever a pattern has to land.
What if the supplier quotes by the piece and I calculated in square feet? Convert with the coverage figure you already derived, then compare piece counts rather than square feet, since piece counts are integers and integers do not hide rounding. Our manual on drywall sheet counts works the same convert then cross check discipline for a material sold by the sheet.
Your tile order checklist
- Sketch the surface and write every dimension on the drawing before you calculate anything.
- Convert inches to decimal feet once, on the sketch, and never mid calculation.
- Subtract openings and permanent obstructions over roughly 10 square feet, and leave everything smaller in the gross area.
- Derive coverage per tile as length times width in inches divided by 144, and keep the decimals.
- Divide net area by coverage for the bare count, then multiply the other way as a cross check.
- Set the waste allowance from the layout, from 5 percent for a straight set in a square room to 20 percent for herringbone.
- Split narrow spaces from wide ones and give each its own allowance.
- Divide square feet to buy by the box coverage and round up to whole boxes.
- Check whether the box rounding already supplies 5 to 10 percent attic stock before adding another box.
- Size thinset by trowel notch and read the coverage from the bag you are buying.
- Work out grout joint volume from the tile size, joint width and joint depth, then confirm bags against the manufacturer's chart.
- Count trim and edge profiles in linear feet and add roughly 10 percent for mitres.
- Specify a single lot for each continuous surface and confirm availability before paying.
- Ask what the return policy is on unopened boxes, since that is what makes rounding up cheap.
The bottom line
A tile count is one division off the tile and one multiplication off the room, and everything that makes it feel hard is bookkeeping around those two operations. Coverage per tile is length times width in inches divided by 144, so a 12 by 24 inch tile covers exactly 2 square feet and an 80 square foot bathroom floor needs 40 of them before anything is cut. Subtract only the openings over roughly 10 square feet, add a waste allowance set by the layout rather than by habit, and remember that layout moves the waste and never the field count.
Then convert to boxes, because boxes are what you buy, and check the rounding before you add a box for attic stock, since the rounding frequently supplies it already. Underneath the tile, thinset follows the trowel notch and grout follows the joint geometry, and grout is smaller than almost anyone guesses. Order every box for one continuous surface from one lot, count the trim in linear feet, and hand the supplier a list rather than a total. Run your own room through the material coverage estimator and the number you carry to the counter will be one you can defend line by line.
This manual sets out an estimating method and is offered for general planning rather than as a specification for any particular installation. Every dimension, coverage figure, box size, waste percentage and bag yield used here is illustrative and chosen to show how the arithmetic works, not a quotation or a product specification, and real tile varies considerably in size, thickness, box packing and price. Thinset and grout coverage differ between products, so the figures printed on the bag you buy override anything calculated here. Where an installation involves waterproofing, movement joints, substrate preparation, structural deflection or a wet area, follow the manufacturer’s written instructions and the applicable installation standards, and bring in a qualified tile professional rather than relying on an estimating formula.
Frequently asked questions
How many tiles do I need for a room?
Measure the floor in feet, multiply length by width for the area, then divide that area by the coverage of one tile in square feet. Coverage per tile is the tile's length times its width in inches divided by 144, so a 12 by 24 inch tile covers exactly 2 square feet and an 80 square foot bathroom needs 40 of them before waste. Multiply the area by a waste factor for your layout, commonly around 10 percent for a straight set in an ordinary room, and divide again. Then round up to whole boxes, because the box is what you actually buy.
How do I calculate tiles per square foot?
Divide 144 square inches by the tile's face area in square inches and you have the number of that tile it takes to cover one square foot. A 3 by 6 inch subway tile has an 18 square inch face, so 144 divided by 18 is 8 tiles per square foot. A 12 by 12 inch tile lands on exactly 1, a 12 by 24 inch on 0.5, and a 24 by 24 inch on 0.25. Doing the division on the tile in front of you beats trusting a chart, because tile sizes vary far more than most people expect.
How much extra tile should I buy for waste?
A commonly used starting point is around 5 percent for a straight set in a genuinely square room with few cuts, 10 percent for a straight set in an ordinary room with jogs and doorways, 15 percent for anything laid on a 45 degree diagonal, and 20 percent for herringbone or other patterns that meet every edge at an angle. Narrow rooms, out of square walls, large format tiles and inexperienced cutting all push the figure higher. These are illustrative planning allowances rather than guarantees, so treat them as a floor and add attic stock on top. The allowance covers cuts you throw away, not tiles you break carrying them in.
Should I subtract doors, windows and cabinets from the tile area?
On walls, yes, subtract any opening bigger than roughly 10 square feet, because a standard door or a decent sized window is a genuine hole in the tiled surface and paying for tile to fill it is wasteful. On floors, subtract only the footprint of something permanent that will never be tiled under, such as a built in cabinet run or a tub deck, and again only when it is larger than about 10 square feet. Small openings and small obstructions are better left in the gross area, because the cuts around them consume roughly what they save. Never subtract a freestanding appliance or a piece of furniture that could move later.
How many tiles are in a box?
There is no standard, which is exactly why the box coverage printed on the label matters more than the piece count. Boxes are generally packed to a convenient coverage rather than a convenient count, so a box of large format tile might hold a handful of pieces and a box of mosaic sheets might hold a dozen sheets, with both landing somewhere in the same coverage range. Work in square feet, divide your square feet to buy by the box coverage, and round up. Then read the piece count as a cross check, because a mismatch between the two usually means you misread one of them.
How much thinset and grout do I need for tile?
Thinset is sized by trowel notch rather than by tile count, because the notch sets how thick the mortar bed is. As illustrative planning figures, a 50 pound bag of modified thinset often covers somewhere in the region of 85 to 95 square feet with a quarter by quarter inch square notch, 60 to 70 with a quarter by three eighths, and 40 to 50 with a half by half inch notch used under large format tile. Grout is a much smaller quantity than people expect: the joints on a typical floor are only one or two percent of the surface. Use the coverage chart on the bag you actually buy, since it accounts for what stays in the bucket and on the sponge.
Do I need extra tile for a diagonal or herringbone layout?
The field count does not change, because a square foot of surface takes the same number of tiles whichever way you rotate them, but the waste allowance changes considerably. A straight set meets a wall squarely, so many offcuts can be turned and used at the opposite end of the same row. A 45 degree diagonal or a herringbone meets every wall on an angle, producing triangular offcuts whose mates rarely fit the next gap, so more of them go in the bin. Set the field count from the area and the tile, then raise only the waste percentage to match the pattern.
How much tile should I keep as attic stock?
Keeping roughly 5 to 10 percent of the installed area in reserve is a common practice, and on a floor you cannot easily replace it is worth being at the top of that range. The reason is that tile is made in batches with a shade and a caliber that drift between runs, so a replacement bought two years later will rarely match the surrounding field even under the same product name. Rounding up to whole boxes often supplies the attic stock for free, which is worth checking before you deliberately add another box. Store the spares flat, dry and labelled with the room they came from.