What's on this page
- Why a fence estimate starts at the corners and the gates
- The whole fence order in one line
- Measuring the fence line, run by run
- Why the post count is sections plus one, per run
- Choosing the post spacing, and what it costs you
- Line posts, corner posts, end posts, and why they differ
- How a gate changes the post count
- Sizing the gate posts for the swing load
- Post length: what goes in the ground and what stands above it
- Rail quantity, by rails per section
- Buying rails in the length the sections actually need
- Picket count: the picket width plus the gap you choose
- Solving for the gap instead of accepting the remainder
- Hole diameter, post depth, and the frost override
- Concrete per hole, from the hole volume minus the post
- Turning cubic feet of concrete into bags
- Gravel in the bottom of each hole
- Hardware counted by the section
- The waste allowance, item by item
- Sloped ground: stepped versus racked
- Property lines, setbacks, and the call before you dig
- A worked example: a 140 foot yard fence with one gate
- Two ways to cross check the whole count
- Where a fence estimate goes wrong
- Your fence order checklist
- The bottom line
Every fence material list is really two calculations wearing one coat. The first is a layout problem: where the corners are, where the gates go, and how the run divides into sections, which decides the post count and nothing else does. The second is ordinary multiplication: rails per section, pickets per foot, concrete per hole, fasteners per crossing. People rush the first and then do the second beautifully, which is how a yard ends up three posts short on a Saturday afternoon with the truck already unloaded and the hire shop closed.
This manual works a fence order end to end, from a tape along the property line to a list you can read out at a counter. It derives the post count from the run rather than the total length, shows why the answer is sections plus one and where the plus one hides, handles the gate as its own arithmetic, counts rails and pickets from the section and the picket pitch, and computes the concrete per hole from the hole volume minus the post so the bag order matches the yields our bags of concrete manual works in detail. For the anchoring technique itself, our fence post tutorial carries the seven steps in order. Run your dimensions through the material coverage estimator, and the companion below recalculates every section on your own fence as you read.
Key takeaways
- Post count is sections plus one, per run. Three sections need four posts, and dividing total length by spacing buys you one post too few for every separate run in the layout.
- Round sections up inside each run, then recompute the actual spacing. A 60 foot run at 8 feet maximum becomes 8 sections at 7.5 feet, not 7.5 sections.
- Every gate opening adds one span to its run, so it adds one post, and it upgrades two posts to a larger section in a deeper hole.
- Pickets come from the pitch, which is picket width plus the gap you choose. A 5.5 inch board with a 0.5 inch gap is a 6 inch pitch, or exactly 2 pickets per foot.
- Concrete per hole is the cylinder minus the post: about 1.75 cubic feet for a 4x4 in a 12 inch hole 2.5 feet deep, near 3 bags of 80 pound mix at a 0.6 cubic foot yield.
Why a fence estimate starts at the corners and the gates
The instinct is to start at one end of the fence line and walk forward, dropping a post every 8 feet until you run out of yard. It produces a tidy drawing and a wrong order, because the fixed points of a fence are not evenly spaced. Corners are fixed by the property. Gates are fixed by where a mower, a bin, or a car has to pass. Ends are fixed by the house, the garage wall, or the neighbour’s existing fence. Those points cannot move to suit an 8 foot rhythm, so the rhythm has to be worked out between them.
Start instead by marking every fixed point on a sketch: each corner, each gate opening with its width, and each terminal point where the fence meets something else. Those marks cut the fence line into runs, and a run is the unit the arithmetic actually operates on. A 140 foot fence around three sides of a yard is not one 140 foot calculation. It is three runs, each rounded and divided on its own, and the difference between those two approaches is usually two or three posts.
The other reason to start here is that corners, ends, and gate posts are not the same product as line posts on most jobs. They carry different loads, sometimes different dimensions, and different hardware. Deciding where they are before counting anything means the order separates cleanly into post types instead of arriving as a pile of identical sticks that turns out to include the gate.
The whole fence order in one line
Compressed as far as it will go, a fence take-off reads: split the line into runs, divide each run by the maximum spacing and round up for sections, add one post per run, add one post per gate, then multiply sections by rails per section, multiply fenced length by pickets per foot, and multiply posts by concrete per hole. Every section below is either measuring one of those inputs honestly or attaching a smaller quantity to it.
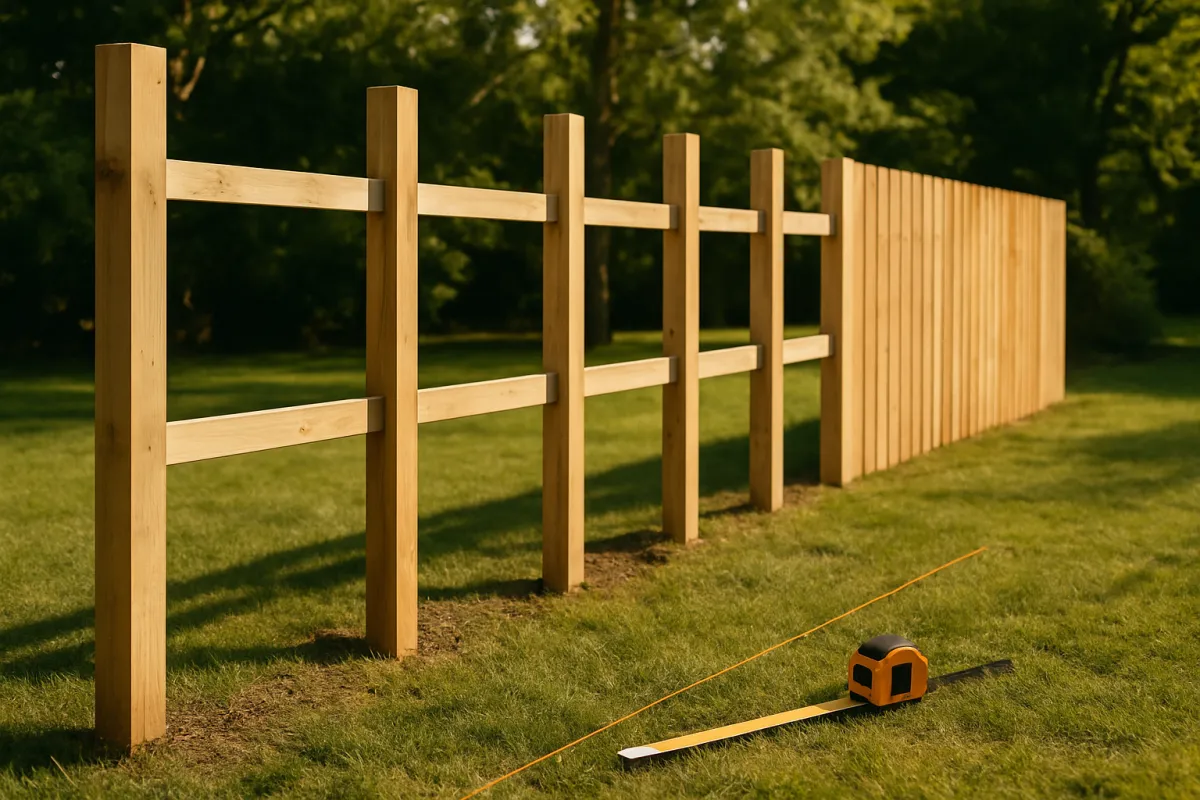
The running example this manual returns to is a yard fence with three runs: 60 feet across the back and 40 feet up each side, meeting the house at both ends, with a single 4 foot gate in one side run. Total fence line 140 feet, fenced length 136 feet once the gate opening is subtracted, maximum post spacing 8 feet on center, 6 feet tall, 3 rails per section, and 5.5 inch boards with a 0.5 inch gap.
Run that through the line and the answers are 18 sections, 20 posts, 57 rails, 300 pickets, and about 73 bags of 80 pound concrete mix. The rest of this manual derives each of those five numbers and cross-checks two of them a second way, because a number that only exists once has never been tested. The same take-off discipline our material estimating manual applies to a whole project applies here to one item on it.
Measuring the fence line, run by run
Measure each run as a straight horizontal distance between its fixed points, taken along the line the fence will actually stand on, not along the lawn edge or the old fence you are replacing. A long tape held level beats a tape dragged over ground contours, because post spacing is set on the level and a tape that follows a dip reads long. On a slope, that distinction matters enough to have its own section further down.
Record each run separately with its own number, and write the gate openings inside the runs they interrupt. The back run in the example is 60 feet. Each side run is 40 feet. The gate sits in one side run, 20 feet from the corner, which splits that run into 20 feet of fence, a 4 foot opening, and 16 feet of fence. That level of detail is not fussiness; it is the only way the section count can be right, because rounding happens inside each piece.
Two habits protect the measurement. First, measure from the same reference at each end, either post center to post center or face to face, and note which you used, because a 3.5 inch post is a real distance when it appears twice per section. Second, measure the fence line twice, once with the tape and once by pacing or by a wheel, and compare. A transposed digit in a 60 becomes a missing post rather than an obvious error, and the second reading is cheaper than the second trip.
Why the post count is sections plus one, per run
This is the rule the whole estimate turns on, and it is worth demonstrating rather than asserting, because everyone nods at it and then gets it wrong on paper. Posts do not fill sections, they bound them. Draw a single section: there is a post at the left end and a post at the right end, so one section takes two posts. Add a second section to the right of it: it needs a post at its own right end, but its left end reuses the post already standing. Two sections, three posts. Add a third: three sections, four posts.
Written out, the pattern is post, section, post, section, post, section, post. Four uprights, three gaps. There is no arrangement of a straight run where this fails, so a run of n sections always takes n plus 1 posts. The plus one is the post at the far end, the one that has no section after it to justify its existence in a length-divided-by-spacing calculation, which is exactly why the division loses it.
Now watch it bite. The example has 136 feet of fenced run. Divide by 8 and you get 17, so the tempting order is 17 posts. The true section count is 18, because rounding happens inside each run rather than across the total. Add the gate opening as its own span and there are 19 spans in the fence. Nineteen spans in one continuous chain of runs means 20 posts. Seventeen against twenty is not a rounding difference; it is fifteen percent of the post order missing.
If the fence is one continuous chain, as a fence around three sides of a yard is, the plus one applies once to the whole chain rather than once per run, because the corner posts are shared between the runs that meet at them. Counted per run, the example gives 9 plus 7 plus 6, or 22 posts, minus the 2 corner posts double counted, which is 20 again. Two routes, one answer, which is the cross-check this rule deserves.
Choosing the post spacing, and what it costs you
Post spacing is an input you choose, bounded above by what the rails can span without sagging and by what the fence style and local practice support. Common residential spacing for a wood fence runs between 6 and 8 feet on center, with 8 feet being the usual maximum for a standard rail and shorter spacing where the fence is tall, the wind exposure is high, or the rails are light. Preassembled panels remove the choice entirely: the panel width is the spacing, and the posts go where the panels end.
Whatever you choose is a maximum, not a target, and this is the second place estimates go wrong. A 60 foot run at 8 feet maximum does not give 7.5 sections. It gives 8 sections, because you cannot build half a section, and the actual spacing becomes 60 divided by 8, or 7.5 feet on center. Round up and recompute, always in that order. Rounding down instead would stretch the spacing past the maximum you set, which is the one direction the number is not allowed to move.
Posts needed for one 60 foot run, by maximum spacing
Sections are 60 divided by the spacing and rounded up; posts are that section count plus one.
Every bar width is that row's post count divided by the largest, 13, times 100. Tightening from 8 feet to 5 feet on a single 60 foot run adds 4 posts, 4 holes, and roughly 4 more posts worth of concrete, which is why spacing is the most expensive single decision in a fence estimate.
Notice what the chart does not show: the rail and picket quantities barely move with spacing. Three rails per section times more sections is more rails, but each one is shorter, so the linear feet of rail is nearly constant. The picket count does not move at all, because pickets are counted from the fenced length. Spacing is essentially a decision about posts, holes, and concrete, and those three travel together.
Line posts, corner posts, end posts, and why they differ
A fence has four post jobs and the count has to separate them, because the order does. A line post sits between two sections and is pulled equally from both sides, so the horizontal forces largely cancel and it mostly resists wind. A corner post has two sections pulling at ninety degrees to each other with nothing opposing either, so it carries a genuine unbalanced load. An end post has one section pulling one way and nothing pulling back. A gate post has a swinging cantilever hanging off it.
In the example, the 20 posts break down as 14 line posts, 2 corner posts where the back run meets each side run, 2 end posts where the side runs meet the house, and 2 gate posts. Add those and you get 20 again, which is a small but genuine cross-check on the layout: if the four types do not sum to the total, a fixed point has been miscounted somewhere on the sketch.
What the distinction buys you is a sensible spend. Corner and end posts commonly get a deeper hole or more concrete than line posts even when the post section is the same, because the load is unbalanced and a lean shows immediately on a corner. Some builders brace corners diagonally back along both runs instead. Gate posts get the full upgrade described two sections below. None of this changes the count, but it changes what the count is made of, and a materials list that reads twenty posts without saying which is not a materials list.
How a gate changes the post count
A gate is not a hole in the fence, it is a span in the fence that happens to be filled by something that swings. That single reframing gets the arithmetic right. The opening is bounded by a post on each side exactly as a section is, so it counts as one more span in its run, and one more span means one more post than the sections alone would suggest.
Work the example’s gated run explicitly. The run is 40 feet long and contains a 4 foot gate opening 20 feet from the corner, leaving 20 feet of fence on one side and 16 feet on the other. The 20 foot piece divides by the 8 foot maximum into 2.5, which rounds up to 3 sections at 6 feet 8 inches each. The 16 foot piece divides into exactly 2 sections at 8 feet. That is 5 sections, plus the gate opening, so 6 spans, and 6 spans need 7 posts. Sections plus one would have said 6. The gate is the seventh.
The general rule falls out cleanly: posts in a run equal sections plus gates plus one. Applied to the whole chain in the example, 18 sections plus 1 gate plus 1 is 20 posts, matching both earlier routes to the same number. Note also that the gate opening is not the gate’s width. A 4 foot opening measured between the post faces takes a gate leaf narrower than 4 feet, because the hinge hardware and the latch clearance both live inside that dimension. Order the opening, then let the gate supplier size the leaf to it.
Sizing the gate posts for the swing load
Two of the posts in the example are doing a job no other post does. A gate hangs entirely off its hinge post, which turns the post into a cantilever loaded sideways at the top, and every swing works that load back and forth in the soil. The latch post takes the impact of closing and whatever a person leaning on the gate contributes. Neither of those is wind resistance, and a post sized for wind will lean out of plumb within a season or two.
The usual response is a larger post in a bigger hole with more concrete. An illustrative residential upgrade is a 6x6 post in an 18 inch hole 3 feet deep against a 4x4 in a 12 inch hole 2.5 feet deep for the line posts. Run the cylinder math on both and the difference is stark. The line post hole holds about 1.96 cubic feet and the post displaces about 0.21, leaving about 1.75 cubic feet. The gate post hole holds about 5.3 cubic feet and the post displaces about 0.63, leaving about 4.7 cubic feet.
That is roughly two and two thirds times the concrete per post, so the two gate posts in this fence consume about 9.4 cubic feet between them, as much as five and a half line posts. It also means the gate posts need longer stock, because 3 feet in the ground under a 6 foot fence is a 9 foot post before any allowance. The wider fence, the heavier gate, or the double gate all push these numbers further, which is a conversation to have with whoever supplies the gate and its hardware rather than a rule to take from a chart.
Post length: what goes in the ground and what stands above it
Post length is the quantity people order last and regret first, because stock lengths come in fixed steps and the required length rarely lands on one. The requirement is simply the above ground height plus the burial depth, with nothing subtracted for the gravel at the bottom of the hole and nothing borrowed from the cap.
In the example, the fence stands 6 feet above grade and the line posts go 2.5 feet into the ground, so each line post needs 8.5 feet of timber. An 8 foot post is short by half a foot, which is why the common instinct to buy 8 foot posts for a 6 foot fence produces either a shallower hole than the plan or a shorter fence than intended. Ten foot stock is the practical answer, with 18 inches cut off each post or left long and trimmed to a string line after setting. The gate posts need 6 plus 3, or 9 feet, so they come off the same 10 foot stock.
Leaving posts long and cutting them to a stretched string after the concrete cures is worth the extra timber. It absorbs small differences in hole depth, it lets the tops follow a deliberate line rather than the ground, and on a stepped fence it is close to the only sane way to work. Order the length that allows it and treat the offcuts as expected, not as waste that means you did something wrong.
Rail quantity, by rails per section
Rails are the easiest quantity in the whole estimate and the one most often bought in the wrong length. The count is sections times rails per section, full stop. What varies is rails per section, which comes from the fence height and style: two rails is common on a fence up to about 4 feet, three rails is the usual answer on a 5 or 6 foot fence, and taller or heavier cladding pushes toward four.
The example has 18 sections and 3 rails per section, so 54 rails. Expressed as linear feet, that is 3 rails times 136 feet of fenced run, or 408 linear feet of rail, and the two numbers should always agree when converted, which is a free check on the section count. If 54 rails and 408 linear feet disagree by more than the offcuts, a section has gone missing between the two calculations.
Rails per section is also a structural decision, not just an arithmetic input. A third rail on a 6 foot fence is not decoration; it stops long boards bowing between supports and it stops the fence racking out of square over time. Adding one takes the example from 36 rails to 54, an increase of 18 sticks and a proportional increase in brackets and fasteners, so it is a real cost that should be decided deliberately rather than discovered when the boards start to cup.
Buying rails in the length the sections actually need
The count is 54 rails, but the yard sells sticks, not rails, so the question becomes how many sticks and how long. No section in the example exceeds 8 feet, so one 8 foot stick covers one rail with a trim cut, and two offcuts from short sections cannot be spliced into a working rail. That means 54 sticks of 8 foot stock, and the cut waste is already embedded in that count rather than needing a percentage on top of it.
The alternative is running rails over the posts in longer lengths, commonly 16 feet, so each stick spans two sections and the joints land on posts. That approach cuts the number of joints in half and produces a stiffer, straighter fence, but it only works when the section spacing divides the stick length. In the example, the 8 foot sections in the second half of the gated run and the whole of the far side run suit 16 foot stock perfectly, while the 7.5 foot and 6 foot 8 inch sections do not, so a mixed order is honest.
Whichever way you buy, add a small allowance for splits, knots that land where a bracket goes, and the stick that gets cut to the wrong figure. Around 5 percent is a reasonable working number here, which takes 54 to 56.7 and rounds to 57 sticks. That allowance is deliberately smaller than the picket allowance, because rails are inspected and cut individually while pickets are handled by the bundle.
Picket count: the picket width plus the gap you choose
Pickets, boards, or slats are counted from a pitch, and the pitch is the picket’s actual width plus the gap you intend between them. It is not the picket width alone, and it is not a number from a table. A 5.5 inch board with a 0.5 inch gap repeats every 6 inches. A 5.5 inch board butted tight repeats every 5.5 inches. A 3.5 inch picket with a 0.5 inch gap repeats every 4 inches. The pitch is the only thing the count cares about.
Convert the fenced length to inches and divide. The example has 136 feet of fenced run, which is 1,632 inches, and a 6 inch pitch, so 1,632 divided by 6 is exactly 272 pickets. Expressed per foot, 12 divided by 6 is 2 pickets per foot, which is the figure worth carrying in your head for that combination. Change the pitch to 4 inches and the same fence needs 3 pickets per foot, or 408 pickets, half again as many for a fence that looks lighter.
The cross-check runs by run. The back run is 60 feet, or 720 inches, which is 120 pickets. The gated run has 36 feet of fence, or 432 inches, which is 72 pickets. The far side run is 40 feet, or 480 inches, which is 80 pickets. Add them: 120 plus 72 plus 80 is 272, matching the whole-fence division. When those two disagree, the fenced length has usually lost or kept a gate opening it should not have.
One honest wrinkle: nominal and actual widths differ. A board sold as a 6 inch picket frequently measures 5.5 inches, and a 4 inch picket measures 3.5 inches. Use the measured width, not the name on the label, and the pitch will be right. Our material coverage reference keeps the same derive-it-yourself posture for the other quantities on a project.
Solving for the gap instead of accepting the remainder
The division above landed on a whole number because the example was chosen so it would. Real runs almost never do, and the fix is to stop treating the gap as fixed and start treating it as the adjustable quantity. Pick a pitch, get an approximate count, round to a whole number of pickets, then solve backward for the gap that makes that count fit the run exactly.
Work it on the back run. The run is 720 inches and the boards are 5.5 inches wide. An approximate count of 720 divided by 6 is 120 pickets. Lay 120 boards in a run and there are 119 gaps between them, so the total board width is 120 times 5.5, or 660 inches, and the remaining 60 inches spread over 119 gaps gives 60 divided by 119, or 0.504 inches per gap. Half an inch, near enough that no one will ever measure it, and it fits the run exactly with no ripped board at the end.
Repeat it on the other runs to confirm the method holds. The gated run’s 432 inches with 72 pickets leaves 71 gaps and 36 inches of gap to spread, giving 0.507 inches. The far run’s 480 inches with 80 pickets leaves 79 gaps and 40 inches to spread, giving 0.506 inches. All three land within a few thousandths of half an inch, which is why the three runs read as one fence rather than three.
The alternative, accepting the remainder, means every run ends with a picket ripped down to whatever is left. Sometimes that is fine, particularly where the last picket meets a house wall and the cut is hidden. At a visible corner it is not, and the two minutes of arithmetic above is the difference. Set the gap once per run, mark a spacer block to that dimension, and let the block do the measuring for the rest of the day.
Hole diameter, post depth, and the frost override
Hole size drives the concrete order more than anything else in the estimate, because diameter enters the volume squared. The common starting rules are a hole roughly three times the post width and a burial depth of about a third of the post’s above ground height. For a 4x4 at 3.5 inches, three times is 10.5 inches, which rounds to the 12 inch auger or shovel width most people have; for a 6 foot fence, a third of the height is 2 feet, and 2.5 feet is a common comfortable answer.
Frost overrides both. Where the ground freezes, a post whose base sits above the local frost depth gets lifted by frost heave regardless of how much concrete surrounds it, so the hole goes below that depth even when the thirds rule is satisfied at a shallower figure. Frost depth is a local number set by local authorities and it varies enormously, so confirm it for your area rather than borrowing a figure from an article. Soil type, water table, and fence height all push the same direction.
The example uses a 12 inch hole 2.5 feet deep for line, corner, and end posts, and an 18 inch hole 3 feet deep for the two gate posts. Those are the same illustrative figures our fence post tutorial works through, kept identical here on purpose so the bag counts in both places agree. Substitute your own depth and the arithmetic below runs the same way; only the numbers move.
Concrete per hole, from the hole volume minus the post
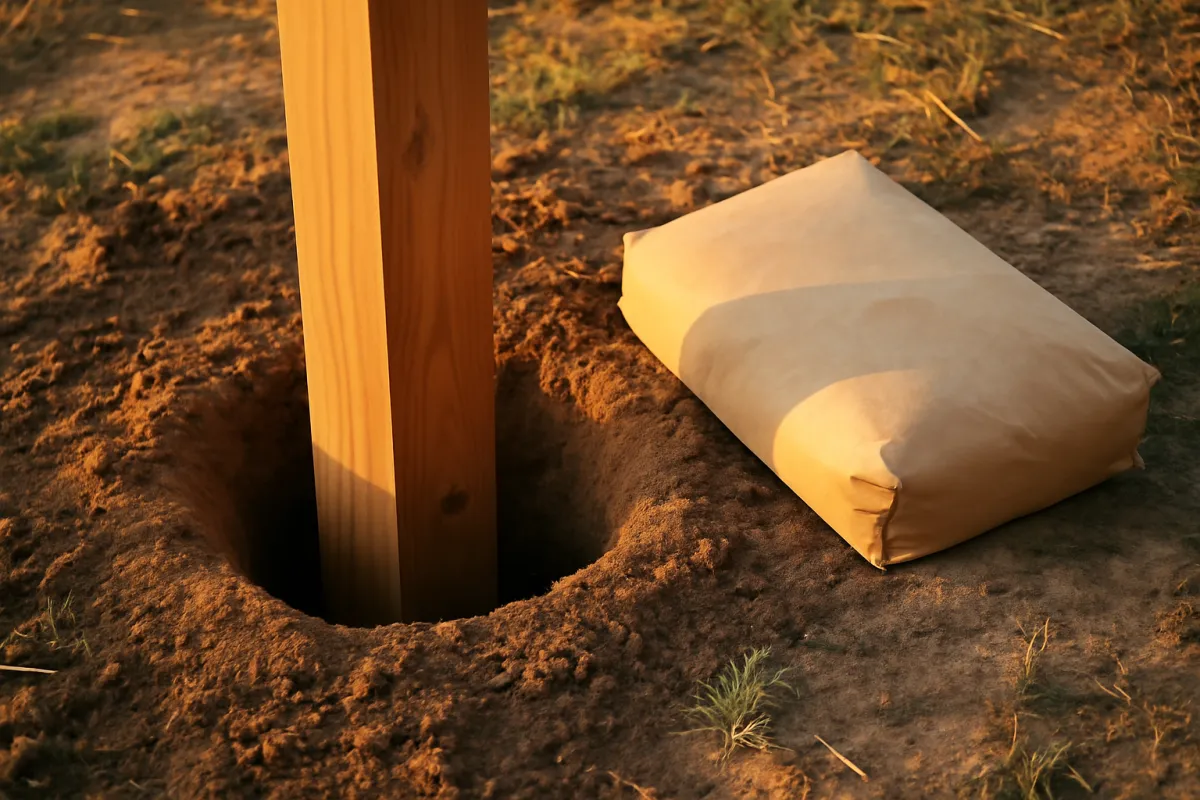
Each hole is a cylinder with a square post standing in the middle of it, so the concrete is the cylinder’s volume minus the post’s volume over the buried depth. Both halves are one line of arithmetic and neither should be skipped, because the post displaces enough to matter across twenty holes.
Take the line post case. A 12 inch diameter hole has a 6 inch radius, which is 0.5 feet. Volume is radius squared times pi times depth: 0.5 times 0.5 times 3.1416 times 2.5, which is about 1.96 cubic feet. The 4x4 post actually measures about 3.5 inches a side, which is 0.2917 feet, giving a cross section of about 0.085 square feet, and over the 2.5 foot burial that is about 0.21 cubic feet. Subtract: about 1.75 cubic feet of concrete per line post.
Now the gate posts. An 18 inch hole has a 9 inch radius, which is 0.75 feet, so the cylinder is 0.75 times 0.75 times 3.1416 times 3, about 5.3 cubic feet. A 6x6 post actually measures about 5.5 inches a side, or 0.4583 feet, for a cross section of about 0.21 square feet, and over 3 feet that is about 0.63 cubic feet. Subtract: about 4.7 cubic feet per gate post.
Multiply by the counts. Eighteen posts at 1.75 cubic feet is 31.5 cubic feet. Two gate posts at 4.7 is 9.4 cubic feet. Total 40.9 cubic feet, which is 40.9 divided by 27, or about 1.51 cubic yards, if you want it in the units our concrete manual uses for larger pours. Note what is not subtracted: the few inches of gravel in the bottom of each hole. Leaving that in the concrete figure is deliberate, because hand dug holes belly outward and the two errors point in opposite directions.
Turning cubic feet of concrete into bags
Bags are sold by weight and used by volume, so the conversion runs through the yield printed on the bag. Illustrative yields commonly used for standard mix are about 0.6 cubic feet from an 80 pound bag and about 0.45 cubic feet from a 60 pound bag, which are the figures our bags of concrete manual works with. Fast setting products intended for post work publish their own yields and they are frequently different, so the label outranks any figure here.
Divide the total. The example needs 40.9 cubic feet, so at 0.6 cubic feet per bag that is 40.9 divided by 0.6, or 68.2 bags, rounding to 69. In 60 pound bags at 0.45 cubic feet the same volume takes 40.9 divided by 0.45, or 90.9 bags, rounding to 91. The weight difference is worth noticing before the trip: 69 of the 80 pound bags is about 5,520 pounds of dry mix, which is a pallet delivery rather than a car boot.
Then add the margin. A bag for every four or five posts is the working allowance, which on 20 posts is 4 bags, taking the order to 73 of the 80 pound bags or 95 of the 60 pound bags. That margin exists because a hand dug hole is never the neat cylinder the formula assumes, because the gravel seat varies, and because running out with two holes left is a different kind of expensive. Unopened bags go back to the yard; a half set post does not.
Where the 73 bag concrete order goes
Illustrative split of the example fence's 80 pound bag order across post types.
Shares are each group's bag count over the 73 bag order: 14 line posts take 24.5 cubic feet or 40.8 bags, the 4 corner and end posts take 7 cubic feet or 11.7 bags, the 2 gate posts take 9.4 cubic feet or 15.7 bags, and the margin is 4 bags. Rounded to whole percents they read 56, 16, 22, and 6, which sum to 100. Two gate posts out of twenty posts carry more than a fifth of the concrete.
Gravel in the bottom of each hole
A few inches of coarse gravel in the bottom of each hole gives the post base somewhere for water to go instead of sitting against end grain. It is a small quantity that is almost always forgotten on the order, and forgetting it means either a second trip or a set of posts sitting in mud.
Compute it as a short cylinder. Four inches is 0.333 feet, so a 12 inch hole takes 0.5 times 0.5 times 3.1416 times 0.333, about 0.26 cubic feet per hole. Eighteen of those is about 4.7 cubic feet. Each 18 inch gate hole takes 0.75 times 0.75 times 3.1416 times 0.333, about 0.59 cubic feet, and two of those is about 1.18 cubic feet. Total gravel is about 5.9 cubic feet, which is roughly 0.22 cubic yards, or about 12 of the half cubic foot bags.
That is a small enough quantity that buying it bagged usually beats a bulk delivery, unless the same weekend already involves gravel for a path or a base, in which case fold it into that order. Our gravel depth manual covers how depth is chosen for the other gravel jobs on a property, and the same conversion, area or footprint times depth in feet divided by 27, is doing the work in both places.
Hardware counted by the section
Hardware is where a fence estimate quietly doubles its line count, and every item on it is derived from a quantity already computed. Rail brackets, if the rails are bracket mounted rather than notched or nailed, run two per rail, one at each end: 54 rails times 2 is 108 brackets, and a few spares takes it to 110. Post caps run one per post: 20. Each bracket takes its own short screws, commonly four, so 108 brackets is on the order of 432 bracket screws.
Picket fasteners come from the crossings. Every picket crosses every rail, and the common practice is two fasteners per crossing so the board cannot pivot. Three rails times two fasteners is 6 fasteners per picket, and 272 pickets times 6 is 1,632. Order against the picket order rather than the bare count, so 300 pickets times 6 is 1,800 fasteners. Screws are sold by weight as often as by count, so confirm the count on the box rather than assuming a pound is a number.
Gate hardware is counted per gate, not per foot: one hinge set, which is commonly two or three hinges depending on the gate’s weight, one latch, and often a drop rod or a cane bolt on a double gate. This is the one item where following the gate manufacturer’s own hardware recommendation beats any general rule, because hinge capacity is rated and a gate that outgrows its hinges sags no matter how good the post is.
The waste allowance, item by item
A single blanket percentage across a fence order is the wrong instrument, because the items fail in different ways. Posts are discrete and positioned, so a percentage makes no sense: you count them exactly and decide separately whether to keep one spare for the post that splits when the concrete is already poured. Rails carry a small allowance near 5 percent for splits and miscuts, since the cut waste is already embedded in buying a stick per rail.
Pickets earn the largest allowance, commonly around 10 percent. Some of that is cull, because boards arrive warped, split at the end, or badly knotted where a fastener has to go, and you sort them on site rather than at the yard. Some of it is the ripped picket at the end of a run when the gap solve is not perfect. On the example, 272 pickets times 1.10 is 299.2, so the order is 300 boards. That is 28 spare boards, which sounds generous until the first bundle is opened.

Concrete gets whole bags rather than a percentage, because bags are indivisible and a hole cannot be part filled. A bag per four or five posts is the working figure, which is 4 bags on this fence and lands the order at 73. Gravel gets rounded up to the next whole bag or the next quarter yard for the same reason. Fasteners get rounded up to the next box, and since boxes are large relative to the need, that rounding is usually the entire allowance.
Sloped ground: stepped versus racked
Almost no yard is level, and the decision between stepping the fence and racking it changes both the look and parts of the count. Stepping keeps each section perfectly level and drops the whole panel at each post, leaving a stair pattern along the top and a triangular gap under each panel at its downhill end. Racking keeps the rails parallel to the ground and the pickets plumb, so the fence follows the grade as a continuous ramp.
Take the count effects one at a time. Racking changes the length: a run measured along a slope is longer than its horizontal distance. A 60 foot horizontal run with a 6 foot drop has a slope length of the square root of 60 squared plus 6 squared, which is the square root of 3,636, or about 60.3 feet. That is about half a percent more rail and picket, which the waste allowance already covers, so racking is close to free in materials terms.
Stepping leaves the section count alone but pushes the post length up. Divide the 6 foot drop across 8 sections and each step is 0.75 feet, or 9 inches. Every post has to reach the top of the higher of its two adjoining panels, so it needs 9 inches more above ground than the fence height, taking a 6 foot fence to 6 feet 9 inches of exposure and, with a 2.5 foot burial, a 9 foot 3 inch post. Ten foot stock still covers it, which is a useful reason to buy long in the first place.
Set the post spacing from the horizontal measurement in both cases, because a spacing is a level dimension and posts are plumb. And on either approach, plan what happens to the triangular gap at the bottom: gravel, a level graded strip, or a kickboard set below the pickets, which is its own linear foot quantity worth adding to the list before the order goes in.
Property lines, setbacks, and the call before you dig
Two checks belong in every fence project and neither is arithmetic. First, call the utility locate service that covers your area before any digging tool touches the ground. In the United States that call is made on 811, the service is commonly free, and it is required by law in many places. Wait for the marks to appear and then dig by hand near them, because buried gas, electricity, water, and communications lines are not visible, are not always where an old plan says, and an auger does not distinguish between soil and a service line.
Second, confirm where the property line actually runs and what the rules on it are. The old fence, the hedge, and the line the mower has taken for fifteen years are all evidence rather than authority. The survey is the authority, and survey pins are worth finding. Fences built on an assumption have to come down at the assuming party’s expense, and a neighbour who was not consulted is a problem that lasts longer than the timber does.
The rules layer on top of the line. Local authorities commonly regulate maximum height, which is frequently different for a front yard than a back one, setbacks from the line or from a road, sight lines at corners and driveways, which side of the fence the finished face must show, and whether a permit is needed at all. Where a homeowners association exists it may add its own conditions on materials, colour, and style. Easements are the quiet one: a fence built over a utility or drainage easement can be legally removed without compensation.
None of this changes a single number in the estimate, and all of it can change the project. Make both calls before ordering, not after, because a fence that has to move by 18 inches is not a small correction once the concrete has cured.
A worked example: a 140 foot yard fence with one gate
Pull the whole chain together on the example fence. The layout is three runs: 60 feet across the back, 40 feet up each side to the house, with one 4 foot gate in a side run 20 feet from the corner. Fence height 6 feet, maximum spacing 8 feet on center, 3 rails per section, 5.5 inch boards with a 0.5 inch gap.
Sections first. The back run is 60 divided by 8, which is 7.5, rounding to 8 sections at 7.5 feet. The gated run splits into 20 feet, which is 2.5 rounding to 3 sections at 6 feet 8 inches, and 16 feet, which is exactly 2 sections at 8 feet, so 5 sections. The far side run is 40 divided by 8, exactly 5 sections at 8 feet. Total 8 plus 5 plus 5, which is 18 sections. Spans are 18 sections plus 1 gate, or 19, and one continuous chain of 19 spans takes 20 posts, split as 14 line, 2 corner, 2 end, and 2 gate.
Then the rest. Posts are 20 pieces of 10 foot stock, 18 of them 4x4 and 2 of them 6x6. Rails are 18 times 3, or 54, plus 5 percent for splits and miscuts, so 57 sticks of 8 foot stock. Pickets come from 136 feet of fenced run at a 6 inch pitch: 1,632 inches divided by 6 is 272 boards, plus 10 percent, so 300. Concrete is 18 posts at 1.75 cubic feet plus 2 at 4.7, which is 40.9 cubic feet, or 69 bags of 80 pound mix at a 0.6 yield, plus 4 margin bags, so 73 bags.
Hardware finishes it: 108 rail brackets, call it 110; about 1,800 picket fasteners; 20 post caps; about 12 bags of gravel for the hole seats; and one hinge set and latch for the gate. That is the whole order on one page, and every figure on it came from a division you can redo at the counter if the yard is out of something and a substitution changes an input.
Two ways to cross check the whole count
Every number above should exist twice, computed differently, before you spend anything. The post count has two routes already. Per run, the counts are 9, 7, and 6, which sum to 22, minus the 2 corner posts each counted by two runs, giving 20. By chain, 18 sections plus 1 gate is 19 spans, and spans plus one is 20. Two independent methods agreeing is worth more than one method checked twice.
The picket count also has two routes. Whole fence: 136 feet is 1,632 inches, divided by the 6 inch pitch, is 272. Run by run: 720 inches is 120, 432 inches is 72, and 480 inches is 80, which sum to 272. If those disagree, the usual culprit is the gate opening, either subtracted twice or not at all, and the difference will be exactly the gate width divided by the pitch, which in this case is 8 pickets.
The rail count converts. Fifty-four rails at an average section length of 136 divided by 18, or about 7.56 feet, is about 408 linear feet, which is the same as 3 rails times 136 feet of run. The concrete converts too: 40.9 cubic feet divided by 27 is 1.51 cubic yards, and 1.51 cubic yards times 27 divided by 0.6 is 68 bags, near enough the 69 the direct division gave once rounding is allowed for.
Build the habit of writing both routes down. It costs a minute per quantity and it catches the errors that a calculator will not, because a calculator will happily multiply the wrong section count by the right rails per section and give you a confident wrong answer. Run your own layout through the material coverage estimator as the second route if you would rather not do the arithmetic twice by hand.
Where a fence estimate goes wrong
The failures repeat, and they are worth naming so you can check for them directly. First, the missing plus one, from dividing total length by spacing. It is short by one post per separate fence line and by one more per gate, which on the example is three posts out of twenty.
Second, rounding across the whole fence instead of inside each run. The example’s 136 feet divided by 8 gives 17 sections, but the runs individually round up to 18. That missing section is also missing three rails and its share of the pickets and fasteners.
Third, estimating concrete by eye. A bag per hole feels reasonable and is roughly a third of the honest cylinder math, because the concrete is the ring around the post rather than the post’s own footprint. Fourth, treating the gate as a hole rather than a span, so its post disappears from the count and its two upgraded posts stay 4x4s.
Fifth, buying 8 foot posts for a 6 foot fence, which forces either a shallow hole or a short fence. Sixth, using nominal picket widths in the pitch, which throws the count by roughly 9 percent on a board that is called 6 inches and measures 5.5. Seventh, ordering everything and discovering the property line question afterward. Only one of those seven is arithmetic, which is the honest summary of what fence estimating actually is.

Your fence order checklist
Work through this in order and the order that arrives is the fence the yard needs.
- Sketched the fence line and marked every corner, terminal, and gate opening with its width before dividing anything.
- Measured each run as a horizontal distance and recorded it separately, with gate openings noted inside the runs they interrupt.
- Divided each run by the maximum spacing, rounded sections up, and recomputed the actual on center spacing from the rounded count.
- Counted posts as sections plus gates plus one for a continuous chain, then cross-checked by summing the runs and subtracting shared corner posts.
- Split the post total into line, corner, end, and gate posts, and confirmed the four types sum back to the total.
- Sized the gate posts and their holes separately, and added their larger concrete volume as its own line.
- Set the post length from above ground height plus burial depth, then bought long enough to trim to a string.
- Multiplied sections by rails per section, converted to linear feet as a check, and chose the stick length that matches the section spacing.
- Divided the fenced length in inches by the picket pitch, cross-checked run by run, and solved for the gap so no run ends on a ripped board.
- Computed the concrete per hole as cylinder minus post, multiplied by the counts, converted at the bag yield, and added a margin bag per four or five posts.
- Added the gravel for the hole seats, the brackets and fasteners by the crossing, the post caps by the post, and the gate hardware by the gate.
- Applied the waste allowance item by item rather than as one blanket percentage on the total.
- Called the utility locate service and waited for the marks, and confirmed the property line, setback, height, and permit position with the local authority.
Everything on that list is a number you can defend at the counter, which is the point. The companion below runs the same chain on your own fence line so the hand math has something to argue with.
The bottom line
A fence material list is layout arithmetic wearing a shopping list. Split the line into runs at the corners and the gates, round each run’s sections up on its own, and count posts as sections plus gates plus one, because posts bound sections rather than fill them and the last post in every chain has no section after it to remind you it exists. Everything after that is multiplication: rails by the section, pickets by the fenced length over the pitch you chose, concrete by the cylinder minus the post, hardware by the crossing. Cross-check the post count and the picket count two ways each, because those two carry the most error and cost the most to fix. Then set the arithmetic down and make the two calls that are not arithmetic at all, to the utility locate service and to whoever can tell you where the line runs and how tall the fence may be. Run your own layout through the material coverage estimator, lean on our fence post tutorial for the setting technique and our square footage manual when the same project involves areas rather than lines, and confirm the bag yield and the stock lengths with your supplier before the pallet is loaded.
Read this manual as estimating method and workshop arithmetic, not as an engineered fence design or a statement of what is permitted where you live. Post spacings, burial depths, hole diameters, picket widths and gaps, rail counts, bag yields, and waste percentages here are typical illustrative values picked so the worked example follows cleanly, and every one of them moves with your fence height, wind exposure, soil, frost depth, timber, and the specific products your supplier stocks. The product label and your local rules outrank anything printed here. Confirm frost depth, height limits, setbacks, easements, and permit requirements with the relevant local authority, establish the property line from the survey rather than from an existing fence, contact the utility locate service and wait for the marks before digging, and bring in a qualified professional for gate posts carrying heavy leaves, retaining or load bearing elements, ground that will not hold a hole, or anything that changes how water crosses a property.
Frequently asked questions
How many fence posts do I need for 100 feet of fence?
Divide the run by your maximum post spacing, round the sections up, then add one. At 8 feet on center, 100 divided by 8 is 12.5, which rounds up to 13 sections at 7 feet 8 inches each, and 13 sections need 14 posts. The extra post is the one at the far end of the last section, and forgetting it is the single most common fence estimating error. If that 100 feet turns a corner or contains a gate, count each straight run separately and add a post for every gate opening.
Why is the post count sections plus one?
Because posts bound sections rather than fill them, so every section has a post at each end and consecutive sections share the post between them. Lay out three sections in a row and count the uprights: post, section, post, section, post, section, post, which is four posts for three sections. The formula generalises to any run, so a run of n sections always takes n plus 1 posts. Where people go wrong is dividing the total fence length by the spacing and buying that many posts, which is short by one for every separate run in the layout.
How many pickets do I need per foot of fence?
Divide 12 inches by the picket pitch, which is the picket width plus the gap you intend to leave. A 5.5 inch board with a 0.5 inch gap gives a 6 inch pitch, so 12 divided by 6 is exactly 2 pickets per foot, and 136 feet of fenced run takes 272 pickets before waste. A 3.5 inch picket with the same 0.5 inch gap gives a 4 inch pitch and 3 pickets per foot, half again as many. Run the division on the board you actually intend to buy, because nominal and actual widths differ and the gap is yours to choose.
How much concrete does one fence post need?
Work the hole as a cylinder and subtract the post. A 12 inch diameter hole 2.5 feet deep holds radius squared times pi times depth, which is 0.5 times 0.5 times 3.1416 times 2.5, about 1.96 cubic feet, and a 4x4 post at 3.5 inches a side displaces roughly 0.21 cubic feet over that depth, leaving about 1.75 cubic feet of concrete. At a typical 0.6 cubic foot yield for an 80 pound bag that is about 3 bags per post, or about 4 bags of 60 pound mix at 0.45 cubic feet each. Confirm the yield printed on the product you buy, because it sets the whole bag count.
Do gate posts need to be bigger than line posts?
A gate hangs its whole weight off one post as a cantilever and swings that load back and forth, which is a completely different demand from a line post that only resists wind. The usual answer is a larger post section, a deeper and wider hole, and more concrete, with an illustrative 6x6 in an 18 inch hole 3 feet deep against a 4x4 in a 12 inch hole 2.5 feet deep for the line. That upgrade takes the pour from about 1.75 cubic feet to about 4.7 cubic feet per post, so two gate posts can carry as much concrete as five line posts. Size gate posts and hardware together with whoever supplies the gate rather than from a general rule.
How much waste should I add to a fence material order?
Waste behaves differently per item, so a single blanket percentage is the wrong tool. Posts are counted exactly and get no percentage, because each one has a determined position; rails are bought one stick per rail per section, which already embeds the cut waste, so a small allowance near 5 percent covers miscuts and splits. Pickets earn the largest allowance, commonly around 10 percent, because you sort out warped and split boards on site and because the last picket in a run is usually ripped narrower. Concrete gets a margin bag for every four or five posts, since hand dug holes always run larger than the textbook cylinder.
How do I calculate fence materials on sloped ground?
Decide between stepping and racking first, because the two answers differ. A racked fence follows the ground, so the run length you measure along the slope is slightly longer than the horizontal distance and the picket count rises by that same small fraction: a 60 foot horizontal run with a 6 foot drop measures about 60.3 feet along the slope, roughly half a percent more material. A stepped fence keeps every panel level and drops each one at the post, so the section count is unchanged but every post has to stand taller by one step height, and each panel leaves a triangular gap at its downhill end that needs infill or grading. Set post spacing from the horizontal measurement either way, because level is what a spacing is measured on.
What should I check before digging fence post holes?
Two things, and neither is optional. Call the utility locate service that covers your area, which in the United States is reached on 811, and wait for the marks before a digging bar touches the ground, because buried gas, power, water, and communications lines do not announce themselves. Separately, confirm where the property line actually runs, using the survey rather than the old fence or the mowing habit, and check the local rules on setback, maximum height, which side the finished face must show, and whether a permit applies. These are questions for the local authority and, where one exists, the homeowners association, not for a calculator.