What's on this page
- Why a stud count starts with layout, not lumber
- Before you start: what to gather and what to settle
- Step 1: Measure every wall and write the length in inches
- Step 2: Settle the stud spacing before you count anything
- Step 3: Count the field studs with length over spacing plus one
- Step 4: Add the extra studs at every corner
- Step 5: Add studs where partitions tee into the wall
- Step 6: Frame each opening with kings, jacks, and cripples
- Step 7: Turn the plates into linear feet
- Step 8: Add blocking, backing, and nailers
- Step 9: Apply a waste factor and round to how lumber is sold
- Step 10: Write the cut list and check it against the plan
- 16 versus 24 inches on center, and what actually decides it
- Why the plus one is not optional
- Nominal and actual: what a 2 by 4 really measures
- Stud length, precut studs, and the 8 foot wall
- Headers: the one number this manual will not give you
- A worked example: a 24 foot wall with two openings
- The full cut list for the worked wall
- Board feet, linear feet, and pieces on one wall
- Common stud counting mistakes
- Troubleshooting the awkward walls
- Your wall framing material checklist
- The bottom line
A stud count is one of the few material estimates that is pure arithmetic on a tape measure, and one of the few that people still get wrong by twenty percent. The reason is not the division. Wall length over spacing plus one is a line of math a child could do. The reason is everything the division does not include: the extra studs stacked at every corner, the pair that appears where a partition tees in, the kings and jacks around every opening, and the short cripples above each header and below each sill that never show up in a per foot rule of thumb.
This manual counts a wall the way a framer lays it out, in four passes rather than one. First the field studs from the layout, then the junctions, then the openings, then the allowance. Plates come out separately as linear feet, blocking comes out of the bay count, and the whole thing ends as a cut list you can hand to a yard. There is a worked 24 foot wall with a door and a window carried all the way through, and a full cut list at the end with every length derived. Run your own wall through the material coverage estimator, and the companion below recalculates every section on your numbers as you read.
Key takeaways
- Field studs are wall length in inches divided by the on center spacing, rounded up, plus one: a 24 foot wall at 16 inches on center gives 19.
- The field count is never the order. Corners, partition tees, kings, jacks and cripples took the same wall from 19 pieces to 41, about 1.7 pieces per foot of wall.
- Each opening costs a fixed four studs, two kings and two jacks, plus cripples counted as the layout marks that fall inside the rough opening.
- Plates are linear feet, not pieces: three feet of plate stock per foot of wall for a single bottom plate and a double top plate, so 72 feet on a 24 foot wall.
- Spacing, stud size, wall height, header size and bracing are set by the adopted code and your building department, so take those from the plan and count only what the plan tells you.
Why a stud count starts with layout, not lumber
Most of the estimates on this site start with an area or a volume. You measure a slab and the concrete follows, you measure a patio and the pavers follow, because those materials fill whatever space you give them. Framing lumber behaves differently. A wall is not filled with studs, it is marked out with them, and the marks come from a repeating interval that somebody chose before any lumber was ordered. Change the interval and the count changes, even though the wall is the same wall.
That is why the first number to settle is the on center spacing, and why the second is the wall length in inches rather than feet. On center means centre of stud to centre of stud, so the interval is the same all the way along regardless of how thick the stud is. Working in inches keeps the division honest, because a 24 foot wall is 288 inches and 288 divides by 16 exactly, while 24 divided by 1.333 feet invites a rounding error nobody catches until the last bay is short.
The third thing to settle is that a stud count is a piece count, not a length. Studs of one length dominate a wall, but jacks, cripples and sill pieces are all shorter offcuts of the same stock, and plates are a different animal entirely. Keeping those four categories separate on paper is what turns a rough number into an order you can defend line by line, and it is the structure every section below follows.
Before you start: what to gather and what to settle
Gather four things before the first division. A dimensioned plan or a sketch of the wall with its real length, marked in feet and inches. The framing spacing the plan calls for, written as an on center figure. The rough opening sizes for every door and window in that wall, taken from the door and window schedule or the manufacturer’s rough opening dimension rather than from the unit itself. And the wall height, which for a stud count means the stud length, not the ceiling height.
Settle three decisions that change the count before you make it. Whether the wall is bearing or non bearing, because that is the single fact that most changes what the code will require of it. How the corners will be built, since a three stud corner, a two stud corner with drywall clips, and a four stud corner all give different extras. And how partitions will meet this wall, because a traditional tee costs two studs while a ladder blocking detail costs none and adds blocking instead.
Three things are deliberately not on that list because this manual will not supply them: the spacing itself, the stud size, and the header size for each opening. All three are code and load dependent, and all three come off the approved plan or from your building department. Everything below shows you what each choice does to the count, and shows the arithmetic clearly enough that you can rerun it in a minute when the plan settles.
Step 1: Measure every wall and write the length in inches
Measure the wall along the line the plates will sit on, which is usually the line snapped on the subfloor, and record the length in inches. If the wall is drawn on a plan, take the dimension from the plan and then verify it on site, because framing dimensions are commonly given to the face of stud on one drawing and to the centre of stud on another, and the difference is 1.75 inches at every junction. Write down which convention the number came from.
Take the length that the studs actually occupy. On a wall that dies into another wall at both ends, that is the full run. On a wall that butts a corner post already framed, the run may be shorter by the thickness of the corner assembly. This distinction matters more on short walls than long ones, since 3.5 inches out of 288 is barely one percent while 3.5 inches out of 48 is seven percent and can cost a whole bay.
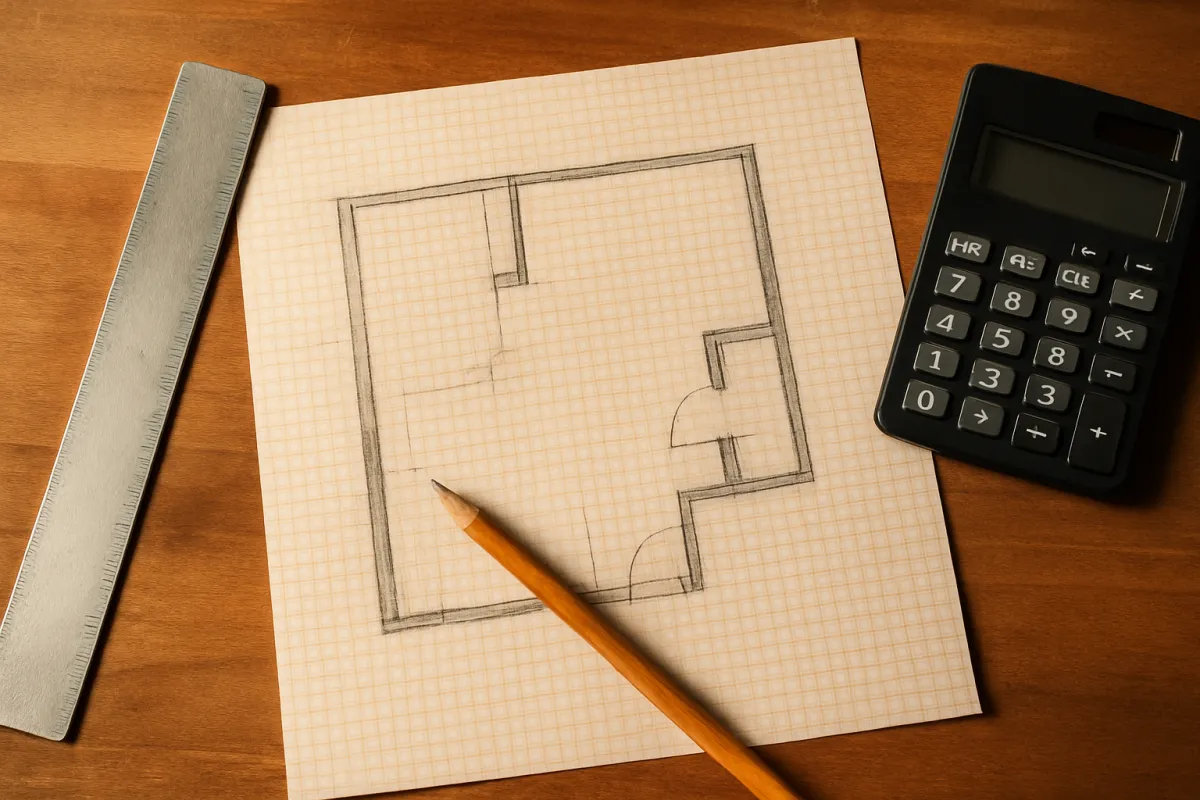
Do the same for every wall in the job and keep them on one list. The single biggest error in a whole house framing take off is not arithmetic, it is a wall that never made it onto the list. Number the walls on the plan, write the number next to each length, and tick them off as you count. The square footage manual on this site uses the same decomposition habit for floor areas, and the discipline transfers directly.
Step 2: Settle the stud spacing before you count anything
The spacing is an input, not a choice this manual gets to make for you. Sixteen inches on center and 24 inches on center are both in common use, and which one a given wall is allowed to use depends on the code adopted in your jurisdiction, the loads the wall carries, the stud size and species, the wall height, and what the sheathing and finish materials are rated to span. Take it from the approved plan. If there is no plan, that is the conversation to have with your building department before you order lumber, not after.
What an estimate can legitimately tell you is the direction of each effect, which is enough to have an informed conversation. Wider spacing means fewer studs and less lumber, which is why it appears in advanced framing approaches, and it leaves a wider cavity for insulation with fewer thermal bridges through the wall. It also puts more load on each remaining stud, asks more of the sheathing and the interior finish to span the gap without telegraphing, and narrows the range of situations where the wall qualifies.
There is a fourth spacing you will see on plans and layout tapes: 19.2 inches on center. It looks arbitrary and is not. Eight feet is 96 inches, and 96 divided by 5 is 19.2, so five bays fit exactly in an 8 foot sheet run. That is the same logic that makes 16 and 24 attractive, since 48 divided by 16 is 3 and 48 divided by 24 is 2, so panel edges land on framing in every case. Any spacing that does not divide into your sheet width forces cut edges to float, which is a framing problem and then a finishing problem.
Step 3: Count the field studs with length over spacing plus one
Here is the whole field calculation: wall length in inches, divided by the on center spacing, rounded up to a whole number of bays, plus one. The rounding up is because a partial bay at the end still needs a stud to close it. The plus one is because studs bound bays the way fence posts bound rails, and a run of n bays has n plus 1 boundaries.
Work it on the wall this manual carries throughout. The wall is 24 feet long, which is 288 inches, framed at 16 inches on center. Divide 288 by 16 and you get 18 exactly, so 18 bays. Add one and the field count is 19 studs. Run the same wall at the other spacings and you get 25 studs at 12 inches on center, 16 studs at 19.2, and 13 studs at 24. The wall never changed; only the interval did.
That gives a per foot figure worth carrying in your head as a check. At 16 inches on center a stud lands every 16 inches, which is 12 divided by 16, or 0.75 studs per foot, plus the one that closes the run. Multiply wall feet by 0.75, add one, and you should land on the same number the long division gave. On the example wall: 24 times 0.75 is 18, plus 1 is 19. The two agree, so the arithmetic is sound. What it is not yet is an order, and the next three steps are why.
Studs on a 24 foot wall, by spacing and by what you count
The first four bars are field studs only, from 288 inches divided by the spacing plus one. The last bar is the same wall at 16 inches on center counting every piece the wall actually needs.
Every bar width is that bar's value divided by the largest, 41, times 100. The gap between the third bar and the first is the entire point of this manual: the same wall at the same spacing goes from 19 layout studs to 41 pieces once two corners, one partition tee and two openings are counted. Spacing is set by the adopted code and the loads, not by this chart.
Step 4: Add the extra studs at every corner
A corner is where two walls meet at an angle, and it has two jobs beyond holding up the wall: it has to give the intersecting wall something to nail to, and it has to give the interior finish material a backing surface in the inside angle. Neither job is done by the single field stud that the layout puts at the end of the run, so corners always cost extra studs above the field count.
The common detail is the three stud corner: the field stud at the end of the wall, a second stud set back to receive the intersecting wall, and a third laid flat or set as a filler to create the nailing surface in the inside angle. Against the one stud the field count already includes, that is two extra studs per corner. A four stud corner, sometimes used where the finish needs more backing, costs three extra. A two stud corner, which relies on drywall clips or a backing angle instead of a third stud, costs one extra and is the detail advanced framing approaches use to cut lumber and open up the corner for insulation.
On the example wall, there is a corner at each end and each is a three stud corner, so the corner extras are 2 times 2, or 4 studs. Notice that the choice of corner detail is worth up to 2 studs per corner, which on a house with sixteen exterior corners is a difference of 32 studs. Notice also that the detail is not free either way: the two stud corner trades lumber for clips and for a backing method that has to actually be specified, not improvised. Pick the detail on the plan, then count it.
Step 5: Add studs where partitions tee into the wall
Every place an interior partition runs into another wall is a tee, and a tee has the same backing problem as a corner in a different geometry. The partition needs to land on something solid, and the finish material on both sides of the partition needs a nailing edge in each inside angle. The field layout does not guarantee a stud in the right place, and even when it does, one stud is rarely enough.
The traditional detail puts two studs in the receiving wall with a gap between them the width of the incoming partition, or a stud with a pair of backing studs flanking it. Either way the cost above the field count is commonly two extra studs per intersection, which is the figure this manual uses. The ladder detail replaces those two studs with short horizontal blocks nailed flat between two field studs, giving the same nailing edges with off cuts instead of full studs. It costs zero extra studs and some blocking, and it leaves the cavity clear for insulation.
The example wall has one interior partition teeing into it, framed with the traditional detail, so the tee extras are 1 times 2, or 2 studs. Add that to the corner extras and the junction total is 6 studs on top of the 19 field studs, before a single opening has been counted. That is a 32 percent increase from two corners and one partition, which is why any rule of thumb quoted per linear foot of wall has to be treated as a rough check rather than an order.
Step 6: Frame each opening with kings, jacks, and cripples
Openings are where the count stops being a division and becomes a small assembly drawing, and where most estimates quietly go wrong. Work each opening from its rough opening dimensions, meaning the framed hole the unit sits in, not the door slab or the window sash. Rough openings come from the manufacturer or the schedule, and they are always larger than the unit itself to leave room for shimming and squaring.
Four studs per opening are fixed, whatever the size. A king stud runs full height on each side of the opening, from bottom plate to top plate, and it is what ties the opening assembly into the wall. Inside each king, a jack stud, also called a trimmer, runs from the bottom plate up to the underside of the header and carries the header’s load down to the plate. Two kings and two jacks is four pieces per opening, and it does not change whether the opening is a 30 inch door or a 6 foot slider, though wide or heavily loaded openings often call for doubled jacks, which the plan will say.
The variable part is the cripples: short studs above the header, and at a window also below the sill, that continue the wall layout across the opening so sheathing and finish material still land on framing every 16 or 24 inches. Count them as the number of layout marks that fall inside the rough opening, which is close enough to the opening width divided by the spacing, minus one. Round the division up before subtracting, and add one to the answer if the opening happens to land badly on the layout.
Step 7: Turn the plates into linear feet
Plates are the part of a framing take off that people forget to count and then discover halfway through the day. They are not studs and they are not counted as pieces. A plate is a length of the same stock running horizontally, and the honest unit for it is linear feet.
A conventional wall has a single bottom plate, sometimes called the sole plate, and a double top plate made of two members stacked. That is three plate members running the full length of the wall, so the rule is three linear feet of plate stock for every foot of wall. On the 24 foot example wall, that is 24 times 3, or 72 linear feet. Walls sitting on concrete commonly get a pressure treated bottom plate instead, which is the same length in a different and more expensive material, and it is worth splitting on the order rather than discovering at the till.
Buying it is a second decision, because plate stock comes in fixed lengths and the joints matter. The upper member of a double top plate is what laps the joints in the lower one and ties adjoining walls together, so its splices need to sit well away from the splices below, and the plan or the code will state the minimum offset. On a 24 foot wall, three runs each made from one 16 foot piece and one 8 foot piece comes to exactly 72 feet with no offcut, and flipping one run so it reads 8 then 16 puts that run’s joint at a different point along the wall. Add the window’s sill plate, 50 inches on the example wall, which usually comes out of plate offcuts.
Step 8: Add blocking, backing, and nailers
Blocking is the last category, and it is counted from bays rather than from studs. A run of studs creates one fewer bay than it has studs, so 19 field studs give 18 bays. The clear width of each bay is the spacing minus the thickness of one stud, which at 16 inches on center with nominal 2 by 4 studs is 16 minus 1.5, or 14.5 inches. At 24 inches on center the same arithmetic gives 22.5 inches. Those two numbers are worth remembering, because insulation batts are made to those bay widths and because every block you cut is one of them.
Multiply bays by clear width to get the blocking in a single horizontal row. On the example wall, 18 bays at 14.5 inches is 261 inches, which is 21.75 linear feet, comfortably covered by two 12 foot pieces. If the wall needs two rows of blocking, double it. Fire blocking, mid height blocking to stiffen a tall wall, and blocking at the horizontal seams of sheet goods are all separate rows and all get counted the same way, but whether any of them is required is a code question specific to your wall height, your materials and your jurisdiction.
Backing is the other half of this line item and the half that gets forgotten. Cabinets, grab bars, handrails, wall hung fixtures, televisions, closet rods and shelf standards all want solid material behind the finish, and the moment to put it there is while the wall is open. Walk the plan, mark every future fixing point, and add a piece of blocking to the list for each. It is the cheapest lumber on the job and the most expensive to add later.
Step 9: Apply a waste factor and round to how lumber is sold
Framing waste behaves differently from the waste on almost every other material in the material coverage reference. With brick or tile the waste is offcuts. With studs the offcuts largely become jacks and cripples, so the real waste is stock quality: boards that crown too hard to use straight, boards with a twist, wane along an edge, a split end, or a knot in the wrong place. You cull those at the pile, not at the wall.
Around ten percent is a reasonable working allowance on studs for that reason, and it is worth treating as a quality allowance rather than a cutting allowance. On the example wall’s 35 stud cut list, ten percent is 3.5, which rounds up to 4 extra studs and an order of 39. If the stock is a grade you know culls heavily, or if the crew is inexperienced and will burn a few on layout mistakes, put the allowance higher and say so on the estimate rather than hiding it in the count.
Plates and blocking waste differently, mostly at the ends of runs where a length does not divide evenly. Do not apply a percentage to those. Figure them from the lengths you can actually buy: work out which combination of stock lengths covers the run with the joints where you want them, and count the pieces. That is the same reasoning our fence materials manual applies to rails, and it gives a tighter answer than a percentage ever will. Round the studs up to how the yard bundles them, since a partial bundle is often priced worse than a whole one.
Step 10: Write the cut list and check it against the plan
A cut list is the estimate turned into instructions. It groups every piece by length, states how many of each, and states which stock each group comes out of. Written properly it does two things at once: it tells the crew what to cut, and it tells you whether the order was right, because the cut list either fits inside the stock you bought or it does not.
Derive the lengths from the wall section rather than measuring them at the wall, because the wall does not exist yet. Take the stud length as your datum. The top of the bottom plate to the underside of the top plate is exactly the stud length, so every other vertical piece in the wall can be expressed from it. The jack is the rough opening height above the subfloor, minus the bottom plate thickness. The head cripple is the stud length, minus the jack length, minus the header depth. The sill cripple is the sill height above the top of the bottom plate, minus the sill thickness.
Then check the list against the plan one last time. Count the openings on the drawing and count the opening groups on the list; they should match. Count the corners and tees on the drawing and check the junction extras. Add the pieces and compare against the pieces per foot figure from earlier as a rough sanity check. Two independent routes to the same number is the standard our materials estimate manual holds every take off to, and framing is no exception.
16 versus 24 inches on center, and what actually decides it
It is tempting to treat the spacing choice as an economic one, since the lumber difference is easy to price. On the example wall the field count drops from 19 studs to 13, which is a 32 percent cut in field lumber, and across a whole house that is real money and real weight. The trouble is that spacing is not primarily an economic decision, and treating it as one is how estimates end up describing walls that will not pass.
What actually decides it is a set of code requirements that vary by jurisdiction and by wall: the stud size and grade, the wall height, whether the wall is bearing and what it carries, the wind and seismic requirements where you build, and the ratings of the sheathing and interior finish materials that have to span between studs. Every one of those has a threshold, and the spacing has to satisfy all of them at once. There is no universal answer, and any table claiming one is describing a specific code edition, a specific stud, and a specific set of loads.
What you can carry away is a list of directions. Wider spacing puts more load on each stud, so it usually demands a larger stud, a higher grade, or a shorter wall. Wider spacing widens the unsupported span of the sheathing and the drywall, so it demands thicker material or accepts more visible deflection. Wider spacing reduces thermal bridging and leaves a wider insulation cavity, which is why it appears in energy focused framing approaches. Take the spacing from the approved plan, plug it in, and let the arithmetic follow.
Why the plus one is not optional
The plus one in the field formula is the same fence post problem that appears everywhere in construction estimating, and it is worth two minutes because it is the single most common source of a wall coming up one stud short. Studs do not fill a wall, they divide it. A 96 inch wall at 16 inches on center has 6 bays, and 6 bays have 7 boundaries: one at each end and five in between. Six is the division; seven is the count.
The error is easy to make and easy to hide, because on a long wall being one stud short looks like a rounding difference rather than a missing piece. On a 24 foot wall, 18 versus 19 is a five percent error that a ten percent waste allowance would absorb, so you never find out. On a 4 foot closet return, 3 versus 4 is a 25 percent error and you find out immediately, standing at the end of the wall holding nothing.
The formula also needs the rounding to happen before the plus one, not after. A 100 inch wall at 16 inches on center gives 6.25 bays, which rounds up to 7 bays and therefore 8 studs, with the last bay narrower than the rest. Round the 6.25 to 6 and you get 7 studs and a 20 inch gap at the end, which is not a gap any sheet edge will land on. The same plus one and the same rounding rule drive the joist count in our deck framing manual, and the failure mode there is identical.
Nominal and actual: what a 2 by 4 really measures
A 2 by 4 does not measure 2 inches by 4 inches, and if you build the arithmetic on the nominal name rather than the real dimension, the errors compound at every junction. Dimensional softwood lumber is named by its rough sawn size and sold at its surfaced size, so a nominal 2 by 4 comes in at about 1.5 by 3.5 inches, and a nominal 2 by 6 at about 1.5 by 5.5 inches. Depth follows the same pattern: a 2 by 8 is about 7.25 inches deep and a 2 by 10 about 9.25.
That 1.5 inch thickness is the number doing real work in a stud count. It is why the clear bay at 16 inches on center is 14.5 inches rather than 16, why a three stud corner adds 3.5 inches to a wall’s effective end, why a header sitting on two jacks is the rough opening width plus 3 inches, and why the double top plate adds 3 inches to the wall height rather than 4. Every one of those follows from 1.5 and 3.5, and none of them follows from 2 and 4.
The 3.5 inch face is what sets the wall thickness, and therefore what a 2 by 6 wall changes. Switching a wall from 2 by 4 to 2 by 6 studs does not change the stud count at all, because the layout interval is unchanged; it changes the width of every plate, every block, every header, and the depth of the insulation cavity. Count the pieces the same way and swap the stock description. If you need the volume of lumber rather than the piece count, our board feet manual converts the whole list in one pass.
Stud length, precut studs, and the 8 foot wall
Wall height and stud length are not the same number, and mixing them is a reliable way to order the wrong lumber. The stud runs from the top of the bottom plate to the underside of the top plate. Everything above and below it is plate. For a wall with one bottom plate and a double top plate, the framed height is the stud length plus 1.5 inches for the bottom plate plus 3 inches for the two top plate members, so 4.5 inches of the wall is not stud at all.
That is where precut studs come from. Yards commonly stock a precut stud at 92 and five eighths inches, and adding the 4.5 inches of plate gives a framed height of 97 and one eighth inches, which is 8 feet 1 and one eighth. The extra inch or so above 8 feet is deliberate: it leaves room for the floor and ceiling finishes so a nominal 8 foot ceiling still measures 8 feet after everything is on. Longer precuts follow the same logic for 9 and 10 foot walls, and a yard will usually have two or three of them on the rack.
The practical rule is to buy the precut when the wall matches one and to buy stock lengths and cut when it does not. Cutting 19 studs to length from 8 foot stock is not the end of the world, but it is 19 cuts, 19 offcuts, and 19 chances to be an eighth of an inch out on a wall that then does not sit flat. The example wall in this manual uses the 92 and five eighths precut throughout, and every derived length below is taken from it.
Headers: the one number this manual will not give you
At every opening a header carries the load that the missing studs used to carry, transfers it into the jacks, and takes it down to the plate and whatever is under it. Its size is a structural question with a real answer that depends on the span, the load above it, the species and grade of the material, whether the wall is bearing or non bearing, and the code edition your jurisdiction has adopted. This manual is not going to publish a span table, because a span table copied without its assumptions is worse than no table at all.
What a counting manual can tell you is the geometry, which is what the cut list needs. A header spans the rough opening and bears on a jack at each end, so its length is the rough opening width plus twice the jack thickness, which for nominal 2 by stock is the opening width plus 3 inches. Its depth determines how much room is left above it, and therefore how many head cripples there are and how long they are. If the header depth plus the jack length happens to equal the stud length, there are no head cripples at all, because the header fits tight to the top plate. Built up headers made from two members with a spacer between them are common where the wall thickness needs filling, and the spacer is an extra line on the order.
So take the header size from the plan, from the engineer, or from your building department, and put it into the geometry above. The example below assumes the design specifies a doubled nominal 2 by 6 header at both openings, which gives a 5.5 inch depth. That is an assumption chosen so the arithmetic is followable, not a recommendation, and it will be wrong for plenty of real walls. Change the depth and every head cripple length in the cut list moves with it.
A worked example: a 24 foot wall with two openings
Here is the whole calculation in one place. The wall is 24 feet long and framed at 16 inches on center with nominal 2 by 4 studs at the 92 and five eighths inch precut length, over a single bottom plate and under a double top plate. There is a three stud corner at each end and one interior partition teeing in with the traditional detail. It has a door with a 38 inch wide by 82.5 inch high rough opening, and a window with a 50 inch wide by 42 inch high rough opening whose head lines up with the door head at 82.5 inches.
Pass one, the field: 24 feet is 288 inches, 288 divided by 16 is 18 bays, plus one gives 19 studs. Pass two, the junctions: two corners at 2 extra each is 4, one tee at 2 extra is 2, so 6 studs. Pass three, the openings. Kings and jacks are fixed at 4 per opening, so 8 studs across the two. Cripples come from the layout marks inside each opening. The door at 38 inches gives 38 over 16, which is 2.375, rounded up to 3, minus 1, so 2 cripples above the header. The window at 50 inches gives 50 over 16, which is 3.125, rounded up to 4, minus 1, so 3 cripples above the header and 3 more below the sill. Cripples total 8.
Add the passes: 19 plus 6 plus 8 plus 8 is 41 pieces in the wall. Against 24 feet of wall that is 1.71 pieces per foot, more than double the 0.75 per foot the layout interval alone suggests. Pass four is the allowance, which is applied to the cut list rather than to the piece count, and the next section shows why those two numbers are different.
Where the 41 pieces in the example wall come from
A 24 foot wall at 16 inches on center with two three stud corners, one partition tee, a 38 inch door and a 50 inch window. Illustrative details; your corner and tee details change these shares.
The five segments are 19, 8, 8, 4 and 2 pieces against a total of 41, so each width is that figure divided by 41 times 100, with the two equal 19.51 percent shares written as 20 and 19 so the widths sum to exactly 100. Only the first segment comes from the wall length; the other four come from its junctions and its holes.
The full cut list for the worked wall
Now turn 41 pieces into lengths. The datum is the 92 and five eighths inch stud, measured from the top of the bottom plate to the underside of the top plate. Full height pieces are the 19 field studs, the 4 corner extras, the 2 tee extras and the 4 king studs, which is 29 pieces at 92 and five eighths.
The jacks are next. The rough opening height is 82.5 inches above the subfloor, and the jack sits on top of the 1.5 inch bottom plate, so the jack is 82.5 minus 1.5, or 81 inches. Four jacks at 81 inches, one per stud, each leaving an 11 and five eighths inch offcut. Head cripples run from the top of the header to the underside of the top plate: the header bottom is at 81 inches above the plate, the doubled 2 by 6 header is 5.5 inches deep, so the header top is at 86.5 and the cripple is 92.625 minus 86.5, which is 6.125 inches. Five of those, two at the door and three at the window, and every one of them comes out of a jack offcut.
Sill cripples run from the top of the bottom plate to the underside of the sill. The sill top is at 82.5 minus 42, or 40.5 inches above the subfloor, the flat 2 by 4 sill is 1.5 inches thick, so its underside is at 39 inches above the subfloor and 37.5 inches above the plate. Three sill cripples at 37.5 inches, and two fit in one 92 and five eighths stud, so 2 studs cover them. The stud order is therefore 29 plus 4 plus 2, which is 35 studs, and ten percent takes it to 39. Headers are 2 by 6: the door header is 38 plus 3, or 41 inches, and the window header is 50 plus 3, or 53 inches, doubled, so 188 inches of 2 by 6, comfortably covered by one 8 foot and one 10 foot piece. Plates are 72 linear feet of 2 by 4, blocking is 21.75, and the sill is 50 inches out of the offcuts.

Board feet, linear feet, and pieces on one wall
Three units describe the same wall and each answers a different question. Pieces is what the crew handles and what the layout produces. Linear feet is what plates, blocking and headers are naturally counted in. Board feet is what a yard quotes rough lumber in and what a whole house take off usually rolls up to, and converting between them is a single multiplication.
Board feet come from nominal dimensions, not actual ones, which is one of the few places the nominal name is the correct input. A board foot is 144 cubic inches of nominal lumber, so per linear foot a nominal 2 by 4 is 2 times 4 divided by 12, or 0.667 board feet, and a nominal 2 by 6 is 2 times 6 divided by 12, or exactly 1.0 board feet. Multiply the linear feet of each size by its factor and add.
Run it on the example wall. The 35 studs at 92.625 inches are 3,241.9 inches, or 270.2 linear feet. Plates add 72, blocking adds 21.75, and the sill adds about 4.2, so the 2 by 4 total is about 368 linear feet. At 0.667 board feet per foot that is roughly 245 board feet. The headers are 188 inches of 2 by 6, which is 15.7 linear feet and, at 1.0 board feet per foot, about 16 board feet. The wall therefore holds about 261 board feet of framing lumber in total, which is the number to carry into a whole house roll up alongside every other wall on the list.
Common stud counting mistakes
The first is forgetting the plus one, covered above, and it is worth naming again because it survives every other improvement to a take off. The second is counting the field studs and calling it done. On the example wall that error is 19 pieces against 41, which is not a shortfall a waste allowance covers; it is a second trip. Count the junctions and the openings as their own passes so neither can be skipped by accident.
The third is measuring openings from the unit rather than from the rough opening. A 36 inch door is not a 36 inch hole, and using the slab width undersizes the header, the sill and the cripple count all at once. The fourth is treating plates as studs, which either produces a stud order that is 72 feet short or a plate order that never gets placed. The fifth is applying a single waste percentage to everything, when studs waste by quality and plates waste by the arithmetic of available lengths.
The sixth is subtler and specific to openings: assuming the field studs inside an opening simply disappear. They do not vanish so much as change job, becoming cripples above and below at the same layout spacing. If you deduct them from the field count and then also count cripples, you have deducted the same pieces twice and your wall will be short. This manual keeps the full field count and adds the opening pieces on top, which slightly over counts on very wide openings and is the safer direction to be wrong in.
Troubleshooting the awkward walls
Short walls break the per foot intuition. A 4 foot closet return at 16 inches on center is 48 inches, 3 bays, 4 studs, which is one stud per foot rather than 0.75, and adding a corner takes it to 6 pieces on 4 feet. Anything under about 8 feet should be counted stud by stud on the sketch rather than trusted to a formula, because the fixed costs of ends and junctions dominate.
Walls that do not divide evenly need the rounding rule applied deliberately. A 21 foot 4 inch wall is 256 inches, and 256 over 16 is exactly 16 bays, so 17 studs. A 21 foot 6 inch wall is 258 inches, 16.125 bays, which rounds up to 17 bays and 18 studs, with the last bay only 2 inches wide. That last stud is usually moved rather than left at 2 inches: framers commonly keep the layout consistent from one end and let the odd bay fall at the far corner where it is easiest to deal with, but where the odd bay lands is worth deciding on paper.
Gable walls, raked walls and stepped walls each need a different treatment. A gable end has studs of continuously varying length, so count them the same way at the same spacing and then compute the lengths from the rise over run of the roof rather than assuming a common length. Our roof pitch manual gives the slope figure that drives those lengths. Walls with a large opening near an end can leave a run of field studs too short to be useful, and walls with back to back openings can leave a single stud between two kings, which the plan may want doubled. Draw those before you count them.
Your wall framing material checklist
Work down this list in order and the order you place is one you can defend line by line.
- Listed every wall on the plan, numbered it, and recorded its length in inches with the dimension convention noted.
- Took the on center spacing, the stud size and the wall height from the approved plan rather than assuming any of them.
- Divided each wall length by the spacing, rounded the bays up, and added one for the field stud count.
- Chose the corner detail and added its extras, commonly two studs per corner for the three stud detail.
- Chose the partition tee detail and added its extras, or swapped them for ladder blocking and added the blocking instead.
- Added two kings and two jacks per opening, and doubled the jacks where the plan calls for it.
- Counted the cripples above each header and below each window sill from the opening width over the spacing, minus one.
- Took every header size from the plan or the engineer, then derived its length as the rough opening width plus 3 inches.
- Counted the plates as three linear feet per foot of wall and chose stock lengths that put the top plate splices where they belong.
- Counted the blocking rows from bays times clear bay width, and added a piece for every future fixing point on the plan.
- Derived every jack, cripple and sill length from the stud length datum and wrote them as a grouped cut list.
- Added about ten percent to the studs for culled stock, and figured plates and blocking from buyable lengths instead.
- Converted the whole list to board feet if the take off rolls up across the job.
- Confirmed spacing, header sizes, bracing, fire blocking, fastening and anything bearing with the building department and a qualified professional.
Run the list top to bottom and the wall arrives as a bundle you can cut from rather than a pile you sort through. The companion runs the same four passes on your own wall, and the material coverage estimator handles the sheathing, insulation and finish materials that go on after the framing is up. When the studs are standing, our drywall sheet count picks up the same wall from the other side.
The bottom line
A stud count is four passes and one division. Divide the wall length in inches by the on center spacing, round the bays up, and add one to get the field studs. Add the extras every corner and every partition tee demands. Add four studs per opening plus the cripples that keep the layout running across it. Then add an allowance for the stock you will cull rather than the offcuts you will make. On the 24 foot wall carried through this manual, that sequence gives 19 field studs, 6 junction extras, 16 opening pieces, 41 pieces in the wall, a 35 stud cut list, and an order of 39 studs alongside 72 linear feet of plate, 22 feet of blocking and 16 feet of header stock. Every one of those numbers rests on a spacing, a stud length and a header depth that came from a plan rather than from this manual, which is the whole point of showing the arithmetic instead of publishing a table. Run your wall through the material coverage estimator, check the piece count two ways, and take the spacing, the headers and anything bearing to your building department before the first plate is snapped.
Read this manual as estimating arithmetic and bench notes, not as a framing plan, a structural calculation, or a statement of what is permitted where you build. The 16 inch spacing, the 92 and five eighths inch stud, the doubled 2 by 6 header, the three stud corner, the rough opening sizes, the ten percent allowance and the 24 foot example wall itself are stated assumptions chosen so the numbers follow cleanly, and every one of them moves with your plan, your lumber and your jurisdiction. Stud spacing and size, allowable wall height, header sizes and spans, bearing and point load paths, bracing, fire blocking, holdowns and the fastening schedule are structural and code matters decided by the code edition adopted where you build and by the loads the wall carries, and nothing above substitutes for the plan your building department approves. Confirm precut lengths and stock availability with your supplier, check whether a wall is bearing before you cut anything into it, and have any structural framing designed and inspected by a qualified professional.
Frequently asked questions
How many studs do I need for a 24 foot wall?
For the field studs alone, divide the wall length in inches by the spacing and add one. A 24 foot wall is 288 inches, and at 16 inches on center that is 288 divided by 16, which is 18 bays, plus one for the stud that closes the last bay, so 19 studs. At 24 inches on center the same wall gives 12 bays plus one, or 13 studs. That field count is never the order, though. On the wall this manual works through, adding two corners, one partition tee and two openings takes the piece count from 19 to 41, which is about 1.7 pieces for every foot of wall.
How do you calculate the number of studs in a wall?
Work it in four passes. First the field: wall length in inches divided by the on center spacing, rounded up, plus one. Second the junctions: add the extra studs each corner and each partition intersection needs, commonly two per junction for a traditional three stud detail. Third the openings: two king studs and two jack studs per opening, plus the cripples above the header and, at a window, below the sill. Fourth the allowance: add roughly ten percent for crooked stock, culls and mistakes. Plates are counted separately as linear feet, not as studs.
Should I frame at 16 or 24 inches on center?
That is a code and load question, not an estimating one, and the honest answer is that the adopted code and your building department decide it. What an estimate can tell you is the direction of each effect. Wider spacing means fewer studs, less lumber and more room for insulation, but it also puts more load on each stud, demands thicker or stiffer sheathing and finish material to bridge the wider gap, and limits which walls can carry which loads. Both 16 and 24 divide cleanly into a 48 inch sheet, so panel edges land on framing either way. Take the spacing from the plan, then count.
How many studs per linear foot of wall?
At 16 inches on center a stud lands every 16 inches, which is 12 divided by 16, or 0.75 studs per foot, plus the one extra that closes the run. At 24 inches on center it is 0.5 per foot plus one, and at 12 inches on center it is 1.0 per foot plus one. Those figures cover the field only. Once corners, partition tees, kings, jacks and cripples are added, the all in figure on the example wall in this manual works out near 1.7 pieces per foot, which is why a per foot rule is a sanity check rather than an order.
How many studs go around a door or window opening?
The fixed part is four: a king stud on each side running full height, and a jack stud inside each king carrying the header. The variable part is the cripples. Above the header, and below the sill at a window, short studs continue the wall layout so sheathing and finish material still land on framing. Count them as the number of layout marks that fall inside the rough opening, which is roughly the opening width divided by the spacing, minus one. A 38 inch door opening at 16 inches on center gives about two cripples above the header, and a 50 inch window gives about three above and three below.
How much lumber do I need for the top and bottom plates?
Plates are linear feet, not pieces. A wall with a single bottom plate and a double top plate uses three linear feet of plate stock for every foot of wall, so a 24 foot wall needs 72 linear feet. Buy that in lengths that let the joints in the upper top plate sit well away from the joints in the lower one, since the upper plate is what ties the wall to its neighbours. On a 24 foot wall, three runs each made from one 16 foot and one 8 foot piece comes to exactly 72 feet, with one run flipped so its joint lands in a different place.
What waste factor should I use for framing lumber?
Around ten percent is a reasonable working allowance for studs, and unlike most materials the waste is less about offcuts than about stock quality. Studs get culled for crown, twist, wane and split ends, and a bundle that looks fine on the rack can give up several pieces once you sight down them. Ten percent on the 35 stud cut list in this manual adds four studs and takes the order to 39. Plates and blocking waste differently, mostly at the ends of runs, so figure those from the lengths you can actually buy rather than by percentage.
Do I need a permit or an engineer to frame a wall?
Very possibly, and a counting manual cannot settle it. Stud spacing, stud size, allowable wall height, header sizes and spans, bearing and point load paths, fire blocking, bracing, holdowns, and the fastening schedule are all set by the code adopted where you build and by the loads the wall actually carries. Whether a wall is bearing or non bearing changes almost every one of those answers, and it is not always obvious from looking. Count studs to plan and budget, then take the framing plan to your building department and, for anything structural, to a qualified professional.