What's on this page
- What rise and run actually mean
- Before you start: what to gather and what to settle
- Step 1: Measure the total rise finished floor to finished floor
- Step 2: Divide the total rise into a whole number of risers
- Step 3: Divide back to get the exact riser height
- Step 4: Count the treads as risers minus one
- Step 5: Choose the tread run and compute the total run
- Step 6: Test the numbers against the stair rules of thumb
- Step 7: Check headroom and size the floor opening
- Step 8: Confirm the landings at both ends
- Step 9: Lay out the stringer with a framing square
- Step 10: Drop the stringer by the tread thickness
- Step 11: Check the throat and pick the stringer stock
- A worked example: one flight from tape to stringer
- A second example: when the rise refuses to divide evenly
- Nosing, tread boards, and the difference between run and tread width
- Where the code numbers come from and why this manual will not print them
- Uniformity: why every riser has to match
- Exterior and deck stairs: what changes
- Winders, landings, and stairs that turn
- Counting the stair materials from the same numbers
- Common stair layout mistakes
- Troubleshooting the awkward stairs
- Your stair layout checklist
- The bottom line
Every stair in the world is one division done twice. You divide the total rise by a riser height you would like, round the answer to a whole number because you cannot build 15.64 steps, then divide the total rise back by that whole number to find the riser you are actually going to build. Everything else, the tread depth, the total run, the headroom, the stringer layout, follows from those two divisions. What makes stairs feel harder than they are is that the first measurement is easy to take wrongly, the second division produces a decimal no tape measure shows, and the stringer has one adjustment that nobody mentions until you have already cut it.
This manual works the whole chain in eleven steps, from the tape on the floor to the pencil line on the stringer. It measures the total rise the way it has to be measured, finished floor to finished floor, sets the riser count and the exact riser, counts treads as risers minus one, chooses a tread run and produces the total run, tests the result against the stair rules of thumb, then checks headroom and the landings before anything gets cut.
The last three steps handle the stringer itself: marking it with a framing square, dropping it by the tread thickness so the first and last risers match, and checking the throat before you buy the board. The same length over spacing plus one arithmetic our deck board manual uses for joists shows up here inverted, as risers minus one. Run your own rise through the material coverage estimator, and the companion below recalculates every step on your own numbers as you read.
Key takeaways
- Total rise is measured finished floor to finished floor. Measuring to a subfloor that has not been covered yet is the single most common stair error, and the missing thickness lands on one step rather than spreading across the flight.
- Divide the total rise by a target riser, round to a whole number of risers, then divide the total rise back by that whole number. An illustrative 109.5 inches over 16 risers is 6.84375 inches exactly, and that decimal is the number you build to.
- Treads are risers minus one on a stair that lands flush with the upper floor. Fifteen treads at a 10.5 inch run is a 157.5 inch total run.
- Drop the stringer by the finished tread thickness. Without it the bottom riser is one tread thickness too tall and the top riser is the same amount too short.
- Maximum riser, minimum tread, headroom, nosing projection and handrail dimensions are code values that vary by adopted code, occupancy and jurisdiction. This manual gives the method and the direction of each limit, and the actual numbers come from your local building department.
What rise and run actually mean
Four words get used loosely on a stair and they mean four different things, so pin them down before any arithmetic happens. Total rise is the vertical distance from the finished lower floor to the finished upper floor. Riser, or unit rise, is that total divided by the number of steps. Total run is the horizontal distance the stair covers from the face of the bottom riser to the face of the top riser. Tread run, or unit run, is the horizontal distance from one nosing to the next.
The pair that causes trouble is tread run and tread board width, because they are not the same measurement. Tread run is measured nosing to nosing, so it is the horizontal spacing that repeats. The tread board is wider than that by the nosing projection, the lip that overhangs the riser below it. A 10.5 inch run with a 1 inch nosing wants an 11.5 inch board, and using the board width as the run inflates the total run by an inch per step.
The second pair that causes trouble is total run and stringer length. The total run is horizontal. The stringer is the diagonal, and it is always longer. Keep them in separate columns on the sheet.
Everything below uses one illustrative flight so the numbers can be followed all the way through: a total rise of 109.5 inches, a 10.5 inch tread run, a 36 inch stair width and a 1 inch finished tread. Those are figures chosen to make the arithmetic legible, not recommendations.
Before you start: what to gather and what to settle
None of the arithmetic works without these, so collect them first. Budget about half an hour of measuring and an hour of calculation for a straight flight, and considerably more if the stair turns, if the floor is out of level, or if the opening above it is already framed.
- A long tape, a pencil, a straightedge, graph paper, a calculator, and a 4 foot level. A laser measure is faster on tall rises but the level is what tells you the two floors are parallel.
- The finished floor levels at both ends, including any covering that is not down yet. Write down the thickness of anything still to come.
- The framed opening above the stair, if it exists, with the position of the header and the total thickness of the upper floor assembly from finished surface to ceiling underside.
- The horizontal space available for the run, measured from the wall or the face where the bottom riser will land out to whatever stops it.
- The width you intend the stair to be, and whether it is open on one side, both, or neither.
- The finished tread thickness and the nosing projection you intend to use, because both feed the stringer layout.
- The maximum riser, minimum tread depth, headroom, nosing and handrail requirements adopted where you build. This is the item people skip and it is the item that decides whether the stair passes.
Difficulty is moderate on the arithmetic and unforgiving on the tolerance. A stair is one of the few pieces of construction where being an eighth of an inch out on one step is a defect rather than a detail, because people walk it in the dark on the strength of a rhythm their feet learned on the second step.
Step 1: Measure the total rise finished floor to finished floor
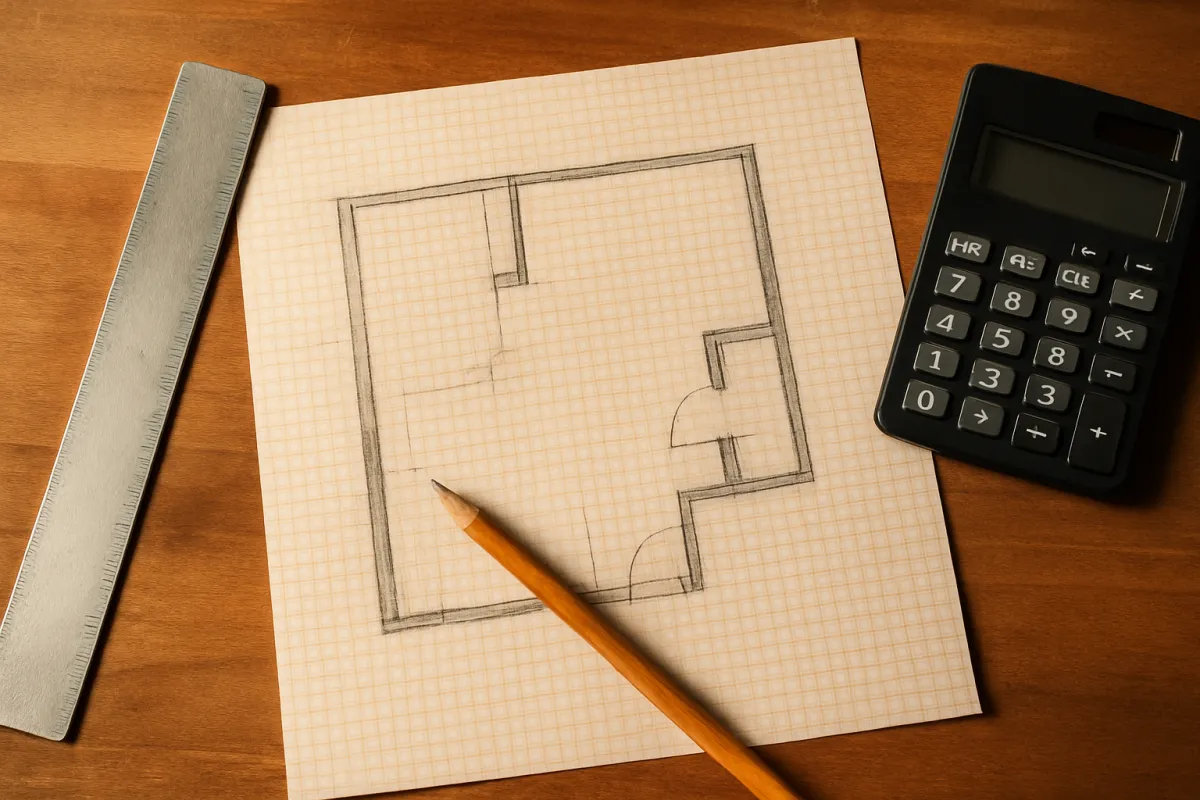
Hook the tape on the finished lower floor and read it at the finished upper floor, in one continuous vertical measurement taken where the stair will actually stand. Do not add two partial measurements, do not measure at a different point in the room, and do not measure to the subfloor.
That last instruction is the whole step. If the upper floor is bare subfloor and three quarter inch material is going down after the stair, the true total rise is three quarters of an inch more than the tape reads. If the lower floor is a slab that will receive tile and thinset, the true total rise is less than the tape reads by that thickness. Write both finishes down as separate numbers on the sheet so they cannot be forgotten.
The illustrative flight measures 108.75 inches to the upper subfloor, and the upper floor is receiving a 0.75 inch finish. The total rise is therefore 109.5 inches, and 109.5 is the number every later step divides.
Watch out for a floor that is not level. Measure the rise at both sides of the stair width. If the two readings differ, you have a decision to make, and it is not to split the difference: pick which surface the stair will be square to, shim the other end, and record which one you chose, because the stringer layout has to reference something fixed.
Watch out also for a rise taken over a joist rather than between them, and for carpet, which compresses and is measured to the top of the pad and backing rather than to the tip of the pile.
Step 2: Divide the total rise into a whole number of risers
Pick a target riser height, divide the total rise by it, and look at the decimal. The target is a comfort choice, not a rule: a shallower target makes an easier stair that eats more floor, and a taller target makes a steeper stair that eats less. Around 7 inches is the value most people reach for on an interior stair, and 109.5 divided by 7 is 15.64.
You cannot build 15.64 risers, so the real question is whether to round down to 15 or up to 16. Rounding down gives a taller riser and a shorter stair. Rounding up gives a shallower riser and a longer stair. On the illustrative flight, 15 risers is 7.3 inches each and 16 risers is 6.84375 inches each, and the total run differs by one whole tread.
Two things settle the choice. The first is the maximum riser height allowed where you build, which is a code value: whichever option exceeds it is not an option at all. The second is the horizontal space you actually have, since every extra riser adds a tread to the run. When both permit either answer, the rules of thumb in Step 6 are the tiebreaker.
Watch out for rounding to a riser you like rather than to a whole number. The riser height is an output of this division, never an input to it. Choosing 7 inches and building 15 risers plus a short one at the end is how a stair becomes a trip hazard.
Riser height and total run for a 109.5 inch total rise
The riser is the total rise divided by the riser count; the run is that count minus one, times a 10.5 inch tread.
Each bar width is that row's riser height divided by the tallest, 7.821 inches, times 100: 100, 93.3, 87.5, 82.4 and 77.8 percent. Adding one riser to this flight lowers every step by roughly four tenths of an inch and lengthens the stair by one full tread, which is 10.5 inches of floor you have to find. That trade is the entire design decision, and the maximum riser adopted where you build sets the ceiling on how far up this list you may go.
Step 3: Divide back to get the exact riser height
With the riser count fixed, divide the total rise by it and keep every decimal place the calculator gives you. On the illustrative flight, 109.5 divided by 16 is 6.84375 inches. That is 6 and 27 thirty seconds of an inch, a fraction that exists on a good ruler and on no tape measure anyone carries.
Do not round it. Rounding to 6.8125, the nearest sixteenth, costs 0.03125 inches per step, and 16 steps of that is exactly half an inch of error that has to go somewhere. It goes into the last riser you lay out, which ends up half an inch different from all the others, and half an inch is enough for a foot to catch.
The number to check first is the multiplication back: 6.84375 times 16 is 109.5, which matches the total rise exactly. Any riser height that does not reproduce the total rise when multiplied by the riser count is wrong, and this one line catches most arithmetic slips before they reach the wood.
Two habits make the decimal workable in the shop. The first is to lay out from a cumulative running total rather than by repeated stepping off, so the marks read 6.844, 13.688, 20.531 and so on up to 109.5, and no error compounds. The second is a story pole: mark the true total rise on a straight stick, set a pair of dividers to roughly the riser, and walk them from end to end, adjusting until the last footfall lands exactly on the top mark. The dividers then carry the exact riser without anybody having to read it.
Watch out for a calculator that has already rounded for you. Work in decimals throughout and convert to fractions only at the last moment.
Step 4: Count the treads as risers minus one
On a stair that lands flush with the upper floor, the number of treads is the number of risers minus one, because the upper floor itself is the last walking surface. Sixteen risers means fifteen treads. That subtraction is small, obvious, and skipped constantly, and it moves the total run by one whole tread depth.
The reason it is easy to lose is the same reason the plus one is easy to lose when counting fence posts or deck joists. Risers and treads alternate, and the sequence starts and ends with a riser: riser, tread, riser, tread, and finally riser, arriving at the floor. Count the letters in that pattern and there is always one more riser than tread. Our fence materials manual works the same alternation in the opposite direction, where the posts are the ones that come out one ahead.
The exception is worth knowing because it is common outdoors. If the stair lands on a platform, a deck surface or a landing whose top is one riser below the arrival level, then the top of the stair carries a real tread and the counts are equal. A deck stair that arrives at a landing pad rather than at the deck surface is the usual case.
Watch out for the mid flight landing, which is a third arrangement again. A landing does not add a riser and it does not remove one, it replaces one tread with a platform, so the tread count drops by one for each landing and the landing depth enters the run instead. Step 8 works that case.
Step 5: Choose the tread run and compute the total run
The tread run is the horizontal distance from one nosing to the next, and unlike the riser it is a choice rather than an output. Deeper treads make an easier stair and a longer one. Shallower treads make a steeper stair and a shorter one. The floor between the two positions is the constraint, and the minimum tread depth allowed where you build is the floor under that.
Once you pick it, the total run is one multiplication: treads times tread run. Fifteen treads at 10.5 inches is 157.5 inches, or 13 feet 1.5 inches. Measure that from the face of the bottom riser to the face of the top riser, which on a flush landing sits at the edge of the upper floor framing.
Now check it against the space. If 157.5 inches does not fit between the bottom riser position and whatever stops the stair, you have four moves and only four: deepen nothing and add risers to shorten nothing, which does not help; reduce the tread run, which steepens the stair and runs into the code minimum; add a landing and turn the stair, which trades length for width; or move the opening. Discovering that at the layout stage costs a pencil. Discovering it after the header is framed costs a weekend.
Watch out for measuring the run to the wrong end. The bottom riser face is not the same as the bottom of the stringer, and the top riser face is not the same as the outside of the header. Both differences are the thickness of a board, and both compound with the finish.
Step 6: Test the numbers against the stair rules of thumb
Three relationships have been used by stair builders for a very long time as comfort checks, and all three are heuristics rather than requirements. They are useful precisely at the moment you are choosing between two legal riser counts.
The first is that the rise plus the run should land near 17 to 18 inches. The second is that the rise times the run should land near 71 to 75. The third, a stride length rule, is that twice the rise plus the run should land near 24 to 25 inches, on the reasoning that a person climbing lifts twice as much as they reach forward.
Run the illustrative flight through all three. A 6.84375 inch riser with a 10.5 inch run gives 17.34, 71.86 and 24.19. All three land inside their bands, which is why 16 risers is the better answer here even though 15 would have been shorter. Test the alternative and the picture changes: a 7.3 inch riser with the same 10.5 inch run gives 17.80, 76.65 and 25.10, so the sum still passes while the product and the stride rule both fall outside. That is the heuristics doing exactly the job they exist for.
Watch out for treating a failed check as a failed stair. These rules do not appear in any code book, they cannot make a stair legal, and they cannot make a legal stair illegal. On a tight retrofit where the total rise and the available run are both fixed, it is entirely possible that no combination satisfies all three, and the honest response is to get as close as the constraints allow and then confirm the actual limits with the building department.
Step 7: Check headroom and size the floor opening
Headroom is measured vertically, from a line drawn through the tread nosings up to the nearest surface overhead, and it is measured everywhere along the flight rather than at one convenient point. The required amount is a code value that varies by adopted code and occupancy, so take it from your building department and not from an article.
The method is fixed even though the number is not. The floor opening has to extend far enough back from the top of the stair that by the time a walker passes under the header they have already descended below it by the required headroom plus the whole thickness of the upper floor assembly. Written as arithmetic, the opening length measured horizontally from the top of the stair is the required headroom plus the floor assembly thickness, divided by the riser height, multiplied by the tread run.
Work it with illustrative figures so the shape of the answer is visible. Take a floor assembly of 12.75 inches, being an 11.25 inch joist, a 0.75 inch subfloor and a 0.75 inch finish, and suppose your confirmed headroom requirement were 80 inches. Then 80 plus 12.75 is 92.75, divided by 6.84375 is 13.55 risers of drop, and 13.55 times 10.5 is 142.3 inches, or about 11 feet 10 inches of opening measured back from the top of the stair. On a 157.5 inch total run that is 90 percent of the stair sitting under open well.
Watch out for the direction of every term. A shallower riser makes the stair descend more slowly and therefore needs a longer opening, not a shorter one. A thicker floor assembly needs a longer opening. A deeper tread needs a longer opening. Headroom is the constraint that quietly kills more retrofit stairs than any other, and it is cheapest to discover before the header exists.
Step 8: Confirm the landings at both ends
A stair needs clear floor at both ends, and the space is not optional. Landing dimensions, the permitted drop from a door threshold, and whether a door may swing over a landing are all code matters, so the requirement comes from the building department. The usual shape of the rule is that a landing must be at least as wide as the stair and at least as deep as the stair is wide, which on a 36 inch stair means a 36 inch square of clear floor at each end.
Add that to the footprint before you commit. The illustrative flight has a 157.5 inch run, and with 36 inches of clear floor at the bottom and 36 inches of arrival space at the top, the stair project claims 229.5 inches, or just over 19 feet, of floor length. Planning to the run alone understates the space by nearly a third.
A mid flight landing changes the arithmetic in a specific way. It does not change the riser count and it does not change the total rise, it replaces one tread with a platform. Put a landing after riser 8 on the illustrative flight and you get 7 treads below it, a landing, and 7 treads above it, so the run becomes 73.5 plus the landing depth plus 73.5. At a 36 inch landing that is 183 inches, which is longer than the straight flight, and the reason to do it anyway is usually that the landing lets the stair turn.
Watch out for the bottom landing that is really a doorway. A door that opens into the space in front of a stair is a separate requirement and a genuinely dangerous detail, and it belongs to the plan reviewer rather than to the tape.
Where the lumber goes on the illustrative 36 inch wide flight
Shares of 185 linear feet: stringers, tread stock, riser stock, handrail, and one skirt board.
Shares are each item's linear feet over the 185 foot total: three stringers at 18 feet is 54 feet or 29.2 percent, fifteen treads at 3 feet is 45 feet or 24.3 percent, sixteen riser boards at 3 feet is 48 feet or 26.0 percent, handrail with extensions at 20 feet is 10.8 percent, and one 18 foot skirt board is 9.7 percent. Rounded to a tenth they sum to 100. Note that the riser boards outnumber the treads by one, exactly as Step 4 predicted, which is a useful check that the take-off and the layout agree.
Step 9: Lay out the stringer with a framing square
A framing square carries two arms, a wide blade and a narrower tongue, and stair layout uses both at once. Clamp a pair of stair gauges to the square, one on the tongue at the riser height and one on the blade at the tread run, and the square now holds the shape of one step. Lay it on the stringer stock with both gauges against the edge, trace the two arms, slide it along until the tongue meets the end of the last run line, and trace again.
Do that for as many triangles as you have treads, then finish the ends. The top of the stringer gets a plumb cut, vertical when the stringer is in place, where it meets the header. The bottom gets a level cut, horizontal in place, where it meets the floor.
The problem with stepping off is that every trace inherits the error of the trace before it. A pencil line has real width, and being a thirty second of an inch out on each of 15 steps accumulates to nearly half an inch by the top. Lay out from a cumulative baseline instead: measure the running totals along the edge, 6.844, 13.688, 20.531 and so on to 109.5, and set the square to each mark rather than to the previous triangle. The error then stays at one line width no matter how long the flight.
Watch out for the fact that you cannot set a stair gauge to 6.84375 with any confidence. Set it as close as the square’s graduations allow, then correct each triangle against the cumulative marks, which are the authority. On a long flight, cutting one stringer, standing it in place and checking every riser before cutting the other two is time well spent.
Step 10: Drop the stringer by the tread thickness
This is the adjustment that catches almost everybody once. Cut a stringer with equal triangles and stand it on the floor, and the first tread seat sits exactly one riser above the floor. Lay a one inch tread on that seat and the top of it is one riser plus one inch above the floor, so the first step a person takes is an inch taller than the riser you calculated.
The same error appears at the other end with the opposite sign. The last tread seat is at 15 risers, its finished surface is 15 risers plus the tread thickness, and the step from there up to the upper floor is one riser minus the tread thickness. So an unadjusted stringer gives a bottom riser an inch too tall and a top riser an inch too short, a two inch spread across a flight where the permitted variation is a small fraction of that.
The fix is one cut. Trim the bottom level cut by the finished tread thickness, which shifts every seat down by that amount. The first tread surface now lands at exactly one riser, every middle step is one riser by construction, and the last step from tread 15 up to the floor is 16 risers minus 15 risers, which is one riser. The whole flight comes out uniform.
There is a second term when the lower floor is not finished yet. If the stringer will stand on a slab that is going to receive a 0.75 inch tile floor, that tile raises the bottom back up, so the drop is the tread thickness minus the finish thickness, or 1 minus 0.75, which is 0.25 inches. Get that term wrong and you have simply moved the error rather than removed it.
Watch out for the open riser stair with no tread nosing sitting on the seat in the usual way, and for a bottom tread that is a different thickness from the rest. In both cases the drop is whatever makes the first finished walking surface land exactly one riser above the finished floor, which is the definition the rule is a shortcut for.
Step 11: Check the throat and pick the stringer stock
Notching a stringer removes material, and what is left behind the notches is called the throat. It is measured perpendicular to the edges of the board, from the inside corner of a notch to the back edge, and it is what actually carries the stair. Codes commonly set a minimum throat, and that value is one to confirm rather than to assume.
The geometry gives it directly. The notch cuts into the board by the perpendicular distance from the corner of the step triangle to its hypotenuse, which is the riser times the run divided by the square root of riser squared plus run squared. On the illustrative step that is 6.84375 times 10.5, or 71.86, divided by the square root of 46.84 plus 110.25, which is 12.533, giving 5.733 inches of notch depth. A 2x12 measures about 11.25 inches, so the throat left is 11.25 minus 5.733, or about 5.5 inches.
Two things follow. First, steeper stairs eat more board: raise the riser to 7.3 and the notch depth goes to 5.926 inches, leaving 5.32 inches of throat on the same 2x12. Second, a narrower board runs out of throat fast, which is why stringers are cut from deep stock rather than from whatever is on the rack.
Length comes from the same triangle. One step’s diagonal is 12.533 inches, and 15 of them is 188 inches, or 15 feet 8 inches of notched length. Add for the plumb cut, the level cut and one recut, and an 18 foot board is the order. Our board feet manual covers the volume arithmetic if the stringer stock is being bought rough rather than dimensioned.
Watch out for the whole triangle shortcut. The diagonal of the total rise and total run, the square root of 109.5 squared plus 157.5 squared, is 191.8 inches, which is close enough to buy the same board but is not the notched length, because the flush top landing means the notches cover 15 runs and 15 rises while the flight climbs 16.
A worked example: one flight from tape to stringer
Pull the whole chain through one stair. The flight runs from a finished lower floor to an upper floor that currently reads 108.75 inches at the subfloor and will receive a 0.75 inch finish, so the total rise is 109.5 inches. The stair is 36 inches wide, the treads are 1 inch thick, and there is 15 feet of clear floor for the run.
Risers. A 7 inch target gives 109.5 divided by 7, or 15.64. Round up to 16 risers. The exact riser is 109.5 divided by 16, which is 6.84375 inches, and 6.84375 times 16 is 109.5, so the division checks.
Treads and run. Sixteen risers landing flush gives 15 treads. At a 10.5 inch run the total run is 157.5 inches, or 13 feet 1.5 inches, which fits inside the 15 feet available with 22.5 inches to spare.
Comfort checks. Rise plus run is 17.34, rise times run is 71.86, and twice the rise plus the run is 24.19. All three land inside their bands. The stair climbs at 33.1 degrees.
Headroom. With a 12.75 inch floor assembly and an illustrative 80 inch requirement, the opening has to run 92.75 divided by 6.84375, or 13.55 risers, times 10.5, which is 142.3 inches back from the top of the stair. That is 14 treads clear of the header on a 15 tread stair.
Stringer. One step’s diagonal is the square root of 46.84 plus 110.25, or 12.533 inches, so 15 steps is 188 inches of notched length and the order is 18 foot stock, three of them for a 36 inch width. Notch depth is 5.733 inches and the throat left in a 2x12 is 5.5 inches. Drop the bottom level cut by the full 1 inch tread thickness, since the lower floor is already finished.
Take-off. Three stringers at 18 feet is 54 linear feet, 15 treads at 3 feet is 45, 16 riser boards at 3 feet is 48, handrail with extensions is about 20, and one skirt board is 18, for roughly 185 linear feet of stock plus the fasteners and the hangers the connection detail calls for.

A second example: when the rise refuses to divide evenly
The first example was chosen to be tidy. Most stairs are not, so run one that fights back. A basement flight measures 116.25 inches from the finished lower slab to the finished upper floor, and there are 13 feet 6 inches, or 162 inches, of clear floor for the run.
Start the same way. At a 7 inch target, 116.25 divided by 7 is 16.61, so the candidates are 16 risers or 17. Seventeen risers gives 116.25 divided by 17, which is 6.8382 inches, and 16 treads at 10.5 inches is a 168 inch run. That does not fit the 162 inches available, so it is out on space alone.
Sixteen risers gives 116.25 divided by 16, which is 7.265625 inches, and 15 treads at 10.5 inches is 157.5 inches, which fits with 4.5 inches to spare. So the geometry chooses 16, and the first thing to do is confirm that 7.265625 is inside the maximum riser adopted where you build, because on a steeper stair that check is no longer a formality.
Now the ugly decimal. 7.265625 inches is 7 and 17 sixty fourths, which sits between a quarter and a five sixteenth and appears on no tape. Round it to 7.25 and you lose a sixty fourth per step, which over 16 steps is a quarter of an inch dumped on the last riser. Round it to 7.3125, the next sixteenth up, and you gain three sixty fourths per step, or three quarters of an inch of overshoot. Neither is acceptable, so the decimal stays and the layout is done from cumulative marks or from dividers walked down a story pole until the sixteenth footfall lands exactly on 116.25.
The comfort checks are worth running even though the answer is forced. Rise plus run is 17.77, twice the rise plus the run is 25.03, and rise times run is 76.29, so the sum passes while the other two sit just outside their bands. That is the honest signature of a stair built to a fixed rise in a constrained run, and the only lever left is a deeper tread, which the 4.5 inches of spare floor will not fund across 15 treads. Deepening the tread to 10.8 inches uses all 162 inches and moves the checks to 18.07, 25.33 and 78.47, which is worse on two of three. The heuristics disagree with each other here, and when they do, the code minimums are what actually decide.
Nosing, tread boards, and the difference between run and tread width
The nosing is the part of the tread that overhangs the riser below it, and it exists because a foot descending lands on the front of the tread. Extending the tread forward gives the foot more to land on without lengthening the stair, since the run is measured nosing to nosing and the overhang repeats.
That repetition is the point people miss. Because every tread overhangs the one below by the same amount, the nosing adds nothing to the total run. It adds to the tread board width. A 10.5 inch run with a 1 inch nosing wants an 11.5 inch board on a closed riser stair, and ordering 10.5 inch stock leaves every tread short at the front.
Nosing projection is usually bounded on both sides by code, with a minimum so there is something to land on and a maximum so nothing catches a toe on the way up. Both numbers, and the question of whether a nosing is required at all on stairs whose treads are already deep, come from your adopted code.
Open riser stairs change the picture again. With no riser board there is nothing to overhang, so the nosing is often smaller or absent, and the open space between treads is itself limited by code because of the risk to small children. Treat the tread depth on an open riser stair as measured the same way and the opening as a separate check.
Watch out for the bottom tread, which on many stairs is deeper than the rest and sometimes rounded on the open side. It is a real tread for counting purposes and a special piece for ordering purposes, so list it separately in the take-off.
Where the code numbers come from and why this manual will not print them
Every dimension in a stair that matters for safety is set by a code, and the code that applies to your stair is the one your jurisdiction has adopted, amended and is enforcing this year. Maximum riser height, minimum tread depth, minimum headroom, the permitted variation between the tallest and shortest riser in a flight, nosing projection limits, minimum stair width, handrail height, handrail graspability, handrail extensions, guard height and guard opening limits are all in that list, and every one of them differs by code edition, by occupancy, and sometimes by whether the stair is inside a single dwelling or serves the public.
Printing a number here would be worse than useless. It would be quoted back at an inspector, and the inspector applies the adopted document rather than an article. What can be said honestly is the direction of each constraint, which is enough to design with.
Riser height has a maximum, so a rise that will not divide into risers under that maximum needs more risers. Tread depth has a minimum, so a run that will not accommodate the required tread across the tread count needs a longer stair, a landing, or a turn. Headroom has a minimum, so a thicker floor assembly or a shallower riser needs a longer opening. Riser and tread uniformity has a maximum permitted variation, so the arithmetic has to be exact rather than close. Handrail height is measured vertically from the nosing line and is bounded top and bottom, so it follows the stair’s slope rather than the wall’s studs.
Get the actual numbers from the building department that will inspect the work, before layout rather than after, and ask which code edition and which local amendments apply. A stair is one of the details an inspector looks at first, and it is also the detail that most reliably requires a permit. That conversation is free and it is the cheapest part of the project.
Uniformity: why every riser has to match
Walking a stair is not a series of decisions, it is a rhythm. A person takes the second step and their body commits to a stride length for the rest of the flight, which is why the odd step out is dangerous in a way that a uniformly steep stair is not. Codes reflect that by limiting how much the tallest and shortest riser in a single flight may differ, and the permitted number is small.
The arithmetic in this manual is built to protect that tolerance. Dividing the total rise by a whole number of risers guarantees the middle steps are identical by construction. Dropping the stringer by the tread thickness guarantees the first and last steps match the middle ones. Laying out from cumulative marks rather than stepping off keeps the accumulated error at one pencil line rather than fifteen. Each of those exists because a stair has no forgiving direction.
The measurement errors that break uniformity all share a shape: they land on one step rather than spreading across the flight. Missing a floor finish puts the whole thickness on the top or bottom riser. Skipping the stringer drop puts the tread thickness on both ends with opposite signs. Rounding the riser puts the accumulated rounding on whichever end you laid out last. A floor that is out of level puts the difference on one side of one step.
The check is simple and it is worth doing before the treads go down. Stand the cut stringer in place, measure every riser from the surface it will actually sit on, and write the numbers in a column. If the column is not flat, the stair is not finished being laid out.
Exterior and deck stairs: what changes
The arithmetic is identical outdoors and three of the inputs move. Exterior stairs are commonly built shallower and deeper than interior ones, meaning a smaller riser and a larger tread, partly because the run is cheaper outside and partly because the surface may be wet. Open risers are ordinary on a deck, so the riser boards drop out of the take-off and the opening between treads becomes a check instead.
The total rise is where deck stairs get interesting, because the bottom of the stair usually lands on something that does not exist yet. If the stair will stand on a concrete pad, the pad’s finished surface is the lower floor, so the total rise runs from the top of that pad to the top of the deck surface. Pour the pad after cutting the stringer and any difference between the planned and actual pad height goes straight into the bottom riser. Our concrete slab manual works the pad volume, and our bags of concrete manual turns it into an order.
The top of a deck stair also frequently lands on a landing rather than flush with the deck, which is the case where treads equal risers rather than risers minus one. Decide which arrangement the deck uses before computing the run.
Tread thickness outdoors is often the same board used for the deck surface, and it usually needs closer stringer spacing than the deck field does, because a stair concentrates load in a smaller area. That is a structural question, not an arithmetic one, and it belongs with the span discussion our deck manual leaves to the building department.
Watch out for frost. The pad or footing under an exterior stair is subject to the same frost depth requirement as the rest of the deck substructure, and a stair that heaves has an uneven bottom riser every winter.
Winders, landings, and stairs that turn
A stair turns for one of two reasons: there is not enough straight floor, or the arrival point is not in line with the departure point. There are two ways to do it and they behave very differently in the arithmetic.
A landing is the simple one. It is a flat platform partway up, it replaces one tread, and it lets the flight change direction by any angle without any of the geometry changing. The riser count is untouched, the riser height is untouched, and the run splits into two pieces with the landing depth between them. A quarter turn landing costs floor in one direction and buys it back in the other, which is exactly what a tight footprint needs.
Winders are the complicated one. A winder is a tread that is wider at one end than the other, so the stair turns while still climbing. The arithmetic changes because tread depth is no longer a single number: it is measured along a walk line at a set distance from the inside edge, and there are usually minimum depths specified both at the walk line and at the narrow end. Those requirements, and whether winders are permitted at all in your situation, are code matters.
The estimating consequence is that a winder flight cannot be laid out with one framing square setting. Each winder tread has its own geometry, the stringers are not identical, and the layout is done from a full size plan rather than from a formula. If the space is tight enough to need winders, it is tight enough to justify drawing the plan at full scale on the subfloor before cutting anything.
Watch out for the spiral, which is a different animal again with its own set of rules, its own tread depth definition, and its own headroom problem at the point where the stair passes under itself.
Counting the stair materials from the same numbers
Once the layout is settled, the take-off falls straight out of the counts, and every line uses a number already computed. Keep the units separate the way our materials estimating manual does, so linear feet, pieces and square feet never get added together by accident.
Stringers are counted by width. A 36 inch stair commonly takes three, with the spacing between them governed by the tread material and its span, which is a structural question. Each one is the notched length plus the end cuts, so three at 18 feet is 54 linear feet on the illustrative flight.
Treads are counted by the tread count, at the stair width plus a little for trimming. Fifteen treads at 3 feet is 45 linear feet of tread stock. Riser boards are counted by the riser count, so 16 at 3 feet is 48 linear feet, and the fact that the risers outnumber the treads by one is the same plus one that Step 4 subtracted, arriving from the other side.
Skirt boards run the diagonal on any closed side, so one is the stringer length again. Handrail runs the diagonal on any side that needs it, plus whatever extensions the code requires at top and bottom, which is why the illustrative 20 feet is longer than the 16 foot slope. Fasteners are counted by the connection: hangers or a ledger at the top, an anchor at the bottom, and a screw schedule for the treads and risers that follows whatever the connectors specify.
Watch out for finish materials, which are counted in square feet rather than linear feet. Fifteen treads 11.5 inches wide by 36 inches is about 43 square feet of surface, and stain or finish coverage works off that, not off the lumber count. Our coverage reference collects the conversions, and if the stair is being tiled rather than boarded, our tile quantity manual handles the piece count and the cutting allowance on the risers and treads.
Common stair layout mistakes
Six errors account for most of the stairs that have to be cut twice, and every one of them happens on paper.
- Measuring to the subfloor. The rise is finished floor to finished floor. Any covering not yet installed at either end has to be added or subtracted before dividing, and the thickness missed does not spread across the flight, it lands on one step.
- Rounding the riser height. The exact riser is the total rise divided by the riser count, decimals included. Rounding to the nearest sixteenth costs a fraction per step that accumulates onto whichever riser you lay out last.
- Counting treads equal to risers. On a flush landing there is always one fewer tread than riser. Getting it wrong moves the total run by one whole tread, which is 10.5 inches of floor that either does not exist or is left over.
- Skipping the stringer drop. An uncut stringer makes the bottom riser one tread thickness too tall and the top riser the same amount too short. Trim the bottom level cut by the finished tread thickness, less any floor finish still to come at the bottom.
- Stepping the square off instead of marking cumulatively. Fifteen traced triangles inherit fifteen pencil lines of error. Mark the running totals along the edge and set the square to those instead.
- Checking headroom after framing the opening. The opening length is the headroom plus the floor thickness, over the riser, times the run, and on a normal flight it consumes most of the stair. Discovering that after the header is in is the expensive order of operations.
Troubleshooting the awkward stairs
What if the two floors are not parallel? Measure the rise at both sides of the stair width and at the top and bottom of the run. Pick one surface as the reference, usually the upper floor since it is the arrival, and shim or scribe the other end. Never average the readings, because the difference does not disappear, it just moves somewhere you did not choose.
What if the run does not fit? Work the four levers in order of cost. Add risers, which shortens nothing but confirms the riser is legal. Reduce the tread run down to but not past the code minimum. Add a landing and turn the stair. Move the floor opening. Anything else, including a hidden short step at the bottom, is a defect rather than a solution.
What if you are replacing treads on an existing stair? Measure every existing riser before ordering anything. Old stairs frequently have a bottom or top riser that is already out of tolerance, and adding a thicker tread than the original changes the first and last risers again. The replacement thickness has to match the original, or the whole flight has to be re-shimmed.
What if the stair is open on one side? The stringer on that side is a finished piece rather than a notched one on many stairs, which changes the material and sometimes the cut. The guard and its posts also attach to the framing rather than to the treads, which usually means blocking added while the stair is open.
What if the tape reading falls between two riser counts almost exactly? Let the run decide. Compute the total run for both, check both against the available floor and against the maximum riser, and if both survive, take the one whose comfort checks land better. The chart above shows how far apart the two answers usually are.
What if the stair serves a garage, a deck, or anything other than a house interior? The occupancy can change the requirements, sometimes substantially. Ask specifically about the use rather than about stairs in general.
Your stair layout checklist
Work through this in order and the stringer that comes off the saw is the stair you calculated.
- Measured the total rise in one continuous vertical measurement, finished floor to finished floor, at the position the stair will occupy.
- Wrote down separately the thickness of any floor finish not yet installed at either end, and adjusted the total rise for it.
- Checked the rise at both sides of the stair width and chose a reference surface if they differ.
- Divided the total rise by a target riser and looked at both whole numbers that bracket the result.
- Confirmed the resulting riser height against the maximum riser adopted where you build.
- Divided the total rise back by the chosen riser count and kept every decimal place.
- Multiplied the exact riser by the riser count and confirmed it reproduces the total rise.
- Counted the treads as risers minus one for a flush landing, or equal to risers for a stair landing on a platform.
- Chose the tread run, confirmed it against the minimum tread depth adopted where you build, and multiplied to get the total run.
- Checked the total run against the floor actually available, measured face of bottom riser to face of top riser.
- Ran the three comfort checks and used them only to choose between options that already pass code.
- Computed the floor opening length as headroom plus floor assembly thickness, over the riser, times the run, using the headroom figure confirmed with the building department.
- Confirmed the landing space at both ends and the door situation at the bottom.
- Computed the notched stringer length as treads times the step diagonal, and added for the end cuts.
- Computed the notch depth and confirmed the remaining throat against the requirement.
- Laid the stringer out from cumulative marks rather than by stepping off, and cut one stringer as a test piece.
- Dropped the bottom level cut by the finished tread thickness, less any floor finish still to be installed at the bottom.
- Stood the cut stringer in place and measured every riser before cutting the other stringers.
- Confirmed handrail, guard, nosing, uniformity tolerance and permit requirements with the local building department.
Every line there is a number you can defend in front of an inspector, which is the point. The companion below runs the same chain on your own rise so the hand arithmetic has something to argue with, and the material coverage estimator handles the finish quantities once the stair itself is settled.
The bottom line
Stair rise and run is two divisions and one subtraction, done in a fixed order and with the decimals kept. Measure the total rise finished floor to finished floor, divide by a target riser to see how many steps you are near, round to a whole number of risers because a stair cannot have a fractional one, then divide the total rise back by that whole number to get the riser you actually build. Treads are risers minus one on a flush landing, the total run is treads times the tread depth you choose, and the three comfort rules of rise plus run, rise times run, and twice the rise plus run are the tiebreaker between two riser counts rather than the decision itself. Then the stringer: mark it from cumulative totals rather than stepping off, drop the bottom by the finished tread thickness so the first and last risers match the middle ones, and check the throat before you buy the board. What none of that arithmetic can supply is the maximum riser, the minimum tread, the headroom, the nosing limits, the uniformity tolerance or the handrail dimensions, because those belong to the code adopted where you build and to the inspector who applies it. Run your own rise through the material coverage estimator, read our square footage manual if the finish quantities come next, and settle the code numbers with the building department before the first pencil line goes on a stringer.
Read this manual as layout arithmetic and shop method, not as a stair design, a structural calculation, or a statement of what is permitted where you build. The 109.5 inch rise, the 116.25 inch rise, the 10.5 inch tread, the 1 inch tread thickness, the 36 inch width, the 12.75 inch floor assembly, the 80 inch headroom figure and every take-off quantity above are illustrative values chosen so the worked numbers follow cleanly, and all of them move with your building. Maximum riser height, minimum tread depth, permitted riser and tread variation, headroom, nosing projection, stair width, landing dimensions, open riser opening limits, winder geometry, handrail height and graspability, handrail extensions, guard height and guard openings are set by the code adopted in your jurisdiction and by the occupancy of the space, and nothing here substitutes for the document your inspector applies. Stringer size, throat, spacing and the connections at the top and bottom are structural, so confirm them with the building department or a qualified designer, secure a permit where one is required, and have the work inspected. Follow the manufacturer’s instruction for any engineered stringer, tread, connector or railing system where it differs from anything above.
Frequently asked questions
What is the formula for stair rise and run?
Rise and run are two divisions done in order. Measure the total rise from the finished lower floor to the finished upper floor, divide it by a target riser height to get a decimal, round that to a whole number of risers, then divide the total rise back by that whole number to get the exact riser. For an illustrative 109.5 inch total rise and a 7 inch target, 109.5 divided by 7 is 15.64, which rounds to 16 risers, and 109.5 divided by 16 is 6.84375 inches per riser. The run then comes from a tread depth you choose: 16 risers gives 15 treads on a flush landing, and 15 treads at 10.5 inches each is a 157.5 inch total run.
How do I measure the total rise of a staircase?
Measure from the finished surface of the lower floor to the finished surface of the upper floor, in one continuous vertical measurement, and take it where the stair will actually sit. The word finished is doing all the work: if the upper floor is still bare subfloor and a three quarter inch material is going down later, you have to add that thickness before you divide, and the same is true of any tile or underlayment still to come at the bottom. Measuring to the subfloor instead is the single most common stair layout error, because the missing thickness does not spread across the flight, it lands entirely on the top or bottom step. On an illustrative 16 riser stair, three quarters of an inch missed at the top leaves that one riser three quarters of an inch taller than the other fifteen.
How many treads are there compared to risers?
On a stair that lands flush with the upper floor, there is always one fewer tread than riser, because the upper floor itself serves as the last walking surface. Sixteen risers means fifteen treads, and that single subtraction sets the entire total run. The exception is a stair that lands on a separate platform or a deck surface set below the arrival level, where the top of the stair carries a real tread and the counts match. Decide which arrangement you are building before you compute the run, because getting it wrong changes the footprint by one full tread depth.
What is dropping the stringer and why does it matter?
Dropping the stringer means trimming the bottom of the cut stringer by the thickness of the finished tread so that the first and last risers come out the same height as all the others. Cut a stringer with equal triangles and set it straight on the floor, and the tread you lay on the first seat sits one tread thickness proud, making the bottom riser too tall by exactly that thickness and the top riser too short by the same amount. Removing the tread thickness from the bottom level cut shifts every seat down by that amount and the whole flight comes out uniform. If the lower floor is still going to receive a finish, drop by the tread thickness minus the finish thickness instead, because that finish will raise the bottom back up.
What are the stair rules of thumb for rise and run?
Three long standing relationships are used as comfort checks, not as code. The first is that rise plus run should land somewhere around 17 to 18 inches. The second is that rise times run should land somewhere around 71 to 75. The third, a stride length rule, is that twice the rise plus the run should land near 24 to 25 inches. An illustrative 6.84375 inch riser with a 10.5 inch run gives 17.34, 71.86 and 24.19, which sits comfortably inside all three. These are design heuristics that predate every code book and they are useful for choosing between two riser counts, but they carry no legal weight and they never override the maximum riser and minimum tread your jurisdiction adopts.
How much headroom does a staircase need and how do I check it?
The required headroom is a code value that varies by adopted code and occupancy, so the number has to come from your building department rather than from an article. The method does not vary. Headroom is measured vertically from a line drawn through the tread nosings up to the nearest thing overhead, and the length of floor opening you need above the stair works out as the required headroom plus the total thickness of the upper floor assembly, divided by the riser height, multiplied by the tread run. Using an illustrative 80 inch requirement with a 12.75 inch floor assembly, a 6.84375 inch riser and a 10.5 inch run, that is 92.75 divided by 6.84375, which is 13.55, times 10.5, or about 142 inches of opening measured back from the top of the stair. On a 157.5 inch stair that means almost the whole run has to sit under open well.
What if the total rise does not divide evenly into a nice riser height?
It almost never does, and the correct response is to keep the ugly decimal rather than to round it. An illustrative 116.25 inch rise over 16 risers is 7.265625 inches, which is 7 and 17 sixty fourths, a number no tape measure shows. Rounding that to 7.25 loses a sixty fourth of an inch per step, and over 16 steps that accumulates into a quarter inch of error that lands on whichever end you laid out last. The trade answer is to lay out from a cumulative running total rather than by stepping off, or to walk a pair of dividers down a story pole marked with the true total rise until the last mark falls exactly on the line.
How long a board do I need for a stair stringer?
Compute the diagonal of one step and multiply by the number of treads, then add allowance for the end cuts. One step whose rise is 6.84375 inches and whose run is 10.5 inches has a diagonal of the square root of 46.84 plus 110.25, which is 12.53 inches, and 15 of those is about 188 inches, or 15 feet 8 inches of notched length. Add a foot or two for the plumb cut at the top, the level cut at the bottom and the inevitable recut, and an 18 foot board is the sensible order for that flight. Check the throat as well, meaning the material left behind the notches, because a 2x12 with a 5.73 inch notch depth keeps about 5.5 inches of throat and a shallower board would keep dangerously little.