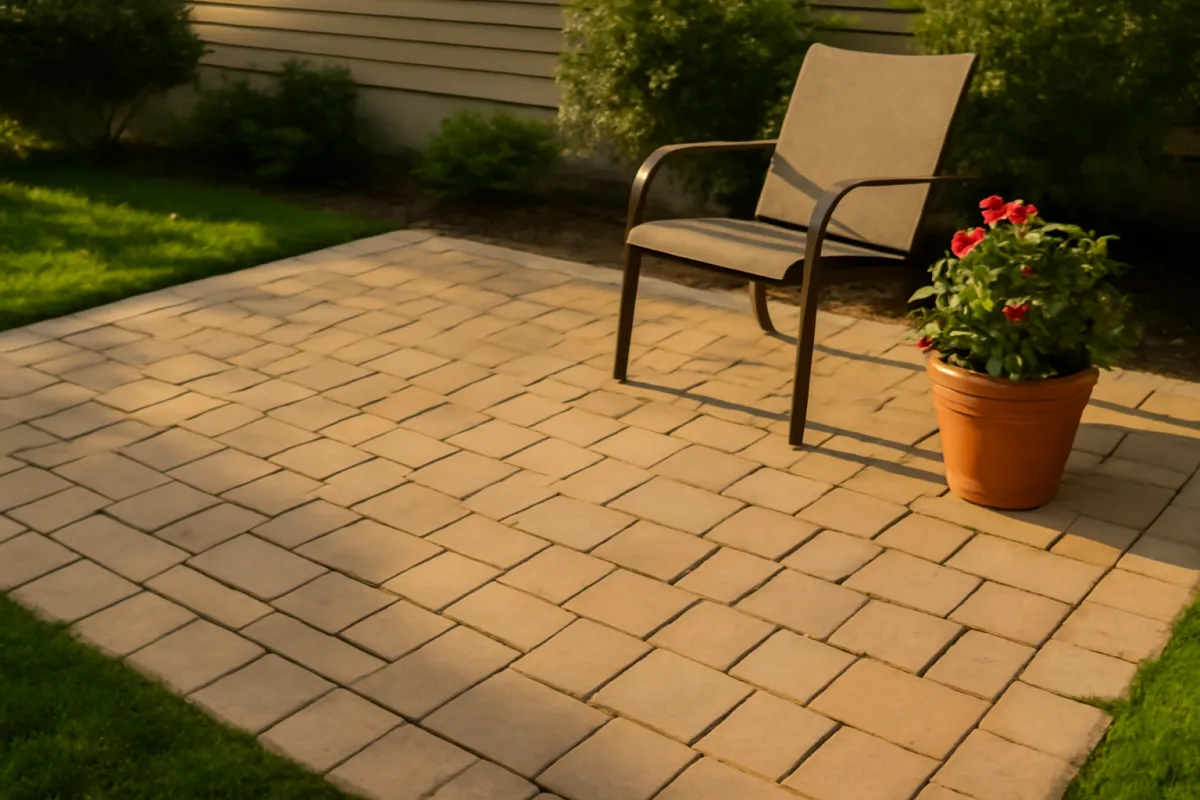
What's on this page
- What paver sealer does
- Should you seal pavers? Weighing the case
- Film-forming versus penetrating paver sealers
- Matte, satin, wet-look, and gloss finishes
- Water-based versus solvent-based sealers
- Joint-stabilizing sealers and the sand question
- Paver sealer types compared side by side
- How much paver sealer you need
- Why paver sealer coverage varies
- How to apply paver sealer: clean the pavers first
- Let the pavers dry before you seal
- Refresh the joint sand before sealing
- Apply the sealer in thin, even coats
- Let the sealer cure before traffic returns
- When to reseal pavers
- What paver sealer costs
- A worked example: sealing a paver patio
- Common paver sealer mistakes
- Sealing new pavers versus resealing old ones
- Efflorescence, weeds, and other paver problems
- The bottom line
Short answer: Paver sealer is a coating that repels water and stains, locks joint sand against weeds and washout, and can deepen color. The main choice is film-forming, which sits on top, adds gloss and wears off, versus penetrating, which soaks in with a natural matte look and lasts longer. Illustrative product cost runs around 0.20 to 0.75 dollars per square foot, and application is clean, dry, re-sand, then thin coats.
Paver sealer is the difference between a patio that stays rich, tight-jointed, and easy to clean for years and one that fades, sheds its joint sand, sprouts weeds between the stones, and stains at the first spilled drink. Pavers are more porous than a troweled slab and they are riddled with open joints, so they take on water, oil, and grime faster and they lose sand to wind and rain, which is exactly the vulnerability a sealer is built to close. The trouble is that “paver sealer” is not one product but a shelf of them, split first into films that sit on top and penetrants that soak in, and then again by finish, by chemistry, and by whether they lock the joint sand or leave it loose.
This explainer sorts that shelf into a decision you can actually make: what a paver sealer does and whether your pavers need one, the film-forming versus penetrating split that matters more than any brand, the matte, satin, wet-look, and gloss finishes and how they differ, water-based versus solvent-based chemistries, how joint-stabilizing sealers handle the sand, how much product a patio needs and why coverage runs low on pavers, how to apply it step by step, when to reseal, and what it costs in illustrative terms. For a broader look at the sealer families across all concrete, our concrete sealer types explainer sorts the whole category, and for the surface underneath, our how to lay a paver patio manual builds the base, sand, and joints a sealer later protects. Run your patio through the companion below or the estimator to size the gallons as you read.
Key takeaways
- A paver sealer does four jobs: it repels water and stains, locks the joint sand against weeds and washout, can deepen color and add a finish, and stabilizes the whole field so the patio holds its look longer.
- The first fork is film-forming versus penetrating: films sit on top, add gloss and lock joint sand, and wear off; penetrating sealers soak in, protect invisibly with a natural matte look, and last longer with less upkeep.
- Finish is mostly a look: matte and satin keep pavers natural, while wet-look and gloss deepen the color and read as rich, at the cost of showing wear and needing an anti-slip additive on walked surfaces.
- Size the order by area, the sealer's own coverage rate, and coats, plus about 10 percent waste, and expect pavers to drink more per square foot than a smooth slab because of their porosity and open joints.
- Clean, dry, and re-sand before you seal, apply thin coats, and let it cure; skipping the cleaning and drying is the mistake behind most white haze and peeling.
What paver sealer does
Before the types, it helps to be clear on what a sealer is actually for on pavers specifically, because pavers ask more of a sealer than a plain slab does. A concrete or clay paver is porous, so it pulls in water like a sponge, and with that water rides everything that stains and damages a patio: oil and grease from a grill or a car, tannins from leaves, dissolved salt in cold climates, and the grime that dulls color over a season. A sealer’s first job is to slow that intake, either by blocking the pores from inside or capping them with a film on top, so spills bead up and wipe away rather than soaking in and setting.
The second job is unique to pavers, and it is often the real reason people seal: the joints. A paver field is only as stable as the sand packed between the stones, and open joint sand washes out in heavy rain, blows away in wind, feeds the weeds and moss that root in the gaps, and gives ants an easy place to nest. A joint-stabilizing sealer binds that sand into a firm, semi-solid crust that resists all of that, which keeps the field tight and cuts the weeding and re-sanding a bare patio demands. This is the benefit a slab sealer never has to provide.
The third and fourth jobs round it out. A film-forming sealer can deepen and enrich the paver color, bringing a faded, sun-bleached patio back to life and adding a wet-look or satin finish that makes the surface look finished rather than raw. And across all of that, sealing stabilizes the whole installation: less sand loss, less shifting, less staining, and a surface that holds its appearance and its structure longer between the heavier maintenance of lifting and re-laying. Match the sealer to whichever of those four jobs you care about most, and the type almost picks itself.
Should you seal pavers? Weighing the case
Not every paver patio needs sealing, so it is worth weighing the case honestly before spending on product and a weekend of work. The strongest arguments for sealing are a surface that stains easily and is a pain to clean, joints that keep washing out or growing weeds, a color that has faded and you want back, and a high-visibility patio or entry where the look matters. If two or three of those describe your patio, sealing usually pays for itself in reduced cleaning, weeding, and re-sanding, and in a surface that simply looks cared for.
The arguments against are real too, and honesty about them keeps expectations sane. Sealing is a recurring commitment, not a one-time fix, because a film wears and has to be redone every few years, and a poorly applied sealer can look worse than no sealer at all, hazing white, turning the surface slick, or peeling in the traffic paths. A rarely used utility path, a shaded patio that never stains, or pavers you are happy to let weather naturally may not justify the ongoing upkeep. Sealing is a choice to trade some maintenance for a different kind of maintenance, not to eliminate it.
The middle position most people land on is to seal the surfaces where the look and the joints matter and to leave the rest. A front entry, a pool surround, a main patio, or a driveway apron earns a sealer; a back utility strip may not. If you do seal, going in with a clear picture of the reseal schedule and the finish you will get, rather than a vague hope that one coat makes the patio maintenance-free forever, is what keeps you satisfied with the result. The rest of this explainer assumes you have made that call and are choosing which sealer and how to apply it.
Film-forming versus penetrating paver sealers
If you learn one distinction about paver sealers, make it this one, because it decides more than any brand or price. Film-forming sealers sit on top of the pavers as a visible coating you can see and feel. Penetrating sealers soak in and leave no film at all. Every other feature, the sheen, the color change, whether the joint sand gets locked, the slip, the reseal interval, and the failure mode, follows from which side of this line a product sits on.
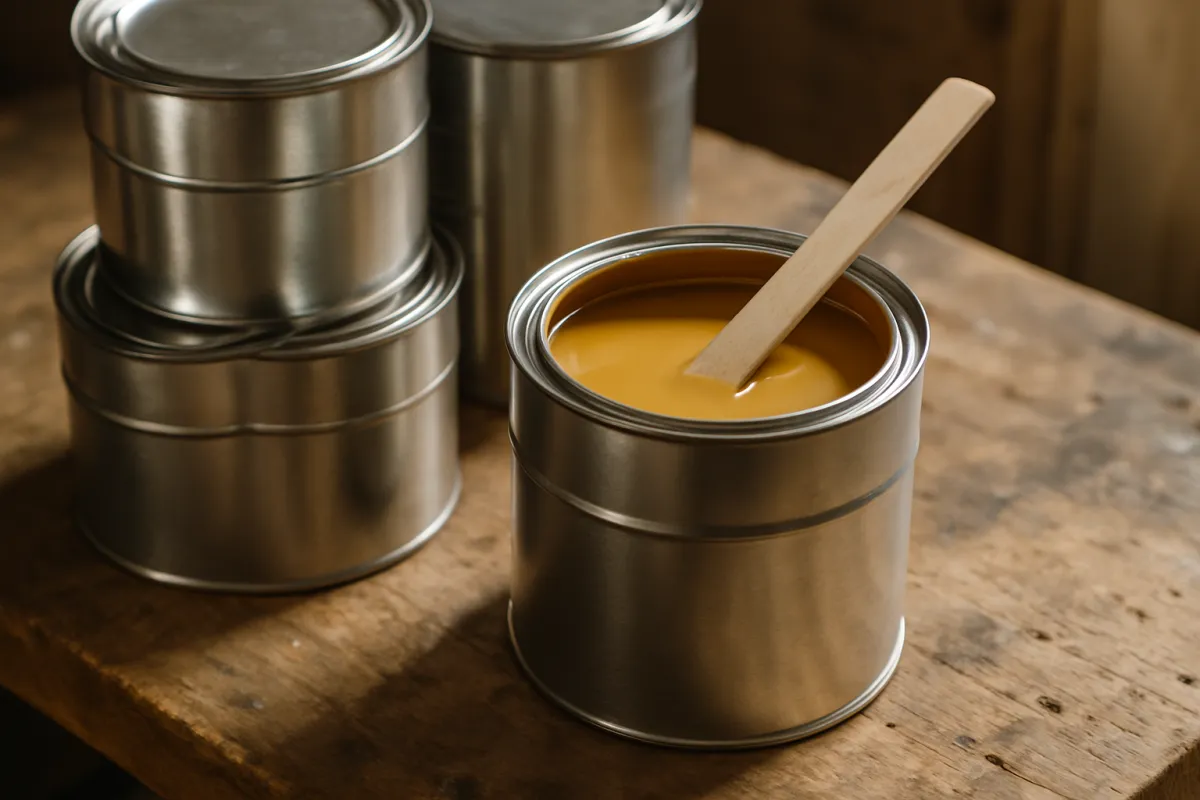
A film-forming sealer forms a coating that lets it do the things pavers are often sealed for: it adds a wet-look or satin sheen, deepens the color, and, crucially for pavers, binds the joint sand into a firm crust that resists washout and weeds. The same film is also its weakness. It wears under foot and tire traffic, can cloud or turn white if it goes over damp pavers or is laid on too thick, can peel if the bond fails, and eventually has to be stripped and recoated rather than simply topped up. Film-forming sealers change the look and stabilize the joints, at the cost of visible wear and more upkeep.
A penetrating sealer works below the surface and shows nothing for it. Because there is no film, it cannot peel, cannot whiten, and is not worn off by tires or feet, which is why it commonly lasts longer between reseals than a film. The trade is that it leaves the pavers looking natural and matte, so it will not deepen the color or give a wet-look shine, and on its own it does little to lock loose joint sand. Penetrating protects invisibly and lasts; film-forming protects visibly, enhances the look, stabilizes the joints, and needs tending. Almost every paver-sealer choice is a weighing of those two.
Matte, satin, wet-look, and gloss finishes
Finish is the part of the decision people feel most strongly about, and on pavers the choices run along a spectrum from invisible to mirror-bright. A matte or natural finish keeps the pavers looking like bare stone, adds no sheen, and is what a penetrating sealer leaves by default because it lays down no film. It suits anyone who wants protection without changing the appearance, and it hides wear and scuffing better than a shine does, which is part of why driveways and high-traffic paths often go matte even when a film is used.
A satin or low-gloss finish is the popular middle ground, and for many patios it is the sweet spot. It deepens and enriches the paver color a little and adds a soft, low sheen without the full mirror effect, so the surface reads as finished and cared for but does not glare in the sun or show every scuff. A wet-look finish goes further, darkening and saturating the color as if the pavers were permanently damp, which makes a faded patio look vivid and rich again and is the signature reason people reach for a film sealer on decorative pavers.
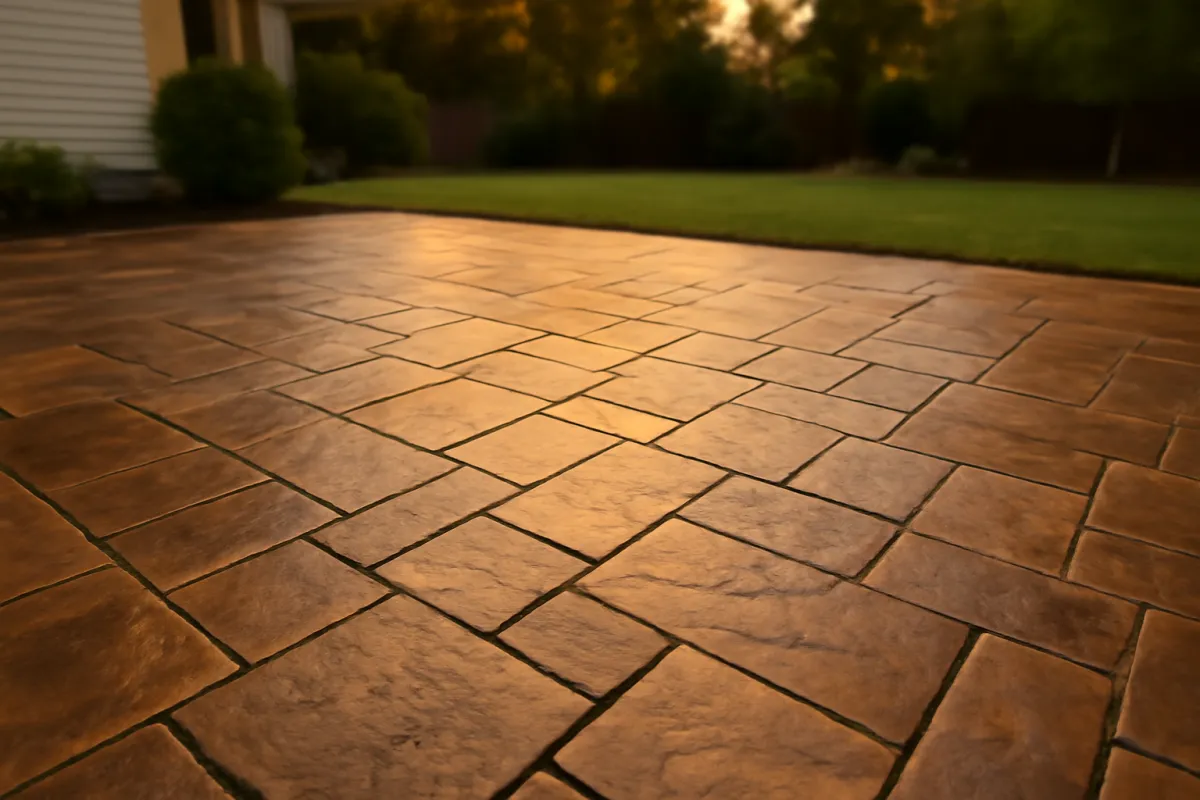
A high-gloss finish is the brightest, reading as polished and almost lacquered, and it shows off decorative pavers dramatically, but it comes with the most side effects. A high gloss shows scuffs, tire marks, and wear most readily, can look artificial on a rustic paver, and is the slickest underfoot when wet, so any gloss or wet-look film on a walkway, steps, or a pool surround usually needs a fine anti-slip grit mixed into the last coat. Neither more nor less sheen is inherently more protective; the protection comes from the sealer type and the quality of the application, not from the shine. Pick the finish for how the surface is used, then confirm it on a test patch of the real pavers in real light, because the same product looks different on different stone.
Water-based versus solvent-based sealers
Cutting across the film-versus-penetrating and finish choices is the carrier, water or solvent, and it changes how a sealer looks, smells, and behaves during application. A water-based sealer carries its solids in water that evaporates as it dries. It is lower in odor, easier and safer to work with, more forgiving of a slightly imperfect surface, and it tends to leave a more natural, lower-sheen finish that enhances color modestly. For a homeowner sealing a patio over a weekend, water-based products are often the friendlier choice, and many modern ones perform very well.
A solvent-based sealer carries its solids in a petroleum solvent, and the trade is performance and appearance for handling. Solvent-based sealers tend to darken and saturate the color the most, which is why a deep wet-look often comes from a solvent product, and they can penetrate and bond aggressively. The cost is strong fumes that demand serious ventilation and a respirator, flammability during application, a shorter working window, and less tolerance for moisture or mistakes, since a solvent sealer laid over damp pavers or in the wrong conditions is more prone to blushing, bubbling, or an uneven finish.
The practical way to choose is to weigh the finish you want against how much fuss and hazard you will accept, and then respect two rules. First, do not mix chemistries or lay a solvent product over a water-based one, or vice versa, without confirming compatibility, because incompatible layers cloud, bubble, or fail to bond. Second, whatever you pick, read the label for the ventilation, temperature, and cure requirements, since a solvent-based sealer in particular is unforgiving of shortcuts. When in doubt on a residential patio, a quality water-based sealer is the lower-risk default, and a solvent-based one is the reach for maximum color and depth by someone ready to handle it.
Joint-stabilizing sealers and the sand question
The feature that sets paver sealers apart from slab sealers is joint stabilization, and it is worth understanding because it is often the whole point. A joint-stabilizing sealer is a film-forming sealer formulated to soak into the joint sand and bind it into a firm, semi-solid crust as it cures, so the sand no longer washes out in rain, blows away in wind, or gives weeds and ants a foothold. The result is a tighter, lower-maintenance field where the joints hold and the surface stays clean, which is exactly the upkeep pavers otherwise demand.
The sand you start with matters, because the sealer locks it exactly where it sits. For a joint-stabilizing sealer to work, the joints should be filled with clean, dry sand swept level to the right height, usually just below the paver chamfer, before you seal, so the sealer crusts a full, correctly leveled joint rather than a half-empty one. This overlaps with, but is not the same as, polymeric sand, which is a joint sand that hardens on its own when wetted; the two are different approaches to the same goal, and mixing them or sealing over uncured polymeric sand without checking compatibility can cause hazing or a weak joint. Our how to lay a paver patio manual covers filling and compacting the joints in the first place.
There is a limit to what joint stabilizing can do, and honesty about it saves disappointment. A stabilizing sealer firms up sound, filled joints; it does not rebuild joints that have already washed out, and it will not turn a poorly built patio into a solid one. It also crusts the sand rather than gluing the pavers into a rigid slab, so the field still flexes and individual pavers can still be lifted for repair if needed. Used on a well-built, properly sanded patio, a joint-stabilizing sealer is one of the most satisfying upgrades a paver surface can get; used to paper over a failing base, it disappoints.
Paver sealer types compared side by side
With the choices described, a single table makes the trade-offs stick. Read down the “how it works” column first, because whether a sealer penetrates or forms a film is the fork everything else hangs on, and then across to the surface and result it suits, the finish it leaves, its illustrative lifespan, and a rough cost. Every figure here is illustrative and typical, meant for comparison rather than as a spec, and it shifts with the specific product, the pavers, the coats, and your climate.
| Sealer type | How it works | Best for | Typical finish | Illustrative lifespan | Illustrative cost |
|---|---|---|---|---|---|
| Penetrating | Soaks in, repels water from within, no film | Driveways, non-slip paths, a natural look | Natural, matte, no sheen | ~4 to 5 years or more | ~$0.20 to $0.60 / sq ft |
| Film-forming (matte/satin) | Thin surface film | Patios wanting subtle color and protection | Low sheen to satin | ~2 to 3 years | ~$0.25 to $0.60 / sq ft |
| Film-forming (wet-look/gloss) | Surface film, higher build | Decorative patios wanting rich color and shine | Wet-look to high gloss | ~2 to 3 years | ~$0.30 to $0.75 / sq ft |
| Joint-stabilizing | Film that also binds the joint sand | Patios where loose joints and weeds are the problem | Matte to satin, sand locked | ~3 to 4 years | ~$0.35 to $0.75 / sq ft |
The pattern in the table is the whole decision in miniature. Penetrating stands alone as the film-free, longest-lasting, natural-look option for driveways and anywhere traction and a bare appearance matter. The film families trade more look and joint stabilization for shorter life and more upkeep, sorting by what you want: subtle satin protection, a rich wet-look shine, or firm joints that resist weeds and washout. Learn which result each row was built for and you will rarely pick wrong. For the same comparison across all concrete surfaces rather than pavers specifically, our concrete sealer types explainer carries the four-family version.
How much paver sealer you need
Once the type is chosen, sizing the order is straightforward arithmetic, and it is the same method regardless of family. Multiply the patio length by the width to get the area in square feet, divide by the sealer’s coverage rate in square feet per gallon, multiply by the number of coats, and add roughly 10 percent for waste and uneven absorption. That gives the gallons to buy. Our how to calculate square footage manual works the area line in full for odd-shaped patios, and the companion below runs the whole chain on your numbers and chosen sealer type.
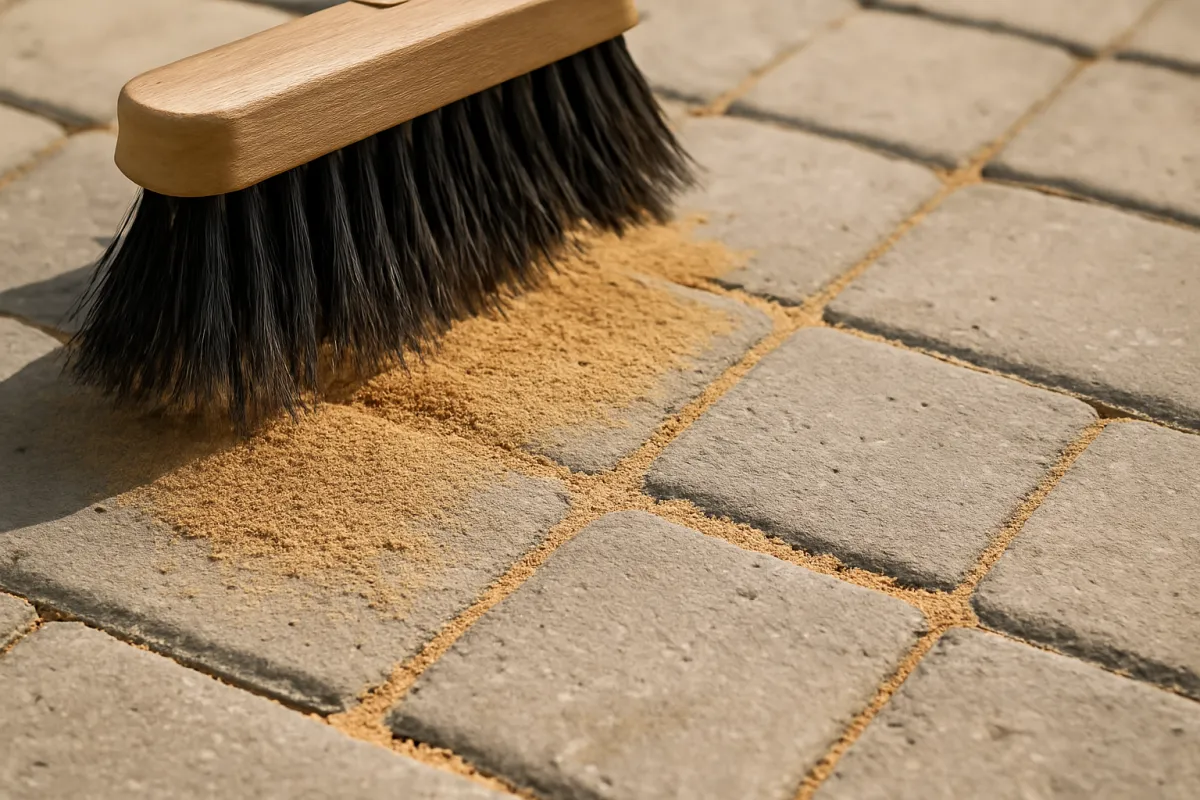
The number that varies most is the coverage rate, and pavers run low on it for two reasons: the paver material is porous and thirsty, and the open joints take extra sealer that a continuous slab never has. As illustrative figures, a film-forming sealer might cover around 150 square feet per gallon per coat on pavers, a penetrating sealer around 125 because the porous surface drinks it in, and a thicker joint-stabilizing sealer around 100 because it has to fill and crust the joints. A worked example makes it concrete: an illustrative 16 by 20 foot patio is 320 square feet, so at 150 square feet per gallon and two coats that is about 4.3 gallons, near 4.7 with a 10 percent waste allowance, so you buy 5.
Two rules keep the estimate honest. First, always confirm the coverage rate against the specific product’s label, because it swings widely with the sealer and with how porous and how wide-jointed your pavers are; a rough, thirsty paver with fat joints covers far less per gallon than a dense, tight-jointed one. Second, buy the whole order at once, rounded up to whole containers, because running short mid-coat means a second trip and a possible batch mismatch across the patio. The estimator and the companion both round the gallons for you once you enter the area, type, and coats.
Why paver sealer coverage varies
The reason a paver patio can drink so much more sealer per square foot than the label’s headline number comes down to what the sealer has to cover and what is actually in the can. Part of a liquid sealer is solids, the material that stays behind and does the protecting, and part is carrier, the water or solvent that keeps it liquid and then evaporates. On a smooth slab the solids simply film the flat surface, but on pavers they also have to coat the textured paver faces, wet the porous body, and soak into the sand-filled joints, so more of every gallon is consumed per square foot of patio.
That is why the coverage figures earlier run lower than a slab sealer’s and why they differ by type. A thin film sealer with modest solids spreads reasonably far across the paver faces but still loses some into the joints. A penetrating sealer disappears into the porous paver body, so how far it goes depends heavily on how thirsty the pavers are. A joint-stabilizing sealer covers the least per gallon of all, because on top of coating the faces it has to fully saturate and crust the joint sand, which takes real volume. High-porosity pavers, wide joints, and a rough surface texture all push coverage down together.
The practical takeaway is to trust the product’s own coverage figure and to expect the low end of it on a rough, wide-jointed patio rather than the optimistic headline. When you compare two sealers, compare their stated coverage and their solids together, because a cheaper gallon that covers half the area is not the bargain it looks like, and a joint-stabilizing product will always cover less than a plain film because it is doing more work per gallon. Budget for the porosity and the joints, buy a little long, and you will not run short in the middle of a coat.
How to apply paver sealer: clean the pavers first
However much the families differ, application follows the same arc, and it opens with the step that decides everything: cleaning. A sealer bonds to clean pavers and fails on dirty ones, sealing in whatever grime, stain, moss, or old sealer is on the surface, so the cleaning is the real work of the job and the part most often rushed. Sweep the patio, pull any weeds from the joints, and wash the surface thoroughly, using a paver cleaner or degreaser on oil and organic stains and treating any efflorescence with the appropriate cleaner, so the pavers go into sealing genuinely clean rather than merely tidy.
Pressure washing is common and effective for a deep clean, but it comes with a paver-specific caution: too much pressure or too close a nozzle blasts the joint sand right out of the joints and can etch the paver faces. Use a moderate pressure, keep the nozzle back and moving, and accept that a good clean will disturb some joint sand, which is fine because you will re-sand before sealing anyway. If the patio has an old, failing, or unknown film sealer on it, that has to come off first with a stripper, because a fresh sealer laid over a peeling one simply peels with it.
The test of a clean patio is that the pavers are uniformly clean and free of stains, moss, old coatings, and loose grime across the whole field, not just in the obvious spots. Spending the extra time here is what separates a sealing job that looks even and bonds for years from one that hazes, blotches, or lifts within a season. Do not seal until the surface is genuinely clean and any stubborn stains are addressed, because the sealer will make whatever is there at seal time permanent. Only once the pavers are clean does the drying step begin.
Let the pavers dry before you seal
Drying is the quiet step that sinks more sealing jobs than any other, because a sealer laid over damp pavers traps that moisture under the film and turns it into a white, cloudy haze that is miserable to fix. After cleaning, the pavers need to dry fully, all the way through the porous body and deep in the joints, not just look dry on the surface, and that takes longer than people expect. A common guideline is to wait a full day or more of dry weather after washing, longer in humid or cool conditions, so the moisture that soaked in during cleaning has genuinely left.
The weather window matters as much as the wait. Seal on a dry, mild day with no rain in the forecast for the cure period, out of direct scorching sun that flashes the sealer off too fast, and within the product’s stated temperature range, avoiding early morning when dew is still present and late evening when it is returning. Damp from below counts too: a patio over a high water table or one that stays shaded and never fully dries is a harder candidate, and sealing it risks the same haze as sealing right after a wash.
A simple field check beats guessing. Tape a small square of plastic sheet tightly to the pavers, leave it a few hours in the sun, and lift it: if moisture has collected under it or the pavers beneath look darkened, the surface is still releasing water and is not ready to seal. Only when the pavers are clean and confirmed dry, and the weather window is open, should the sealer go down. Rushing past this step to seal a still-damp patio is the single most common cause of a hazed, ruined finish.
Refresh the joint sand before sealing
With the pavers clean and dry, the joints come next, because the sealer will lock the sand exactly where it sits, so the sand has to be right first. Cleaning, and especially pressure washing, pulls sand out of the joints, and over time the joints settle and lose sand anyway, so before sealing you sweep fresh, dry joint sand across the patio and work it down into the gaps with a broom until each joint is filled to the correct level, usually just below the top chamfer of the paver. This matters most with a joint-stabilizing sealer, which crusts whatever sand is there into the finished joint.
Getting the sand level right is a small art with a big payoff. Underfilled joints leave weak, hollow gaps that the sealer cannot properly stabilize and that invite washout and weeds; overfilled joints leave sand sitting on the paver faces where the sealer can lock it into an ugly haze or crust on the surface. Sweep the sand in, then sweep the excess cleanly off the paver faces so sand remains only in the joints at the right height, and on a large patio a light compaction helps the sand settle before you seal. The joints should look full and even across the whole field.
Dry sand is non-negotiable here, because damp joint sand seals in the same haze that damp pavers do. Use dry sand, fill on a dry day, and if you are using polymeric sand rather than a joint-stabilizing sealer to firm the joints, follow that product’s own wetting and cure process and confirm whether and when it can be sealed over, since sealing uncured or the wrong polymeric sand causes problems. Our how to lay a paver patio manual covers the original jointing in detail. With full, level, dry joints, the patio is finally ready for sealer.
Apply the sealer in thin, even coats
Application itself is the easy part once the prep is done, and the golden rule is thin coats. Two thin coats almost always outperform one thick one, because a thick film cannot dry or cure evenly, so it traps carrier, stays tacky, clouds, bubbles, or peels, while thin coats bond and cure fully. Stir the sealer before and during use so the solids stay mixed, and apply it with the tool the product calls for, typically a low-pressure sprayer for even coverage, a roller, or a combination, working in manageable sections and keeping a wet edge so the sections blend without lap marks.
The cardinal sin is over-application, and pavers make it tempting because the porous surface and open joints seem to swallow sealer, inviting you to pour on more. Resist it: puddled sealer in the joints or on the paver faces does not soak in and protect better, it sits, whitens, and stays tacky, and it is the most common cause of a blotchy, hazy paver finish. Spread the sealer evenly, back-roll or brush out any puddles, and let the first coat reach its stated recoat time before the second goes on. If you want a wet-look or gloss finish, the second coat builds it; if you want subtle, one careful coat may be enough.
Two paver-specific notes round out the application. If the surface is a walkway, steps, or pool surround and you are using a gloss or wet-look film, mix a fine anti-slip grit into the final coat, because a glossy film on wet pavers is genuinely slick. And keep the sealer off adjacent surfaces you do not want coated, since it will bond to them too. For the full step-by-step of sealing an outdoor concrete surface, our how to seal a concrete driveway manual works the process end to end, and much of it carries straight over to a paver patio.
Let the sealer cure before traffic returns
The last step is patience, because a sealer that looks dry is not the same as a sealer that has cured, and walking or parking on it too soon ruins the finish you just laid. Most sealers are dry to the touch within a few hours but need far longer to cure fully, often a day before light foot traffic and several days to a week or more before vehicles or furniture return, and the exact window is on the product label and depends on the temperature and humidity. During that cure, the carrier is still leaving and the film is still hardening, so pressure marks, scuffs, and tire prints all show up permanently if you rush.
Protecting the cure means keeping the patio genuinely off-limits, not just lightly used. Rope it off if you must, keep pets and kids clear, and above all keep water off it: rain, sprinklers, or dew during the cure can blush a fresh film white, which is the same haze the drying step guards against, arriving from the other end. This is why the weather window has to cover the whole cure, not just the hour of application, and why sealing right before forecast rain is a gamble that often loses.
Once the sealer has fully cured, the payoff arrives: a surface that beads water, resists stains, holds its joint sand, and shows the finish you chose, all of which will last until the film wears enough to reseal. Note the date you sealed, because the reseal schedule counts from there, and keep any leftover sealer sealed and labeled for touch-ups. A cured, correctly applied paver sealer is low-maintenance for years; the maintenance it does need is the periodic reseal covered next, not constant fussing.
When to reseal pavers
Resealing is where the sealer families separate most clearly, and it is the number to weigh heaviest if you dislike redoing work. The pattern follows straight from film versus penetrating: a film that lives on the surface wears off and needs replacing, while a penetrant that lives in the pores has nothing on top to wear. The chart below lines up illustrative reseal intervals so the gap is visible at a glance, with a penetrating sealer lasting noticeably longer than a bare wet-look film.
How long paver sealer lasts before resealing
Illustrative typical years between reseals by sealer type; real intervals shift with traffic, sun, coats, and how well the sealer was applied.
Each bar's width tracks its illustrative interval against the longest, the penetrating sealer at roughly 5 years. A wet-look film at about 2 years reseals more than twice as often, which is why the glossier finish costs more over a decade even when the gallon is cheaper.
The intervals carry practical weight beyond the numbers. A wet-look or gloss film at roughly 2 to 3 years means a reseal every couple of years to keep the sheen even, since the film wears fastest in the traffic paths and the shine goes patchy there first. A satin or joint-stabilizing film lasts a little longer before it dulls or the joints loosen, and a penetrating sealer at roughly 4 to 5 years or more is close to set-and-forget by comparison. Sun exposure, heavy traffic, and freeze-thaw all shorten these, while a shaded, lightly used patio stretches them.
There is a simple field test that beats any calendar: splash water on the pavers. If it beads up and sits, the sealer is still repelling water and doing its job; if it soaks straight in and darkens the paver, the protection has worn through and it is time to reseal. For a film sealer, a dulling or patchy sheen and loosening joint sand are the other tells. Running that test each year tells you what the patio actually needs rather than what a chart predicts, and it is the honest way to time a reseal.
What paver sealer costs
Cost is where the families reorder themselves depending on whether you look at the gallon or the decade, and the honest comparison is the decade. Per square foot of product, the rough illustrative ranges run from a penetrating sealer around $0.20 to $0.60, a film-forming sealer around $0.25 to $0.75 depending on the finish, and a joint-stabilizing sealer at the higher end because it is a thicker system doing more work per gallon. These are illustrative figures that shift with your market, the number of coats, the paver porosity, and whether you buy consumer or professional products.
Where a paver sealing budget goes over ten years
Illustrative split of the total product cost of keeping a film-sealed patio protected across a decade; a penetrating sealer would shift more weight to the first bar and less to resealing.
These illustrative shares sum to 100 percent. For a film sealer that reseals every 2 to 3 years, the repeat applications, not the first one, are the biggest slice of the ten-year cost, which is why a longer-lasting penetrating sealer can be cheaper over time even at a higher price per gallon.
The gallon price hides the real cost, which is how often you reseal, as the budget chart shows. A cheap wet-look film reseals every 2 to 3 years, so across ten years you might apply it three or four times, while a penetrating sealer costs a little more per gallon but might reseal only two or three times in the same decade. Add up the product and the labor over ten years and the pricier, longer-lasting sealer is often the cheaper and lower-effort path, which is the kind of total-cost thinking the reseal chart is meant to prompt.
The other side of the ledger is the patio the sealer protects, and against that number sealing is inexpensive insurance whatever type you choose. Against the cost and labor of lifting and re-laying pavers, replacing washed-out joints, or living with a permanently stained surface, a few gallons of sealer on a schedule is a small line item. The expensive path is not the pricier sealer; it is skipping the seal, choosing the wrong type, or applying it badly and paying for it in early redoing. Size the product cost with the companion below once you know the type and area.
A worked example: sealing a paver patio
Pull the whole decision together on one realistic job: a 16 foot by 20 foot concrete paver patio, a few years old and sound, in a sunny backyard, where the owner wants the faded color brought back, the loose joints locked against weeds, and a finish that looks rich without being dangerously slick. Walking it through shows how the choices narrow and then how the gallons fall out.
Start with the goals, which point at a film. The owner wants deepened color and stabilized joints, and a penetrating sealer does neither, so this is film-forming territory, and specifically a joint-stabilizing sealer to lock the sand. For the finish, a full high gloss would be slick and would show every scuff on a walked patio, so a satin or a modest wet-look is the sweet spot: it saturates the faded color and reads as finished without the glare or the slip, and a fine anti-slip grit goes into the last coat for safety. That settles the type and the finish before any measuring.
Now size it. The area is 16 times 20, which is 320 square feet, and our how to calculate square footage manual works that line in full. At an illustrative joint-stabilizing coverage of around 100 square feet per gallon and two coats, that is 320 times 2, divided by 100, about 6.4 gallons, near 7 with a 10 percent waste allowance, so the owner buys 7. Change any input and it moves predictably: pick a thin film at 150 square feet per gallon instead and the gallons drop, drop to one coat and they roughly halve, and doubling the patio roughly doubles them. The whole job is then clean, dry, re-sand, two thin coats with grit in the last, and cure before the furniture returns, resealed in three or four years after a yearly water test.
Common paver sealer mistakes
Most paver-sealing regret traces to a handful of errors made before or during the job, and naming them is the fastest way to avoid them. Each is a mismatch between how sealer behaves and what the pavers needed.
- Sealing over damp or dirty pavers. A sealer laid on a wet or unclean surface traps moisture and grime into a permanent white haze or a blotchy finish. Clean thoroughly, then let the pavers dry all the way through before a drop of sealer goes down.
- Laying the sealer on too thick. Puddled, over-applied sealer does not protect better; it clouds, stays tacky, and peels. Two thin coats beat one heavy one every time, so spread it even and back-roll out any puddles.
- Skipping the joint sand. Sealing empty or half-filled joints wastes the stabilizing benefit and leaves gaps for weeds and washout. Re-sand the joints full and level, with dry sand, before you seal.
- Ignoring slip on a walked surface. A gloss or wet-look film is slick when wet, which is a hazard on steps, walkways, and pool surrounds. Add a fine anti-slip grit to the final coat on any surface people walk on.
- Sealing new pavers too soon. Fresh pavers can still be releasing efflorescence, and sealing over it locks in a cloudy blush. Let new pavers cure, surface any efflorescence, and clean it off before sealing.
- Choosing on gallon price instead of lifespan. The cheapest wet-look film reseals every couple of years, so over a decade it can cost more than a pricier, longer-lasting sealer. Compare the total over the life of the patio, not the shelf price.
Every one of these dissolves once you match the sealer and the process to what the pavers actually need, which is the entire point of understanding the types and the steps.
Sealing new pavers versus resealing old ones
New and old pavers ask for slightly different handling, and knowing which situation you are in avoids a couple of classic mistakes. New pavers, freshly installed, are tempting to seal right away to protect that crisp look, but fresh pavers and fresh joint sand often need to settle and release efflorescence first, the white powdery haze that migrates to the surface as the pavers cure. Seal over active efflorescence and you lock it under the film as a permanent cloudy blush, so the common guidance is to wait, sometimes a season, until any efflorescence has surfaced and been cleaned off and the joints have settled, before the first seal.
Old pavers, being resealed, bring a different question: what is already on them. If the patio was sealed before, the new sealer has to be compatible with the old one, and a like-over-like recoat on a sound existing film is usually fine after a thorough clean and a light scuff. If the old sealer is peeling, flaking, whitened, or simply unknown, the reliable path is to strip it back to bare pavers first, because a fresh sealer over a failing one fails with it. This is why resealing sometimes means more prep than the first seal ever did, and why an unknown existing sealer is worth testing in a corner before committing.
What new and old share is that the prep decides the result. New pavers need patience and an efflorescence check; old pavers need an honest assessment of the existing sealer and a strip if it is failing. Both need the same clean, dry, re-sanded surface before the new sealer goes on. Confirm the specific waiting window for new pavers and the compatibility of any recoat against the paver and sealer manufacturer instructions, since products and their timelines differ, and when in doubt on either, a test area answers the question before the whole patio is committed.
Efflorescence, weeds, and other paver problems
A few paver-specific problems shape sealing decisions, and understanding them keeps the sealer from making things worse. Efflorescence, already mentioned, is the most common: it is a natural salt haze that works its way out of concrete pavers as they cure and after they get wet, and while it usually clears on its own or with an efflorescence cleaner, sealing over it traps it. The rule is simple: deal with efflorescence before sealing, not after, and give new pavers time to get it out of their system.
Weeds, moss, and ants in the joints are the problems a joint-stabilizing sealer is built to fight, but the sealer works by keeping new growth from taking hold in firmed sand, not by killing what is already established. Clear existing weeds and moss and clean the joints before sealing, because a stabilizing sealer crusts whatever is there, roots and all, if you skip that. Once sealed, the firmed joints resist re-invasion far better, which is much of the maintenance payoff, but the occasional windblown seed can still find a foothold, so the benefit is a big reduction, not a permanent guarantee.
Staining and color loss are the last pair, and they cut both ways with sealing. A sealer prevents future oil, rust, and organic stains from soaking in and slows the sun-fading that dulls a patio, which is a real benefit; but sealing over an existing stain can lock it in, so stains should be addressed before the seal, not sealed over in hope. Rust and hard-water stains in particular want the right cleaner first. The theme across all of these is the same as the whole application arc: whatever is on or in the pavers at seal time, the sealer tends to make permanent, so the fix goes before the film, not under it.
The bottom line
Choosing and using a paver sealer comes down to two questions asked in order: film-forming or penetrating, and then which finish and result you want. A penetrating sealer soaks in, protects invisibly, keeps the pavers natural and matte, and lasts the longest with the least upkeep, which suits driveways, non-slip paths, and anyone who wants protection without changing the look. A film-forming sealer sits on top, which is what lets it deepen color, add a satin or wet-look finish, and, as a joint-stabilizing product, lock the joint sand against weeds and washout, all at the cost of wearing and needing a reseal every few years. Match the sealer to the result you care about, pick the finish for how the surface is used rather than the picture on the can, and above all respect the prep, because the clean, dry, re-sanded surface underneath decides whether the sealer bonds for years or hazes in a season. Size the order from a measured area at the product’s own coverage rate, apply it in thin coats, let it cure, and judge cost over a decade rather than per gallon. Do that and a paver sealer keeps a patio rich, tight, and easy to clean for years, which is the whole reason to seal in the first place. The companion below sizes the gallons and cost for your patio and type, so you can buy right in one trip.
Read this explainer as plain background on how paver sealers differ and how to apply them, not as a product spec you can follow without checking the label. The sealer types, coverage rates, reseal intervals, finishes, and costs here are typical illustrative values that vary with the specific product, the paver porosity and joint width, the number of coats, your climate, and how the sealer is applied, and newly installed pavers, polymeric-sand joints, or any surface with an efflorescence or moisture problem are situations best confirmed with the manufacturer. Test a small area, confirm the sealer choice, coverage, compatibility, joint-sand method, and cure time against the product instructions and your local conditions, and consult a paver or hardscape professional for any patio that is settling, heaving, or losing its base before you seal over the symptom.
Frequently asked questions
What does a paver sealer actually do?
A paver sealer does four jobs at once, which is why it earns its place on a patio or driveway. It slows the water, oil, and stains that soak into a porous paver, so spills wipe up instead of setting in. It locks the joint sand in place, which cuts down on the sand washing out, the weeds that root in open joints, and the ants that nest in them. It can deepen the color and add a wet-look or matte finish, turning a faded surface rich again. And on the whole it stabilizes the field so the pavers shift less and the patio holds its look longer between real maintenance. Treat any single benefit as illustrative and match the sealer to the result you actually want.
What is the best paver sealer?
There is no single best paver sealer, only the right one for the pavers, the exposure, and the look you want. For a patio where you want the color to pop and the joints locked, a film-forming joint-stabilizing sealer in a wet-look or satin finish is the common pick. For a driveway or a surface you want to keep looking natural and non-slip, a penetrating sealer protects from within without a glossy film that can wear or turn slick. Water-based products are lower in odor and more forgiving, while solvent-based ones tend to darken color more and are fussier to apply. Treat any product family, coverage figure, or lifespan here as illustrative, and confirm the specific sealer against the manufacturer instructions for your pavers and climate before you buy.
What is the difference between film-forming and penetrating paver sealers?
A film-forming paver sealer sits on top of the pavers as a visible coating, which is what lets it add gloss, deepen color, and bind the joint sand into a firm crust. That same film wears under traffic and sun, can cloud or turn white if applied over damp pavers or laid on too heavy, and eventually has to be stripped and recoated rather than simply topped up. A penetrating paver sealer soaks into the pores and repels water from within, leaving no film, no sheen, and a natural matte look, so it cannot peel or whiten and it holds up longer between reseals, but it does little to lock joint sand or enhance color. Film changes the look and stabilizes the joints at the cost of upkeep, while penetrating protects invisibly and lasts. Most real choices weigh those two against each other.
How much paver sealer do I need?
Multiply the patio length by the width for the area in square feet, divide by the sealer's coverage rate per gallon, multiply by the number of coats, and add about 10 percent for waste. Coverage varies a lot because pavers are more porous than a troweled slab and the open joints drink extra, but as illustrative figures a film-forming sealer might cover around 150 square feet per gallon per coat, a penetrating sealer around 125, and a thicker joint-stabilizing sealer around 100. An illustrative 16 by 20 foot patio is 320 square feet, so at 150 square feet per gallon and two coats that is about 4.3 gallons, near 4.7 with waste, so you buy 5. The companion below sizes the gallons on your own patio and sealer type.
How do you apply paver sealer step by step?
Clean the pavers thoroughly, let them dry completely, refresh the joint sand, apply the sealer in thin even coats, and let it cure before traffic returns. The cleaning and drying steps decide everything, because a sealer bonds to clean, dry pavers and fails on dirty or damp ones, trapping moisture into a white haze. Re-sand the joints to the right level first if you are using a joint-stabilizing product, since the sealer locks the sand exactly where it sits. Then apply two thin coats rather than one heavy one, keeping a wet edge and never letting the sealer puddle, and keep foot and vehicle traffic off until the product's stated cure time has passed. This explainer walks each of those steps in full.
How often should you reseal pavers?
How often you reseal depends on the sealer type, the traffic, and the exposure, so treat any interval as illustrative. A film-forming wet-look or gloss sealer commonly needs redoing roughly every 2 to 3 years because the surface film wears under sun and traffic and the sheen goes patchy in the walk paths. A penetrating sealer often lasts longer, on the order of 4 to 5 years or more, because it protects from within rather than as a film that can wear off. A joint-stabilizing sealer sits in between and is usually refreshed when the joints start to loosen or the finish dulls. A simple field test beats any calendar: splash water on the pavers, and if it beads and sits the sealer is still working, while if it soaks in and darkens the paver it is time to reseal.
How much does it cost to seal pavers?
Paver sealing cost depends on the sealer family, the coverage, and how many reseals the surface needs over the years, so any figure is illustrative and shifts with your market. As rough per-square-foot product costs, a penetrating sealer might run around $0.20 to $0.60, a film-forming or wet-look sealer around $0.25 to $0.75, and a joint-stabilizing sealer at the higher end because it is a thicker system. The honest comparison is over a decade rather than per gallon, since a film-forming sealer reseals more often than a penetrating one, so a cheaper gallon can cost more across ten years once you add the repeat applications and the labor. Confirm current pricing locally, and use the companion below to size the product cost for your own patio and sealer type.
Should you seal newly installed pavers?
You can seal new pavers, but timing matters more than with an old patio, because fresh pavers and fresh joint sand often need to settle and release efflorescence first. Efflorescence is the white, powdery haze that migrates to the surface as the pavers cure, and sealing over it can trap it under the film as a permanent cloudy blush. The common guidance is to wait until the pavers have gone through a cure and cleaning period, sometimes a season, so any efflorescence has surfaced and been washed off, before you seal. New joint sand should also be fully swept in and settled so the sealer locks it at the right level. Confirm the specific waiting window and any efflorescence cleaner against the paver and sealer manufacturer instructions, since products differ.