What's on this page
- What crawl space encapsulation actually costs per square foot
- What is included in a full encapsulation job
- The liner: grade, thickness, and why it is not a basic vapor barrier
- Sealing vents and the rim joist
- Sump pump cost: when standing water changes the job
- Dehumidifier cost and why most complete jobs budget for one
- Insulation: why the plane moves from the floor to the wall
- What drives crawl space encapsulation cost
- Signs a crawl space genuinely needs encapsulation
- Is encapsulation worth it for your specific crawl space
- DIY versus hiring a pro
- How long an encapsulation job takes
- Warranty and what a sealed liner should carry
- Mold remediation and encapsulation are two different jobs
- Pest control and a sealed crawl space
- Insurance and whether encapsulation is covered
- Regional cost swings
- Ways to keep crawl space encapsulation cost down
- Permits and local requirements
- Comparing encapsulation bids line by line
- A worked example: a 1,200 square foot crawl space priced
- The bottom line
Short answer: As an illustrative planning range, full crawl space encapsulation commonly runs 5 to 15 dollars per square foot of crawl space floor area, with a working midpoint near 9 dollars, so a 1,200 square foot crawl space lands near 10,800 dollars at the midpoint. A sump pump adds an illustrative 600 to 1,500 dollars and a dehumidifier adds 300 to 700 dollars, each priced as its own line rather than folded into the base liner cost.
Crawl space encapsulation cost is one of those numbers that looks simple from a single square-foot rate and turns out to hide several genuinely separate jobs stacked under one name. The vapor barrier liner itself, a heavy sheet sealed across the floor and up the walls, is only the baseline. Whether a sump pump, a dehumidifier, insulation, and structural repair are also needed depends entirely on the specific crawl space in front of you, which is exactly why two quotes for the same square footage can land thousands of dollars apart.
This cost brief prices crawl space encapsulation the way a foundation or waterproofing contractor actually breaks one down: a base liner rate per square foot, then the sump pump, dehumidifier, and insulation add-ons priced separately and explicitly, so no figure here quietly changes meaning halfway through. It sits alongside our french drain cost brief, which prices the exterior drainage work that often accompanies a wet crawl space, and our insulation manual and R-value manual, which cover the insulation side this brief references but does not re-price. Run your own crawl space through the estimator or the companion below as you read.
Key takeaways
- Full crawl space encapsulation commonly runs an illustrative 5 to 15 dollars per square foot of floor area, with a midpoint near 9 dollars, before any add-ons.
- A sump pump, needed only where standing water is a real history, adds an illustrative 600 to 1,500 dollars, and a dehumidifier adds 300 to 700 dollars, both priced as separate lines.
- Full encapsulation uses a thicker, fully sealed 10 to 20 mil liner up the walls, not just a loose floor sheet, which is why it costs more than a basic vapor barrier.
- Encapsulating moves the insulation plane from the vented floor above to the sealed perimeter wall, a mechanism change worth understanding before you insulate either way.
- Every dollar figure here is illustrative and local: standing water, structural repairs, and crawl space accessibility move the real number more than square footage alone.
What crawl space encapsulation actually costs per square foot
The base rate for full crawl space encapsulation, the liner, sealing, and basic air sealing without a sump pump or dehumidifier, commonly runs an illustrative 5 to 15 dollars per square foot of crawl space floor area, with a working midpoint near 9 dollars. That wide range reflects how much the liner grade, the wall height being sealed, and the crawl space’s accessibility can shift the number even before any mechanical add-on enters the picture.
For a typical 1,200 square foot crawl space, roughly the footprint of a modest single-story home, that midpoint lands the base job near 10,800 dollars. A smaller 800 square foot space lands closer to 7,200 dollars, and a larger 2,000 square foot space climbs past 18,000 dollars at the same rate. The companion below runs this math on your own crawl space’s footprint as you go.
What is included in a full encapsulation job
A complete encapsulation job is built from several distinct pieces, and knowing them explains both the wide base rate and why add-ons price separately. The core is the liner itself, a heavy vapor barrier sealed continuously across the entire floor and sealed or taped up the foundation walls to a height above the normal soil line. Vents that used to ventilate the space to outside air are sealed shut, since the whole point of encapsulation is removing that outside air exchange. Gaps at the rim joist where pipes, ducts, and wiring pass through get air-sealed as part of the same pass.
Most complete jobs add a sump pump if the space has any history of standing water and a dedicated dehumidifier to hold the newly sealed space at a safe humidity level, both covered in their own sections below. Insulation, moved from the floor above to the perimeter wall once the space is sealed, is the common companion step, and this brief covers the mechanism without re-pricing the insulation itself, which our insulation manual already does in depth.
The liner: grade, thickness, and why it is not a basic vapor barrier
A basic vapor barrier and a full encapsulation liner are not the same product, which is part of why encapsulation costs more than simply laying plastic on the floor. A basic barrier is commonly a thinner 6 mil sheet, loosely laid and sometimes left unsealed at the seams or the walls, mainly meant to slow moisture vapor rising directly out of exposed soil. It is cheap and better than nothing, but it leaves real gaps for moisture and air to move around its edges.
A true encapsulation liner is thicker and more durable, commonly 10 to 20 mil or a reinforced, puncture-resistant product, sealed continuously across the whole floor, run up the foundation walls, and taped at every seam rather than simply overlapped. As an illustrative material figure, the liner itself runs 0.50 to 1.50 dollars per square foot before labor, a modest line relative to the full installed price, which tells you plainly that most of what you are paying for in encapsulation is the labor to seal it correctly, not the plastic itself.
Sealing vents and the rim joist
Sealing the foundation vents that used to let outside air circulate through the crawl space is a required step in any true encapsulation job, not an optional extra, because the entire premise of encapsulation is removing that outside air exchange and replacing it with a controlled, sealed environment instead. Vents are typically sealed with a rigid foam plug or a dedicated vent cover product, sometimes with a small mechanical damper if local code requires one for inspection access.
Air sealing at the rim joist, the band around the top of the foundation wall where the floor framing sits, closes a second major leak path that a liner on the floor alone does nothing about. Spray foam is commonly used here specifically because it seals irregular gaps around framing members more completely than a batt or a rigid board can, a detail this brief’s companion spray foam insulation cost brief covers in depth for anyone treating the rim joist as part of the same project.
Sump pump cost: when standing water changes the job
A vapor barrier liner manages moisture vapor rising from damp soil, but it does nothing for actual standing water, and in fact can make a wet crawl space look worse at first, since water that used to soak slowly into exposed dirt now simply pools on top of an impermeable liner instead. If your crawl space has any real history of groundwater intrusion, a high water table, or rainwater directed toward the foundation by poor exterior grading, a sump pump is not optional, it is the piece that actually solves the water problem the liner cannot.
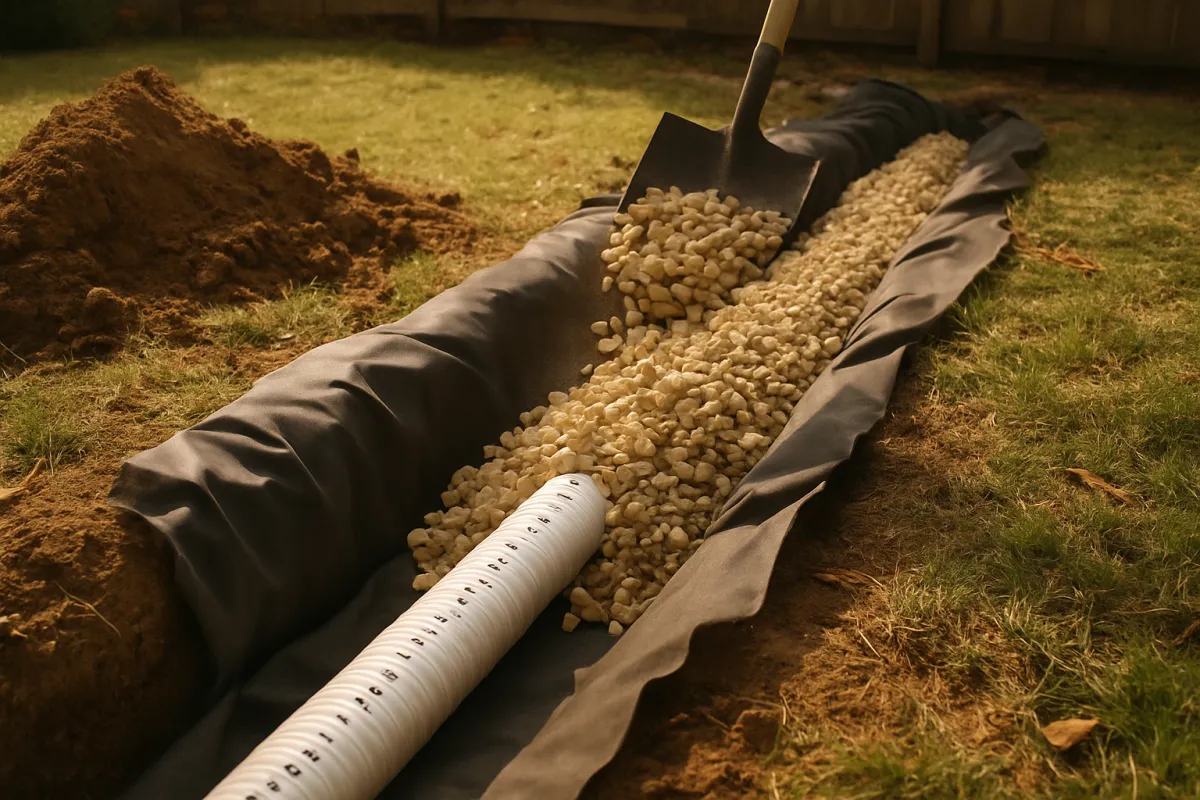
As an illustrative figure, a sump pump system, the pit, the pump, a check valve, and a discharge line routed away from the foundation, commonly adds 600 to 1,500 dollars installed on top of the base encapsulation cost. A battery backup pump is a reasonable addition anywhere a power outage during a storm is a real risk, since that is precisely when a sump pump is working hardest and most likely to be needed. Our french drain cost brief covers the related exterior drainage work that often reduces how much water ever reaches the crawl space in the first place.
Dehumidifier cost and why most complete jobs budget for one
Once a crawl space is sealed and its vents closed, the natural air exchange that used to dilute humidity, imperfect and uncontrolled as it was, is deliberately removed. If any moisture still gets into the sealed space, from the slab beneath a liner seam, from plumbing, or simply from residual dampness in the framing, humidity can climb inside the now-sealed space with nowhere to go unless something actively manages it. A dedicated dehumidifier is that something, and most complete encapsulation jobs budget for one as a standard line rather than an optional extra.
As an illustrative figure, a crawl space dehumidifier, sized for the space and set to maintain a target humidity automatically, commonly runs 300 to 700 dollars for the unit itself, with installation, often including a dedicated drain line or a condensate pump so the unit never needs manual emptying, adding more on top. Skipping the dehumidifier to save money upfront is a common shortcut, and it is the single most frequent reason an otherwise well-installed encapsulation job still develops a musty smell or visible condensation within the first year or two.
Insulation: why the plane moves from the floor to the wall
Encapsulating a crawl space changes a real engineering decision about where insulation belongs, not just a cosmetic choice. In a vented, unencapsulated crawl space, insulation commonly goes in the floor above, between the joists, because the crawl space itself is treated as effectively outdoor-adjacent space, which is exactly the scenario our R-value manual works through in its own floor-over-crawl-space example. Once a crawl space is sealed and conditioned, that logic flips: insulating the perimeter foundation wall instead of the floor above brings the crawl space itself inside the home’s effective thermal envelope.
This matters because insulating both the floor and the wall is redundant and can trap moisture in the wrong place, while insulating neither leaves an encapsulated space with no thermal boundary at all. Rigid foam board against the foundation wall or spray foam applied directly to it are the two common approaches, and our spray foam insulation cost brief prices the latter in full for anyone pairing insulation with the same encapsulation project.
What drives crawl space encapsulation cost
Beyond the add-ons already covered, a handful of site factors move the base liner rate within its own wide range. Accessibility is the first and often the largest: a crawl space with generous headroom and an easy entry point is far faster and less physically demanding to work in than a cramped 18 inch space reachable only through a tight exterior hatch, and labor time, not material, dominates the installed price. Crawl spaces with existing debris, old insulation that has to be removed first, or standing water already present also add real time before the actual liner work can even begin.
Foundation wall height and total perimeter length matter too, since the liner has to run up every wall to the sealing height, not just across the floor, so an unusually tall foundation or a complex, multi-angled perimeter adds material and sealing labor beyond what the floor area alone would suggest. Existing structural issues, rotted framing, active pest damage, or a foundation crack, are their own cost category entirely and are commonly flagged during the initial inspection as separate repair line items before the encapsulation itself is priced.
Signs a crawl space genuinely needs encapsulation
A handful of observable signs separate a crawl space that genuinely needs encapsulation from one where the spending would be mostly precautionary. A musty, earthy smell noticeable in the living space above, especially one that gets stronger in humid weather, is one of the most common complaints that traces back to a vented crawl space pulling damp air upward through the home. Visible condensation on ductwork, water pipes, or the underside of the subfloor during humid months is another concrete sign, as is standing water or visibly wet soil after rain rather than ground that is simply damp to the touch.
Sagging insulation hanging loose from the floor joists, visible mold on framing or old insulation, and any soft or spongy flooring directly above the crawl space are all signs that moisture has already been doing damage for some time rather than remaining a theoretical risk. A crawl space with none of these signs, dry soil, no musty smell, and insulation still properly in place, is a lower-priority candidate, where encapsulation is more of an improvement than a repair, a distinction worth being honest with yourself about before committing to the higher end of this brief’s cost range.
Is encapsulation worth it for your specific crawl space
Encapsulation solves a specific, recurring problem: moisture entering an unsealed crawl space from damp soil and outside humid air, which can feed wood rot in the floor framing above, attract pests drawn to the damp environment, and pull musty, humid air up into the living space through the stack effect, the same natural pressure difference that makes warm air rise through a house. For a crawl space with a genuine, ongoing moisture problem, visible condensation, a musty smell noticeable from the living space above, or any history of wood rot, the upfront cost is commonly weighed against the real alternative cost of repeated repairs or a persistent indoor air quality issue that is otherwise hard to fix.
For a crawl space that is already genuinely dry, has good exterior drainage, and shows no signs of moisture trouble, the cost is harder to justify on moisture grounds alone. Some owners still choose to encapsulate a dry space purely for the cleaner, more usable storage area a sealed, finished-looking floor provides, which is a legitimate reason but a different value proposition than solving an active problem. An honest inspection of your actual crawl space’s condition, not a general rule, should decide this one.
DIY versus hiring a pro
Laying a vapor barrier liner yourself is a realistic do-it-yourself project for a comfortable, reasonably accessible crawl space, and the liner material itself is a modest cost relative to a full professional installed price. The genuine cost a professional quote is largely pricing is not the plastic, it is hours spent crawling and working in a low, dark, often dusty or uncomfortable space, which is exactly the kind of labor most people are glad to pay someone else to do.
The pieces worth hiring out even if you tackle the liner yourself are the ones with real consequences for getting them wrong: sealing every seam and wall transition completely, since a gap anywhere defeats much of the purpose, sizing and wiring a sump pump correctly, and selecting and installing a dehumidifier sized for the actual space rather than guessing. A hybrid approach, laying and sealing the liner yourself and hiring out the mechanical pieces, is a reasonable middle path that captures real savings without taking on the parts most likely to go wrong without experience.
How long an encapsulation job takes
A full encapsulation on a typical 1,200 square foot crawl space commonly takes a professional crew one to three days, depending heavily on accessibility, how much old debris or failed insulation has to come out first, and whether a sump pump is being added at the same time. A simple, clean, easily accessible space with no demolition needed can sometimes finish in a single long day, while a cramped space with extensive old material to remove, or one needing a sump pit dug into the floor, commonly stretches toward the longer end.
The schedule matters because most of the labor happens in a confined space one or two workers at a time, so adding more crew members speeds a job up less than it would on an open-floor project like a patio or a driveway. If a sump pump and dehumidifier are part of the same job, expect the electrical and plumbing pieces to add their own time on top of the liner work itself, sometimes coordinated as a separate trade visit rather than the same crew doing everything start to finish.
Warranty and what a sealed liner should carry
A reputable encapsulation contractor should offer a specific warranty on the liner material and the sealing workmanship, commonly somewhere in the range of 10 to 25 years for the liner itself depending on the product used, with workmanship coverage on the sealing and installation often shorter. Ask specifically what the warranty covers, whether it transfers to a future homeowner if you sell the home, and what would void it, since a punctured liner from someone later storing sharp items directly on top of it is a common and reasonable exclusion.
A sump pump and dehumidifier typically carry their own separate manufacturer warranties on the equipment itself, distinct from the liner warranty, so confirm both pieces are documented rather than assuming one warranty covers the whole job. A contractor unwilling to put a specific warranty term in writing is a meaningful signal worth weighing against the rest of a bid, regardless of how competitive the price looks.
Mold remediation and encapsulation are two different jobs
Encapsulation addresses the moisture that feeds mold growth, but it is not itself a remediation service for mold that is already present and established on framing or old insulation. If a crawl space inspection turns up visible mold, especially anything extensive or on structural framing members, that is commonly its own separate scope, cleaned or treated by a remediation specialist, priced apart from the encapsulation work and sometimes required to be completed before the liner and sealing can proceed.
Treating existing mold and then encapsulating without addressing the moisture source that let it grow in the first place wastes the remediation spending, since the same conditions will likely allow it to return. The correct order is almost always to identify and address the moisture source first, through grading, drainage, or a sump pump as needed, remediate any existing mold, and only then install the sealed liner as the long-term barrier against the problem recurring.
Pest control and a sealed crawl space
A damp, vented crawl space is an attractive environment for a range of pests, from wood-destroying insects drawn to persistently moist framing to rodents that can enter through the same vents an encapsulation job seals shut. Sealing the vents and air-sealing the rim joist as part of encapsulation genuinely removes several common entry points, which is a real secondary benefit beyond the moisture control itself.
Encapsulation is not a substitute for a dedicated pest inspection or treatment if an infestation is already established, and a liner installed over an active termite or rodent problem without addressing it first simply seals the problem in rather than solving it. As with mold, the sensible order is inspecting for and addressing any active pest issue before or during the same project, not after the liner is already down and sealed.
Insurance and whether encapsulation is covered
Homeowners insurance commonly treats gradual moisture damage, the slow deterioration encapsulation is meant to prevent, very differently from a sudden, accidental event, and that distinction usually decides whether any part of a crawl space project is covered. A standard policy typically excludes damage from long-term dampness, mold that developed gradually, or wear that built up over time, which means encapsulation itself is almost always an out-of-pocket preventive expense rather than something a policy reimburses.
A sudden event, a burst pipe that flooded the crawl space overnight, is a different category and may be covered for the cleanup and repair, though even then a policy may specifically exclude the mold or rot that develops afterward if remediation is delayed. Flood damage from rising groundwater or surface water is its own separate category, commonly excluded from a standard homeowners policy entirely and only covered under a specific flood insurance policy. Confirm your own policy’s specific language with your insurer before assuming any part of an encapsulation project would be reimbursed, since assuming coverage that does not exist is a common and costly surprise.
Regional cost swings
Every rate in this brief is a national illustrative figure, and the real number in your market moves with local labor costs, how common encapsulation work is in your region, and how much your local soil and water table conditions typically demand in the way of sump pumps and drainage work. Regions with naturally high water tables, heavy clay soil that drains poorly, or a humid climate overall commonly see encapsulation priced toward the higher end of the range and see sump pumps specified more often as a near-default rather than an occasional add-on.
Drier regions with sandy, well-draining soil and a lower water table commonly see more jobs completed as liner-and-sealing-only without a pump, which keeps the all-in total closer to the base rate. Get a quote from a contractor who regularly works in your specific area and soil type, since their default scope assumptions are more informative than any single national range.
Ways to keep crawl space encapsulation cost down
A few real levers exist even on a job with this much fixed scope. The clearest is being honest about whether a sump pump is actually needed: if your crawl space has never shown standing water and your exterior grading already directs rainwater away from the foundation, a quote that defaults to including a pump anyway is worth questioning rather than accepting automatically. Clearing out old debris, old insulation, or stored items yourself before the crew arrives removes labor time that would otherwise be billed.
Choosing a quality mid-range liner rather than the thickest premium product available is a reasonable place to trim cost without meaningfully compromising the result, since the sealing workmanship matters more to long-term performance than squeezing a few extra mils of thickness out of the liner itself. What should never be cut is sealing completeness: a liner that covers most of the floor but skips sealing every seam or wall transition defeats much of the purpose, and a partial seal is a common way an encapsulation job underperforms its cost.
Permits and local requirements
Whether crawl space encapsulation requires a permit varies by jurisdiction and often depends on what exactly is being done. Laying a vapor barrier alone is frequently exempt in many places, while sealing foundation vents, which some older building codes required specifically for ventilation, can trigger a permit or an inspection requirement in jurisdictions that have not updated their code to reflect sealed-crawl-space practices. Adding a sump pump with a discharge line that connects to or crosses municipal drainage infrastructure can also require a permit depending on your local rules.
The only reliable answer comes from your local building department, and it is worth confirming before vents are sealed rather than after, since a few jurisdictions still require a minimum ventilated area unless an approved mechanically conditioned alternative is installed in its place. A reputable encapsulation contractor working in your area should already know your local code’s specific stance on vent sealing and can usually confirm it without you having to call yourself.
Comparing encapsulation bids line by line
An encapsulation bid that reads as a single lump sum is the hardest one to judge, because a lower total can hide a thinner liner grade, a skipped dehumidifier, or an assumption that no sump pump is needed rather than a genuinely better price for the same scope. Ask every bidder to itemize the liner’s mil thickness and whether it runs up the walls or only across the floor, whether vents are being sealed and how, whether a sump pump and dehumidifier are included or priced separately, and whether any insulation is part of the same quote.
Two bids for the same square footage can differ by thousands of dollars for reasons that have nothing to do with one contractor being a better value: one may be quoting a thin floor-only liner while the other quotes a full wall-to-wall sealed system with a pump and dehumidifier included. Confirm what each line actually covers before comparing totals, and treat an unusually low bid as a signal to ask specifically what it leaves out rather than an automatic win.
A worked example: a 1,200 square foot crawl space priced
Take a common case end to end: a 1,200 square foot crawl space under a modest single-story home, with a known history of minor standing water after heavy rain but no major structural damage. The base encapsulation, a full 15 mil sealed liner up the walls, vent sealing, and rim joist air sealing, prices at the illustrative midpoint of 9 dollars per square foot, roughly 10,800 dollars.
Add a sump pump at an illustrative 1,000 dollars for the standing-water history, and a dehumidifier at an illustrative 500 dollars installed, and the full job reaches roughly 12,300 dollars as a planning figure. Skip both add-ons for a crawl space with no water history and no need to actively manage humidity beyond what the sealed liner itself helps with, and the same square footage lands back near the 10,800 dollar base figure. The chart below breaks down where that money goes across a complete job with both add-ons included.
Where a complete crawl space encapsulation job's cost goes
Illustrative split for a 1,200 sq ft crawl space with a sump pump and dehumidifier included.
The base liner and its sealing labor still carry most of the job even with both add-ons included, which is why a quote that is missing the sump pump or dehumidifier can look deceptively cheap against one that includes them.
Illustrative crawl space encapsulation cost per square foot, by scope
Base liner alone against the fuller scopes most real jobs end up needing.
A basic floor-only vapor barrier is a different, much cheaper product than true encapsulation, which is exactly why the two should never be compared on price alone without first confirming they are the same scope.
Scale the same job up to a larger 2,000 square foot crawl space under a bigger single-story footprint, and the base liner alone at the 9 dollar midpoint reaches roughly 18,000 dollars, with the sump pump and dehumidifier adding the same illustrative 1,000 and 500 dollars regardless of footprint, since those two systems are sized to the space’s moisture load rather than scaling linearly with square footage the way the liner itself does. That is worth noting directly: a bigger crawl space does not necessarily need a bigger sump pump or a larger dehumidifier, so do not assume every line in a quote should grow proportionally with the floor area just because the liner cost does.
Run your own crawl space’s square footage and known moisture history through the companion below to see how the add-ons move your own total.
The bottom line
Crawl space encapsulation cost comes down to a short list in a fixed order: the floor area, the liner grade and whether it runs up the walls, and whether a sump pump and dehumidifier are part of the scope. As an illustrative planning range, the base job runs 5 to 15 dollars per square foot, near 9 at the midpoint, and you turn that into a total by multiplying by your crawl space’s footprint, not by guessing from the home’s floor area alone, since the two are not always identical.
Confirm whether your space has a real moisture or standing-water history before deciding on a sump pump, budget for a dehumidifier on any fully sealed space, and move your insulation to the perimeter wall rather than leaving it in the floor once the space is sealed. Measure your footprint with our square-footage manual or the estimator, price your own numbers in the companion below, and get more than one written bid that itemizes the liner grade and every add-on separately. Do that and the quote you receive becomes a number you can judge rather than one that simply surprises you.
Treat this as workbench education, not a price quote or an engineering assessment. Every dollar figure here, per square foot, per add-on, and per project, is an illustrative planning range, and your crawl space’s accessibility, existing moisture or structural condition, foundation height, and region will each move the real numbers, often significantly. A crawl space with active standing water, visible structural damage, or signs of pest activity should be assessed by a qualified foundation or waterproofing contractor before any encapsulation work begins, since encapsulating over an unresolved water or structural problem can trap it rather than solve it. Build your actual budget on a live, written quote and an in-person inspection of your specific crawl space, not on any single figure printed here.
Frequently asked questions
How much does crawl space encapsulation cost?
As an illustrative planning range, full crawl space encapsulation, a heavy vapor barrier across the floor and up the walls, sealed vents, and basic air sealing, commonly runs somewhere around 5 to 15 dollars per square foot of crawl space floor area, with a working midpoint near 9 dollars. A typical 1,200 square foot crawl space lands near 10,800 dollars at that midpoint, though the range swings widely because a sump pump, a dehumidifier, and insulation are each priced as their own add-on rather than folded into the base liner cost. Get a written local quote, since standing water, structural repairs, and how much of the space is accessible move the real figure more than any single table.
What is included in crawl space encapsulation?
At its core, encapsulation is a heavy vapor barrier liner sealed across the entire crawl space floor and sealed or taped up the foundation walls, combined with sealing the vents that used to ventilate the space to outside air and air-sealing gaps where pipes, ducts, or wiring pass through the rim joist. Most complete jobs also add a sump pump if the space has ever taken on standing water, and a dedicated dehumidifier to hold the sealed space at a safe humidity level once outside air is no longer flushing through it. Insulation at the perimeter wall rather than the floor above is the common companion step, covered separately in this brief.
Is crawl space encapsulation worth the cost?
Encapsulation addresses a specific, recurring problem, moisture entering an unsealed crawl space from the soil and outside air, that can otherwise feed wood rot, pest activity, and musty air drawn up into the living space above through the stack effect. For a crawl space with a genuine, ongoing moisture problem, the cost is commonly weighed against the alternative cost of repeated wood repairs, mold remediation, or a musty-smelling home that is hard to otherwise fix. For a genuinely dry crawl space with good drainage already, the upfront cost is harder to justify on moisture grounds alone, though some owners still value the cleaner, more usable storage space a sealed floor provides.
Do I need a sump pump with crawl space encapsulation?
Only if the crawl space has a real history of taking on water, whether from groundwater, a high water table, or poor exterior drainage directing rainwater toward the foundation. A vapor barrier alone manages moisture vapor rising from damp soil, but it does nothing for actual standing water, which will simply pool on top of the liner instead of soaking into the ground beneath it, often making a wet crawl space look worse rather than better until a pump is added. As an illustrative figure, a sump pump system commonly adds 600 to 1,500 dollars installed on top of the base encapsulation cost, and a battery backup is a reasonable addition anywhere a power outage during a storm is a real risk.
How much does a crawl space dehumidifier cost?
A dedicated crawl space dehumidifier, sized for the space and set to maintain a target humidity automatically, commonly runs an illustrative 300 to 700 dollars for the unit itself, with installation, often including a dedicated drain line or condensate pump, adding more on top. Encapsulating a crawl space without adding a dehumidifier is a common shortcut that saves money upfront but can let humidity climb inside the now-sealed space if any moisture still gets in, since the natural air exchange with outside that used to dilute it is now deliberately blocked. Most complete encapsulation jobs budget for a dehumidifier as a standard line rather than an optional extra.
How is crawl space encapsulation different from a vapor barrier alone?
A basic vapor barrier is a thinner plastic sheet, often 6 mil, loosely laid across the crawl space floor and sometimes not sealed at the seams or the walls, mainly to slow moisture vapor rising directly from exposed soil. Full encapsulation uses a thicker, more durable liner, commonly 10 to 20 mil or a reinforced product, sealed continuously across the floor, up the foundation walls, and taped at every seam, paired with sealed vents and air sealing at the rim joist, turning the crawl space from a vented outdoor-adjacent space into something closer to a sealed, semi-conditioned one. The thicker, fully sealed approach costs more but addresses moisture far more completely than a loose floor liner alone.
Can I encapsulate my own crawl space?
Laying a vapor barrier liner yourself is a realistic do-it-yourself project for a comfortable, accessible crawl space, and the liner material itself is a modest cost, an illustrative 0.50 to 1.50 dollars per square foot for a quality 10 to 20 mil product before labor. The work itself is uncomfortable, crawling and working in a low, dark, often dusty space for hours, which is the real cost a professional quote is largely pricing. Sealing the liner properly at every seam and up the walls, installing a sump pump, and wiring a dehumidifier correctly are each harder to get right without experience, so a hybrid approach, doing the liner yourself and hiring out the mechanical pieces, is a reasonable middle path.
Does encapsulating a crawl space help with energy bills?
Often somewhat, though the effect is usually modest rather than dramatic on its own. An unsealed, vented crawl space can be a significant source of air leakage and humidity moving into the floor above it, and sealing and conditioning the space, especially when paired with insulating the perimeter wall rather than the vented floor above, can reduce how hard a home's heating and cooling system works to manage that moisture and temperature swing. The bigger, more reliably noticeable benefits are usually a drier, less musty crawl space and less long-term risk to the floor framing above it, with any energy savings a real but secondary bonus on top.