
What's on this page
- The riprap calculator in one line
- What riprap is, and how it differs from gravel and rock mulch
- Riprap classes and sizes: D50 and why it matters
- Measuring the area: slopes, channels, and shorelines
- Layer thickness: the 1.5 to 2 times D50 rule
- From cubic yards to tons: riprap’s density
- A worked example: a 40 by 10 foot slope revetment
- Bedding stone and filter fabric underneath riprap
- Riprap for drainage swales and channel linings
- Riprap for shoreline and streambank protection
- Grouted versus loose riprap
- Hand-placed versus dumped riprap, and why it changes thickness
- Buying riprap: by the ton, by the yard, by the load
- What riprap costs, in rough terms
- Permits and environmental review near water
- Maintenance and signs riprap needs attention
- The reverse problem: a delivered tonnage, what area it covers
- Common mistakes sizing riprap
- Your riprap order checklist
- The bottom line
Short answer: Multiply the area in square feet by the layer thickness in feet to get cubic feet, divide by 27 for cubic yards, then multiply by an illustrative density of 1.3 to 1.6 tons per cubic yard for the tons to order. A 400 square foot slope at an 18 inch layer is 600 cubic feet, about 22.2 cubic yards, which lands somewhere around 29 to 36 tons depending on the rock's density.
A riprap calculator answers a question that a gravel or mulch calculator almost gets you to, and then quietly gets wrong, because riprap is sold by weight while every other loose material on this site is planned by volume first. The area-times-thickness math is identical to any other coverage calculation, but the conversion from cubic yards to the tons a supplier actually bills for depends on a density figure that moves more for riprap than it does for compacted gravel or sand, because large, irregular, angular stone leaves more air between pieces than a smaller, more uniform material does.
This manual works riprap from the project to the delivery ticket: what separates riprap from ordinary gravel or decorative stone, how class and size are specified, the area and thickness math, the ton conversion and why the density figure is wider than other materials, the fabric and bedding layer underneath, and how hand-placed and dumped riprap differ in the thickness they actually need. It sits alongside our gravel manual for the comparable loose-material math and our tons to cubic yards manual for the general weight-to-volume conversion riprap leans on hardest. Run your own project through the estimator or the companion below as you read.
Key takeaways
- The formula is area in square feet times layer thickness in feet, divided by 27 for cubic yards, times an illustrative 1.3 to 1.6 tons per cubic yard for tons.
- Riprap is structural erosion control rock, sized and classed for a specific water velocity or slope; it is not interchangeable with decorative landscape stone.
- Layer thickness is commonly specified as roughly 1.5 to 2 times the rock class's median stone diameter, called the D50, not a single fixed depth.
- Riprap density runs lower than compacted gravel, commonly 1.3 to 1.6 tons per cubic yard, because large angular stone leaves more air space in a loose layer.
- Most riprap installations over soil need a geotextile filter fabric underneath to stop the soil washing through the gaps as water moves across the surface.
The riprap calculator in one line
Compressed to one pass: find the area the riprap will cover, multiply by the specified layer thickness to get a volume, convert that volume to cubic yards, then multiply by the rock’s density to get the tons you order. Area times thickness divided by 27 gives cubic yards; cubic yards times density gives tons.
In one line: area in square feet, times thickness in feet, divided by 27, times an illustrative 1.3 to 1.6 tons per cubic yard, equals tons of riprap to order.
Every section below either measures one of those inputs honestly, area, thickness, or density, or explains why the number is a range rather than a fixed figure for this particular material. Riprap behaves like gravel in the geometry of the calculation and unlike gravel in how wide its density range runs, which is the one habit worth unlearning if you are used to ordering compacted base material.
What riprap is, and how it differs from gravel and rock mulch
Riprap is large, angular, broken rock, placed specifically to resist being displaced by moving water, wave action, or gravity on a slope, which sets it apart from both compacted gravel base and decorative landscape stone even though all three are loose rock products. Compacted gravel is chosen and graded to interlock and pack tight under load, the base material this site’s other manuals cover for driveways, patios, and walls. Decorative stone and rock mulch are chosen for appearance and ground cover in a garden bed, usually smaller and often rounded rather than angular.
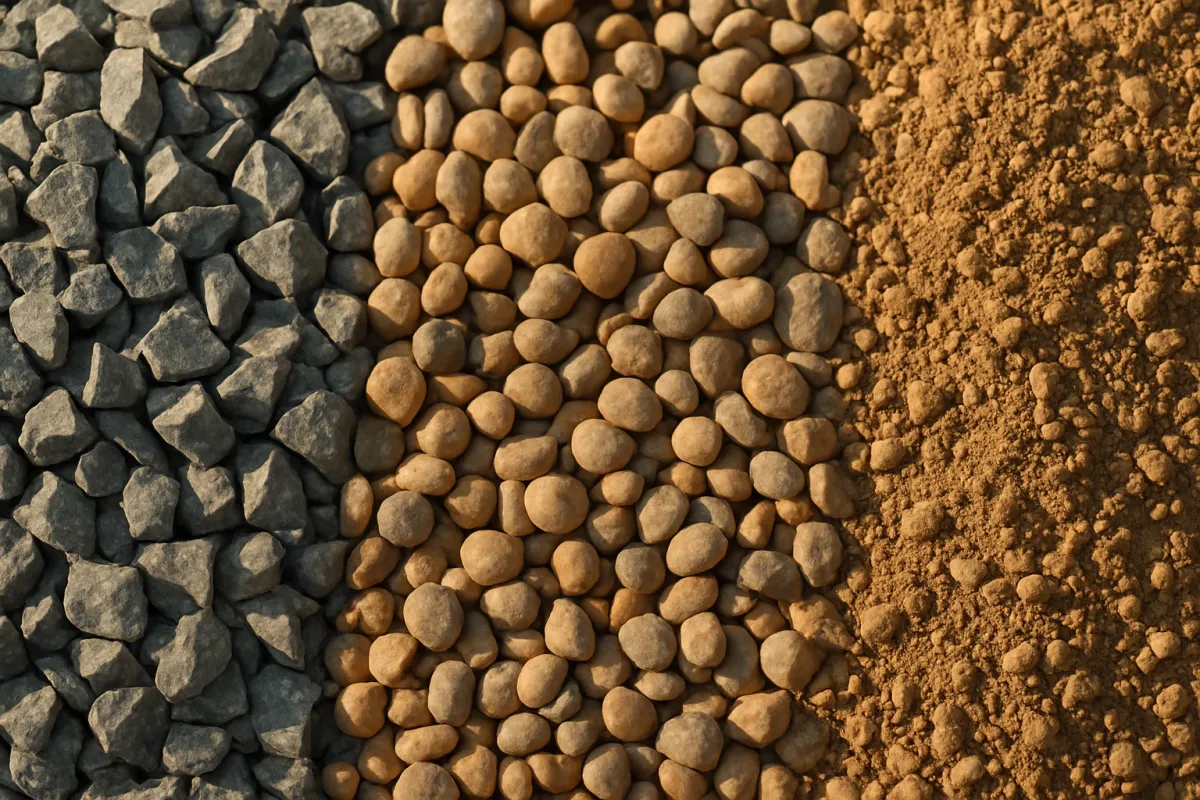
Riprap sits in a different category from both: it is structural, specified by an engineer or a drainage standard for a particular job, and its size, shape, and placement are chosen specifically to withstand erosive force rather than to look attractive or to compact into a stable base. Using decorative stone where a design calls for riprap is not a cosmetic downgrade, it is leaving the slope or channel genuinely unprotected, since smaller, often rounded stone has far less resistance to being moved by the same flow that a correctly sized riprap class would withstand.
Riprap classes and sizes: D50 and why it matters
Riprap is specified by a class or a size designation tied to the median stone size in the mix, commonly called the D50, meaning 50 percent of the stones by weight are larger than that size and 50 percent are smaller. A mix is never a single uniform size; it is a graded blend within a specified range around that median, which is part of why riprap interlocks well once placed, smaller stones filling gaps between larger ones.
The class required for a given project is an engineering determination driven by the water velocity, wave energy, or slope the riprap has to resist, not a preference or a visual choice. A slow drainage swale needs a smaller class than an actively eroding streambank, and a shoreline exposed to wave action from open water needs a larger class again. Confirm the specified class from an engineered design, a local drainage authority’s standard, or a qualified contractor rather than selecting a size by eye at a stone yard, since an undersized class on a real erosion-control job can fail outright rather than merely underperform.
Measuring the area: slopes, channels, and shorelines
Area for a riprap project is measured the same way any surface coverage is, length times width for a simple rectangle, decomposed into pieces for an irregular shape, the same approach our general estimating manual uses for any material. The complication specific to riprap is that the surface is very often sloped rather than flat, a channel bank or a shoreline revetment running up and away from the water at an angle, which means the area measured along the slope’s actual surface is larger than the flat, plan-view footprint a satellite image or a site plan would show.
To convert a flat, plan-view length to a slope-surface length, divide by the cosine of the slope angle, or equivalently use the slope distance directly if you can measure it with a tape run along the actual ground surface rather than a horizontal distance. A slope rising 3 feet vertically over a 10 foot horizontal run, a common riprap application, has a surface length about 4.5 percent longer than the horizontal distance alone, which is a small but real correction that grows as the slope gets steeper, and on a steep bank approaching a one-to-one slope the correction climbs well past 40 percent, enough on its own to leave a tonnage order meaningfully short if it is skipped.
Layer thickness: the 1.5 to 2 times D50 rule
Once the area is settled, thickness is the lever that determines the volume, exactly the way depth decides a topsoil or mulch order, and riprap thickness is commonly tied directly to the rock size rather than chosen independently of it. A widely cited rule of thumb specifies the layer thickness at roughly 1.5 to 2 times the class’s D50, the median stone diameter, which ensures the layer is thick enough to seat the largest stones properly and present a continuous, interlocking surface rather than a thin scatter with gaps down to the soil.
Illustrative layer thickness by riprap class (D50)
Thickness at 1.75 times the median stone diameter, a commonly cited midpoint of the 1.5 to 2 range.
Each bar is the class's median stone size, D50, times 1.75. Larger rock classes need proportionally thicker layers, which is why a single fixed thickness figure across every project understates what a larger class actually requires.
This is also why a single fixed thickness, say 6 inches for every job, is the wrong default for riprap even though it might be a reasonable planning figure for a gravel path. A project specified at a larger rock class needs a thicker layer by the same proportion the rock itself is bigger, and the volume, and therefore the tonnage, scales directly with that thickness. Always confirm the specified or recommended thickness for your actual rock class before running the volume math.
From cubic yards to tons: riprap’s density
Once area and thickness give a volume in cubic feet, divide by 27 for cubic yards, the same conversion every other bulk material on this site uses. The step specific to riprap is the next one: converting cubic yards to tons, since riprap is almost always sold and delivered by weight rather than by loose volume.
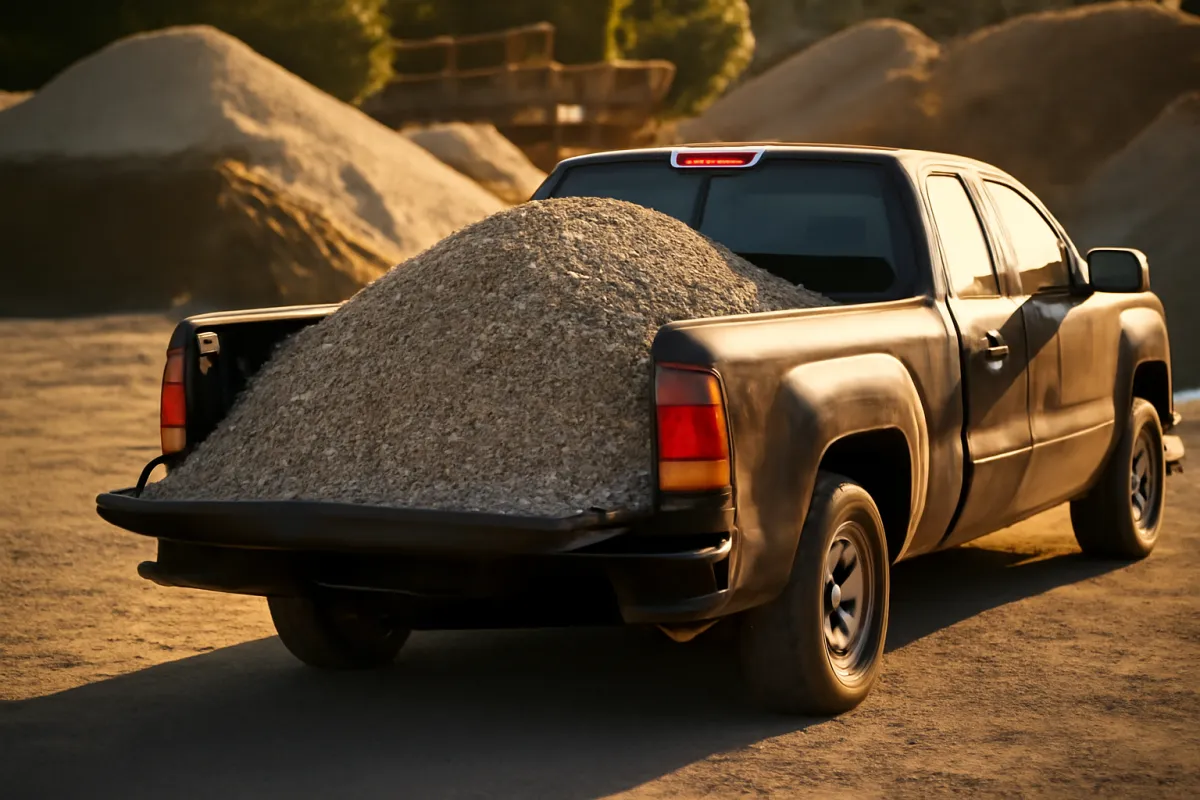
A commonly cited density range for riprap is somewhere around 1.3 to 1.6 tons per cubic yard, noticeably lighter per cubic yard than many people expect, and lighter than compacted crushed stone or gravel base, because the loose, angular, interlocking placement of a riprap layer leaves real air space between the large stones that a smaller, more uniformly graded compacted material does not leave to the same degree. The exact figure depends on the specific rock type, its gradation, and how the layer settles once placed, so treat the range as a planning figure and confirm actual density with your supplier for a large order, since even a 10 percent difference in assumed density moves the tonnage on a big job by a meaningful amount.
This is the single biggest difference between estimating riprap and estimating almost any other bulk material this site covers. A gravel or sand order is forgiving of a small density error because the per-unit cost is modest and the margin of a rounding-up allowance easily absorbs it; a 32 ton riprap order moving by even 5 percent on density is well over a ton of material and real delivered cost, which is exactly why this manual treats the density figure as something to confirm, not assume.
A worked example: a 40 by 10 foot slope revetment
Pull the whole calculation together on a running project. A streambank revetment runs 40 feet along the water’s edge and extends 10 feet up the slope, an area of 400 square feet. The design specifies an 18 inch, or 1.5 foot, layer thickness for the rock class being used.
Volume is 400 times 1.5, 600 cubic feet, which divided by 27 is about 22.2 cubic yards. At the illustrative density range of 1.3 to 1.6 tons per cubic yard, that is 22.2 times 1.3, about 28.9 tons, up to 22.2 times 1.6, about 35.6 tons, a midpoint around 32 tons. Most suppliers will round an order like this to a clean delivery increment, commonly whole or half truckloads, rather than the exact decimal the formula returns.
What the 32-ton order is made of
Illustrative volume-to-weight path for the worked example, to 100 percent of the 22.2 cubic yards.
Unlike the other charts on this site, riprap has no neat sub-material split to show: the entire volume is the rock itself, which is exactly why the density range, rather than a composition breakdown, is the number worth getting right here.
This project also needs a bedding layer and filter fabric underneath, covered next, which is a separate, smaller material order from the riprap tonnage itself. Run your own area, thickness, and density range through the companion below for the same numbers on your project.
Bedding stone and filter fabric underneath riprap
Most riprap placed over soil, rather than directly onto rock or an engineered structure, needs a geotextile filter fabric laid down first, and often a layer of smaller bedding stone between the fabric and the riprap itself. The fabric’s job is to let water pass through while keeping the underlying soil particles from migrating up through the gaps between the large riprap stones, a failure mode that happens entirely underground and is invisible from the surface until the slope has already begun to erode from beneath an apparently intact rock layer.
Bedding stone, when specified, is a smaller graded stone that sits between the fabric and the riprap, both protecting the fabric from being punctured by the larger stones above it and providing a more graduated transition in particle size from the fine soil to the large riprap. Both the fabric and any bedding layer are separate line items from the riprap tonnage calculated above, priced and ordered on their own, and skipping either one on a project that specifies them is a common, expensive mistake precisely because the consequence is not visible until the installation has already failed. Fabric is typically priced and ordered by the square foot of the same area already calculated for the riprap itself, with a modest overlap allowance where adjacent sheets of fabric join, commonly an illustrative 10 to 20 percent added to the bare area for that overlap.
Riprap for drainage swales and channel linings
A drainage swale or a lined channel carrying moving water during storm events is one of the most common riprap applications outside of streambank and shoreline work, and the area calculation there usually covers the channel’s wetted perimeter, the bottom plus both sloped sides, rather than a single flat area. Treat each surface, the bottom and each side slope, as its own rectangle in the same decomposition method used for any irregular footprint, remembering to use the slope-surface length rather than the horizontal distance for the angled sides.
The rock class for a drainage application is set by the design flow velocity the channel is expected to carry, which is an engineering calculation outside the scope of this manual, so treat any size mentioned here as illustrative rather than a specification for a real drainage structure. A channel that is undersized for its actual peak flow is a flood and erosion risk, not just an underperforming cosmetic choice.
Riprap for shoreline and streambank protection
Shoreline and streambank riprap, called revetment when placed along a bank to resist erosion from flowing or wave-driven water, generally uses a larger rock class than a drainage swale because the erosive forces, current, wave action, and ice in some climates, are typically stronger and more sustained than storm-water flow through a swale. The layer often extends both above and below the normal water line, since the zone right at the waterline, where wetting and drying cycle repeatedly, is frequently the most erosion-prone part of a bank.
Measuring this kind of installation usually means breaking the bank into the submerged, waterline, and above-water zones separately if the specified rock class or thickness differs between them, which it sometimes does on a larger engineered project, then summing each zone’s own area and volume rather than treating the whole bank as one uniform calculation. A bank that transitions from a steep lower slope to a gentler upper one may also need two different thickness figures for the same reason, which is one more case where decomposing the project into pieces, the same discipline the area section above describes, pays off on a riprap job specifically.
Grouted versus loose riprap
Standard riprap is placed loose, stone resting against stone with no binder, which allows water to pass freely through the layer and lets individual stones shift slightly to accommodate minor settling without the whole structure failing. Grouted riprap fills the gaps between stones with a flowable concrete grout, locking the layer into a more rigid, continuous mass, typically specified where erosive forces are severe enough that loose stone would be displaced, or where a smoother, more walkable surface is wanted.
Grouting adds a separate material and labor cost on top of the riprap tonnage itself, calculated from the void space between the stones the grout has to fill, commonly an illustrative 30 to 40 percent of the riprap’s placed volume, though the real figure depends heavily on the specific rock gradation. Grouted riprap is a specialized application that is usually specified by an engineer for a particular erosion problem rather than chosen as a general upgrade, since it also loses some of loose riprap’s ability to let water drain through the layer.
A related alternative worth knowing by name, though it is a different product entirely from either loose or grouted riprap, is a gabion: wire mesh baskets filled with smaller rock and wired shut, stacked to form a wall or a revetment face. Gabions use smaller, less expensive stone than riprap typically requires and can hold a steeper face than loose riprap safely could, at the cost of the wire baskets eventually corroding or failing over a long enough service life, which loose or grouted stone riprap does not have as a failure mode. Choosing between the three is a design decision for an engineer, not a quantity this calculator’s formula decides on its own.
Hand-placed versus dumped riprap, and why it changes thickness
Riprap can be installed either by dumping and lightly leveling the stone with equipment, the faster and more common method for most projects, or by hand-placing individual stones in a deliberate, interlocking arrangement, which is slower and more labor-intensive but can achieve a tighter, more uniform layer at a somewhat reduced thickness for the same erosion protection. Specifications sometimes allow a thinner hand-placed layer than a dumped one for this reason, since the careful placement reduces the voids a dumped layer leaves to chance.
For most residential and general landscape applications, dumped riprap with equipment is the standard, economical method, and the thickness figures and D50 multiples discussed above assume that placement method rather than a hand-fitted one. If a project specifies hand placement, confirm whether the specified thickness has already been adjusted for it before ordering the standard dumped-method volume, since ordering to the dumped thickness for a hand-placed job overbuys the material.
Buying riprap: by the ton, by the yard, by the load
Riprap is almost universally sold and delivered by the ton, weighed on a truck scale, rather than by loose volume, which is difficult to measure accurately for large, irregular stone loaded in a dump truck or trailer. Your project planning, though, naturally starts from the opposite direction, the area and thickness you need to cover, which gives a volume first. The practical sequence is to calculate the cubic yards your project needs, then convert to tons using your specific supplier’s stated density for their actual product, confirming that figure rather than relying solely on the illustrative range in this manual.
A full truckload is a common delivery increment for larger riprap orders, commonly somewhere in the range of 15 to 25 tons depending on the truck and local hauling regulations, so a sizable project may be rounded to a whole or half truckload rather than the exact calculated tonnage, both for delivery efficiency and because partial loads are sometimes priced less favorably per ton than a full one.

For a small residential project, a single small truckload or even a handful of super sack bags may suit the job better than the minimum a bulk quarry order requires, and it is worth asking the supplier what their minimum delivery is before finalizing a design around a bulk per-ton price that assumes a much larger order than the project actually needs.
What riprap costs, in rough terms
Pricing riprap follows the tonnage calculated above, since material and delivery are typically quoted per ton rather than per cubic yard once the figure reaches a supplier. As an illustrative planning range, riprap commonly runs somewhere around 40 to 100 dollars per ton delivered, with the rock class, local quarry distance, and delivery volume all moving the figure, larger classes and longer hauls generally pushing toward the higher end. On the 32 ton worked example above, that range puts the material and delivery cost somewhere around 1,280 to 3,200 dollars, a wide enough band that a real quote from a local supplier matters far more than any figure given here.
Filter fabric and any bedding stone are separate, typically smaller costs, priced by the square foot of fabric and the ton of bedding material respectively, and labor for placement, whether dumped and spread with equipment or hand-placed, is its own line again. Confirm current pricing locally before budgeting a real project, since riprap pricing varies with hauling distance more than almost any other material on this site, given how heavy and bulky it is to transport.
Permits and environmental review near water
Riprap work on a streambank, shoreline, or any area adjacent to a watercourse or wetland is frequently subject to permit requirements beyond an ordinary landscaping or drainage project, because disturbing the bank of a natural waterway affects water quality, habitat, and flow for everyone downstream, not just the property where the work happens. Requirements vary widely by jurisdiction and by the specific water body, and can involve a local building department, a state environmental agency, and in some cases a federal review depending on the waterway’s classification.
This is a step to take before ordering material, not after, since riprap placed without a required permit can be subject to a stop-work order or a requirement to remove the work entirely, which is a far larger cost than the delay of confirming requirements up front. If your project touches a stream, river, lake shoreline, or wetland boundary, contact the relevant local or state environmental or water resources office before finalizing the design, independent of whatever the volume and tonnage math in this manual tells you to order.
Maintenance and signs riprap needs attention
A properly specified and placed riprap installation is a long-lived, low-maintenance structure, but it is not entirely maintenance-free, and a periodic visual check catches problems while they are still small and inexpensive to fix. Signs worth watching for include individual stones that have visibly shifted or rolled out of position, soil or fines appearing on top of or between the riprap stones, which can indicate the filter fabric beneath has failed or was never properly installed, and any new erosion, undercutting, or slumping at the toe or edges of the riprap field, which often signals that water is finding a path around rather than over the protected area.
Vegetation establishing within and around riprap is generally not a problem on its own and can even help stabilize the surrounding soil, but woody vegetation with aggressive root systems growing directly through a riprap layer over time can eventually disturb the stone’s placement and is sometimes removed as routine maintenance on engineered installations. Repairing a riprap installation generally means adding or resetting stone in the affected area using the same class and thickness as the original design, which is the same calculation this manual works through for a new installation, scaled down to the repair area.
The reverse problem: a delivered tonnage, what area it covers
Sometimes the order runs backward from the design process above: a specific tonnage has already been delivered, perhaps from a bulk purchase or a quote that was accepted before the exact area was finalized, and the question is how much area that tonnage will actually cover at a given thickness. The same formula rearranges cleanly. Divide the tonnage by the density to get cubic yards, multiply by 27 for cubic feet, then divide by the thickness in feet to find the coverage area.
A delivered 30 tons at an illustrative 1.45 tons per cubic yard midpoint density is about 20.7 cubic yards, or 558.6 cubic feet. Spread at an 18 inch, 1.5 foot, thickness, that covers about 372 square feet, a smaller area than the 400 square foot worked example earlier in this manual used, which is exactly why confirming the actual delivered tonnage against the planned area before placement begins catches a shortfall while there is still time to order more, rather than discovering a gap in the coverage partway through spreading the stone.
Common mistakes sizing riprap
The most consequential mistake is treating riprap and decorative landscape stone as interchangeable, substituting a smaller or more rounded stone for a specified riprap class because it looks similar or costs less, which leaves the actual erosion problem the riprap was meant to solve unaddressed. Close behind is using a single fixed layer thickness regardless of rock class, instead of scaling the thickness to the class’s D50, which can leave a layer of large stone too thin to seat properly and present a continuous surface.
Measuring area from a flat site plan or satellite image without correcting for the slope’s actual surface length understates the volume on anything but a gentle grade. Skipping the filter fabric on an installation over soil creates a failure mode that is invisible until the slope has already begun eroding from underneath. And assuming a single density figure without confirming it with the actual supplier can move a large order’s tonnage, and its cost, by more than a reasonable margin of error should allow.
Your riprap order checklist
The whole manual, compressed to the sheet worth taking to the supplier.
- Confirm the specified rock class. Size is an engineering determination based on water velocity, wave action, or slope, not a visual choice.
- Measure the true surface area. Correct a sloped surface’s length for the actual slope distance, not the flat horizontal measurement.
- Set thickness from the class, not a fixed number. Commonly 1.5 to 2 times the class’s D50, the median stone diameter.
- Run the volume. Area times thickness, divided by 27, gives cubic yards.
- Convert to tons with a confirmed density. An illustrative 1.3 to 1.6 tons per cubic yard; confirm your supplier’s actual figure for a large order.
- Price the fabric and bedding stone separately. Both are commonly required under riprap placed over soil and are not part of the riprap tonnage itself.
- Round to the supplier’s delivery increment. Often a whole or half truckload, commonly 15 to 25 tons, for a sizable order.
The bottom line
Riprap sizing is the same area-times-thickness volume math every bulk material on this site uses, with one extra and genuinely variable step: converting that volume to the tons a supplier actually bills for, using a density figure that runs wider for large, angular rock than it does for compacted base material. Confirm the specified class and thickness from an engineered design rather than a visual guess, measure the true slope surface rather than a flat plan view, and price the filter fabric and bedding stone as their own lines.
Check permit requirements early if the work touches a natural waterway, and plan a periodic visual check once the riprap is placed, since both the legal and the physical side of an erosion control project are easier to handle before a failure than after one. Run your own project through the companion below or the estimator, confirm density with your actual supplier, and the tonnage that comes back is one a delivery ticket can match.
Treat this manual as workshop arithmetic meant to make a bulk rock order legible, not an engineering specification for an erosion control or drainage structure. The rock classes, thickness multiples, density figures, and prices above are typical illustrative values that vary by region, supplier, and project, and your own site will move the real numbers. Riprap sizing for an actual erosion, drainage, or streambank project should be confirmed with a qualified engineer or your local drainage authority, since an undersized installation can fail outright rather than merely underperform.
Frequently asked questions
How do I calculate how much riprap I need?
Find the area the riprap will cover in square feet, multiply by the layer thickness in feet to get cubic feet, divide by 27 for cubic yards, then multiply by an illustrative density of around 1.3 to 1.6 tons per cubic yard to get tons. A 400 square foot slope at an 18 inch, or 1.5 foot, layer is 600 cubic feet, about 22.2 cubic yards, which at that density range works out to roughly 29 to 36 tons, commonly rounded to the supplier's increment.
How thick should a riprap layer be?
Layer thickness is commonly specified relative to the rock's own size, often cited as roughly 1.5 to 2 times the D50, the median stone diameter, of the riprap class being used, rather than as one fixed depth for every project. A larger rock class needs a thicker layer, since the stones themselves are bigger and a thin layer would leave gaps and an uneven surface. Thickness is also frequently set by an engineered design for erosion control or drainage work rather than chosen freely, so confirm the specified thickness for your project before assuming a generic multiple of the stone size.
How much does riprap weigh per cubic yard?
Riprap density is commonly cited somewhere around 1.3 to 1.6 tons per cubic yard, lighter than many people expect for stacked rock, because the loose, angular placement of a riprap layer leaves meaningful air space between the irregular stones, more than a compacted gravel base does. The exact figure varies with the rock type, gradation, and how tightly the layer settles, so treat any single number as an illustrative range and confirm density with your specific supplier for a large order.
What is the difference between riprap and rock mulch or decorative stone?
Riprap is structural erosion control material, dense, angular, broken rock sized and placed specifically to resist being moved by flowing water or wave action on a slope, channel, or shoreline. Rock mulch and decorative landscape stone are chosen for appearance and ground cover in a garden bed, typically far smaller, often rounded rather than angular, and not engineered to resist erosive force. The two are priced and sold differently and are not interchangeable: using decorative stone where riprap is specified leaves a slope or channel genuinely unprotected against erosion.
What size riprap do I need?
Riprap is commonly specified by a class or a size designation tied to its median stone diameter, called the D50, and the correct class depends on the water velocity, wave action, or slope the riprap has to resist, which is an engineering determination rather than a preference. A gentle drainage swale with slow flow needs a smaller class than an active streambank or a shoreline exposed to wave action. Confirm the specified class for your project from an engineered design or local drainage authority rather than guessing from the visual size of a sample at a yard.
Do I need filter fabric or bedding stone under riprap?
Most riprap installations over soil use a geotextile filter fabric, and often a layer of smaller bedding stone, beneath the riprap layer itself. The fabric keeps the underlying soil from washing up through the gaps between the large riprap stones as water moves through and around them, which would otherwise undermine the slope from beneath even while the riprap on the surface looks intact. Skipping the fabric on a project that specifies it is a common and expensive mistake, since the failure happens underground and is not visible until the slope has already begun to fail.
How is riprap sold, by the ton or by the yard?
Riprap is most commonly sold and delivered by the ton, since it travels and is weighed on a truck scale rather than measured by loose volume, which is hard to gauge accurately for large, irregular stone. Your own project planning, though, usually starts from volume, the area and thickness you need to cover, so the practical path is to calculate cubic yards from your project dimensions first, then convert to tons using the supplier's stated density for their specific product, since density varies enough between quarries to matter on a large order.
What does riprap cost per ton?
Riprap pricing varies by region, rock class, and hauling distance from the quarry, so any figure is an illustrative planning range rather than a quote. As a rough illustrative range, riprap commonly runs somewhere around 40 to 100 dollars per ton delivered, with larger classes and longer hauls pushing toward the higher end. Confirm current pricing with a local supplier for your specific class and delivered quantity, since riprap is a heavy, bulky material where hauling distance alone can move the delivered price meaningfully.