What's on this page
- Before you start: materials, water, tools, and weather
- Step 1: Choose your mixing method
- Step 2: Calculate how much you need and gather tools
- Step 3: Get the water ratio right
- Step 4: Mix by hand, wheelbarrow, or mixer
- Step 5: Check the consistency with a slump test
- Step 6: Place it and clean up before it sets
- What is actually in a bag of concrete mix
- A worked example: a 3 by 3 foot equipment pad
- Common mistakes when mixing concrete
- Troubleshooting: too wet, too dry, weather, and big pours
- Your concrete mixing checklist
- The bottom line
Short answer: Mix concrete in six steps: choose bagged premix or your own cement, sand and gravel, calculate the batch from the bag yield (an 80 pound bag makes about 0.6 cubic feet), measure the water (an illustrative starting point is about three quarters of a gallon per 80 pound bag, but follow the bag), mix to a uniform color, check the slump, and place it within the working window. Too much water permanently weakens cured concrete.
Mixing concrete looks like the simple part of a concrete job, and in one sense it is: add water to a bag of grey powder and stone, stir, and pour. What that picture hides is that the mixing step is where most of the strength is won or lost, and it is lost quietly. A batch mixed a little too wet looks better going in, spreads more easily, and finishes smoother, and then cures into concrete that is measurably weaker, dustier, and more prone to cracking than the same bag mixed correctly. The difference does not show until months later, which is exactly why so many people get it wrong.
This manual mixes concrete in six plain steps, from choosing whether to buy bagged premix or proportion your own cement, sand, and gravel, through the water ratio that decides everything, to placing the batch before it sets. It carries a worked example all the way through to a real bag count and an illustrative water figure, and it leans on the bag-count math in our how many bags of concrete do I need manual and the volume math in our how much concrete do I need manual, narrowing both to the single job of mixing a good batch. Run your own numbers through the companion below or the estimator in about a minute, and it recalculates your bags and water as you read.
Key takeaways
- The whole job is six steps: choose a method, calculate the batch, get the water right, mix to a uniform color, check the slump, and place it before it sets.
- Water is the number one mistake. An illustrative starting point is about three quarters of a gallon per 80 pound bag, but the figure printed on your bag is the one to follow, added gradually and never all at once.
- Too much water permanently weakens cured concrete: a soupy mix that pours easily buys workability with strength you cannot get back.
- A bag of concrete mix is already cement, sand, and gravel in roughly a 1 part cement, 2 parts sand, 3 parts gravel blend, so with bags you only add water.
- Hand-mixing suits small jobs; past about half a cubic yard the labor argues for a rented mixer or a ready-mix delivery, a threshold worth respecting before you buy.
Before you start: materials, water, tools, and weather
Mixing concrete is a project with a clock built into it. From the moment water hits the mix, a chemical reaction is underway and the batch has a working window, usually on the order of an hour for standard mix, after which it stiffens whether you are ready or not. That single fact shapes the whole setup: everything you need should be within reach before the first drop of water goes in, because you cannot pause to fetch a missing tool once the batch is live.
What to settle and gather before you open a bag:
- The materials. For most small jobs, bagged concrete mix is the whole material list, since it already contains cement, sand, and gravel in the right proportions. Buy one bag size for the job and note its yield: an 80 pound bag makes about 0.6 cubic feet of placed concrete, a 60 pound bag about 0.45, a 50 pound bag about 0.375, and a 40 pound bag about 0.30, as illustrative figures. If you are proportioning your own, you need separate cement, sand, and gravel.
- The water. Clean water, measured, not eyeballed from a running hose. Have a marked bucket so you can add a known amount and hold some back. The illustrative starting figure is about three quarters of a gallon per 80 pound bag, but read the bag.
- The tools. A wheelbarrow or a mixing tub or a powered mixer, a hoe or a square shovel for folding the mix, a bucket for water, and a margin trowel. For placing, whatever the job needs.
- PPE. Wet concrete is caustic and will burn skin and eyes on contact, so waterproof gloves, safety glasses, and long sleeves are not optional, and a dust mask for the dry pour matters because cement dust is harmful to breathe.
- The weather. Concrete cures best in mild, calm conditions, commonly cited around the 50s to 70s Fahrenheit. Hot, dry, or windy weather shortens the working window and pulls water from the surface, while near-freezing weather stalls the curing, both covered in the troubleshooting section.
Time and difficulty: mixing a batch is a matter of minutes, and the skill is not strength but discipline, measuring the water, mixing thoroughly, and not over-batching. For where this fits in a full pour, our how to pour a concrete slab manual sets mixing in the larger sequence, and our how to estimate materials for a project manual frames the takeoff. Get the setup honest and the six steps are mostly careful sequence.
Step 1: Choose your mixing method
Start by deciding what you are actually mixing, because the answer changes the whole rest of the job. There are two paths: bagged premix, where cement, sand, and gravel arrive already blended and you add only water, and mixing from scratch, where you buy separate cement, sand, and gravel and proportion them yourself. For the overwhelming majority of home and small-trade jobs, bagged premix is the right answer, and it is worth understanding why before you reach for the other path.
Bagged concrete mix removes the hardest part of getting concrete right, which is proportioning the dry materials. A quality bag already holds cement, sand, and gravel in a blend engineered for general use, so you cannot get the ratio wrong, you only have to get the water right. It is sold in fixed weights (commonly 40, 50, 60, and 80 pound bags), each with a printed yield and water figure, and it suits everything from a fence post to a small pad. The trade-off is cost per cubic foot: bags are the most expensive way to buy concrete by volume, which is fine at small scale and painful at large scale.
Mixing from scratch, proportioning your own cement, sand, and gravel, makes sense mainly when you are mixing a large volume and want to control the cost, or when a job calls for a specific mix you cannot buy bagged. The classic general-purpose ratio is roughly 1 part cement, 2 parts sand, and 3 parts gravel by volume, often written 1:2:3, with water added to reach a workable consistency. That figure is an illustrative starting point, not an engineered spec, and getting it consistent by hand batch after batch is genuinely harder than it sounds.
Watch out for choosing scratch-mixing to save money on a job that is really a truck job. If you are mixing enough that proportioning your own materials looks worthwhile, you are usually past the point where hand-mixing anything is practical, and a ready-mix delivery is both easier and more reliable. For a small job, take the bag. Our how much does concrete cost manual weighs the bag-versus-truck cost in full.
Step 2: Calculate how much you need and gather tools
Before you buy or open anything, work out how much concrete the job actually needs, because both over-buying and under-buying hurt: leftover bags are wasted money and weight, while running short mid-pour risks a cold joint where a fresh batch meets one that has already set. The method is the same volume calculation every concrete job uses, and it lands on a bag count you can shop from.
Find the volume in cubic feet first. For a pad or slab shape, that is length times width times thickness with every measurement in feet, so convert the thickness from inches by dividing by 12. A small pad of 3 by 3 feet at 4 inches thick is 3 times 3 times 0.333, about 3.0 cubic feet. For a cylindrical hole or footing, it is radius squared times pi times depth. Our how many bags of concrete do I need manual works these shapes in full and is the companion to this step.
Turn the volume into bags by dividing by the bag yield and rounding up. At 0.6 cubic feet per 80 pound bag, that 3.0 cubic foot pad is 3.0 divided by 0.6, exactly 5 bags before margin. In 60 pound bags, it is 3.0 divided by 0.45, about 6.7, which rounds to 7. Add a small cushion for spillage and irregular shapes, so call it 6 of the 80 pound bags or 8 of the 60 pound bags to be safe. Then gather the tools from the before-you-start list so nothing is missing once you begin.
Watch out for two classic errors here. The first is leaving thickness in inches, which inflates the volume twelvefold and has you buying a truckload for a pad. The second is buying the exact calculated count with no margin, then coming up half a bag short with the mix already going off. Round up, keep a spare bag, and you never have to stop mid-job. Run your own dimensions through the companion below and it returns the bag count and an illustrative water estimate on your numbers.
Step 3: Get the water ratio right
This is the step that decides whether your concrete is strong or weak, and it is the one most people get wrong, so treat it as the heart of the whole job. Concrete gains strength from the reaction between cement and a specific amount of water, and adding more water than that does not help, it hurts: the excess stays in the mix, later evaporates, and leaves tiny voids that permanently weaken the cured concrete and make it prone to cracking, dusting, and surface scaling. The water figure is not a suggestion, it is a specification.
Start from the bag. Manufacturers print a water figure for their product, and that printed number is the one to follow, because it is set for that specific mix. As an illustrative reference, standard concrete mix commonly needs roughly 6 pints, about three quarters of a gallon, of water per 80 pound bag, with smaller bags needing less in proportion, so on the order of 0.56 gallon for a 60 pound bag and about 0.375 gallon for a 40 pound bag. Those are starting points to sanity-check the bag against, not replacements for it.
The safe technique is to hold water back, not add it back. Measure the recommended amount, add most of it (roughly three quarters), mix, then add the last portion a little at a time until the mix just reaches a workable consistency and no further. It is far easier to add a splash more water to a stiff mix than to rescue a soupy one, and a batch mixed too dry can be corrected while a batch mixed too wet cannot. When you are unsure, stop on the stiff side of workable.
Watch out for the running-hose habit, dribbling water in from a hose with no idea how much has gone in, which is how batches end up soupy without anyone deciding to make them that way. Measure the water in a marked bucket so you always know the amount, and never add extra water on site to make stiff concrete easier to spread, because that trades strength you cannot recover for a few easier minutes.

Concrete strength falls as water rises
Illustrative relative strength of the same mix at increasing water content; the exact numbers vary by product, but the direction never does.
These are illustrative relative figures, not product strengths, and each bar's width tracks its value against the correct-water baseline of 100. The lesson is the shape: strength falls steadily as water rises, so the wetter a mix looks, the weaker it usually is.
Step 4: Mix by hand, wheelbarrow, or mixer
With the water measured, this step combines the dry mix and water into a uniform batch, and the technique depends on your equipment. The goal is identical in every case: fold and turn the material until the color and texture are completely uniform, with no dry pockets and no pooled water, because unmixed dry material never gains full strength and a weak spot is a weak spot wherever it hides.
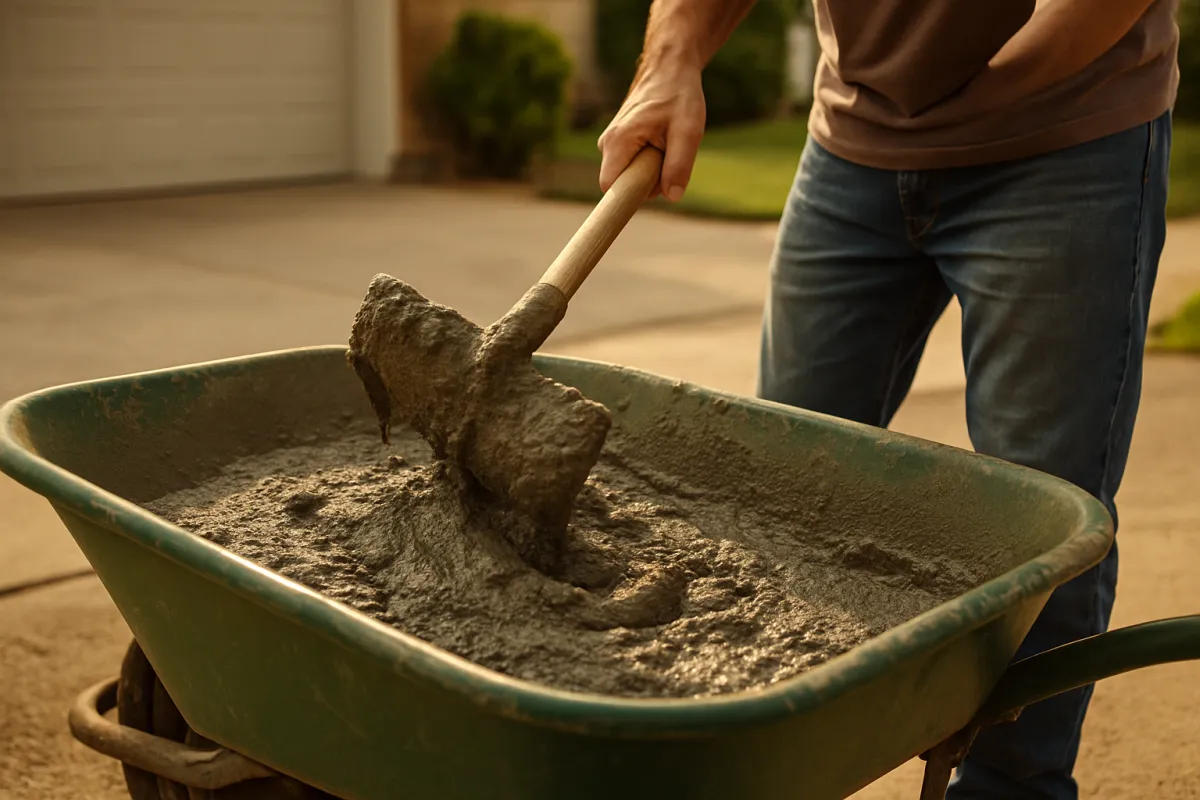
Mixing in a wheelbarrow or mixing tub is the common small-batch method. Pour the dry mix in, make a crater in the center, and add most of your measured water into it, then use a hoe or a square shovel to pull the dry material from the edges into the water, folding it over and chopping through the pile against the sloped front of the barrow. Work in one or two bag batches at a time so the mix stays manageable and wet enough to combine, and scrape the corners and bottom where dry mix hides. Add the last of the water gradually as you go.
Mixing by hand on a clean, hard surface or in a mortar tub works the same way for even smaller amounts: form a ring of dry mix, add water to the center, and fold inward with a hoe. Keep the mix contained so nothing leaks out, and turn it thoroughly, since hand-mixing tempts people to stop while dry pockets remain.
A powered mixer is the tool once you are past a handful of bags. Add most of the water first, then the dry mix, and let the drum turn for a few minutes until uniform, adding the last water to fine-tune. A mixer is faster, more consistent, and easier on your back, and it earns its rental somewhere around the point where you would otherwise mix more than roughly a half-dozen bags in a session.
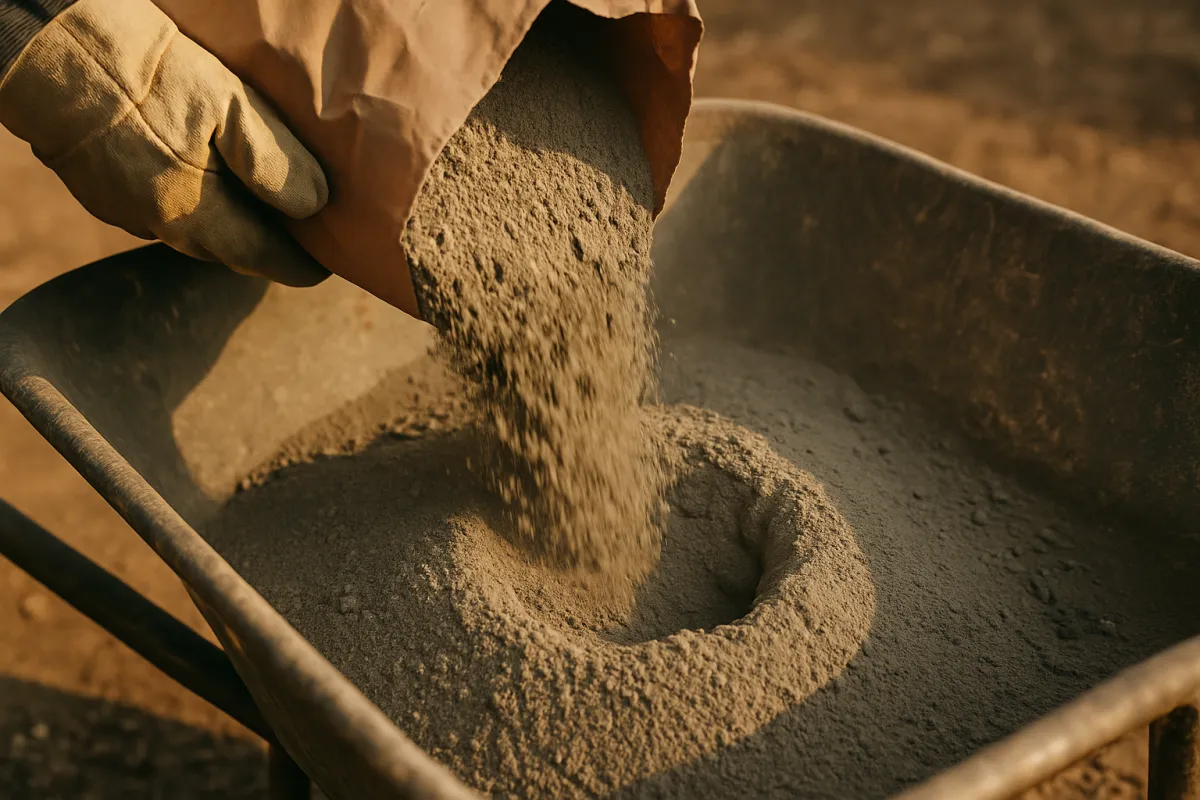
Watch out for mixing too big a batch at once, the error that ties this step to the clock. A barrow loaded with more concrete than you can place before it stiffens leaves you either rushing a bad placement or scraping a set batch into the bin. Mix what you can use, and mix it thoroughly, because a fast, incomplete mix with dry pockets is worse than a slightly slower one that is genuinely uniform.
Step 5: Check the consistency with a slump test
Once the batch looks uniform, this step confirms it is the right wetness before you commit it, using a simple field version of the slump test that needs no special equipment. The target is concrete that is plastic and cohesive, holding a shape without crumbling and without slumping into a puddle, roughly the texture of thick oatmeal or peanut butter. Too dry and it will not consolidate or finish; too wet and it is already weakened. The check takes seconds and saves a whole batch.
Do the quick field check by pulling a hoe or trowel through the mix and lifting a scoop. Good concrete holds the ridges and grooves the tool leaves without them flowing back together, and it sits on the blade without running off. Make a small pile and it should hold a rounded shape, not spread flat. If you cut a trench through the batch with the hoe, the walls of the trench should stand rather than collapse or ooze closed.
Read what the check tells you. If the mix crumbles, will not hold together, or the surface looks dry and grainy, it needs a little more water, added a splash at a time and remixed. If it flows off the blade, spreads flat, shines with surface water, or a trench closes on itself, it is too wet, and the honest fix is not to pour it as a weak batch but to stiffen it by mixing in a little more dry mix if you have it. On the running example, each roughly one-bag batch is quick to check this way before it joins the pour.
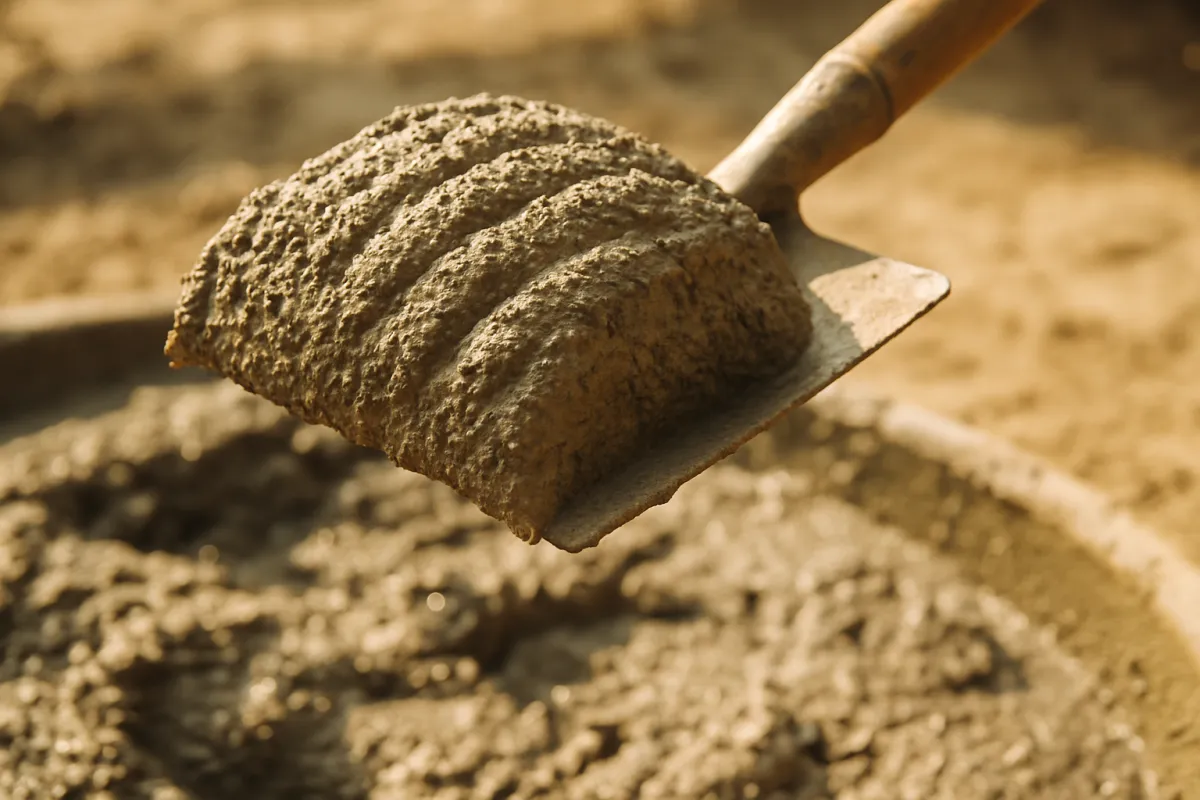
Watch out for judging consistency by how easily the concrete pours, which is exactly backwards: the easier it flows, the wetter and weaker it usually is. A good mix takes a little effort to move and place, and that resistance is the feel of strength. Trust the shape it holds, not the ease with which it spreads.
Step 6: Place it and clean up before it sets
Mixing done, this final step gets the batch into place and your tools clean before the concrete sets, and both halves are governed by the same clock that has run since the water went in. Standard mix stays workable for something on the order of an hour, less in heat, so placing is not a leisurely step. Move the batch to where it is going, work it into the corners and against any forms so there are no voids, and consolidate it by tamping or working a tool through it to release trapped air, then screed or float it level for its use.
Work in a planned sequence so you are never trapped or racing. Place from the far side back toward your exit, keep each fresh batch against the previous one so they knit before either sets, and finish as you go rather than mixing far ahead of your placing. If you are filling a form or a hole, fill and consolidate in the same motion so the concrete is dense all the way down, since a void you cannot see is a weak spot you will not find until later.
Clean up immediately, because cured concrete is extremely hard to remove from tools and skin. Rinse the wheelbarrow, hoe, bucket, and trowel with water before any concrete on them starts to harden, scraping off what you can first, and never let a coated tool sit through the working window. Wet-wash the equipment away from where the rinse water can pool on finished concrete or run into drains it should not.
Watch out for letting concrete set in the mixer or barrow, the error that ruins equipment and wastes material at once. A mixer left with concrete in it while you place a batch can seize with a hardened load, so keep the drum turning and rinse it out the moment the last batch is placed. Plan the placing before you mix the final batch, so nothing is caught sitting in a container while the clock runs out.
What is actually in a bag of concrete mix
It helps to know what you are mixing, because it explains why the water ratio matters and why a bag behaves the way it does. Concrete mix is not a single substance but a blend of three things, and only one of them actually reacts with water. Understanding the split makes the strength lesson intuitive rather than a rule to memorize.
The blend is, roughly, cement, sand, and gravel in the classic general-purpose proportion of about 1 part cement, 2 parts sand, and 3 parts gravel by volume. The gravel, the coarse aggregate, is the biggest share and forms the rigid skeleton that carries load. The sand, the fine aggregate, fills the gaps between the stones. The cement, the smallest share, is the only ingredient that reacts with water: it forms a paste that hardens and glues the aggregate into a solid mass. Water is not shown in the split because it is measured separately, and its amount, relative to the cement, is what sets the final strength.
What is in a bag of concrete mix
Illustrative proportions by volume for a general-purpose 1:2:3 blend; water is added separately and is not shown here.
These illustrative shares come from the 1:2:3 ratio (one part in six is cement, two are sand, three are gravel) and sum to 100 percent. Only the cement, the smallest share, reacts with water, which is why the water-to-cement balance decides the strength.
The practical upshot is that a bag has done the hard proportioning for you, so your only job is the water. It also explains the strength rule: since a fixed amount of cement can only bind so much water, extra water dilutes the paste and weakens the glue holding everything together. Mixing your own from separate materials means owning that 1:2:3 balance yourself, batch after batch, which is why bags are the easier path for anything but a large, cost-driven pour.
A worked example: a 3 by 3 foot equipment pad
Pull the six steps together on one realistic small job, a 3 foot by 3 foot pad, 4 inches thick, the kind of pad you might set under an air conditioner condenser, a small shed step, or a generator, and watch the plan flow from a tape measure to a mixed, placed batch.
Step 1, method: this is a small pad of a few cubic feet, so bagged premix is the clear choice, no proportioning of separate materials. Step 2, calculate: the volume is 3 times 3 times 0.333 foot, about 3.0 cubic feet. In 80 pound bags at 0.6 cubic feet each, that is 3.0 divided by 0.6, exactly 5 bags before margin, so buy 6 to be safe; in 60 pound bags at 0.45 each it is about 6.7, round to 7, so buy 8. Take the 80 pound path: 6 bags on hand, 5 to place plus a spare.
Step 3, water: at an illustrative three quarters of a gallon per 80 pound bag, five bags is about 3.75 gallons total, but you mix batch by batch, so it is roughly three quarters of a gallon per bag, added mostly up front with the last quarter held back. Follow the figure on the actual bag. Step 4, mix: work one or two bags at a time in the wheelbarrow, craters and folds, until each batch is a uniform grey with no dry pockets. Step 5, check: pull the hoe through each batch and confirm it holds its ridges like thick oatmeal, adjusting with a splash of water or a scoop of dry mix. Step 6, place: shovel each batch into the form, work it into the corners, consolidate, screed level off the form tops, and rinse the barrow and hoe before the next batch, finishing before the mix sets.
So one measured pad produces a clean plan: about 3.0 cubic feet of concrete, 5 eighty-pound bags to place with a sixth as margin, an illustrative 3.75 gallons of water added a little at a time, all mixed and placed by hand in a session well inside the working window. Change any input and it moves predictably: take the pad to 4 by 4 feet and the volume rises to about 5.3 cubic feet, roughly 9 of the 80 pound bags; double the thickness and the concrete doubles. At about 0.11 cubic yard, this pad is squarely a hand-mix job, comfortably under the half-yard line where a mixer or truck takes over. Run your own pad through the companion below and the bag count and water estimate are done for you.
Common mistakes when mixing concrete
A handful of errors account for nearly every weak or failed batch, and all of them happen during mixing, not later, which is what makes them so easy to prevent and so hard to fix after the fact.
- Too much water. The single most common and most damaging mistake. A soupy mix that pours easily cures weaker, dustier, and more crack-prone than the same bag mixed correctly, and the strength does not come back. Measure the water, hold some back, and stop on the stiff side of workable.
- Dry pockets. Stopping the mix while unmixed dry material still hides in the corners and bottom of the container leaves weak spots, because dry mix never gains full strength. Fold thoroughly and scrape the edges until the color and texture are uniform throughout.
- Mixing too much at once. A batch bigger than you can place before it sets forces a rushed, poor placement or wastes concrete that goes off in the barrow. Mix in one or two bag batches you can actually use inside the working window.
- Guessing the water with a hose. Dribbling water from a running hose with no measurement is how batches drift soupy without anyone deciding to make them so. Use a marked bucket and always know how much water has gone in.
- Wrong ratio when scratch-mixing. Proportioning your own cement, sand, and gravel by eye, rather than to a consistent measure like 1:2:3, gives batches that vary in strength. Bagged mix avoids this entirely, which is why it suits small jobs.
- Letting it set in the mixer or barrow. Concrete left sitting while you do something else can harden into a ruined load and a seized mixer. Keep a mixer turning, place promptly, and rinse everything the moment the last batch is out.
Every one of these is a decision made in the few minutes of mixing, about the water, the thoroughness, the batch size, or the timing, which is exactly why a careful mixer gets strong concrete from the same bag that a careless one gets weak concrete from.
Troubleshooting: too wet, too dry, weather, and big pours
Real batches rarely behave like the tidy example, so here is how to handle the conditions that complicate them.
What if the mix is too wet? If a batch has come out soupy, flowing off the blade and shining with surface water, do not place it as is, because it will cure weak. The correct fix is to stiffen it by mixing in more dry material, ideally more of the same bagged mix, until it returns to a plastic, shape-holding consistency, then place it. What you must never do is place it wet and hope, or worse, add water elsewhere to match it. If you have no dry mix left to stiffen it, it is better to remix with the next bag than to pour a weak batch into a pad you care about.
What if the mix is too dry? A batch that crumbles, will not consolidate, or looks grainy and short of paste simply needs more water, and this one is easy: add water a splash at a time, remixing between additions, until it just reaches the shape-holding consistency. Because you held water back in Step 3, you should have room to do exactly this. Dry is the recoverable direction, which is the whole reason to err toward it.
What about hot or cold weather? Heat, dry air, and wind shorten the working window and pull water out of the mix and the surface fast, so in hot weather mix smaller batches more often, work in shade if you can, keep everything ready to place immediately, and do not let a barrow sit. Near-freezing weather stalls the curing chemistry and risks freeze damage before the concrete gains strength, so in cold weather protect fresh concrete from freezing and expect a slower set. A commonly cited comfortable range is roughly the 50s to 70s Fahrenheit.
What if the job is large? Volume is the dividing line, and it sits near half a cubic yard for hand-mixing. Past that, mixing bag after bag by hand cannot keep pace, risks cold joints where one batch sets before the next is placed, and simply exhausts you, so a rented powered mixer or a short-load ready-mix delivery becomes the right call. A single cubic yard is around 45 of the 80 pound bags, which puts the scale of hand-mixing a real pour in perspective. Our how much concrete do I need manual covers the ready-mix side, and our how many bags of concrete do I need manual works the bag count where hand-mixing still makes sense.
Your concrete mixing checklist
Before you open the first bag, run down this compact checklist. It is the save-this asset of the whole job.
- Chosen the method: bagged premix for a small job, scratch-mixing only for a large, cost-driven pour.
- Calculated the volume in cubic feet (length times width times thickness in feet, or radius squared times pi times depth), and converted the bag count with a spare.
- Gathered the tools, a marked water bucket, and PPE: waterproof gloves, eye protection, long sleeves, and a dust mask for the dry pour.
- Read the water figure on the bag and set a measured amount, planning to hold roughly a quarter of it back.
- Checked the weather for a mild, calm window and planned smaller batches if it is hot or windy.
- Mixed in one or two bag batches, folding thoroughly until the color and texture are uniform with no dry pockets.
- Checked each batch with the field slump test: plastic and shape-holding, like thick oatmeal, not soupy.
- Adjusted too-dry batches with a splash of water and too-wet batches with more dry mix, never placing a soupy batch.
- Placed and consolidated each batch into corners and against forms, screeding level, before it started to set.
- Rinsed the barrow, mixer, hoe, bucket, and trowel immediately, before any concrete on them hardened.
Work top to bottom and the concrete you mix is uniform, correctly watered, and placed inside its window, which is the difference between a batch that reaches its strength and one that quietly falls short. The companion below runs your bag count and an illustrative water estimate on your own numbers, so you can check your plan before you buy.
The bottom line
Mixing concrete is six steps worn into a sequence: choose bagged premix or a scratch mix, calculate the volume and bag count, get the water ratio right, mix to a uniform batch by hand or machine, check the slump so it is plastic not soupy, then place and clean up before it sets. The whole job turns on one discipline that is invisible in the finished concrete: the water. A batch mixed a little too wet looks better going in and cures measurably weaker, and no amount of good finishing gets that strength back, which is why the printed water figure and a marked bucket matter more than any trowel technique. Measure the water and hold some back, mix thoroughly enough to kill every dry pocket, keep each batch small enough to place inside the working window, and rinse your tools the moment you are done. Do that, and the concrete you mix from an ordinary bag reaches the strength it was designed for, which is the only kind worth mixing.
Read this manual as bench notes meant to teach the method, not as an engineered specification you can pour a structural element from without checking. The mix ratios, bag yields, water figures, working times, and strength comparisons here are typical illustrative values, and your real numbers shift with the product, the weather, the job, and how wet you mix. Follow the water and yield printed on the bag you actually buy, confirm the mix and any load-bearing detail against the product or a qualified professional, and verify your final quantities before you pour anything that has to hold.
Frequently asked questions
How do I mix concrete step by step?
Choose your method (bagged premix or mixing from separate cement, sand, and gravel), calculate how much you need in cubic feet, measure the right amount of water, combine and mix until the color and texture are uniform, check the consistency so it is plastic rather than soupy, then place and finish it before it starts to set. Each step is quick, but the order matters because the water ratio and the working time are the two things you cannot undo once they are wrong. This manual walks all six steps with a worked example carried through to a real bag count and an illustrative water figure, and it treats the water ratio, the single most common mistake, as the step that decides whether the concrete is strong or weak.
How much water do you add to a bag of concrete?
Standard concrete mix needs roughly 6 pints, about three quarters of a gallon, per 80 pound bag as an illustrative starting point, with smaller bags needing less in proportion, so about 0.56 gallon for a 60 pound bag. The exact figure is printed on the bag and is the number to follow, because manufacturers set it for their specific product. The safe method is to add most of the water, mix, then add the last little bit gradually until the mix holds a shape but is still workable, rather than dumping all the water in at once. Too much water permanently weakens the cured concrete, so err on the dry side and add water slowly rather than trying to remove it later.
What is the correct concrete mix ratio?
A widely cited general-purpose ratio for mixing concrete from separate materials is roughly 1 part cement, 2 parts sand, and 3 parts gravel by volume, often written 1:2:3, with water added to reach a workable consistency. Bagged concrete mix already contains cement, sand, and gravel blended in the right proportions, so with a bag you only add water and the ratio is handled for you. The 1:2:3 figure is an illustrative starting point rather than an engineered specification, and the right mix for a structural or load-bearing pour should be confirmed against the product or a professional. For most small home projects, a quality bagged mix removes the need to proportion the dry materials at all.
Can you mix concrete in a wheelbarrow?
Yes, a wheelbarrow is one of the most common ways to mix small batches of concrete by hand, using a hoe or a shovel to fold the dry mix and water together against the sloped front of the barrow. A wheelbarrow suits jobs up to a handful of bags at a time, because beyond that the mixing becomes slow and heavy and a powered mixer earns its rental. The keys are to mix in manageable batches, usually one or two bags at a time so the mix stays wet and uniform, and to add water gradually rather than flooding the barrow. Past roughly half a cubic yard total, hand-mixing bag after bag stops being practical and a mixer or ready-mix delivery is the better path.
Why is too much water bad for concrete?
Concrete gains its strength from the chemical reaction between cement and a specific amount of water, and any water beyond that amount stays in the mix as excess that eventually evaporates and leaves tiny voids, which permanently weakens the cured concrete and makes it more prone to cracking, dusting, and surface scaling. A mix that looks soupy and pours easily is almost always too wet, and the workability that feels helpful in the moment is bought with strength you cannot get back later. This is why the water figure on the bag matters and why adding water on site to make stiff concrete flow is one of the most damaging shortcuts. When in doubt, mix on the stiff side of workable rather than the wet side.
How long do you have to work with mixed concrete before it sets?
Standard concrete mix typically stays workable for something on the order of an hour after water is added, though the exact window shrinks in hot, dry, or windy weather and stretches a little in cool conditions, and fast-setting products can begin to stiffen in as little as 20 to 40 minutes. Once the mix starts to stiffen, working it further breaks the bonds that are forming and weakens the result, so the rule is to mix only what you can place and finish within the working window. On a warm day, mixing smaller batches more often keeps every batch fresh and avoids a barrow of concrete going off before you can use it. Never add water to re-loosen a batch that has started to set, because that ruins the strength.
Do you mix concrete wet or dry first?
The common method for bagged mix is to put most of the water in the mixing container or the mixer first, then add the dry mix to it, which reduces dry pockets and dust, though a wheelbarrow is often worked the other way by making a crater in the dry mix and pouring water into the center. Either way, the goal is the same: combine and fold until there are no dry pockets and the color and texture are completely uniform, holding back the last portion of water to fine-tune the consistency. Dry pockets are a common cause of weak spots, because unmixed dry material never gains full strength. Take the extra minute to scrape the corners and bottom of the container where dry mix hides.
When should I use ready-mix instead of mixing my own?
Volume is the deciding factor: mixing your own from bags is practical for small jobs, but past roughly half a cubic yard, and certainly past a full cubic yard, the labor of mixing dozens of bags by hand against a setting clock outweighs any saving, and a rented mixer or a short-load ready-mix delivery becomes the better choice. A cubic yard is around 45 of the 80 pound bags, each of which must be carried, opened, and mixed, so a single yard is a punishing amount of hand work. Ready-mix also arrives uniformly blended and lets you place a large pour continuously, which avoids the cold joints that form when one hand-mixed batch sets before the next is placed against it. Match the method to the volume, not the other way around.