What's on this page
- Before you start: dimensions, tools, helpers, and weather
- Step 1: Plan the slab size, thickness, and slope
- Step 2: Calculate the concrete and base material
- Step 3: Excavate and compact a gravel base
- Step 4: Build and level the forms
- Step 5: Add gravel, vapor barrier, and reinforcement
- Step 6: Pour and screed the concrete
- Step 7: Float, edge, and finish the surface
- Step 8: Cure the slab properly
- A worked example: a 10 by 10 foot slab
- A slab from base to cure: where the work goes
- Bags or ready-mix: sizing the pour
- Common mistakes when pouring a concrete slab
- Troubleshooting: big pours, cracks, weather, and finish
- Your concrete slab checklist
- The bottom line
Short answer: Pour a concrete slab in eight steps: plan the size, thickness and slope, calculate the concrete, compact a gravel base, build level forms, set reinforcement on chairs, pour and screed, finish, then cure it properly. Order by volume: length times width times thickness in feet, divided by 27, plus 5 to 10 percent waste. An illustrative 10 by 10 foot slab at 4 inches needs about 1.23 cubic yards before waste.
A concrete slab is a deceptively simple thing to look at and an unforgiving one to get wrong. The finished surface, the part you see, is poured and troweled in a single afternoon, but almost everything that decides whether that surface stays flat, level, and crack-free for decades happens before the truck arrives and in the days after it leaves. A compacted base, square and level forms, reinforcement set in the right plane, a clean pour, and above all a real cure are the whole game, and none of them show once the concrete has gone off, which is exactly why they get rushed.
This manual pours a concrete slab in eight plain steps, from stretching a tape across the ground to keeping the finished slab damp while it cures, with a worked example carried all the way through to concrete and gravel quantities. It leans on the volume math in our how to calculate concrete for a slab manual and the base-material figures in our how much gravel do I need manual, and narrows both to the single job of pouring a slab-on-grade. Run your own dimensions through the material estimator in about a minute, and the companion below recalculates the concrete order against your numbers as you read.
Key takeaways
- A slab is built in a sequence: a compacted gravel base, level forms, reinforcement set on chairs, a clean pour and screed, a finish, and a proper cure. The order is not optional.
- Order the concrete by volume: length times width times thickness in feet, divided by 27 for cubic yards, plus a 5 to 10 percent waste factor.
- An illustrative 10 by 10 foot slab at 4 inches needs about 1.23 cubic yards of concrete before waste, near 1.36 with a 10 percent allowance, plus roughly 1.5 cubic yards of base gravel.
- Past about half a cubic yard, a slab is a ready-mix order, not a bag job, because mixing dozens of bags by hand risks cold joints between batches.
- The two most skipped steps, a compacted base and a full cure, are the two that decide whether the slab cracks, so never adding water to the mix and never shortcutting the cure matter more than a neat trowel finish.
Before you start: dimensions, tools, helpers, and weather
Pouring a slab is a project with a hard deadline built into it: once the concrete is in the forms, it is setting whether you are ready or not, so the setup decides how the whole day goes. Before anything is ordered, four things need to be settled: the dimensions and layout, the tools and equipment, the helpers you will need on pour day, and the weather window. Rushing any of them is where a slab starts to go wrong, and unlike most projects, you cannot pause a pour partway to fix it.
What to settle and gather:
- The dimensions and layout. Length and width in feet across the footprint, the thickness in inches (commonly around 4 inches for a patio or shed floor, more for heavier loads), and the drainage slope if the slab needs to shed water. Sketch the shape, square the corners, and note where the slab meets any existing structure.
- Tools and equipment. A tape measure, stakes and string, a shovel and a mattock or a hired mini-excavator, a landscape rake, a plate compactor (rentable by the day), form lumber and stakes, a level and a long straightedge, a screed board, a bull float, an edger, a groover, a hand float and trowel, a broom for the finish, and a wheelbarrow if you are moving concrete by hand.
- Helpers on pour day. Concrete waits for no one, so a slab of any size needs hands: someone placing, someone screeding, someone floating, all working before the mix stiffens. A solo pour is realistic only for a very small pad. Line up your helpers before you book the truck.
- The weather window. Concrete cures best in mild, calm conditions, commonly cited around the 50s to 70s Fahrenheit. Watch the forecast for the pour and the days after, because hot, dry, windy, or near-freezing weather all work against a clean cure and are covered in the troubleshooting section.
Time and difficulty: a small slab is a weekend, with the base and forms taking the first day and the pour and finish the second, and the cure running for days after that. The genuine skill is not the trowel work but the discipline of the invisible steps: compacting the base, setting the forms truly level, and protecting the cure. For a slab that is one line in a larger job, our how to estimate materials for a project manual frames this same takeoff as part of a full build. Get the plan and the crew honest, and the eight steps that follow are mostly careful sequence.
Step 1: Plan the slab size, thickness, and slope
Start with the four decisions that shape everything downstream: the size, the thickness, the slope, and whether you need a permit. Measure the length and width in feet across the footprint the slab will actually occupy, and square the corners so the shape is a true rectangle rather than a subtle parallelogram, checking the diagonals against each other since equal diagonals mean square corners. Write the dimensions down as feet. A common small slab runs somewhere around 10 by 10 feet for a shed floor or a patio, but size it to the use you have in mind.
Set the thickness next, because it moves the concrete order more than any other input. A common residential slab-on-grade is around 4 inches thick for a patio, shed floor, or walkway, while a slab that carries a vehicle or heavier load, such as a driveway or garage floor, often runs 5 to 6 inches. Thickness multiplies straight into the volume, so a 6 inch slab needs about half again as much concrete as a 4 inch one on the same footprint. Treat any thickness figure here as an illustrative starting point, and confirm the right depth for your load and soil.
Plan the slope if the slab sits outdoors and must shed water. A commonly cited target is a slight fall of roughly a quarter inch or so per foot, running away from any structure, so a 10 foot run away from the house is about 2.5 inches of total drop. The slope is built into the forms and the base, not corrected at the end.
Watch out for skipping the permit question. Many slabs, especially those attached to a structure, near a property line, or carrying a building, need a permit and an inspection, and the rules are local. Check before you dig, not after you pour, because an unpermitted slab can be an expensive thing to undo.
Step 2: Calculate the concrete and base material
With the footprint, thickness, and slope set, this step turns them into an order for the two materials that matter: the concrete itself and the gravel base under it. Both are volume calculations, the same length times width times depth over 27 line our how to calculate concrete for a slab manual works in full. The trap, every single time, is that thickness arrives in inches, so convert it to feet first by dividing by 12.
Start with the concrete. Take the running example of a 10 by 10 foot slab at 4 inches thick. The thickness in feet is 4 divided by 12, about 0.333 feet. Volume is 10 times 10 times 0.333, which is about 33.3 cubic feet, and 33.3 divided by 27 is roughly 1.23 cubic yards. Concrete punishes under-ordering, so add a waste factor of 5 to 10 percent: 1.23 times 1.1 is about 1.36 cubic yards, which a ready-mix supplier would likely round up to 1.5 yards. That waste covers spillage at the chute, low spots in the base, and form deflection.
Now the gravel base. For a 4 inch compacted base under the slab, the volume is the same footprint times the base depth: 100 times 0.333, about 33.3 cubic feet, or roughly 1.23 cubic yards from the formula. Loose gravel compacts when placed, so add about 20 percent: 1.23 times 1.2 is roughly 1.48 cubic yards, near 1.5 cubic yards to order. Our how much gravel do I need manual covers the base-material side in detail.
Concrete needed by slab size
Cubic yards of concrete for a 4 inch slab with a 10 percent waste allowance, at different slab sizes.
The order scales straight with area at a fixed thickness: the 10 by 10 foot example is about 1.4 cubic yards, and the 12 by 20 foot slab, roughly two and a third times the area, is about 3.3. Each bar is area times 0.333 foot, over 27, plus 10 percent, with widths tracking the cubic yards against the largest.
Watch out for calculating either volume in inches without converting to feet, which inflates the result twelvefold, and for dividing by 3 instead of 27, which over-orders by roughly nine times. Carry both numbers, the concrete and the base, in cubic yards, and run your own slab through the estimator to check the chain in seconds.
Step 3: Excavate and compact a gravel base
Numbers settled, this step moves to the ground: strip the soil, then build and compact the gravel base that supports the whole slab. Mark the footprint with stakes and string following the dimensions from Step 1, squaring the corners, and set the string lines at the finished slab height so you can measure down from them consistently. Then excavate to the total depth of the base plus the slab thickness, so the finished concrete sits where you want it.
The excavation depth is the sum of the layers, not just the slab. For the running example, that is roughly 4 inches of gravel base plus 4 inches of slab, about 8 inches total, so you dig on the order of 8 inches below the finished surface. Strip the topsoil and any organic material, because roots and soft soil settle and rot under a slab, and set the spoil aside since there is a surprising amount of it. If the slab needs a drainage slope, build that fall into the excavated subgrade so every layer above copies it.
Spread the gravel base using an angular crushed stone that locks together under compaction rather than a rounded stone that stays loose. The key discipline is to compact in lifts, not all at once: a plate compactor only reaches an inch or two down, so a 4 inch base is best spread and packed in two passes of roughly 2 inches each, wetting the stone lightly so it packs tight. For the example, the base is about 1.5 cubic yards of gravel with the compaction allowance from Step 2.

Watch out for pouring a slab straight onto loose or uneven soil to save a step, the classic false economy that lets the slab settle unevenly and crack. A base that is compacted honestly now is a slab that stays flat later, so a soft site earns a deeper, better-compacted base, not a thinner one.
Step 4: Build and level the forms
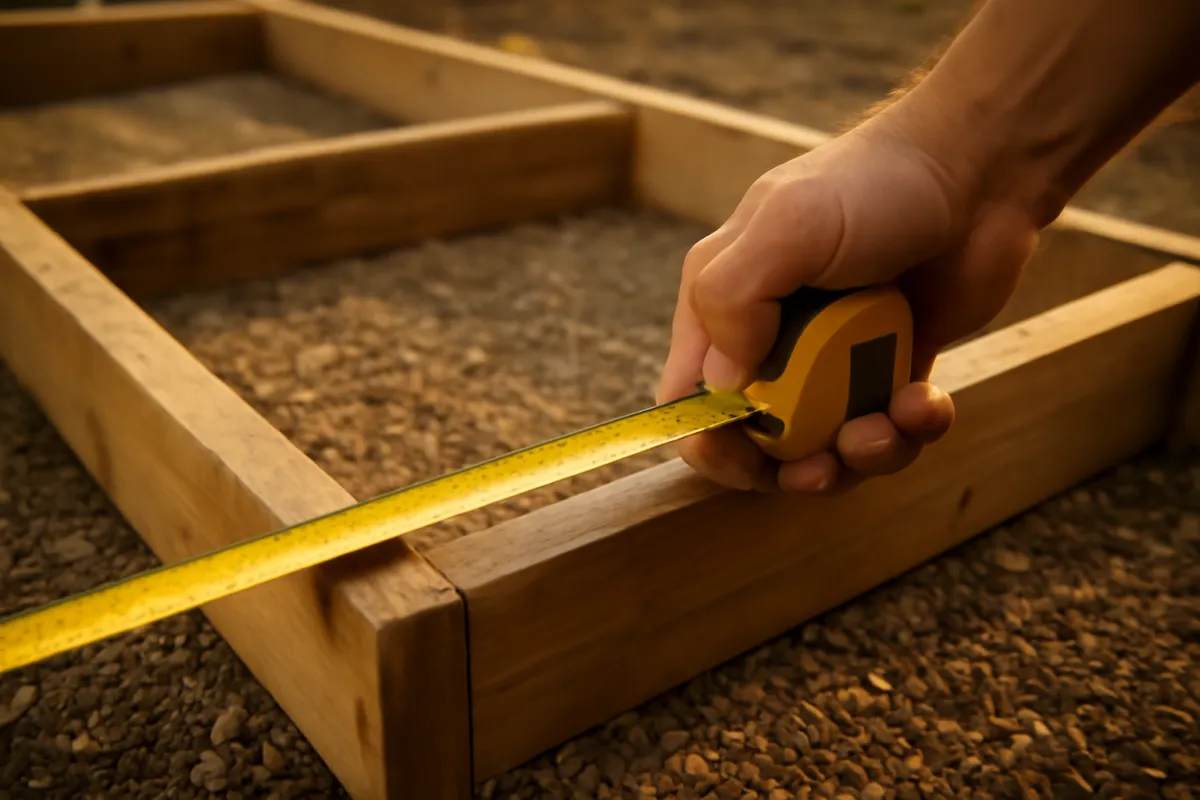
With the base compacted, this step builds the mold the concrete is poured into: the forms that set the slab’s exact shape, height, and edges. Forms are usually straight, sound lumber, commonly 2 by 4s for a 4 inch slab set on edge, staked firmly on the outside so the wet concrete, which is heavy and pushes hard, cannot bow or blow them out. Set the top edge of the forms at the finished slab height, because you will screed the concrete off the tops of the forms, so the forms are your level reference for the whole surface.
Set the forms square and level, or to the planned slope. Run string lines or a long level along and across the forms, and check the diagonals of the rectangle against each other to confirm square corners. If the slab sheds water, tilt the forms to the planned fall of roughly a quarter inch per foot rather than dead level, and check that fall the same way. Stake the forms every few feet and where they join, and brace any corner or long run that the concrete could push, because a form that moves during the pour takes the slab’s edge and level with it.
For the 10 by 10 foot example, that is four form boards making a square, staked on the outside, their tops at the finished height and checked level or to the slope, ready to receive concrete. Grease or wet the inside faces if you want the forms to strip cleanly later.
Watch out for weak, under-staked forms. Wet concrete is far heavier than it looks, and a form that bows out under it leaves a slab that is thick, out of square, and low along that edge, with no fix once the concrete is in. Overbuild the forms rather than underbuild them, since they only have to hold for one pour.
Step 5: Add gravel, vapor barrier, and reinforcement
With the forms set, this step prepares the inside of the mold: topping the base if needed, laying a vapor barrier where one belongs, and setting the reinforcement that holds a cracked slab together. If the base needs a final leveling course inside the forms, add and compact it now so the slab thickness is uniform, because a base that humps up in the middle leaves the concrete thin there, and thin spots are where a slab cracks first.
Lay a vapor barrier where the slab needs to block ground moisture from rising through it, which is common for interior floors, slabs under a building, or anywhere a dry surface matters. It is typically a polyethylene sheet rolled across the base with overlapped seams, run up to the forms. An open outdoor patio may not need one, but a shed or garage floor usually does, so decide by the slab’s use.
Set the reinforcement so it actually works. Reinforcement does not stop concrete cracking, it holds any crack tightly closed so the slab stays one structural piece. A common residential choice is a grid of half inch rebar at roughly 12 to 18 inch spacing, or welded wire mesh, and the detail that matters most is height: set it on chairs so it sits in the middle third of the slab thickness, not flat on the base. For a 4 inch slab, that means the steel sits around the middle, roughly 2 inches down, not on the ground.
Watch out for laying rebar or mesh flat on the base and pouring over it, a shortcut that does almost nothing, because reinforcement lying on the ground ends up at the very bottom of the slab where it cannot hold the surface together. Chairs or supports that lift the steel into the concrete are cheap and are the whole point, so never skip them. Confirm the reinforcement size and spacing for your slab and load with local practice.
Step 6: Pour and screed the concrete
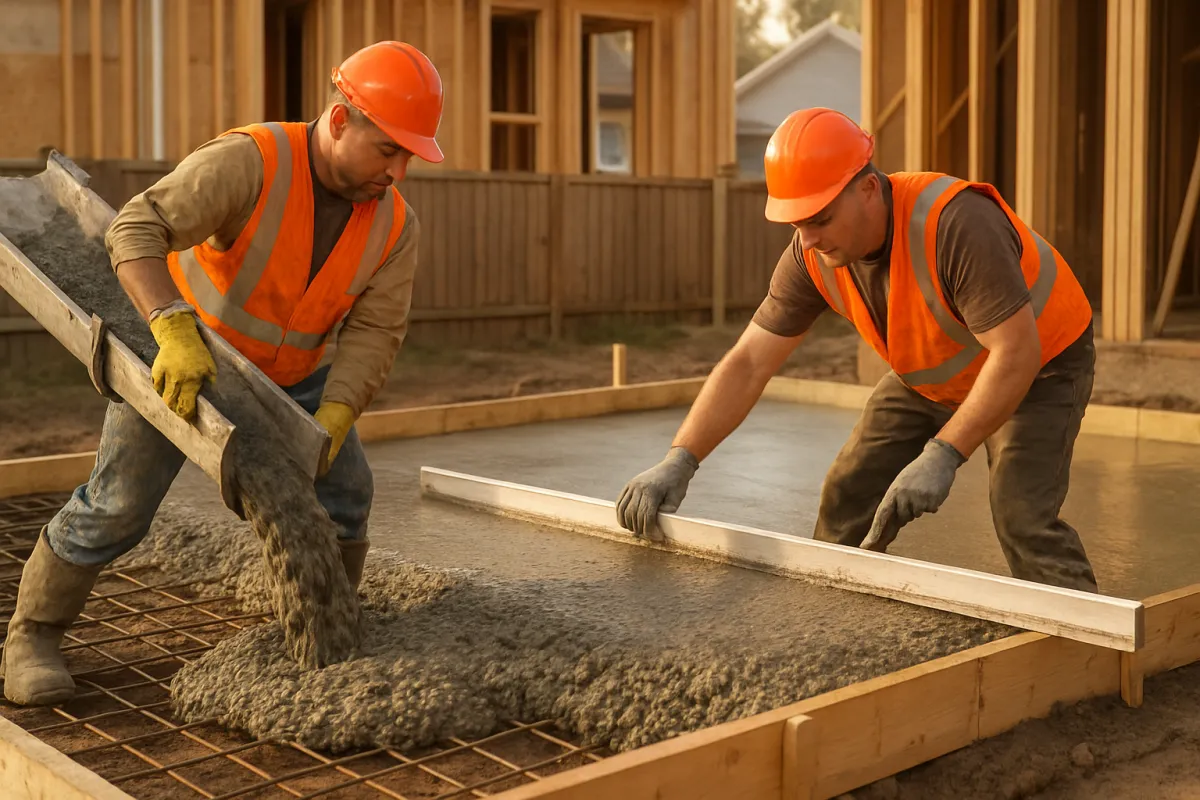
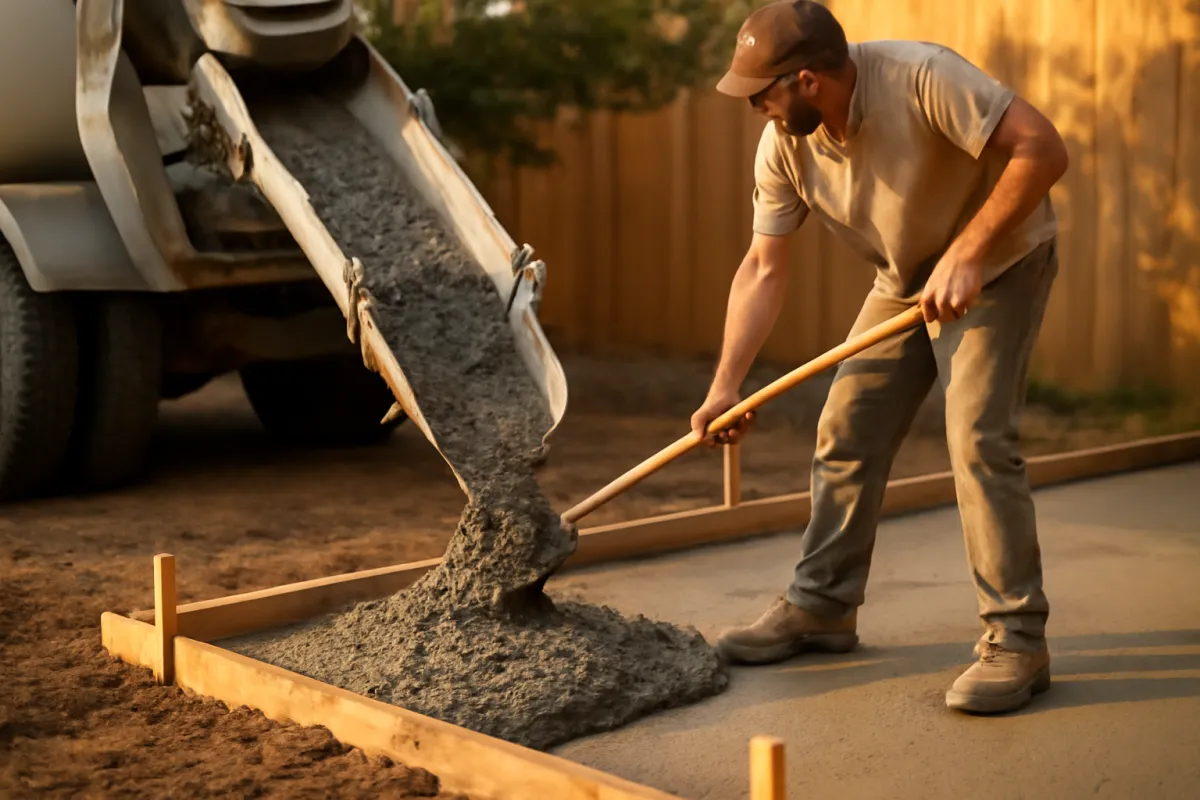
This is pour day, the step with the clock running: place the concrete into the forms and strike it off level with a screed before it stiffens. Have every helper and tool ready before the first concrete arrives, because from the moment it is in the forms it is setting. Place the concrete evenly across the slab, working from the far corner back toward your exit so you are never trapped, and fill slightly above the form tops so there is material to screed off. Move it with a shovel or rake, not by adding water, and consolidate it into the corners and along the forms so there are no voids.
Screed as you go, do not wait for the whole slab. Screeding means dragging a straight board across the tops of the forms in a sawing, side-to-side motion to strike the concrete off level with the form tops, which is why the forms had to be set true in Step 4. Pull the excess ahead of the board and let it fill any low spots, making a second pass if needed. Two people screed faster than one and keep the board flat, which matters because the screed sets the flatness of the finished slab.
For the 10 by 10 foot example, roughly 1.36 cubic yards of concrete goes down in one continuous pour, which is squarely a ready-mix delivery rather than a bag job, so the whole slab is placed and screeded before any of it sets.
Watch out for adding water to the mix to make it easier to spread, the single most damaging shortcut on pour day, because the excess water permanently weakens the cured concrete and increases cracking and dusting. If the concrete is stiff, place and work it faster, but do not splash water into it. Also watch for pouring faster than your crew can screed, which leaves concrete setting before it is struck off level.
Step 7: Float, edge, and finish the surface
With the slab screeded flat, this step turns a rough, struck-off surface into a finished one, in a sequence timed to the concrete’s setting. First, once the surface sheen of bleed water has left but the concrete is still workable, bull-float the whole slab to knock down the ridges the screed left and push the larger aggregate just below the surface. This is a flattening pass, not a smoothing one, and it is done early while the concrete is still soft.
Next, edge and groove. Run an edger along the form tops to round the slab’s edges, which are otherwise sharp and prone to chipping, and cut control joints with a groover or a saw. Control joints are deliberate weak lines, commonly cut to about a quarter of the slab depth and spaced so the slab is divided into panels no more than roughly two to three times as long as they are wide, so that when the slab shrinks and cracks, as concrete does, it cracks along the joint you chose rather than randomly across the surface. On the 10 by 10 foot example, a joint splitting the slab into panels keeps any shrinkage crack on a line.
Finally, finish the surface for its use. For an outdoor slab, a patio, walkway, or driveway, a broom finish is the common choice: after floating, drag a broom across the surface to leave fine grooves that give grip when the surface is wet, because a smooth troweled slab outdoors is slick and dangerous. A garage or interior floor may be troweled smoother instead. Time the finish to the concrete, since working it too early traps bleed water and too late tears the surface.
Watch out for troweling an outdoor slab glass-smooth, which looks tidy dry and turns into a skating rink in the rain, and for skipping control joints, which lets the slab crack wherever it wants. A broom finish and cut joints are small efforts that decide grip and where the inevitable shrinkage cracking lands.
Step 8: Cure the slab properly
This is the step that makes or breaks the slab’s strength, and the one most often shortchanged because the hard work looks done: cure the concrete by keeping it damp and at a stable temperature while it gains strength. Concrete does not dry to get hard, it cures through a chemical reaction that needs water, so letting a fresh slab dry out too fast starves that reaction and leaves the surface weak, dusty, and more prone to cracking. Curing is about holding moisture in during the early window, most critically the first seven days.
Do it by any method that keeps the surface damp: cover the slab with plastic sheeting, lay wet burlap and keep it wet, mist it regularly, or apply a curing compound that seals moisture in. Start as soon as the finish has set enough not to be marred, and keep it up continuously, because a slab that is wetted and allowed to dry repeatedly cures worse than one kept steadily damp. In hot, dry, or windy weather the surface loses water fastest, so curing matters most exactly when it is hardest.
The milestones are worth knowing. As illustrative figures, concrete commonly reaches around 70 percent of its design strength in about seven days of proper curing and close to full strength near 28 days. You can usually walk on the slab within a day or two and take light loads within a week, but keep heavier loads off until it has cured longer, and treat 28 days as the common reference for full strength.
Watch out for treating the pour as the finish line and walking away. A slab that is floated, jointed, and broom-finished beautifully but then left to dry out in the sun can end up weaker than one that was finished plainly and cured well. The cure is invisible and unglamorous, and it is the single step that most decides whether the slab lives up to its thickness.
A worked example: a 10 by 10 foot slab
Pull the eight steps together on one realistic build, a 10 foot by 10 foot slab, 4 inches thick, on a 4 inch compacted gravel base, and watch the plan flow from a tape measure to a material order and a pour.
Step 1, plan: the footprint is 10 by 10 feet, 100 square feet, 4 inches thick, level for a shed floor (or sloped a quarter inch per foot, about 2.5 inches of fall, if it is an outdoor patio), permit checked. Step 2, calculate: the concrete is 100 times 0.333 foot, about 33.3 cubic feet, roughly 1.23 cubic yards, near 1.36 with a 10 percent waste allowance, which the supplier rounds toward 1.5 yards; the base is the same 33.3 cubic feet, about 1.23 cubic yards, near 1.5 with the 20 percent compaction allowance. That concrete volume, well past half a yard, is a ready-mix order, not bags: at about 0.6 cubic feet per 80 pound bag it would be roughly 56 bags, far too many to mix by hand against a setting clock.
Step 3, excavate and base: dig about 8 inches below the finished height across the 100 square feet, then spread and compact roughly 1.5 cubic yards of angular gravel in two lifts. Step 4, forms: stake four 2 by 4s into a square, tops at the finished height, checked level or to the slope. Step 5, reinforce: lay a vapor barrier if the slab needs one, then set a rebar grid or wire mesh on chairs so the steel sits around mid-depth. Step 6, pour and screed: place about 1.36 cubic yards of ready-mix in one go and screed it off the form tops. Step 7, finish: bull-float, edge, cut a control joint or two, and broom-finish for grip. Step 8, cure: cover and keep the slab damp for at least seven days.
So one measured slab produces a clean plan: about 1.36 cubic yards of concrete ordered as ready-mix, roughly 1.5 cubic yards of base gravel, forms, reinforcement, and a week of curing. Change any input and it moves predictably: take the thickness to 6 inches and the concrete climbs to about 2.0 cubic yards with waste; double the footprint and both volumes roughly double. Run your own dimensions through the estimator and the arithmetic, including the inch-to-foot and divide-by-27 steps, is done for you.
A slab from base to cure: where the work goes
It is tempting to picture pouring a slab as mostly the pour, the dramatic part with the truck and the wet concrete, but the pour is a small slice of the real effort, and seeing where the work actually goes helps you plan the time and the crew. A slab is far more preparation and aftercare than pour, which is why the base and the cure, the bookends, are where slabs most often go wrong.
Roughly, the base preparation, the excavation, the gravel, and the compaction, is the biggest single share of the hands-on labor, because moving and packing soil and stone is heavy, slow work. Building and leveling the forms and setting the reinforcement is the next large share, and it is precise rather than heavy. The pour and screed, the part everyone pictures, is a short, intense burst, and the floating and finishing another. Setting up the cure is quick to start but runs for days after.
A slab from base to cure: where the work goes
Illustrative split of the hands-on effort across the build; the cure then continues passively for days after the setup.
These are illustrative shares of the active work, and they sum to 100 percent. The pour that everyone pictures is only about a sixth of the effort, while the base and the forms together are the majority, which is why a slab is won or lost before the concrete arrives.
The chart makes the lesson concrete: if you budget your time and crew around the pour, you will underestimate the base and the forms, which are most of the work, and you will treat the cure, which runs for days, as an afterthought. Plan the day around the preparation, and the pour itself becomes the quick part it should be.
Bags or ready-mix: sizing the pour
One decision quietly shapes the whole pour, and it is worth settling before you order: bagged concrete you mix on site, or ready-mix delivered by the truck. The deciding factor is volume, and the crossover sits near half a cubic yard for a slab. Below it, bagged concrete is often the simpler and cheaper path, with no delivery minimums and the ability to mix only what you need. Above it, the labor of mixing bag after bag by hand starts to outweigh any saving, and worse, it risks cold joints where one batch sets before the next is placed against it.
Put the scale in numbers. A single cubic yard is roughly 45 of the 80 pound bags or about 60 of the 60 pound bags, each of which must be carried, opened, and mixed against a setting clock. The 10 by 10 foot example slab, at about 33.3 cubic feet, would be roughly 56 of the 80 pound bags at about 0.6 cubic feet each, which is far too many to mix by hand and keep the whole slab wet enough to pour as one piece. Our how many bags of concrete do I need manual works the bag-count side of this in full, and our how much concrete do I need manual covers the ready-mix and short-load side.
The practical rule is to let the volume choose. Under about half a cubic yard, price the bags; between roughly half a yard and a yard is a gray zone where a rented mixer or a short-load delivery both make sense; past a yard, order ready-mix so the whole slab pours continuously. Ready-mix arrives blended and lets you place the slab in one go, which is exactly what avoids the cold joints that hand-mixing dozens of bags can create, and it is why almost any real slab is a truck job.
Common mistakes when pouring a concrete slab
A handful of errors account for nearly every slab that fails early, and all of them are decisions made before, during, or right after the pour, not accidents later.
- No base or no compaction. Pouring onto loose or uneven soil to save a step lets the ground move unevenly under the slab, which cracks and settles it. Build and compact a real gravel base, in lifts, every time.
- Weak, under-staked forms. Wet concrete is heavy and pushes hard, so a form that bows or blows out leaves a slab out of square, out of level, and thick along that edge, with no fix once poured. Overbuild and stake the forms.
- Reinforcement laid flat on the base. Rebar or mesh lying on the ground ends up at the bottom of the slab where it does almost nothing. Set the steel on chairs so it sits in the middle third of the thickness, or leave it out knowingly rather than pretending it works flat.
- Adding water to the mix. Splashing water into the concrete to make it flow permanently weakens the cured slab and increases cracking and dusting. Work the concrete faster or use a workable mix, but never add water on site.
- Skipping the cure. A slab left to dry out fast, especially in sun or wind, cures weak, dusty, and crack-prone no matter how good the finish looked. Keep it damp for at least seven days.
- Pouring in bad weather. Very hot, dry, windy, or near-freezing conditions all work against a clean cure. Plan the pour around the forecast, and adjust the method at the extremes rather than pushing ahead unchanged.
Every one of these is a decision about something invisible or easy to rush in the finished slab, the base, the forms, the steel, the mix, the cure, the weather, which is exactly why they get skipped and exactly why they matter.
Troubleshooting: big pours, cracks, weather, and finish
Real slabs rarely match the tidy example, so here is how to handle the conditions that complicate them.
What if the slab is large? Volume is the dividing line. Past about half a cubic yard, a slab is a ready-mix order rather than a bag job, because mixing dozens of bags by hand cannot keep pace and risks cold joints between batches. A large slab may also need to be poured in planned sections with proper joints, or need a pump to reach the forms, and it always needs more hands. Size the crew and the delivery to the volume, not the other way around.
What if the slab cracks? Some fine hairline cracking is normal in concrete as it shrinks, which is exactly why control joints are cut, to steer that cracking onto chosen lines. Wider or structural cracking usually traces back to a poor base, a slab that was too thin, reinforcement in the wrong plane, added water, or a rushed cure, all of which are prevented in the steps above rather than fixed after. Control joints cut to about a quarter of the slab depth, spaced into reasonable panels, are the main defense, along with a good base and a real cure.
What about hot or cold weather? Heat, dry air, and wind pull water out of the surface fast, which risks rapid setting and cracking, so in hot weather pour early or late, shade the slab, use wind breaks, and cure aggressively. Near-freezing weather slows or stalls the curing chemistry and risks freeze damage before the concrete gains strength, so in cold weather protect the slab with insulating blankets or a heated enclosure and keep it from freezing until it has cured. A commonly cited comfortable range is roughly the 50s to 70s Fahrenheit.
What if the finish is uneven or slick? An uneven surface usually means the screed board was not kept flat on the form tops or the forms were not level, so the fix is upstream, in true forms and disciplined screeding, not in the trowel. A slick outdoor slab is the sign of a surface troweled too smooth, so drag a broom finish across an outdoor slab for grip. If a slab has already cured too smooth outdoors, surface treatments and non-slip coatings exist, but it is far easier to broom it in while the concrete is fresh.
Your concrete slab checklist
Before the concrete is ordered and before the first shovel goes in, run down this compact checklist. It is the save-this asset of the whole build.
- Measured the slab length and width in feet, set the thickness, and squared the corners.
- Planned any drainage slope of roughly a quarter inch per foot, and checked whether a permit is needed.
- Calculated the concrete by length times width times thickness in feet over 27, plus a 5 to 10 percent waste factor, and the base gravel at about 4 inches plus 20 percent.
- Chose bags or ready-mix by the volume, ordering ready-mix past about half a cubic yard.
- Excavated to the total depth of base plus slab, then spread and compacted the gravel base in lifts.
- Built and staked level forms with their tops at the finished height, checked square and to any slope.
- Laid a vapor barrier where needed and set the reinforcement on chairs in the middle third of the slab.
- Lined up the helpers and tools, and watched the forecast for a mild pour window.
- Poured continuously and screeded off the form tops, without adding any water to the mix.
- Bull-floated, edged, cut control joints, and broom-finished for grip.
- Kept the slab damp and protected for at least seven days of curing.
Work top to bottom and the slab you pour is one that is supported, level, reinforced, and cured, which is the difference between a slab that lasts and one that cracks. The companion below runs the concrete and base calculations automatically on your own dimensions, so you can check your hand math before you order.
The bottom line
Pouring a concrete slab is eight steps worn into a sequence: plan the size, thickness, and slope, calculate the concrete and base, excavate and compact the base, build and level the forms, add the vapor barrier and reinforcement, pour and screed, float and finish, then cure it properly. The whole thing rests on a few disciplines that are invisible once the concrete has set, a real compacted base, true and staked forms, steel in the right plane, a mix you never water down, and above all a full cure, which is exactly why the slabs that fail are the ones that rushed them. Settle the base and the thickness deliberately, because they decide how the slab is supported, order the concrete with a waste factor and as ready-mix past half a yard, and give the cure the full week it needs. Do that, and the slab you pour is the flat, level, crack-resistant kind that still carries its load decades on, which is the only kind worth the weekend.
Read this manual as bench notes meant to teach the method, not as a build you can order and pour without checking. The thicknesses, base depths, reinforcement spacing, slopes, curing times, and volumes here are typical illustrative values, and your real numbers shift with the load, the subgrade, the climate, the mix, and local code. Measure your own site, run it through the eight steps, confirm the slab thickness, base, reinforcement, and any permit or structural detail with the people doing the work and your local requirements, and verify the final quantities with your supplier before any concrete is delivered.
Frequently asked questions
How do I pour a concrete slab step by step?
Plan the size, thickness, and slope, then calculate the concrete and base material, excavate and compact a gravel base, build and level the forms, add the vapor barrier and reinforcement, pour and screed the concrete, float and finish the surface, and cure it properly. Each step is prepared and checked before the next begins, because a slab is only as good as the base and forms underneath it and the curing after it. This manual walks all eight steps with a worked example carried through to real quantities, and it treats the base and the cure, the two most rushed steps, as the ones that decide whether the slab lasts.
How thick should a concrete slab be?
A common residential slab-on-grade is around 4 inches thick for patios, shed floors, and walkways, with 5 to 6 inches often used where the slab carries heavier loads such as a driveway or a garage floor. Thickness is the single input that moves the concrete order the most, because it multiplies straight into the volume, so a 6 inch slab on the same footprint needs about half again as much concrete as a 4 inch one. Treat any thickness figure here as an illustrative starting point and confirm the right depth for your use and soil with local practice, since load, climate, and code all shift it.
Do I need gravel under a concrete slab?
A compacted gravel base under a slab spreads the load onto the soil, drains water away from the underside, and gives the concrete a firm, uniform surface to sit on, which is why most slab-on-grade builds use one. A commonly cited base is roughly 4 inches of compacted angular gravel over firm subgrade, deeper on soft or clay soils. Skipping the base, or laying the concrete on loose or uneven soil, is one of the most common reasons a slab cracks and settles, because the ground moves unevenly under it. The base is the layer never to skimp, since it is invisible once the slab is poured but decides how the slab is supported.
How much concrete do I need for a slab?
Multiply the slab length by width by thickness, with every measurement in feet, then divide by 27 for cubic yards, and add a 5 to 10 percent waste factor. Thickness usually arrives in inches, so divide it by 12 first. An illustrative 10 by 10 foot slab at 4 inches is 100 times 0.333 feet, about 33.3 cubic feet, which is roughly 1.23 cubic yards, near 1.36 with a 10 percent waste allowance. Our concrete calculation manual works this volume line in full. Past about half a cubic yard, that volume is a ready-mix order rather than a bag job.
Does a concrete slab need rebar or wire mesh?
Reinforcement does not stop concrete from cracking, but it holds the two sides of any crack tightly together so the slab stays as one structural piece rather than drifting apart, which is why most slabs use rebar in a grid or welded wire mesh. A common residential choice is a grid of half inch rebar at roughly 12 to 18 inch spacing, or wire mesh, set on chairs so it sits in the middle third of the slab thickness rather than lying on the ground. Reinforcement laid flat on the base does almost nothing, because it needs to be inside the concrete to work. Confirm the size and spacing for your slab and load with local practice.
How long does concrete take to cure?
Concrete keeps gaining strength for weeks, but the practical milestones are that it commonly reaches around 70 percent of its design strength in about seven days of proper curing and close to full strength near 28 days, as illustrative figures. Curing means keeping the concrete damp and at a stable temperature during that early window so the chemistry that builds strength can continue, most critically for the first seven days. You can usually walk on a slab within a day or two and take light loads within a week, but heavier loads should wait, and the 28 day mark is the common reference for full strength. Rushing this step is the quiet way a slab ends up weaker than it looks.
Can I add water to concrete to make it easier to work?
Adding extra water to wet concrete on site to make it flow more easily is one of the most damaging things you can do to a slab, because the excess water permanently weakens the cured concrete and increases cracking and surface dusting. The mix is designed around a specific water content, and more water means a weaker, more porous result that you cannot fix later. If the concrete is stiff, the right answers are to place and work it faster, use a mix or admixture designed for workability, or plan the pour so it goes down before it starts to set, never to splash more water into it. Follow the water figure on a bag or the supplier's mix, not the temptation of the moment.
What is the best weather to pour a concrete slab?
Mild, calm, overcast weather is the friendliest for a slab, because concrete cures best at moderate temperatures with the surface protected from drying too fast. Very hot, dry, or windy conditions pull water out of the surface quickly and can cause rapid setting and cracking, while near-freezing temperatures slow or stall the curing chemistry and risk freeze damage before the concrete gains strength. A commonly cited comfortable range is roughly the 50s to 70s Fahrenheit, with measures such as shade, wind breaks, or heated enclosures used at the extremes. Plan the pour around the forecast, and treat hot and cold weather as reasons to adjust the method, not to push ahead unchanged.