What's on this page
- Before you start: tools, materials, time, and difficulty
- Step 1: Decide whether epoxy beats paint
- Step 2: Test the slab for moisture and age
- Step 3: Choose the right epoxy kit
- Step 4: Clean, degrease, and repair cracks
- Step 5: Etch or grind to open the concrete
- Step 6: Roll the base coat and broadcast the flakes
- Step 7: Seal it with a topcoat, then cure
- A worked example: coating a two-car garage floor
- How much epoxy a garage floor needs
- Where the time goes in an epoxy floor job
- Common mistakes when epoxying a garage floor
- Troubleshooting: peeling, bubbles, and hot tire pickup
- Your garage floor epoxy checklist
- The bottom line
Short answer: Epoxy a garage floor in seven steps: decide between a one-part epoxy paint and a two-part epoxy, test the slab, choose the kit, clean and repair, etch or grind the surface, roll the base coat and broadcast flakes, then topcoat and cure. Size the order by area divided by coverage per gallon, times coats, plus about 10 percent; an illustrative 20 by 20 foot garage takes about 3.5 gallons in two coats.
A garage floor takes more abuse than almost any concrete in a house: hot tires roll across it, oil and brake fluid drip onto it, road salt melts off in winter, and tools and jacks scrape it all year. Bare concrete soaks all of that up, stains permanently, and slowly dusts and pits, which is why a two-part epoxy coating has become the popular fix. Done well it turns a gray, porous slab into a hard, glossy, chemical-resistant floor that wipes clean and looks finished. Done in a hurry it peels off in sheets within a season, and the difference between those two outcomes is almost never the rolling: it is the preparation underneath, the moisture test, the clean, the etch or grind, that decides whether the coating bonds to the concrete or sits on top of it waiting to lift.
This manual epoxies a garage floor in seven plain steps, from choosing between a true epoxy and an ordinary epoxy paint for concrete to letting the finished floor cure before you park on it, with a worked example carried all the way through to coverage and gallons. It borrows the coverage math from our how much paint do i need manual and the area method from our how to calculate square footage manual, and narrows both to the single job of coating a garage floor. Run your own dimensions through the floor coating estimator in about a minute, and the companion below recalculates the kit size against your numbers as you read.
Key takeaways
- Epoxying a floor is a sequence: decide the product, test the slab, choose the kit, clean and repair, etch or grind, roll the base and flakes, then topcoat and cure. The order is not optional.
- The concrete decides everything. Epoxy bonds to a clean, dry, profiled slab and peels off a smooth, damp, or greasy one, so the prep and the etch, not the rolling, are the real work.
- Match the kit to the use: a one-part epoxy paint is cheap and easy but wears fast; a two-part 100 percent solids epoxy builds the thickest, most durable film and is what most people mean by an epoxy floor.
- Size the order by area: length times width, divided by the coverage per gallon, times the coats, plus about 10 percent waste. An illustrative 20 by 20 foot garage takes about 3.5 gallons in two coats.
- Never park on fresh epoxy. Most kits want several days to cure, commonly cited around three to seven, and hot tire pickup and peeling trace straight back to skipped prep or an early return to traffic.
Before you start: tools, materials, time, and difficulty
Epoxying a garage floor is one of the more rewarding concrete projects a homeowner can take on, but it is less forgiving than ordinary painting, because a two-part epoxy has a working time you cannot pause and the surface underneath has to be right before you mix a thing. Before anything is opened, four things need to be settled: the kit and tools, the condition and moisture of the slab, the time you will need across several days, and a clear plan for the room so you never seal yourself into a corner. Most of the preparation is really about the concrete, not the coating, which is exactly why the floor, not the roller, decides the result.
What to settle and gather:
- The kit and application tools. A garage floor epoxy kit sized to your measured area (see the sizing math below), a low-nap or medium-nap roller with a solvent-resistant core on an extension pole, a quality brush for cutting in edges, a paint tray or roller screen, painter’s tape and plastic to mask walls and thresholds, spiked shoes if you are broadcasting flakes, and a couple of clean buckets for mixing. Buy the kit from a measured area, not a guess.
- Cleaning, repair, and profiling supplies. A stiff broom or blower, a pressure washer or hose and stiff scrub brush, a concrete degreaser for oil stains, a crack filler and patching compound, and either an acid etch (muriatic or a safer citric etch) or a rented diamond grinder to open the surface profile.
- Testing and safety gear. A sheet of plastic and tape for the moisture test, gloves, eye protection, and a respirator suited to the product, especially for solvent-based kits, plus good ventilation. Read the product label before you start.
- The conditions. A slab that has fully cured, a moderate temperature range for the whole application and early cure, and low enough humidity for the coating to set. Epoxy is far fussier about temperature and moisture than a driveway sealer.
Time and difficulty: plan the job across several days. Cleaning, repairs, and etching or grinding come first, with drying time after, then the coating day itself, then several days of undisturbed cure before any vehicle returns. The active work is a long day or two, but the drying and curing set the calendar. It is an intermediate project: the rolling is easy, and the skill is in the preparation and in working fast and clean once the epoxy is mixed and the clock is running.
Step 1: Decide whether epoxy beats paint
Start by settling what you are actually going to put down, because the word epoxy covers two very different products and choosing the wrong one is the quiet reason many floors disappoint. A one-part epoxy paint for concrete is really a latex or acrylic floor paint with a little epoxy blended in, sold ready to use in a single can. A two-part epoxy is a resin and a hardener you mix just before rolling, which cures by chemical reaction into a much thicker, harder, more chemical-resistant film. They look similar in the store and behave nothing alike on the floor.
Choose by how the garage is used. A one-part epoxy paint is cheaper, easier, and forgiving to apply, and it is a reasonable pick for a light-duty floor that mostly needs to look better and shed dust. Its trade-off is durability: the thinner film wears faster under tires and is more prone to hot tire pickup, where the coating lifts where warm tires sit. A two-part epoxy, especially a 100 percent solids product, builds a far thicker and tougher film that stands up to oil, chemicals, dropped tools, and daily driving, which is what most people picture when they say a floor is epoxied. It costs more and demands better prep, but it is the durable answer for a working garage.
Watch out for assuming any product in the epoxy aisle is a true epoxy. Read whether it is one-part or two-part and what percentage solids it is, because that single detail predicts the durability far better than the price or the picture on the can. If the garage is a workshop or parks daily drivers, lean toward a two-part system and commit to the prep it requires. Treat every durability claim here as illustrative and confirm the specific product against its label.
Step 2: Test the slab for moisture and age
Before you spend a dollar on a kit, prove the slab can hold a coating, because epoxy over a wet or too-new floor fails no matter how well you roll it. Moisture is the silent killer of garage floor epoxy: water vapor rising through the concrete pushes up under the film and lifts it off. The simplest field test is the plastic sheet test: tape a roughly 18 by 18 inch square of plastic tightly to the clean bare concrete, leave it a full day or more, then check for condensation or a darkened slab underneath. Moisture there means the floor is not ready and needs a moisture-tolerant system or further investigation.
Check the age as well as the moisture. Fresh concrete is still releasing water as it cures, so a new slab usually needs to reach a full cure before it takes a coating, commonly cited around 28 days, the same window concrete uses to approach its full strength. Coating a green slab traps that curing moisture and is a fast route to a milky, bubbled, or peeling floor. If the garage is new construction, confirm how long ago it was poured before you plan the job.
Watch out for a slab that passes the eye but fails the plastic. A garage floor can look bone dry and still drive enough vapor to fail an epoxy, especially a slab poured on grade without a vapor barrier. If the plastic test shows moisture, do not simply push ahead: choose an epoxy rated for higher moisture or a moisture-mitigating primer, or reconsider whether a penetrating treatment suits the slab better. The test costs a sheet of plastic and a day, and it prevents the most expensive failure in the whole project.
Step 3: Choose the right epoxy kit
With the product type decided and the slab proven, choose the specific kit, because the base chemistry shapes the thickness, the durability, the fumes, and how much working time you get. Two-part epoxies come in three broad families that behave differently, and matching the family to your garage and your comfort level matters more than the color chart. Match the kit to the use first and the finish second.
Water-based epoxies are the thinnest and most forgiving: they roll on easily, have milder fumes, breathe a little which tolerates slightly more slab moisture, and are a good beginner choice, though the thinner film is the least durable of the three. Solvent-based epoxies build a thicker, glossier, more durable film and bond aggressively, but they carry strong fumes that demand serious ventilation and a proper respirator, and their working time is short. 100 percent solids epoxies are the professional-grade option: with essentially no carrier to evaporate, they build the thickest, hardest, most chemical-resistant film in a single coat, which is the classic showroom garage floor. The trade-off is a short pot life and an unforgiving application, so they reward experience and a well-rehearsed plan.
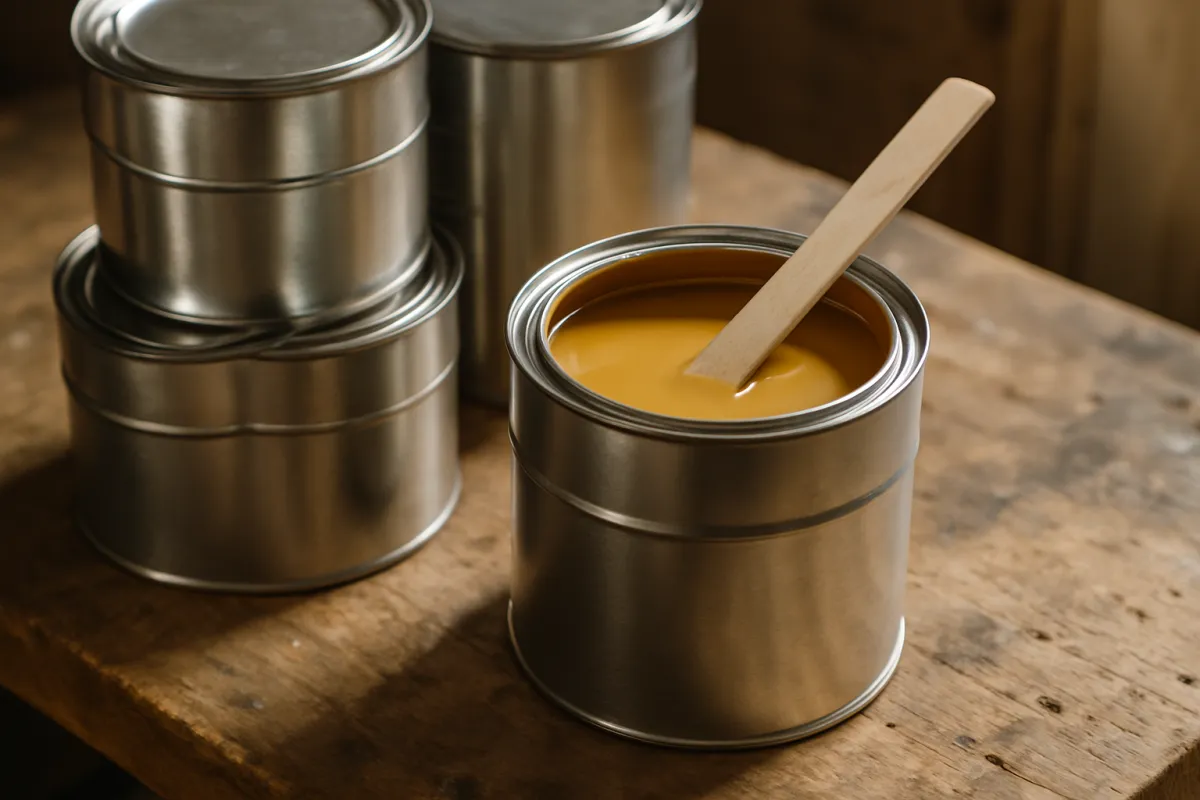
The hero of this manual, the amber two-part product in the cans, stands in for any of these: the method is the same, and only the working time, the fumes, and the film thickness change. Most garage kits also include the decorative color flakes and a clear topcoat, so read what the kit contains before you add anything.
Watch out for buying on gloss and color alone. A cheap kit that covers thin and cures soft looks the same in the can as a premium one, so read the solids percentage, the coverage rate, the pot life, and whether a separate topcoat is included. Treat every coverage figure, film thickness, and durability claim here as illustrative, and confirm the specific kit against the manufacturer instructions for your slab, climate, and how hard the floor will be worked.
Step 4: Clean, degrease, and repair cracks
This is the first half of the step that decides whether the coating bonds or fails, and the one most often rushed because it feels like it is not the real job: strip the floor completely clean and repair its damage before any profiling or coating. Epoxy bonds to clean, sound concrete and cannot bond through dust, oil, or loose material, so any grime you leave becomes a spot where the film lifts and peels. In a garage, the enemy is oil: years of drips soak into the slab exactly where the car parks, and oil is precisely the film epoxy will not stick over.
Work through the surface in order. Clear the garage completely, sweep or blow off all loose dirt and grit, then scrub or pressure wash the whole slab to strip ground-in dust and residue. Attack every oil and grease stain separately with a concrete degreaser, scrubbing and rinsing until water no longer beads on the spot, because a stain that still repels water will still repel epoxy. If an old coating is peeling, it usually has to come off, since a new coat will only fail along with it.
Then repair the concrete itself. Fill cracks with a suitable concrete crack filler and patch spalled or chipped areas with a patching compound rated to take a coating, following each product’s cure time, because epoxy rolled over an open crack simply bridges a gap that will telegraph and split. Our how to repair concrete cracks manual walks the crack filling and patching in full, and it is the natural prep step to finish before you profile the slab. Larger structural cracks are a repair job in their own right. Once cleaned and patched, the slab must dry completely before the next step.
Step 5: Etch or grind to open the concrete
With the floor clean and repaired, complete the preparation by opening a bondable profile, because epoxy grips a slightly rough, porous surface and slides off a smooth, troweled, or sealed one. This is the non-negotiable step that separates a coating that lasts from one that peels, and it comes in two forms. Acid etching washes a mild acid, muriatic or a safer citric or phosphoric etch, over the clean wet slab to microscopically roughen the surface, then rinses it thoroughly. Mechanical grinding runs a rented diamond grinder across the floor to abrade a consistent profile, which is the more reliable professional standard.
Choose the method for your floor and comfort. Etching is cheaper, needs no rental, and is beginner friendly, but it works unevenly and does little on a very smooth or previously sealed slab, so it demands care and a thorough rinse to neutralize and remove all the acid residue. Grinding costs more in tool rental and effort and raises dust that a vacuum shroud should capture, but it produces the even, dependable profile that gives the coating its best chance, especially on a slick or sealed floor where an acid etch struggles. When in doubt on an important floor, grinding is the surer path.
Watch out for skipping this step because the floor already feels rough. A slab that feels textured to a bare hand can still be too closed for epoxy to key into, and a previously sealed floor almost always needs grinding because the sealer blocks the etch. After etching, the surface should feel like fine sandpaper (a common target), and it must be fully rinsed and dried before coating. A profile you can feel and a floor that is bone dry are the two conditions the base coat needs.
Step 6: Roll the base coat and broadcast the flakes
Now the visible part, and the rule that governs all of it: mix only what you can use, roll the base coat thin and even, and broadcast the flakes while it is still wet. A two-part epoxy starts curing the moment the resin and hardener meet, so mix each batch thoroughly for the full time the label states, then pour it out in a ribbon rather than leaving it to heat up and kick in the bucket. Cut in the edges with a brush first, then roll the field in manageable sections, working from the far corner back toward the door so you never coat yourself in.
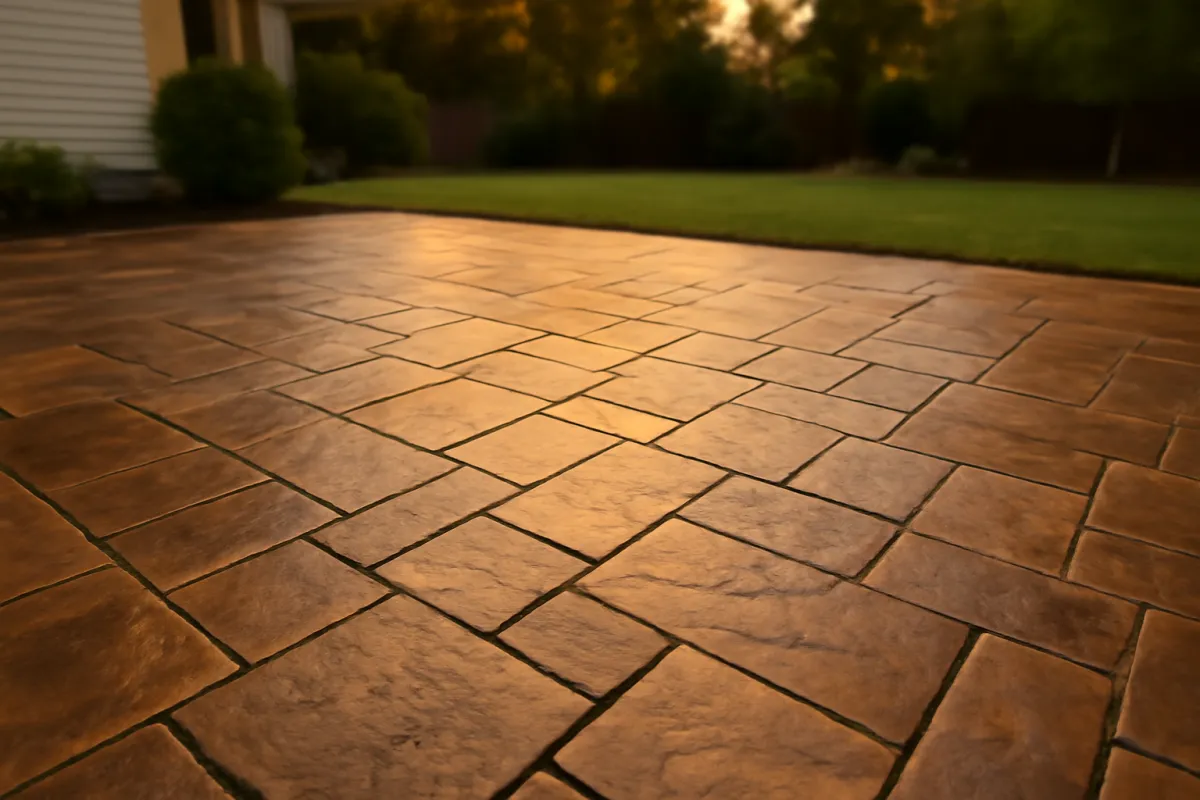
Keep the coat thin and consistent. Epoxy is self-leveling to a point, but a puddle or a thick lap line cures unevenly, traps air, and can stay soft, so lay it at the coverage rate the kit specifies rather than flooding it on. If you are adding the decorative color flakes, broadcast them by tossing them up and letting them fall evenly into the wet base within the working window, wearing spiked shoes so you can step across the coated floor without marking it. Broadcast to the density you want: a light scatter for a hint of color, a heavy full-refusal cast where the surface is fully covered.
Watch out for mixing more than you can roll before it kicks, the single most common two-part epoxy mistake. A batch left too long in the bucket generates its own heat, thickens, and cures before it reaches the floor, wasting product and leaving a gap. Mix in batches sized to your pace, keep a wet edge between sections, and if you are working alone consider a slower water-based product that buys you more time. Thin, even, and within the working window beats thick and rushed every time.
Step 7: Seal it with a topcoat, then cure
The color is down, but the job is not finished until a clear topcoat is on and the floor has cured undisturbed: after the base coat has set for the time the kit specifies, roll the clear topcoat to lock in the flakes, add depth and gloss, and give the wear layer that actually takes the tire and foot traffic. Many kits include this clear coat, and some add an anti-slip additive you can mix into it, which is worth considering because a glossy epoxy floor is slick when wet. Apply the topcoat with the same thin, even discipline as the base, cutting in and rolling in sections toward the door.
Then let it cure, which is the step that quietly ruins more floors than any other when it is skipped. Cure times vary by product, temperature, and humidity, but as illustrative guidance many epoxy floors are dry to the touch within a several-hour window, ready for light foot traffic after about a day, and ready for vehicle traffic only after several days, commonly cited around three to seven days for a full cure. The film keeps hardening across that whole window, so returning a car early is a direct cause of hot tire pickup and peeling. Keep foot traffic, water, and especially vehicles off the floor for the full window on the label.
Watch out for treating dry to the touch as fully cured. A floor can feel hard underfoot days before it has reached the chemical hardness that resists hot tires and chemicals, and the temptation to park the car back in is exactly what marks a nearly finished floor. Give the coating its full cure, keep the space ventilated and at a stable temperature while it hardens, and the last few days of patience protect all the work that came before.
A worked example: coating a two-car garage floor
Pull the seven steps together on one realistic job, a 20 foot by 20 foot two-car garage, existing concrete a few years old and sound, coated with a two-part 100 percent solids epoxy in a base and a clear topcoat with a light flake broadcast, and watch the plan flow from a decision to a kit size and a finished floor.
Step 1, decide: the garage doubles as a workshop and parks a daily driver, so the owner picks a two-part 100 percent solids epoxy over a one-part paint for its durability. Step 2, test: an 18 by 18 inch plastic square taped down overnight comes up dry, and the slab is well past a 28 day cure, so it is ready. Step 3, choose: a 100 percent solids kit with flakes and a clear topcoat included, read for its coverage and pot life. Step 4, clean and repair: the whole 400 square feet is swept, scrubbed, the oil stain where the car parks degreased until water no longer beads, two hairline cracks filled, then left to dry.
Step 5, profile: because the floor was never sealed, the owner acid etches it, rinses thoroughly, and lets it dry to a fine-sandpaper feel. Step 6, base and flakes: the area is 20 times 20, which is 400 square feet, our how to calculate square footage manual works this line in full. At an illustrative 100 percent solids coverage of 250 square feet per gallon per coat, one coat is 400 divided by 250, which is 1.6 gallons, and a base plus a topcoat is two coats, so about 3.2 gallons, near 3.5 with a 10 percent waste allowance. The base is rolled in batches from the back corner out, flakes broadcast into it. Step 7, topcoat and cure: once the base sets, the clear coat goes on, then no foot traffic for a day and no car for the several-day cure.
So one measured garage produces a clean plan: about 3.5 gallons of epoxy across two coats, a day of prep and drying, a day of coating, and several days of cure before parking. Change any input and it moves predictably: pick a thinner water-based kit and the coverage stretches; step up to a three-car garage and the gallons climb with the area. Run your own dimensions through the floor coating estimator and the area, coats, and waste arithmetic is done for you.
How much epoxy a garage floor needs
The most common planning question is simply how big a kit to buy, and the answer is pure coverage math: floor area, divided by the coverage per gallon per coat, times the number of coats, plus a waste allowance. Buying short is the worst outcome, because a two-part epoxy cannot wait while you drive back for another kit, and a fresh batch may not blend seamlessly into a partly cured coat. Measuring the floor and sizing the kit before you mix is the whole defense.
The chart shows how the gallons scale with garage size for a two-coat system, a base plus a clear topcoat, at an illustrative 100 percent solids coverage. A one-car garage takes only a couple of gallons, while a three-car floor more than doubles it, and a thinner water-based product would stretch each figure further. The point is that the order tracks straight with the measured area, so an accurate length and width is all it takes to buy right in one trip.
How much epoxy a garage floor needs
Illustrative gallons of a 100 percent solids epoxy at about 250 square feet per gallon per coat, two coats (base plus topcoat), with a 10 percent waste allowance, at different garage sizes.
The order scales straight with area at a fixed coverage and coat count: the 400 square foot two-car floor is about 3.5 gallons, and the 660 square foot three-car floor is about 5.8. Each bar is area divided by 250, times two coats, plus 10 percent, with widths tracking the gallons against the largest.
That coverage discipline is the same one behind our how much paint do i need manual, only with a thicker film and a stricter no-running-short rule. Buy the kit sized for two coats plus waste from a measured area, and the companion below sizes it on your own numbers so the only thing left to decide is the color.
Where the time goes in an epoxy floor job
It is tempting to picture epoxying a floor as mostly the rolling, the satisfying part with the fresh gloss and the flakes, but the rolling is a small slice of the real effort, and seeing where the work actually goes helps you plan the days honestly. An epoxy job is far more cleaning, repairing, and profiling than coating, which is exactly why the concrete, not the epoxy, decides the result.
Roughly, the cleaning, degreasing, crack repair, and etching or grinding together are the single biggest share of the hands-on effort, because a garage floor is a large surface and every square foot has to come clean, sound, and profiled. Masking the walls and thresholds and staging the tools is a small but worthwhile share, and it matters more here than in ordinary painting because you cannot pause once the epoxy is mixed. Rolling the base coat and broadcasting the flakes is a modest, steady share, the clear topcoat a little less, and the final cleanup another small share. The cure then runs passively for days after all the active work is done.
Where the time goes in an epoxy floor job
Illustrative split of the hands-on effort across the job; the cure then continues passively for several days after the coating is down.
These are illustrative shares of the active work, and they sum to 100 percent. The cleaning, repair, and profiling alone are nearly half the effort, while the two coats together are about a third, which is why an epoxy floor is won on the prep long before the resin is mixed.
The chart makes the lesson plain: if you budget your time around the coating, you will underestimate the prep, which is most of the work, and you will be tempted to cut it short, which is exactly the shortcut that makes epoxy peel. Plan the days around the concrete, and the rolling itself becomes the quick, satisfying part it should be.
Common mistakes when epoxying a garage floor
A handful of errors account for nearly every garage floor epoxy that peels, bubbles, or lifts under tires, and all of them are decisions made before or during the job, not accidents later.
- Skipping the moisture test. Water vapor rising through an untested slab lifts the coating off from below. Run the plastic sheet test first, and choose a moisture-rated system if it fails.
- Coating a smooth or sealed floor. Epoxy cannot key into a slick surface, so a floor that was not etched or ground will peel no matter how carefully it is rolled. Profile every floor, and grind a previously sealed one.
- Leaving oil or dirt behind. Epoxy will not bond over grease, so any stain that still repels water becomes a peel point. Degrease every oil spot until water soaks in evenly.
- Mixing more than you can roll. A two-part epoxy kicks in the bucket if it sits, wasting product and leaving gaps. Mix in batches sized to your pace and pour it out promptly.
- Rolling it too thick. A flooded coat traps air, cures unevenly, and can stay soft. Lay it at the kit’s coverage rate in thin, even passes, not one heavy flood.
- Parking too soon. The film keeps hardening for days, so an early car causes hot tire pickup and peeling. Wait the full cure the label specifies before any vehicle returns.
Every one of these is a decision about moisture, profile, cleanliness, mixing, thickness, or cure time, which is exactly why they get skipped and exactly why they decide whether the coating lasts.
Troubleshooting: peeling, bubbles, and hot tire pickup
Real garages rarely match the tidy example, so here is how to read the three failures that show up most.
What if the epoxy is peeling or flaking off? Peeling almost always means the coating never truly bonded, from a floor that was not profiled, not fully cleaned and degreased, or still holding moisture from an untested slab. The cause points to the fix, and unfortunately it usually means stripping the failed coating back to sound concrete, correcting the missed prep, and recoating, because epoxy cannot be patched onto a surface it would not stick to the first time. Prevention is the real answer: test for moisture, profile the slab, and degrease every stain before you mix.
What if the coating cured with bubbles or pinholes? Bubbles usually come from outgassing, where air trapped in the porous concrete expands and pushes up through the wet epoxy, made worse by rolling in direct sun or on a slab that is warming through the day. Rolling during a stable or falling temperature, and a back-roll to break the surface, both help release the air. A badly bubbled coat may need sanding and a fresh topcoat, while a light texture can sometimes be buried under the clear coat. Coating in the cooler, stable part of the day is the best prevention.
What about hot tire pickup, where the coating lifts where warm tires sit? This is the signature failure of a thin or under-cured film, or of a one-part epoxy paint used where a two-part epoxy was needed. The heat and weight of a parked tire soften a weak coating and pull it up. The fix is a more durable two-part system at a proper film build, fully cured before the car returns. If a floor is picking up already, it typically needs stripping and recoating with a tougher product. The companion below and the square footage manual handle the gallons so the only variable left is doing the prep and the cure right.
Your garage floor epoxy checklist
Before the kit is bought and before the first batch is mixed, run down this compact checklist. It is the save-this asset of the whole job.
- Decided between a one-part epoxy paint and a two-part epoxy, matched to how hard the floor is worked.
- Ran the plastic sheet moisture test, and confirmed any new slab has fully cured before coating.
- Chose a kit type suited to the garage: water-based, solvent-based, or 100 percent solids, read for coverage and pot life.
- Measured the floor length and width, calculated the area, and bought a kit sized for two coats plus about 10 percent waste.
- Cleared and cleaned the whole slab, degreased every oil stain until water soaks in, and filled cracks and spalls.
- Etched or ground the concrete to an even profile, then rinsed and dried it fully to a fine-sandpaper feel.
- Masked the walls and thresholds, staged every tool, and planned the sections before mixing anything.
- Mixed in batches, rolled the base coat thin and even, and broadcast the flakes within the working window.
- Rolled the clear topcoat, then kept foot traffic and vehicles off for the full cure the label specifies.
Work top to bottom and the floor you coat is one that is dry, clean, profiled, evenly coated, and fully cured, which is the difference between an epoxy floor that lasts for years and one that peels within a season. The companion below sizes the kit on your own dimensions, so you can buy right in one trip.
The bottom line
Epoxying a garage floor is seven steps worn into a sequence: decide between an epoxy paint and a true epoxy, test the slab for moisture and age, choose the kit type, clean and repair the concrete, etch or grind a bondable profile, roll the base coat and broadcast the flakes, then seal it with a topcoat and cure. The whole job rests on a truth that is easy to rush past, that the coating performs only as well as the concrete underneath it, which is why the moisture test, the degreasing, and the profile, not the rolling, are where an epoxy floor is won or lost. Choose the product for how hard the floor is worked, prove the slab is dry, buy the kit from a measured area with a waste allowance, mix only what you can roll, and give the finished floor its full cure before you park. Do that, and a few days and one kit turn a stained, dusting slab into a hard, glossy floor that shrugs off the oil, salt, and tires that would otherwise wear it out.
Read this manual as bench notes meant to teach the method, not as a product spec you can follow without checking the label. The kit types, coverage rates, etching and grinding choices, cure times, and moisture guidance here are typical illustrative values, and your real numbers shift with the specific product, the concrete, the climate, and how the floor is used. Test your own slab for moisture, measure it, confirm the kit choice, coverage, working time, and cure schedule against the manufacturer instructions and your local conditions, and consult a flooring or concrete professional for any slab that shows persistent moisture, spalling, or a previous coating failure before you coat it.
Frequently asked questions
How do I epoxy a garage floor step by step?
Decide whether a true two-part epoxy beats a one-part epoxy paint for your floor, test the slab for moisture and confirm it has cured, then choose the kit type suited to your garage. From there the work is preparation: clean and degrease the concrete, repair any cracks, and etch or grind the surface to open a bondable profile. Only then do you mix and roll the base coat, broadcast the decorative flakes into it, and finish with a clear topcoat before letting it cure. This manual walks all seven steps with a worked example carried through to real coverage and gallons, and it treats the preparation, the part most often rushed, as the part that decides whether the coating bonds for years or peels in months.
What is the difference between epoxy paint for concrete and real epoxy?
The label epoxy paint for concrete usually means a one-part product that is really a latex or acrylic floor paint with a small amount of epoxy added, sold ready to use in a single can. A true epoxy is a two-part system that you mix from a resin and a hardener just before rolling, and it cures by a chemical reaction into a much thicker, harder, more chemical-resistant film. One-part epoxy paint is cheaper, easier, and fine for a light-duty floor, but it wears faster. A two-part 100 percent solids epoxy builds the thickest, most durable coating and is what most people picture when they say a garage floor is epoxied. Treat any durability figure here as illustrative and confirm the specific product against its label.
How much epoxy do I need for a garage floor?
Multiply the floor length by width for the area in square feet, divide by the coverage rate per gallon per coat, multiply by the number of coats, and add about 10 percent for waste. Coverage varies widely by product and film thickness, but an illustrative 100 percent solids epoxy might cover around 250 square feet per gallon per coat, while a thinner water-based product might stretch further. An illustrative 20 by 20 foot two-car garage is 400 square feet, so at 250 square feet per gallon and two coats that is about 3.2 gallons, near 3.5 with a waste allowance. Our how much paint do i need manual works the same coverage math, and the [companion below](#companion) sizes the gallons on your own dimensions.
Do I have to etch or grind concrete before epoxy?
Yes, some form of surface profiling is not optional, because epoxy bonds to a slightly rough, open concrete surface and peels off a smooth, sealed, or dirty one. The two common methods are acid etching, where a mild acid such as muriatic or a safer citric acid is washed over the clean slab to microscopically roughen it, and mechanical grinding with a diamond grinder, which is more reliable and the professional standard. Etching is cheaper and beginner friendly but can be uneven and does little on a very smooth or previously sealed floor. Grinding costs more in tool rental but produces the consistent profile that gives the coating its best chance to last. Whichever you use, the slab must be fully rinsed and dried afterward.
How long does garage floor epoxy take to cure?
Cure time varies by product, temperature, and humidity, so treat any figure as illustrative and follow the label. As typical guidance, many epoxy floors are dry to the touch within a several-hour window, ready for light foot traffic after roughly a day, and ready for vehicle traffic after several days, commonly cited around three to seven days for a full cure. The coating gains hardness over that whole window, which is why parking a car on it too early is a frequent cause of tire marks and peeling. Cool or humid conditions stretch every stage. Plan the job so the floor can sit undisturbed for the full cure the label specifies before anything heavy rolls back in.
Can you epoxy a garage floor yourself, and how hard is it?
A garage floor epoxy kit is a genuinely doable weekend project for a careful homeowner, but it is less forgiving than ordinary painting because the preparation is demanding and the two-part products have a working time you cannot pause. The rolling itself is straightforward, and the difficulty lives in the prep: thorough cleaning, degreasing, crack repair, and an even etch or grind, all done before a drop of epoxy is mixed. Once the resin and hardener are combined the clock starts, so the room has to be masked, the tools staged, and the plan clear before you mix. Most failures trace back to rushed prep or a coat rolled too thick, not to the rolling skill itself.
Why is my garage floor epoxy peeling or bubbling?
Peeling almost always means the coating never bonded, from a floor that was not etched or ground, not fully cleaned and degreased, or still holding moisture from an untested slab. Bubbles and pinholes usually come from outgassing, where air trapped in the concrete pushes up through the wet epoxy, made worse by rolling in direct sun or on a warming slab. Hot tire pickup, where the coating lifts where warm tires sit, points to a thin or under-cured film or a one-part paint used where a two-part epoxy was needed. The common thread is preparation and film build: a properly tested, cleaned, profiled slab coated at the right thickness and fully cured resists all three. Prevention is far easier than the repair, which usually means stripping back and recoating.
Is epoxy or a penetrating sealer better for a garage floor?
They do different jobs, so the better choice depends on what you want. An epoxy coating sits on top of the slab as a thick, glossy, chemical-resistant film that transforms the look and resists oil, stains, and abrasion, which is why it is popular for garages that double as workshops. A penetrating sealer soaks into the concrete and protects it from within with no film and no change in appearance, which suits an outdoor slab or anyone who wants low-maintenance protection without a coating that can eventually peel. Our how to seal a concrete driveway manual covers the penetrating and film sealers for outdoor slabs, where epoxy is a poor fit because it yellows in sunlight. For an enclosed garage floor, epoxy is the more transformative option.