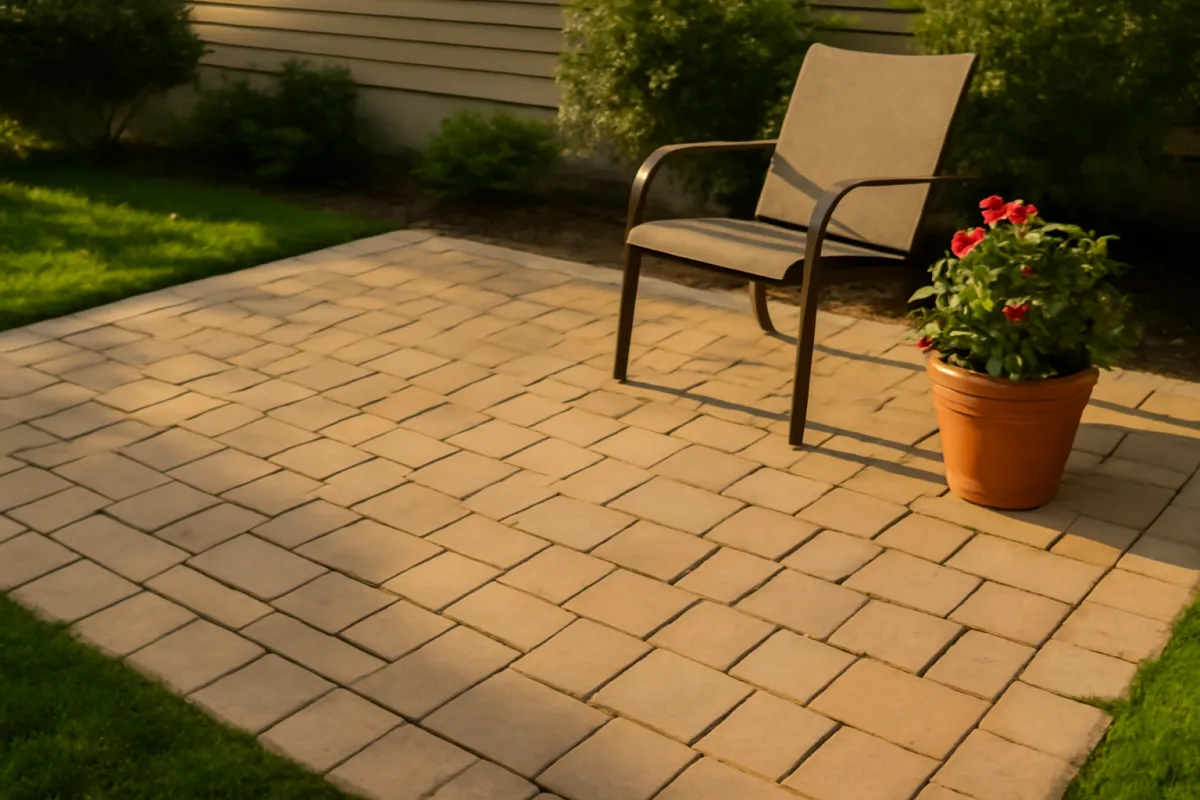
What's on this page
- Before you start: dimensions, tools, and materials
- Step 1: Plan the size, layout, and slope for drainage
- Step 2: Calculate the pavers, gravel base, and sand
- Step 3: Mark and excavate to the right depth
- Step 4: Install and compact the gravel base
- Step 5: Screed a level sand bed
- Step 6: Lay the pavers in your pattern
- Step 7: Cut edge pavers and install edge restraint
- Step 8: Sweep in joint sand and compact
- A worked example: a 10 by 12 foot patio
- Why a paver patio is built in layers
- Choosing pavers and a laying pattern
- Concrete paver patio vs poured concrete, brick, and stone
- Drainage and slope: giving a patio a fall
- Common mistakes when laying a paver patio
- Troubleshooting: soft ground, settling, weeds, and shape
- Your paver patio checklist
- The bottom line
Short answer: Lay a paver patio in layers: plan a slope of roughly a quarter inch per foot away from the house, excavate, compact a gravel base, screed a roughly 1 inch sand bed, set the pavers, fit an edge restraint, then sweep joint sand into the gaps. An illustrative 10 by 12 foot patio needs about 132 square feet of pavers with waste, roughly 1.8 cubic yards of base gravel and 10 cubic feet of sand.
A paver patio is one of those projects that looks like decorating and is really engineering: the part you see, the pattern of pavers, is the last and easiest step, and the part that decides whether the patio stays flat for years or sinks into a puddle-catching mess is all hidden underneath. Base depth, compaction, a level sand bed, a real drainage slope, and an edge restraint are the whole game, and none of them show once the last paver is set, which is exactly why they get rushed.
This manual lays a paver patio in eight plain steps, from stretching a tape across the yard to sweeping the final joint sand, with a worked example carried all the way through to pavers, gravel, and sand quantities. It leans on the volume math in our how much gravel do I need manual and the bedding sand figures in our how much sand do I need manual, and narrows both to the single build a backyard patio needs. The steps below assume a concrete paver patio, the most common unit by far, and a later section weighs concrete pavers against poured concrete, brick, and stone if the material is still open. Run your own dimensions through the material estimator in about a minute, and the companion below recalculates the patio order against your numbers as you read.
Key takeaways
- A paver patio is built in layers: a compacted gravel base for load and drainage, a roughly 1 inch screeded sand bed, the pavers, then joint sand swept into the gaps.
- Order the base by volume: length times width times base depth in feet, divided by 27 for cubic yards, plus about 20 percent for compaction.
- An illustrative 10 by 12 foot patio needs about 132 square feet of pavers with waste, roughly 1.8 cubic yards of base gravel, and about 10 cubic feet of bedding sand.
- Build a slight slope of roughly a quarter inch per foot away from the house, because a flat patio holds water and eventually settles.
- The two most skipped steps, a deep enough compacted base and an edge restraint, are the two that decide whether the patio holds its shape.
Before you start: dimensions, tools, and materials
A paver patio is a real weekend project, not a five minute calculation, so the setup decides how smoothly the rest goes. Before anything is ordered, four things need to be settled: the dimensions and layout, the drainage direction, the tools and equipment, and the materials for each layer. Rushing any of them is where a patio starts to go wrong underground, where you cannot see it later.
What to settle and gather:
- The dimensions and layout. Length and width in feet across the footprint the patio will occupy, plus the paver you have chosen and its thickness, commonly around 2 to 2.4 inches for a standard patio paver. Sketch the shape and pick the laying pattern now, because the pattern affects the waste factor.
- The drainage direction. Decide which way water should shed, almost always away from the house or any structure, and confirm the ground can accept the runoff there. The slope is planned before you dig, not fixed afterward.
- Tools and equipment. A tape measure, stakes and string, a shovel and a mattock or a hired mini-excavator, a landscape rake, a plate compactor (rentable by the day), two screed rails and a straight screed board, a rubber mallet, a masonry saw or splitter for cuts, a level, and a broom.
- The materials for each layer. Gravel base (angular crushed stone that compacts), coarse bedding sand for the roughly 1 inch bed, the pavers plus a waste allowance, edge restraint for the open sides, and joint sand for the gaps. Geotextile fabric under the base is worth it on soft soil.
Time and difficulty: a modest patio is a weekend or two of real labor, more if you excavate by hand, and the arithmetic itself takes about ten minutes. The genuine skill is patience with the invisible layers: excavating to a consistent depth, compacting the base, and screeding a truly flat sand bed. For a patio that is one line in a larger yard project, our how to estimate materials for a project manual frames this same takeoff as part of a full job. Get the plan honest and the eight steps that follow are mostly careful repetition.
Step 1: Plan the size, layout, and slope for drainage
Start with the three things that shape everything downstream: the size, the pattern, and the slope. Measure the length and width in feet across the footprint the patio will actually occupy, and square the corners so the shape is a true rectangle and not a subtle parallelogram. Write the dimensions down as feet. A common small backyard patio runs somewhere around 10 by 12 feet, but size it to the furniture and use you have in mind, since a dining set needs more clear space than a pair of chairs.
Choose the laying pattern next, because it changes how much waste you order. A running bond or a stack pattern that lines up with the patio edges wastes little, so a waste allowance around 10 percent is common. A herringbone or any diagonal pattern crosses the edges at an angle and produces more cut pieces, so the allowance climbs, often to around 15 percent. Decide the pattern now and carry its waste factor into Step 2.
The slope is the third and most overlooked plan decision. A patio must shed water, so it is built with a slight, deliberate fall, commonly cited at roughly a quarter inch or so per foot, running away from the house or any wall. On a 12 foot run away from the house, a quarter inch per foot is about 3 inches of total drop from the high edge to the low edge. Mark the high point and the low point now, because that fall gets built into the excavation, the base, and the sand bed, not corrected at the end.
Watch out for planning a patio with no fall at all, or one that sheds toward the house. A dead flat patio holds water in the joints and base, and a patio that drains toward the building sends water where you least want it. Decide the direction and the amount of fall before a single measurement goes into the material calculation, because the slope quietly changes the excavation depth across the footprint.
Step 2: Calculate the pavers, gravel base, and sand
With the footprint, pattern, and slope set, this step turns them into an order for the three materials a patio needs. The pavers are an area calculation, and the base and bedding sand are volume calculations, the same length times width times depth over 27 line our how to calculate cubic yards manual works in full. The trap, every time, is that depth arrives in inches, so convert it to feet first by dividing by 12.
Start with the pavers. The paver area is simply the patio area: length times width. Take the running example of a 10 by 12 foot patio: that is 120 square feet of pavers. Then add the waste factor for your pattern. At 10 percent for a running bond, 120 times 1.10 is 132 square feet of pavers to buy, so you have enough for cuts and the occasional cracked piece.
Now the gravel base. For a walk-on patio, an illustrative base is 4 inches of compacted gravel (deeper for soft ground). Depth in feet is 4 divided by 12, about 0.333 feet. Volume is 120 times 0.333, which is 40 cubic feet, and 40 divided by 27 is about 1.5 cubic yards from the formula. Loose gravel compacts when placed, so add about 20 percent: 1.5 times 1.2 is roughly 1.8 cubic yards to order.
Finally the bedding sand. It is a level layer about 1 inch deep, so depth in feet is 1 divided by 12, about 0.083 feet. Volume is 120 times 0.083, about 10 cubic feet, which is roughly 0.37 cubic yards, or close to 20 of the fifty pound bags at about half a cubic foot each. Our sand manual covers the bedding-versus-joint-sand split in detail.
Patio material needs by size
Cubic yards of gravel base for a 4 inch compacted base, with a 20 percent compaction allowance, at different patio sizes.
The base order scales straight with area: the 10 by 12 foot example is about 1.8 cubic yards, and the 14 by 20 foot patio, roughly two and a third times the area, is about 4.1. Each bar is area times 0.333 foot, over 27, plus 20 percent, with widths tracking the cubic yards against the largest.
Watch out for calculating the base or sand in inches without converting to feet, which inflates the volume twelvefold, and for ordering the pavers with no waste factor at all, which leaves you short the day the pattern needs its first cut. Carry all three numbers, in the units the yard sells in, and run your own patio through the estimator to check the chain in seconds.
Step 3: Mark and excavate to the right depth
Numbers settled, this step moves to the ground: mark the patio outline exactly, then dig out the soil so the finished pavers sit where you want them, flush with the surrounding grade or a step below a door threshold. Mark the footprint with stakes and string, following the dimensions from Step 1, squaring the corners, and setting the string lines at the finished height so you can measure down from them consistently.
The excavation depth is the sum of every layer, not just the base. Add the base depth, the sand bed, and the paver thickness to get the total dig. For the running example, that is roughly 4 inches of base, 1 inch of sand, and about 2.4 inches of paver, which is around 7.4 inches total, so you excavate on the order of 7 to 8 inches below the finished surface. Strip the topsoil and any organic material, because roots and soft soil settle and rot, and set the spoil aside, since there is a surprising amount of it.
Build the drainage slope into the excavation itself. Dig the low edge slightly deeper so the whole excavated bottom already carries the fall you planned in Step 1, roughly a quarter inch per foot toward the low side. The base and sand copy the shape of the subgrade, so a subgrade that already slopes correctly makes every layer above it slope correctly with far less fussing.
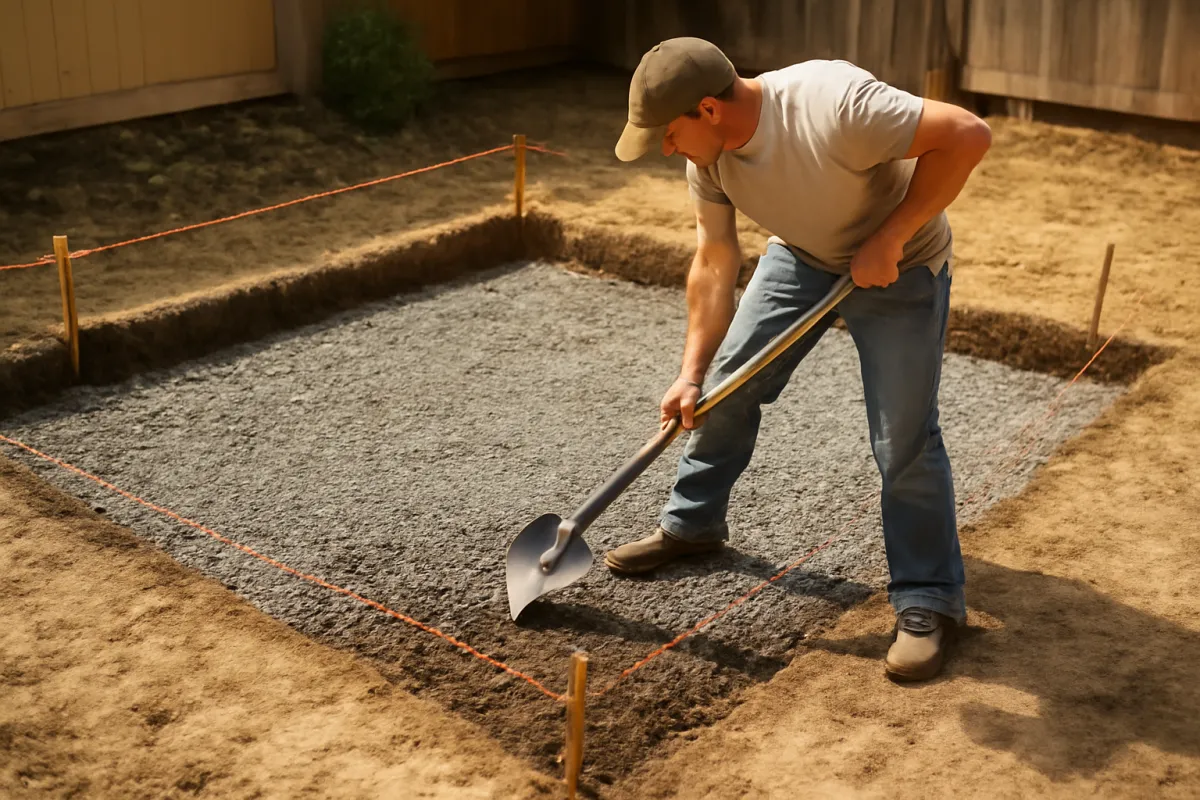
Watch out for digging unevenly or leaving soft pockets, because a low spot in the subgrade becomes extra gravel the formula never counted, and a soft pocket becomes a settled dip later. Firm and roughly level the subgrade, on its planned slope, before any fabric or base goes down. If the ground is soft or wet, that is a signal to dig deeper and build a thicker base, which the troubleshooting section covers.
Step 4: Install and compact the gravel base
This step builds the structural heart of the patio: the compacted gravel base that carries load and drains water away from the pavers. If the soil is soft or prone to holding water, roll geotextile fabric across the excavated footprint first, running it up the sides and overlapping any seams, so the base cannot sink into the soil and the soil cannot pump up into the stone. On firm, well-draining ground the fabric matters less, but it is cheap insurance on clay.
Spread the gravel in the base, using an angular crushed stone that locks together under compaction rather than a rounded stone that rolls and stays loose. The key discipline is to compact in lifts, not all at once: a plate compactor only reaches an inch or two down, so a 4 inch base is best spread and packed in two passes of roughly 2 inches each, wetting the stone lightly so it packs tight. Keep checking the slope with a level as you go, since the base is where the fall is established.
For the 10 by 12 foot example, the base at 4 inches is 120 times 0.333, about 40 cubic feet, or roughly 1.5 cubic yards from the formula, near 1.8 with the compaction allowance. That is the layer never to skimp: a soft site earns a deeper base, not a thinner one, because the base is what stops the patio from settling under the loads it will carry.
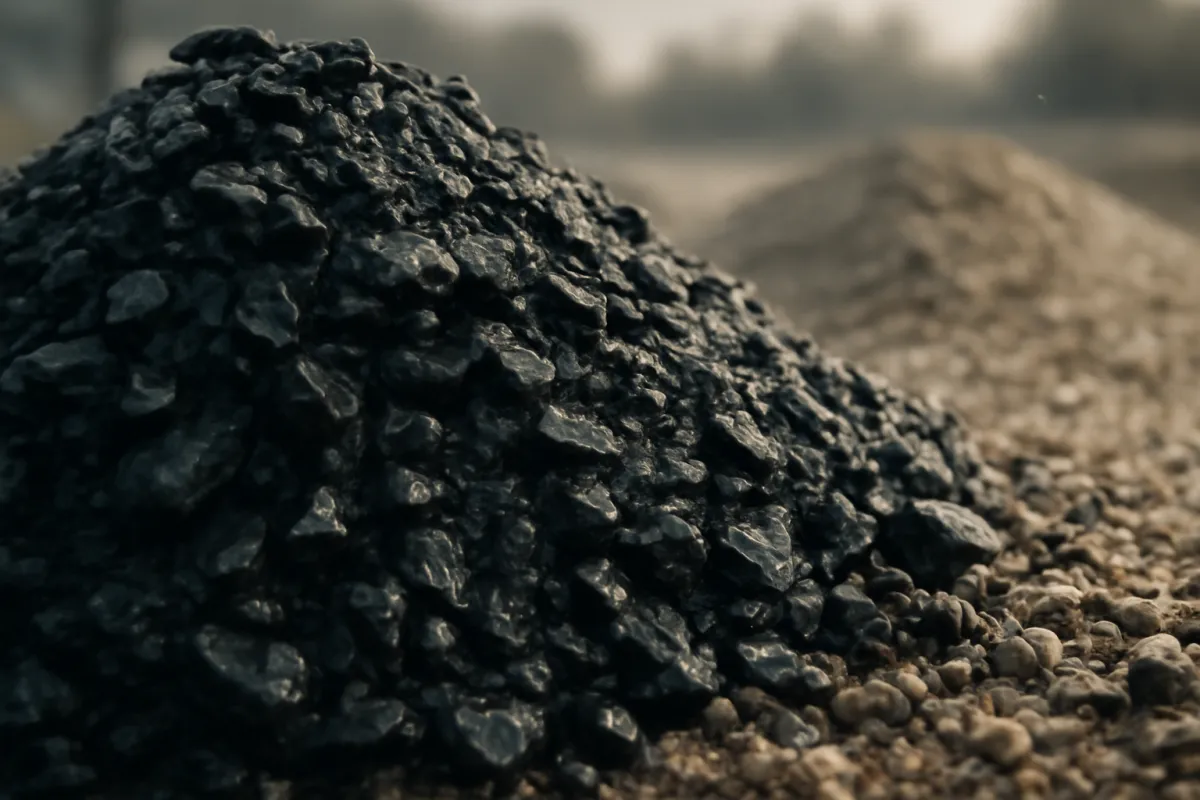
Watch out for compacting a base that is too thick in one pass, which leaves the bottom loose and sets up a slow settle, and for skipping the fabric on soft soil to save a little money, the classic false economy that lets the whole build lose depth from below. A base that is compacted honestly now is a patio that stays flat later.
Step 5: Screed a level sand bed
With the base compacted and sloped, this step lays the thin, precise layer the pavers actually sit on: a screeded bed of coarse bedding sand, about 1 inch deep. This layer is not structural and is not meant to fix an uneven base. Its only job is to give each paver a firm, even seat, so it must be flat and consistent, which is why it is screeded rather than raked. Use a coarse, angular bedding sand, sometimes called leveling or paver sand, not a fine masonry or play sand.
The screeding method is simple and worth doing carefully. Lay two screed rails, straight pipes or bars of a consistent height, across the base at the bedding depth, following the same slope as the base. Pour sand between them, then drag a straight board across the tops of the rails to strike the sand off level with them. The result is a bed of uniform thickness that already carries the drainage slope. Work in sections, and do not walk on the screeded sand, since a footprint is exactly the kind of dip that telegraphs through the finished pavers.
For the 10 by 12 foot example, the bedding sand at 1 inch is 120 times 0.083, about 10 cubic feet, roughly 0.37 cubic yards, close to 20 of the fifty pound bags. Order a little extra, because sand settles and spills, and a bed that runs short in the last section leaves you rescreeding with a different batch.
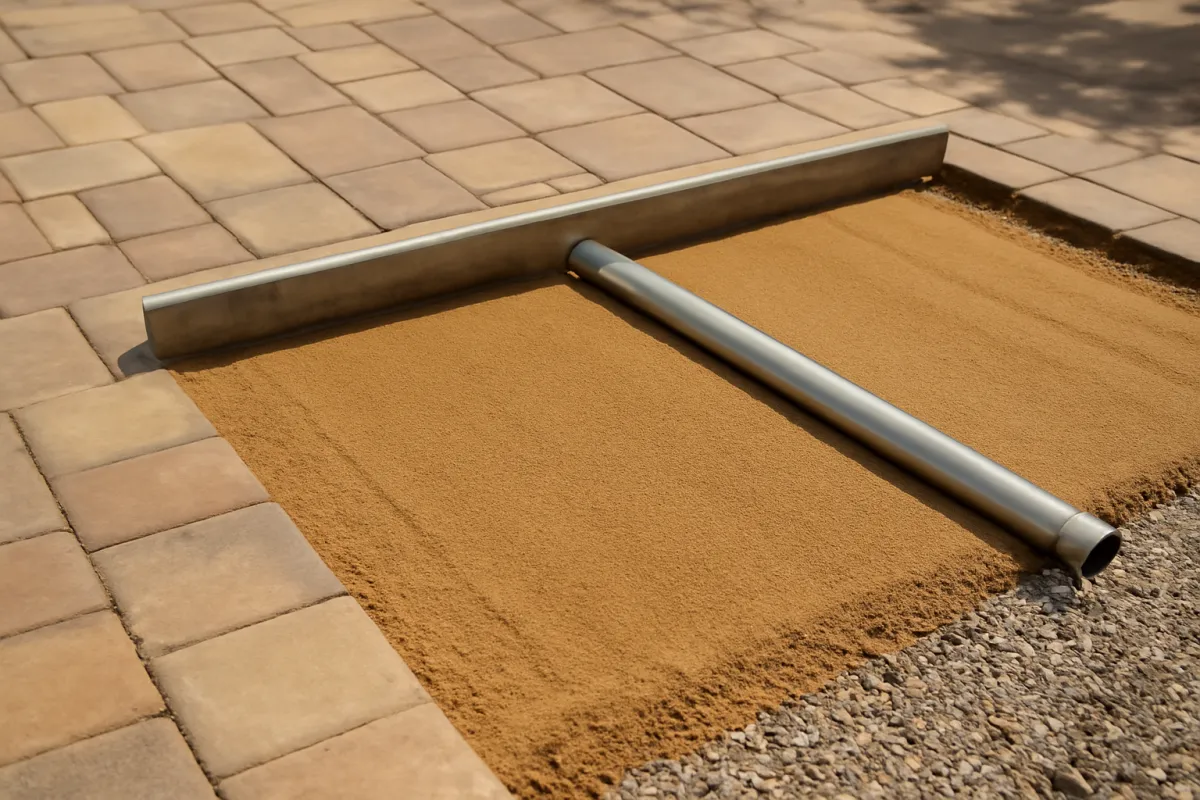
Watch out for using the sand bed to hide a bad base. A thick, uneven sand layer feels like it fixes a rough base, but sand keeps moving under load, so a patio bedded on deep sand over a poor base settles unevenly no matter how flat the sand started. Keep the bed to about an inch, and put the effort into the base instead.
Step 6: Lay the pavers in your pattern
Now the visible work: setting the pavers into the sand bed in the pattern you chose. Start from a straight, fixed edge, ideally a corner against the house or a solid border, and work outward so the pattern stays true and any cut pieces land at the far, open edges. Place each paver straight down onto the sand rather than sliding it, because sliding drags sand and disturbs the level bed, then seat it with a gentle tap of a rubber mallet.
Keep consistent joint spacing as you go. Some pavers have built-in spacer nibs that set the gap; others need a small, even joint held by eye or a spacer, since tight, uniform joints are what let the field lock together once the joint sand is in. Check your lines frequently with a string or a straightedge, because a small drift early becomes a visible curve across a full patio, and it is far easier to correct after two rows than after twenty.
For the 10 by 12 foot example, you are covering 120 square feet, and having ordered about 132 square feet with the 10 percent waste allowance, you have enough for the cuts and the odd damaged piece without a mid-project supply run. Lay the full pavers first across the field, and leave the edge cuts for Step 7 once the field shows you exactly where the border falls.
Watch out for kneeling or walking on the screeded sand ahead of the laid pavers, which dents the bed, and for letting the pattern drift without checking your lines. Work off the pavers already laid, keep a string line as a reference, and the pattern stays square from the first row to the last.
Step 7: Cut edge pavers and install edge restraint
With the field laid, this step finishes the perimeter: cutting the edge pavers to fit and installing the edge restraint that holds the whole patio together. Mark each edge piece against the actual gap rather than a measurement, since real patios are never perfectly square, then cut with a masonry saw or a splitter. Wear eye and hearing protection, cut outdoors in the dust, and dry-fit each piece before committing so the border line stays clean.
The edge restraint is the step people most often skip, and skipping it is why so many patios spread and loosen from the edges in over a few seasons. A paver field has nothing holding its outer row in place, so under load and freeze-thaw the perimeter pavers creep outward, the joints open, and the pattern comes apart from the outside. The restraint stops that. It can be plastic paver edging spiked into the compacted base along the open sides, a concrete haunch, or a solid border course, and it goes around every edge not already held by a house wall or a footing.
Install the restraint tight against the outer pavers and anchor it into the base, not into loose soil, so it actually resists the outward push. For the running example, the restraint runs around the three or four open sides of the 10 by 12 foot patio, a small material line item that does an outsized share of the work of keeping the patio intact.
Watch out for treating the edge restraint as optional trim. It is structural: without it, even a perfectly laid field on a good base slowly walks apart at the perimeter. Also watch for cutting edge pieces too small to hold, since a sliver of paver at the border pops loose easily, so aim for cuts that leave a substantial piece and adjust the layout if the border is landing on thin slivers.
Step 8: Sweep in joint sand and compact
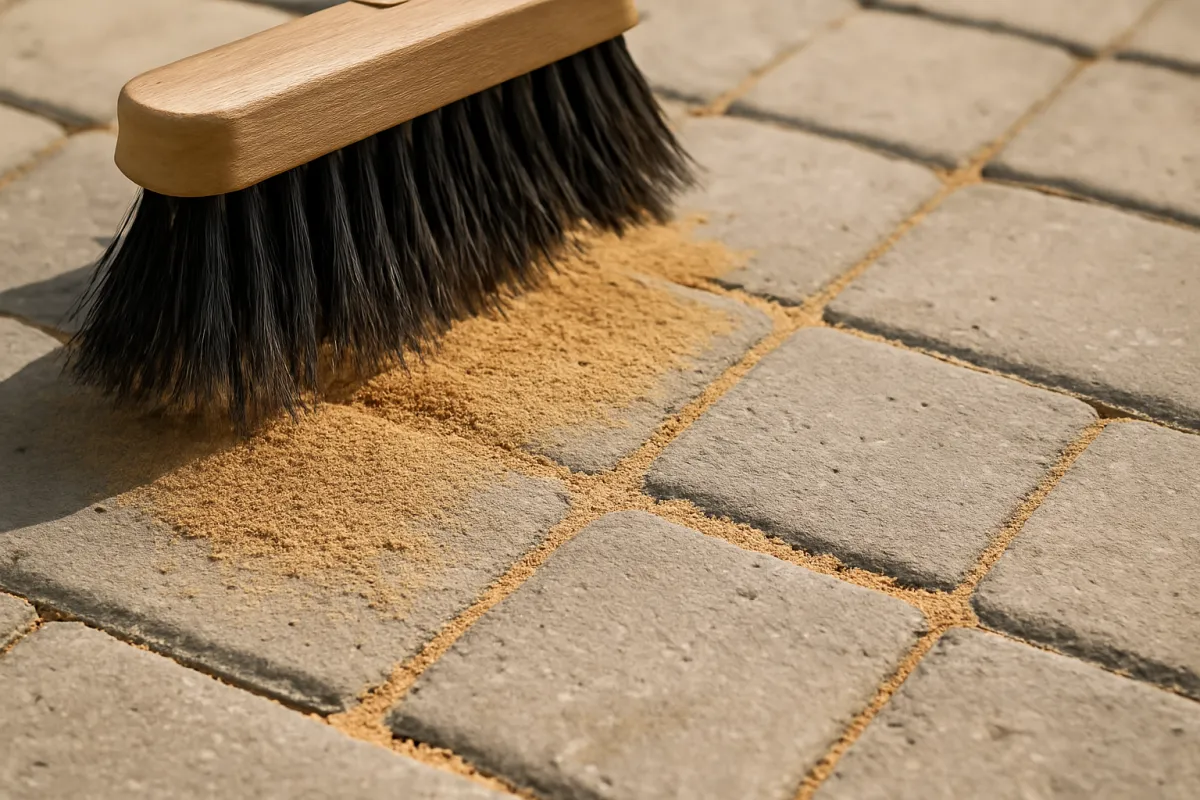
The final step locks the pavers into a single, stable surface: sweeping joint sand into the gaps and compacting it in. Once the field and border are complete and the restraint is set, spread joint sand across the surface and sweep it into the joints with a broom, working it in from several directions until the gaps are full to the top. Joint sand is a separate, finer product from the bedding sand, and it is estimated by coverage per bag rather than by the bedding volume, as our sand manual explains.
Run the plate compactor over the whole patio to vibrate the sand down into the joints and settle the pavers firmly onto the bed. A protective mat or pad under the compactor plate helps avoid scuffing the paver faces. The joints will drop as the sand packs, so sweep in more sand and compact again, repeating until the joints stay full after a pass. This is what turns a field of loose pavers into an interlocked surface that carries load as one.
Polymeric joint sand, which contains a binder that hardens when lightly wetted, is a common choice because it resists washout and weeds better than plain sand. If you use it, follow the product’s own wetting instructions carefully, since over-wetting or leaving a haze on the paver faces is the usual way it goes wrong. A bag covers a stated square footage that depends on the paver size and joint width, so buy to the coverage on the bag for your patio area.
Watch out for calling the patio done after one sweep. The joints almost always drop on the first compaction, so a single pass leaves them under-filled, and under-filled joints are where washout, movement, and weeds start. Sweep, compact, and top up until the joints hold full, then clear the surface. That last, patient repetition is what makes the difference between a patio that stays tight and one that loosens by the next spring.
A worked example: a 10 by 12 foot patio
Pull the eight steps together on one realistic build, a 10 foot by 12 foot backyard patio, a running bond pattern, a 4 inch compacted base, a 1 inch sand bed, and a paver about 2.4 inches thick, and watch the plan flow from a tape measure to a material order.
Step 1, plan: the footprint is 10 by 12 feet, 120 square feet, running bond, sloped a quarter inch per foot away from the house, about 3 inches of fall across the 12 foot run. Step 2, calculate: pavers are 120 square feet, plus 10 percent waste, about 132 square feet to buy; the base is 120 times 0.333 foot, 40 cubic feet, about 1.5 cubic yards from the formula and near 1.8 with the 20 percent compaction allowance; the bedding sand is 120 times 0.083 foot, about 10 cubic feet, roughly 0.37 cubic yards, close to 20 fifty pound bags.
Step 3, excavate: dig about 7 to 8 inches below the finished height across the 120 square feet, building the slope into the subgrade. Step 4, base: spread and compact roughly 1.8 cubic yards of angular gravel in two lifts, checking the slope. Step 5, screed: strike a 1 inch bed of coarse sand off two rails on the same slope. Step 6, lay: set the pavers in running bond from a fixed edge, keeping joints tight. Step 7, edges: cut the border pieces and spike an edge restraint around the open sides. Step 8, joints: sweep joint sand, compact, and top up until the joints hold full.
So one measured patio produces a clean order: about 132 square feet of pavers, roughly 1.8 cubic yards of base gravel, about 10 cubic feet of bedding sand, plus edge restraint and joint sand. Change any input and the order moves predictably: widen the patio to 12 by 16 feet and the base climbs to about 2.8 cubic yards; switch to a herringbone pattern and the paver waste allowance rises toward 15 percent. Run your own dimensions through the estimator and the arithmetic, including the inch-to-foot and divide-by-27 steps, is done for you.
Why a paver patio is built in layers
The single decision that separates a patio that stays flat from one that settles is building it in the right layers rather than setting pavers on bare soil or a thick pile of sand, so it is worth understanding why each layer exists before trusting the plan. A paver patio has three working layers plus the joints, and each does a different job.
The gravel base is about load and drainage. A compacted, angular base spreads the weight of furniture, foot traffic, and anything else across the subgrade so the ground does not deform, and it lets water drain down and away rather than pooling under the pavers. It is the structural layer, which is why its depth and compaction matter most and why it is never the layer to thin. The bedding sand is about seating: a thin, even layer that lets each paver find a firm, level rest without the base needing to be perfectly smooth to the millimeter. The pavers are the wearing surface, the part that carries traffic and sheds water off the slope. The joint sand ties the pavers together so the field acts as one interlocked surface.
A paver patio's layers, base to surface
Illustrative thickness split of a build with a 4 inch base, a 1 inch sand bed, and a paver about 2.4 inches thick.
On a roughly 7.4 inch total build, the base is a little over half the thickness, the pavers about a third, and the thin sand bed the rest. The segments are each layer's thickness over the 7.4 inch total, so they sum to 100 percent. A deeper base for soft ground shifts the split downward, but the base is never the layer you thin.
The chart shows the simplest version, but the lesson holds however you size it: a real base at the bottom for strength and drainage, a thin sand bed to seat the pavers, and the pavers locked by joint sand on top. Get the proportions wrong, most often by thinning the base and thickening the sand, and the patio settles no matter how neat the surface looks on day one.
Choosing pavers and a laying pattern
The paver and the pattern you choose affect both the look and the order, so it is worth a moment before you buy. Pavers come in concrete, brick, and natural stone, in a range of thicknesses; a common patio paver is around 2 to 2.4 inches thick, thick enough for foot traffic but not necessarily for vehicles, which want a thicker, stronger unit. The thickness feeds directly into the excavation depth from Step 3, so confirm the actual paver you are buying before you dig.
The laying pattern is partly aesthetic and partly practical. A running bond, where each row is offset from the last, and a stack bond, where pavers line up in a grid, both run parallel to the patio edges, so they produce mostly straight cuts at the border and waste relatively little, which is why a 10 percent allowance is common for them. A herringbone pattern, where pavers interlock at right angles, is strong and popular for exactly that interlock, but because it meets the edges at an angle it produces more, and more awkward, cut pieces, so the waste allowance rises, often toward 15 percent. Any diagonal layout does the same.
The practical rule is to pick the pattern first, then set the waste factor to match it, and carry that factor into the paver order in Step 2. It is also worth buying all the pavers for a patio from the same production batch where you can, because color can shift slightly between batches, and a mid-project top-up from a new batch can show as a patch. Our how much gravel do I need manual covers the companion base materials, which is worth a read before you place the whole order.
Concrete paver patio vs poured concrete, brick, and stone
Most backyard patios are built from one of four surfaces, and the choice changes the cost, the build, and how the patio ages far more than the pattern does. A concrete paver patio is the default for a reason: concrete pavers are pressed units in consistent sizes, thicknesses, and colors, which makes them predictable to order, easy to lay to a tight joint, and forgiving to cut. Because they are individual units on a flexible base, a concrete paver patio moves slightly with frost and settlement rather than cracking, and any single unit that stains, chips, or sinks can be lifted and reset without a scar.
Poured concrete is the direct competitor and the cheaper install. A slab is placed in one operation, so the labor that a paver field spends setting several hundred units by hand simply does not exist, and the illustrative installed figures reflect it: a plain broom-finish slab commonly runs near 8 dollars per square foot against roughly 18 for pavers, with stamped concrete sitting between them while imitating the paver look. Our concrete patio cost brief works those rates and the whole-project totals in detail. What the slab gives up is repairability. Concrete cracks eventually, the crack follows the stresses in the slab rather than a joint line, and a patch shows. A cracked slab is also awkward to modify later, while a concrete paver patio can be opened for a utility line and closed again with the same pavers.
Clay brick and natural stone sit above concrete pavers on price and below them on predictability. Brick brings a color that runs through the unit rather than sitting on the surface, so wear shows less, but sizes vary more between batches and cuts are more fragile. Natural stone, whether flagstone or cut pieces, is the most expensive of the four and the most variable in thickness, which makes the bedding layer harder to screed to a consistent seat and often means setting each piece individually rather than laying a repeating pattern.
The build in this manual is the same for all of them: a compacted base, a screeded bedding layer, the units, an edge restraint, and joint sand. Only the thickness of the unit and the waste factor change, so if you switch materials after Step 1, revisit the excavation depth in Step 3 and the waste allowance in Step 2 before you order anything. On flat ground with a tight budget, poured concrete is hard to beat on price; where you want a surface you can repair, modify, and keep looking new for decades, a concrete paver patio earns its premium.
Drainage and slope: giving a patio a fall
Water is what quietly ruins a paver patio, so the drainage slope deserves more thought than its small effort suggests. A patio surface sheds most rain off the top if it is sloped, but a flat patio holds water in the joints and lets it soak into the bedding sand and base, where it softens the support, washes out joint sand, and over freeze-thaw cycles heaves and settles the pavers. The defense is a deliberate fall built into every layer.
The commonly cited target is a slope of roughly a quarter inch or so per foot, running away from the house or any structure, though the right figure varies with the site and the paver. On a 12 foot patio sloping away from the house, a quarter inch per foot is about 3 inches of total drop from the high edge at the house to the low, open edge. That is enough to move water without feeling tilted underfoot, and it is why the slope is planned in Step 1 and built into the subgrade, the base, and the sand bed rather than being an afterthought.
Where the water goes after it leaves the patio matters too. On an open yard it can sheet into lawn or beds, but a patio bounded by walls, a house, or higher ground may need a channel drain along the low edge or a route for the runoff so it does not pool against a structure or wash across a walkway. A patio set into a slope also has to manage water coming from uphill, which may mean a swale or drain above the patio to intercept it. The through-line is that the slope is set once, at the base, and every layer above copies it, so a base screeded flat by mistake cannot be sloped later without lifting the pavers.
Common mistakes when laying a paver patio
A handful of errors account for nearly every paver patio that fails early, and all of them are decisions made before or during the build, not accidents afterward.
- Building the base too shallow. The base carries the load and drains the water, so thinning it to save gravel is a false economy: a skimpy base settles under furniture and traffic and takes the flat surface with it. A soft site earns a deeper base, not a thinner one.
- No slope, or the wrong slope. A dead flat patio holds water that washes out joints and heaves the pavers, and a patio that drains toward the house sends water where it does the most harm. Build a fall of roughly a quarter inch per foot away from structures.
- An uneven or too-thick sand bed. Sand keeps moving under load, so a thick, uneven bed used to hide a rough base settles unevenly. Keep the bed to about an inch, screeded flat, and put the effort into the base.
- No edge restraint. Without a border holding the outer pavers, the field spreads and the joints open from the edges in. The restraint is structural, not trim, and belongs on every open edge.
- Wrong paver count with no waste factor. Ordering pavers to the bare area leaves you short the first time the pattern needs a cut. Add roughly 10 percent for a straight pattern and about 15 percent for herringbone or diagonal.
- Calling the joints done after one sweep. Joint sand drops on the first compaction, so a single pass leaves the joints under-filled, which is where washout and weeds begin. Sweep, compact, and top up until the joints hold full.
Every one of these is a decision about something that is invisible or easy to rush in the finished patio, the base depth, the slope, the sand bed, the edge, the joints, which is exactly why they get skipped and exactly why they matter.
Troubleshooting: soft ground, settling, weeds, and shape
Real yards are rarely the tidy, firm, gently sloping ground the basic build assumes, so here is how to handle the conditions that complicate it.
What if the ground is soft or muddy? Soft subgrade is the most common complication, and the answer is depth and separation, not more sand. Dig out the soft material to firmer ground, lay geotextile fabric, and build a thicker compacted base than usual so the load spreads across a wide enough footprint that the ground holds. Persistent wet may also want a drainage solution alongside, and the same base-building logic our how to build a gravel driveway manual uses for soft sites applies to a patio.
What if the patio settles or a paver sinks? Settling is almost always a base problem: a spot that was under-compacted, too thin, or built over a soft pocket. The durable fix is not to shim the low paver with sand, which just moves again, but to lift the affected pavers, add and recompact base to the right depth, rescreed the sand, and relay. Filling a sinking spot from the top feeds the same failure, so treat the cause under the paver, not the dip on the surface.
What about weeds in the joints? Weeds usually mean the joint sand has thinned or washed out, leaving gaps where wind-blown seed can root. The fix is to keep the joints full, topping up joint sand where it has lost depth, and polymeric joint sand resists both washout and weeds better than plain sand. A geotextile fabric under the base blocks growth from below, but some seed lands on top, so expect occasional clearing before growth establishes.
What if the patio is not a simple rectangle? Curved or irregular shapes are laid the same way, with the field of full pavers set first and the curve cut into the edge afterward, which produces more cut pieces, so raise the waste allowance accordingly. A flexible plastic edge restraint follows a curve well, and marking the curve with a hose or a string-and-stake arc before you cut keeps the line smooth. The base, sand, slope, and joint steps are identical; only the edge cutting and the waste factor change.
Your paver patio checklist
Before the pavers are ordered and before the first shovel goes in, run down this compact checklist. It is the save-this asset of the whole build.
- Measured the patio length and width in feet and squared the corners.
- Chose the laying pattern and set the paver waste factor to match, about 10 percent straight or 15 percent herringbone.
- Planned a drainage slope of roughly a quarter inch per foot away from the house.
- Calculated the pavers by area plus waste, the base by length times width times base depth over 27 plus 20 percent, and the sand at about 1 inch deep.
- Excavated to the total depth of base plus sand plus paver, with the slope built into the subgrade.
- Installed and compacted the gravel base in lifts, on the planned slope, over fabric on soft soil.
- Screeded a level 1 inch bed of coarse bedding sand off rails, on the same slope.
- Laid the pavers in the pattern from a fixed edge, keeping joints tight and lines checked.
- Cut the edge pavers and installed an edge restraint around every open side.
- Swept in joint sand, compacted, and topped up until the joints held full.
Work top to bottom and the patio you lay is one that sheds water, carries load, and holds its shape and its pattern. The companion below runs the paver, base, and sand calculations automatically on your own dimensions, so you can check your hand math before you order.
The bottom line
Laying a paver patio is eight steps worn into a sequence: plan the size, pattern, and slope, calculate the pavers, base, and sand, excavate to depth, compact the base, screed the sand bed, lay the pavers, cut the edges and set a restraint, then sweep in joint sand and compact. The whole thing rests on a few disciplines that are invisible once the last paver is set, a real compacted base, a genuine drainage slope, a thin and level sand bed, and an edge restraint, which is exactly why the patios that fail are the ones that rushed them. Settle the base depth and the slope deliberately, because they decide whether the surface stays flat, order the pavers with a waste factor that matches the pattern, and give the joints the second and third sweep they need. Do that, and the patio you lay is the flat, well-draining, tight-jointed kind that still looks laid-yesterday years on, which is the only kind worth the weekend.
Read this manual as bench notes meant to teach the method, not as a build you can order and dig without checking. The depths, layer thicknesses, waste factors, slopes, and volumes here are typical illustrative values, and your real numbers shift with the paver, the pattern, the subgrade, the climate, and local practice. Measure your own site, run it through the eight steps, confirm the base depth, slope, and any structural or drainage detail with the people doing the work and your local requirements, and verify the final quantities with your supplier before any material is delivered.
Frequently asked questions
How do I lay a paver patio step by step?
Plan the size and a drainage slope, calculate the pavers, gravel base, and sand, then mark and excavate the area to the right depth. Install and compact a gravel base, screed a level sand bed, lay the pavers in your pattern, cut the edge pieces and set an edge restraint, and finish by sweeping joint sand into the gaps and compacting. Each layer is prepared and checked before the next goes on, which is what keeps the finished surface flat and stable. This manual walks all eight steps with a worked example carried through to real quantities.
What goes under a paver patio?
A paver patio is built in layers: a compacted gravel base at the bottom for load and drainage, a thin screeded bed of coarse sand the pavers are set into, then the pavers themselves, with finer joint sand swept into the gaps at the end. The gravel base is the structural layer and is the one never to skimp, commonly around 4 to 6 inches for a walk-on patio and deeper for soft ground or vehicle loads. The sand bed is only about an inch, just enough to seat the pavers evenly. Skipping or thinning the base is the most common reason a patio settles.
How much gravel do I need for a paver patio?
Multiply the patio length by width for the area, multiply by the base depth in feet, then divide by 27 for cubic yards, and add roughly 20 percent because loose gravel compacts as it is placed. An illustrative 10 by 12 foot patio with a 4 inch base is 120 square feet times 0.333 feet, about 40 cubic feet, or roughly 1.5 cubic yards from the formula, near 1.8 cubic yards with the compaction allowance. Our gravel manual works this volume line in full. Depth drives the order more than the footprint, so settle the base depth before you calculate.
How much sand do I need for a paver patio?
Paver bedding sand is usually a level layer about 1 inch deep over the compacted base, so multiply the paver area by 1 inch, or 0.083 feet, then divide by 27 for cubic yards. For the illustrative 10 by 12 foot patio that is 120 times 0.083, about 10 cubic feet, roughly 0.37 cubic yards, which is close to 20 of the fifty pound bags at about half a cubic foot each. That covers the bedding layer only. The joint sand swept into the gaps at the end is a separate product estimated by coverage per bag, as our sand manual explains.
How deep should a paver patio base be?
A common walk-on patio base is roughly 4 to 6 inches of compacted gravel over firm subgrade, with the deeper end for soft or clay soils, freeze-prone climates, or any area that will carry more than foot traffic. On top of the base sits about an inch of bedding sand and then the paver, which is often around 2 to 2.4 inches thick for a standard patio paver. Depth is the single most sensitive input because it drives both the excavation and the gravel order, so confirm it against local practice and your soil before you dig. Treat any depth figure here as an illustrative starting point.
Does a paver patio need a slope for drainage?
Yes. A flat patio holds water, which works into the joints and base and eventually causes settling and staining, so the surface is built with a slight slope so water sheds off. A commonly cited target is a fall of roughly a quarter inch or so per foot, sloped away from the house or any structure, though the right figure varies with the site. On a 12 foot run away from the house that is about 3 inches of total fall from the high edge to the low edge. The slope is built into the base and sand bed, not corrected at the end.
What is edge restraint and do I need it?
Edge restraint is a border that holds the outer pavers in place so the whole field cannot spread or creep outward over time. It can be plastic paver edging staked into the base, a concrete haunch, or a solid border course, and it goes around the open sides of the patio. Without it, the perimeter pavers gradually push out, the joints open, and the pattern loosens from the edges in, which is one of the most common paver patio failures. It is a small part of the material order and a large part of whether the patio holds its shape, so it is not the place to economize.
Is a concrete paver patio better than poured concrete?
They fail and age differently, so the honest answer depends on what you want from the surface. A concrete paver patio is a field of individual units set on a compacted base, so it flexes slightly with frost and settlement instead of cracking, and a damaged or stained unit lifts out and swaps in. Poured concrete is a monolithic slab, cheaper to install because it is placed in one operation rather than set by hand, but a crack across it is permanent and a patch rarely disappears. As illustrative installed figures, pavers commonly run near 18 dollars per square foot against roughly 8 for a plain broom-finish slab, which our concrete patio cost brief prices in full. Pavers ask more labor and more money up front and give repairability back over the years.
What patio paver thickness should I use?
A common patio paver for foot traffic is roughly 2 to 2.4 inches thick, which is what the depths in this manual assume. Thinner units exist for overlays and light decorative work, and thicker, stronger units are made for driveways and anything carrying a vehicle, so match the paver to the load rather than to the price per piece. Thickness matters beyond strength because it feeds straight into the excavation depth in Step 3: the dig is base plus bedding sand plus the actual paver you bought, so confirm the real thickness of the unit at the yard before you break ground. Getting it wrong by half an inch across a whole patio means either a surface that sits proud of the surrounding grade or a base you have to rebuild.
How do I keep weeds out of paver joints?
Weeds in joints usually mean the joint sand has thinned or washed out, leaving gaps where wind-blown seed can root, so keeping the joints full is the first defense. Polymeric joint sand, which contains a binder that hardens when wetted, resists weeds and washout better than plain sand and is a common choice for this reason. A geotextile fabric under the base also blocks growth from below. Even so, some seed lands on top, so expect occasional maintenance, topping up joint sand where it has lost depth and clearing any growth before it establishes.