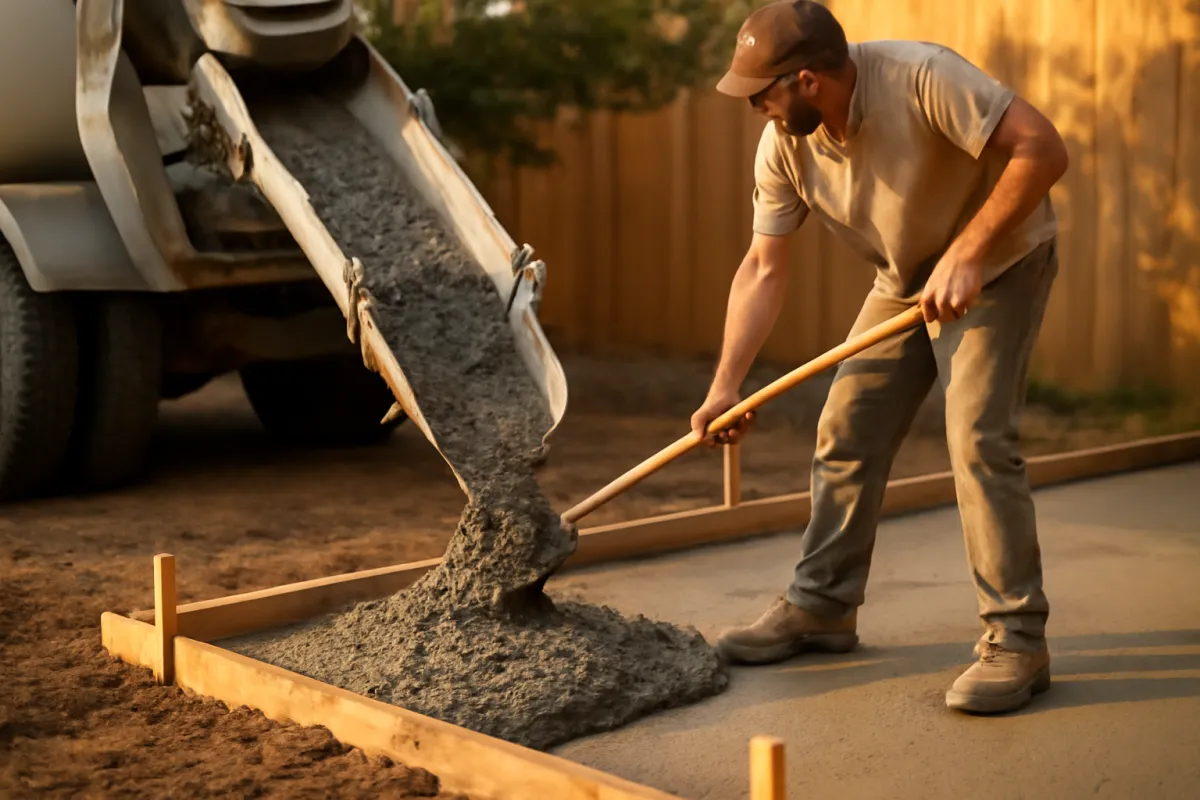
What's on this page
- Why does concrete crack: the short answer
- What concrete does as it hardens
- The four crack families at a glance
- Plastic shrinkage cracks: the first hours
- Settlement cracks: when the ground gives way
- Drying shrinkage cracks: why most slabs crack eventually
- Structural cracks: load, spans, and real trouble
- Freeze-thaw, heave, and the slow movers
- What causes cement to crack: the water problem
- The water-cement ratio in numbers
- Control joints: telling concrete where to crack
- Joint spacing math: the 2 to 3 times rule
- Curing: the cheapest crack prevention there is
- The subgrade: crack prevention below the slab
- What rebar and mesh actually do
- Reading a crack: width, pattern, and movement
- Hairline or structural: when to worry
- When a crack needs repair
- Weather on pour day: the other crack maker
- A worked example: jointing a 10 by 20 patio
- Where crack prevention effort actually goes
- The crack prevention checklist
- The bottom line
Short answer: Concrete cracks because it shrinks as it dries and hardens, commonly cited around a sixteenth of an inch per ten feet, while the ground beneath restrains it, and that tension exceeds concrete's weak tensile strength. Most cracks fall into four families: plastic shrinkage in the first hours, settlement over soft ground, drying shrinkage over weeks to months, and structural cracks from load or movement. Water content, subgrade, control joints and curing are the controls.
Somewhere in the first year of almost every slab’s life, a thin dark line appears, and the owner asks the same question the trades have been answering for a century: why does concrete crack, and was it something we did? The honest answer is both reassuring and useful. Concrete cracks because it shrinks as it dries and hardens, and because the ground it sits on grips it while it tries. That tension has to go somewhere. The entire craft of crack prevention is not stopping this, which is impossible, but managing where, when, and how big.
This explainer works through that answer properly: the four crack families and how to tell them apart, the causes you control on pour day (water content, subgrade, joints, curing) and the ones you only get to plan around, the commonly cited joint spacing math, and the honest limits of rebar. It pairs with three neighbors in our concrete series: our slab pouring tutorial builds the pour this explainer keeps referencing, our concrete crack repair walkthrough takes over once a crack already exists, and our weather manual for rain and cold pours covers the forecast side of the same physics. The companion below runs the joint spacing math on your own slab as you read.
Key takeaways
- Concrete cracks because it shrinks as it dries, commonly cited around a sixteenth of an inch per ten feet, while the ground restrains it; managed cracking, not zero cracking, is the real goal.
- Four families cover most cracks: plastic shrinkage (first hours), settlement (soft ground), drying shrinkage (weeks to months, near universal), and structural (load or movement, the one that earns a professional).
- Water is the biggest controllable cause: extra mixing water beyond the design ratio cuts strength and increases shrinkage at the same time, a double penalty paid in cracks.
- Control joints schedule cracks rather than prevent them: commonly cited spacing is 2 to 3 times the slab thickness in inches, expressed as feet, cut about a quarter of the depth, within roughly the first day.
- Rebar and mesh do not prevent shrinkage cracks; they hold cracks tight. Prevention lives in the water ratio, the compacted subgrade, the joints, and the curing.
Why does concrete crack: the short answer
Strip away the special cases and one mechanism explains most cracks: restrained shrinkage. Fresh concrete is placed at its largest size it will ever be. As the chemical reaction between cement and water hardens it, and as the surplus mixing water slowly evaporates out of it over weeks, the slab tries to get slightly smaller. A commonly cited planning figure is shrinkage of roughly a sixteenth of an inch per ten feet of slab, which sounds trivial until you remember the slab is not free to move. It is gripped by friction against the ground, keyed into footings, wrapped around plumbing penetrations, and pinned at corners.
A material that wants to shrink but is held still experiences tension, and concrete is famously lopsided about tension: strong in compression, weak in tension, commonly cited at only about a tenth of its compressive strength. So the tension builds as the slab dries, and when it exceeds what the concrete can carry at that age, the slab relieves the stress the only way it can: a crack. Every prevention lever in this explainer works on one side of that equation or the other, either reducing how much the concrete shrinks, reducing how strongly it is restrained, helping it gain tensile strength before the stress peaks, or deciding in advance where the inevitable relief line will form.
What concrete does as it hardens
The reason water sits at the center of the crack story is what hardening actually is. Concrete does not dry the way mud dries; it cures, meaning the portland cement in the mix reacts chemically with water to grow the interlocking crystals that make stone out of slurry, a distinction our portland cement versus concrete explainer unpacks fully. That reaction only needs a fraction of the water a workable mix contains. The rest is there so the material can be moved, placed, and finished, and once its job is done, it has nowhere to go but out.
That surplus water leaves in two acts, and each act has its own crack family. In the first hours, while the concrete is still plastic, water rises to the surface as bleed water and evaporates; if the surface loses water faster than it rises, the still-soft top layer shrinks over a fluid interior and tears. Over the following weeks and months, the hardened slab slowly releases the rest, and the whole body of the concrete contracts, which is the drying shrinkage that control joints exist to manage. Understanding the two acts is half the diagnosis: a crack that appeared the first afternoon and a crack that appeared in month three have different causes, different preventions, and different meanings.
The four crack families at a glance
Most cracks a homeowner will ever meet belong to one of four families, and the table sorts them by the two questions you can answer from the driveway: when did it appear, and what does it look like?
| Crack family | Typical timing | Typical look | Root cause |
|---|---|---|---|
| Plastic shrinkage | First hours, before hardening | Shallow parallel tears, often diagonal, stopping short of edges | Surface dried faster than bleed water rose |
| Settlement / subgrade | Weeks to years | Follows the soft spot; may offset vertically | Ground under the slab compacted poorly or washed out |
| Drying shrinkage | Weeks to months | Fairly straight, full depth over time, hairline width | Restrained shrinkage as surplus water left |
| Structural / overload | Any time after loading | Wide, growing, or offset; matches the load path | Load or movement beyond the slab's spec |
Two smaller patterns are worth naming so they do not alarm anyone. Crazing is a fine network of surface-only lines like cracked glaze on pottery, a cosmetic artifact of the surface drying faster than the body, and it does not deepen. Plastic settlement cracks form directly over rebar or large aggregate when soupy concrete settles around them in the first hours, telegraphing the bar’s position as a line. Both are cousins of the main families, and both trace to the same causes this explainer keeps circling: water and early drying.
Plastic shrinkage cracks: the first hours
Plastic shrinkage cracks are the sprinters of the family, appearing while the concrete is still soft enough to hold a thumbprint. The mechanism is a race at the surface. Fresh concrete constantly bleeds a thin film of water upward as its solids settle; sun, wind, low humidity, and warm air evaporate that film away. As long as bleed water rises as fast as the air removes it, the surface stays wet and happy. When evaporation wins the race, the top fraction of an inch dries and shrinks while everything under it is still fluid, and the stretched skin tears. The result is the signature look: shallow, roughly parallel cracks, often diagonal across a slab, frequently stopping short of the edges.
The fix is entirely about slowing the race, which makes this the most preventable family of the four. Pour early in the morning on hot days, dampen the subgrade so it does not steal water from below, put up windbreaks or sunshades when the forecast is working against you, and get curing protection on the surface as soon as finishing allows. Hot, dry, windy days multiply evaporation dramatically, which is why the same crew with the same mix can pour a flawless slab in April and a torn one in July. The weather half of this story runs deep enough that it gets its own treatment in our rain and cold weather manual, including the hot weather playbook.
Settlement cracks: when the ground gives way
The second family has nothing to do with the concrete and everything to do with what is underneath it. A slab is a stiff plate, and it is only as supported as the ground it sits on. If a section of subgrade compacts poorly, was backfilled loosely over a trench, holds organic soil that decays, or gets washed out by water moving under the slab, that section stops pushing back. The slab bridges the void for a while, carrying load in bending, which is exactly what concrete is worst at, and then it snaps along the edge of the soft zone. Settlement cracks are the family most likely to offset vertically, one side sitting lower, because a piece of the slab has genuinely sunk.
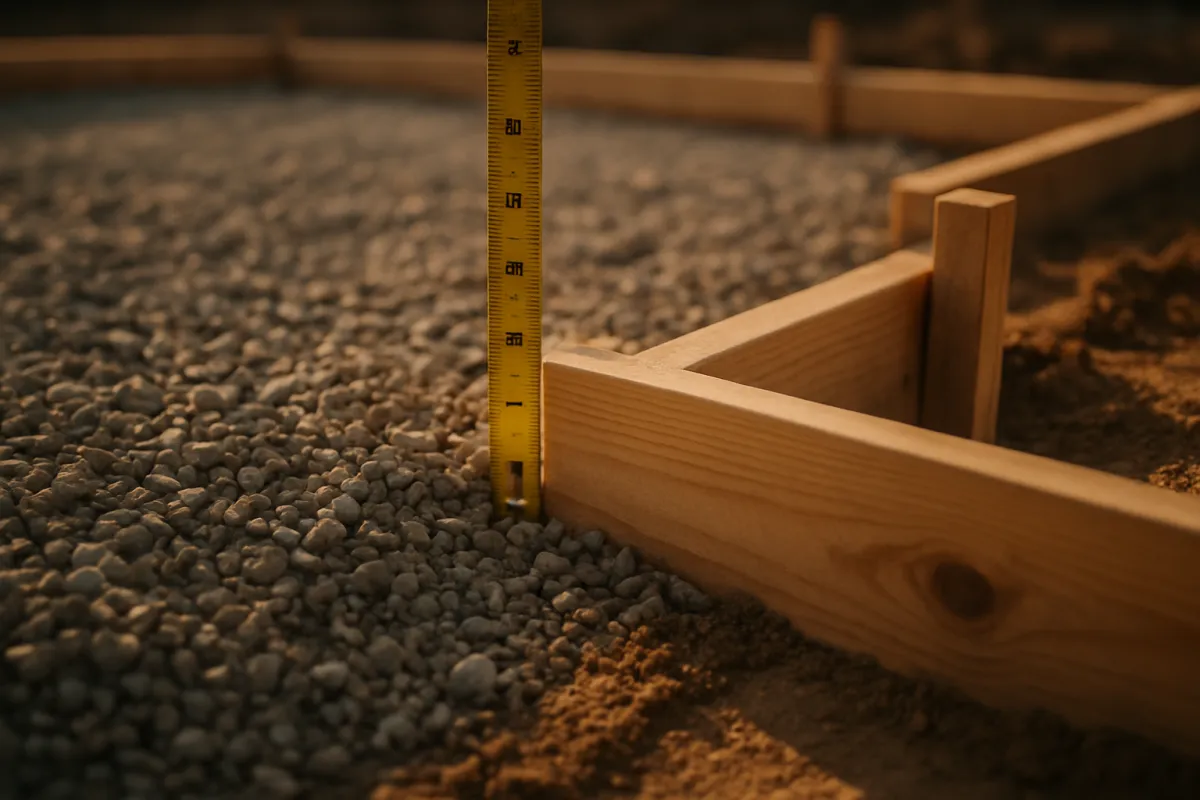
Prevention is entirely front-loaded into the prep, which is why our slab pouring tutorial spends so much of its length below grade. Strip out organic soil, compact the subgrade uniformly, place a commonly cited base of roughly 4 inches of compacted angular gravel, and pay special attention to trench lines and utility crossings, which are the classic soft stripes under future cracks because backfill rarely gets compacted as well as undisturbed ground. Water management is the other half: downspouts and grading that move water away from the slab edge keep the base from washing out years later. A slab that settled is not a filler job; the void is still there, which is where the repair conversation in our crack repair walkthrough draws its line between cosmetic and structural.
Drying shrinkage cracks: why most slabs crack eventually
The third family is the near-universal one, the reason the industry’s slogan is that there are two kinds of concrete: concrete that has cracked and concrete that is going to. Over the weeks and months after the pour, the surplus mixing water that made the slab placeable slowly evaporates out of the hardened material, and the slab contracts. Multiply the commonly cited sixteenth of an inch per ten feet across a 40 foot driveway and the slab is trying to lose roughly a quarter inch of length against the grip of the ground beneath it. Tension builds slowly and evenly, which is why these cracks arrive politely, months later, fairly straight, and usually hairline.
Because the cause is the material itself, drying shrinkage cannot be prevented outright, only reduced and redirected. Reduced, by mixing with no more water than the design calls for, since surplus water converts directly into surplus shrinkage. Redirected, by control joints, which give the slab pre-weakened straight lines to crack along instead of letting the tension pick its own path across the middle of your patio. A drying shrinkage crack that forms under a joint is a system working as designed; the identical crack wandering across an unjointed slab is the same physics with worse planning. That distinction, between cracking and uncontrolled cracking, is the single most useful reframe in this whole subject, and it is why the jointing sections below are the heart of the prevention story.
Structural cracks: load, spans, and real trouble
The fourth family is the one the other three get mistaken for, which is why it earns its own screens. Structural cracks come from force or movement beyond what the slab or wall was built for: vehicles parked on a thin walkway slab, a loaded dumpster on a patio, tree roots jacking a corner, expansive clay soils swelling and shrinking with the seasons, frost heave lifting a footing, or a foundation moving under a wall. The concrete is not failing at being concrete; the spec is failing at matching the load.
The tells are width, growth, and offset. Structural cracks tend to run wider than hairline, commonly flagged around a quarter inch, they grow over weeks rather than stabilizing, and they are the family most likely to show displacement, one face proud of the other, or the stair-step pattern through block walls that tracks foundation movement. Context multiplies the signal: a crack in a foundation wall, a slab that carries vehicles, or a wall near sticking doors and sloping floors deserves a professional assessment, not a tube of filler, because sealing it hides the messenger while the cause keeps working. Prevention happens at design time: thickness matched to the load, footings below frost depth, and honest answers about what will ever park, sit, or lean on the surface. Our crack repair walkthrough opens with exactly this triage because it is the step that decides whether repair is even the right verb.
Freeze-thaw, heave, and the slow movers
Beyond the big four, a handful of slower mechanisms crack and break concrete over years rather than months, and they matter most in cold and wet climates. Freeze-thaw damage is water physics: hardened concrete is subtly porous, water that soaks in expands roughly a tenth of its volume when it freezes, and repeated cycles of that internal jacking flake, scale, and eventually crack the surface. The defenses are air-entrained concrete for exterior work, which distributes microscopic bubbles that give freezing water somewhere to expand, and sealing the surface so less water gets in to begin with, the maintenance case our concrete sealer explainer makes in full. Freeze-thaw is also the argument for getting the pour itself right before the season turns: a slab that froze in its first nights arrives at winter already weak at the surface, so a fall or winter pour belongs in our cold weather concrete manual before it belongs in a sealer schedule.
Frost heave is the larger-scale cousin: soil that freezes swells upward, and a slab or footing sitting on frost-prone ground gets lifted unevenly, then dropped in the thaw, a cycle that cracks slabs and racks structures. It is why footings go below local frost depth and why free-draining gravel bases earn their keep, since well-drained coarse material holds less water to freeze. Corrosion rounds out the slow movers: steel inside concrete that rusts expands several times over, spalling the concrete off from within, usually where cracks or thin cover let water and salt reach the bar. Each of these is a years-long story, but every one of them starts at the same door: water getting where it should not, which keeps the maintenance advice consistent across the whole series. Keep water moving off and away from concrete, and the slow movers mostly stay slow.
What causes cement to crack: the water problem
When people ask what causes cement to crack, the practical answer, the one that changes behavior on pour day, is water. The chemistry sets up a trap. Cement needs surprisingly little water to fully hydrate; a commonly cited figure is that hydration alone would be satisfied with a water-cement ratio far below what anyone could actually place and finish. Workable mixes therefore carry deliberate surplus water, and every gallon of surplus does two bad things at once. It dilutes the cement paste, leaving a weaker, more porous final material, and it is exactly the water whose eventual departure is drying shrinkage, so more of it means more shrinking to do.
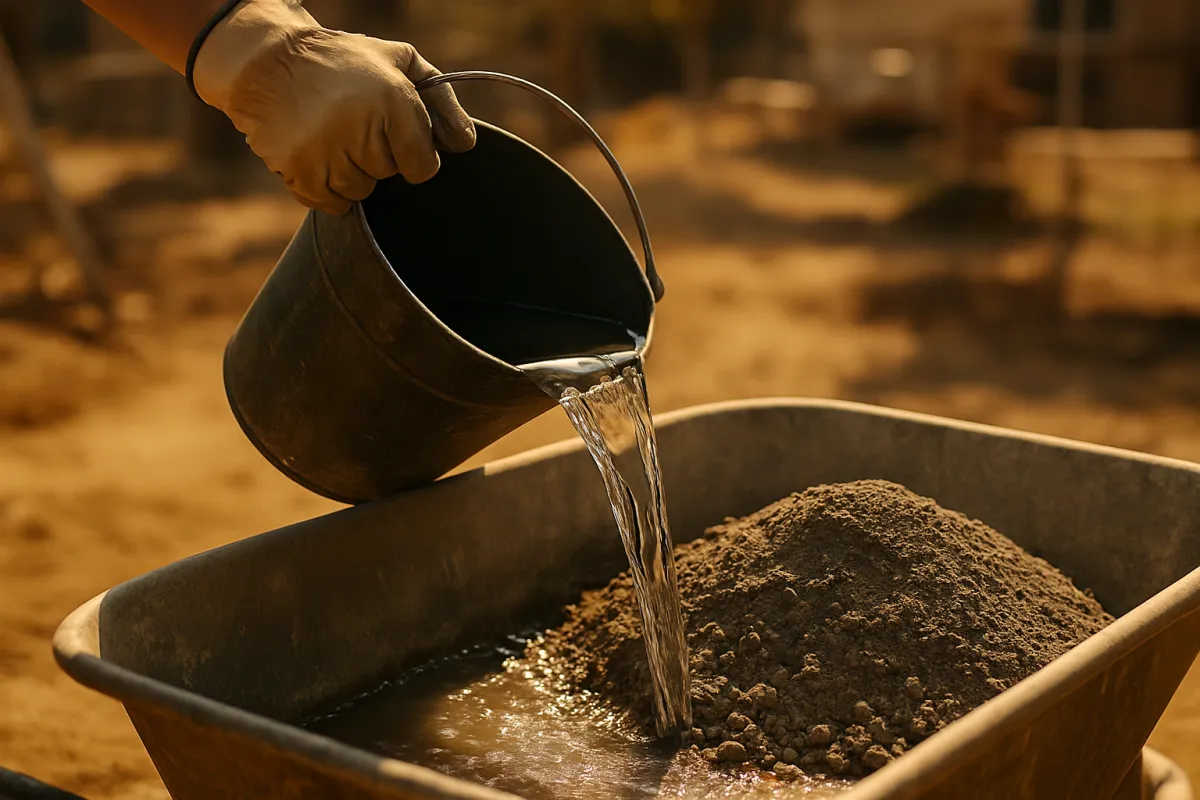
The trap springs on pour day because wet concrete is easier. It flows into corners, screeds with less effort, and finishes smoother, so the temptation to add another bucket at the wheelbarrow or ask the driver to add water at the truck is constant, and the penalty is invisible for weeks. Our concrete mixing manual builds its whole method around resisting that temptation: measure water, add the last of it gradually, and judge the mix by how it holds a shape rather than how easily it pours. The mix that seems stubborn in the wheelbarrow is usually the one that stays uncracked in the ground.
The water-cement ratio in numbers
The relationship between water and final quality is steep enough to deserve numbers, even illustrative ones. Strength in concrete tracks the water-cement ratio inversely: less water per pound of cement means denser paste and stronger, tighter concrete. Set an illustrative index of 100 for a mix at a commonly used ratio around 0.45, and the slide looks like this as water climbs.
More water, weaker concrete
Illustrative relative strength index by water-cement ratio; the exact numbers vary by mix, but the direction never does.
Each bar's width matches its illustrative index against the 0.45 mix at 100. The figures are planning illustrations, not lab values for any specific product, but the shape of the curve is the point: water added past the design ratio pays for easier spreading with a large slice of final strength, and the same surplus water raises shrinkage, so the weakened slab also has more cracking force applied to it.
Read the chart alongside the shrinkage story and the double penalty becomes vivid. The soupy mix ends up weaker in tension exactly when drying shrinkage applies more tension to it, which is why watered-down slabs so often show the whole crack catalog at once: crazing from the wet surface, plastic settlement lines over the bar, and early, wide drying shrinkage cracks. Bagged products state their water range per bag for this reason, and the arithmetic of how many bags and how much water a job needs is worked in our bagged concrete manual. When a mix is genuinely too stiff to place, the professional levers are plasticizers and adjusted proportions, not the garden hose.
Control joints: telling concrete where to crack
Since drying shrinkage cannot be prevented, the industry’s elegant answer is to stop fighting it and start scheduling it. A control joint is a straight groove deliberately cut partway through the slab, commonly about a quarter of its depth. The groove thins the cross-section along that line, making it the weakest path through the slab, so when shrinkage tension finally exceeds the concrete’s tensile strength, the crack forms at the bottom of the groove and runs along it, hidden beneath a tidy straight line. The slab still cracks. It simply cracks where it was told to.
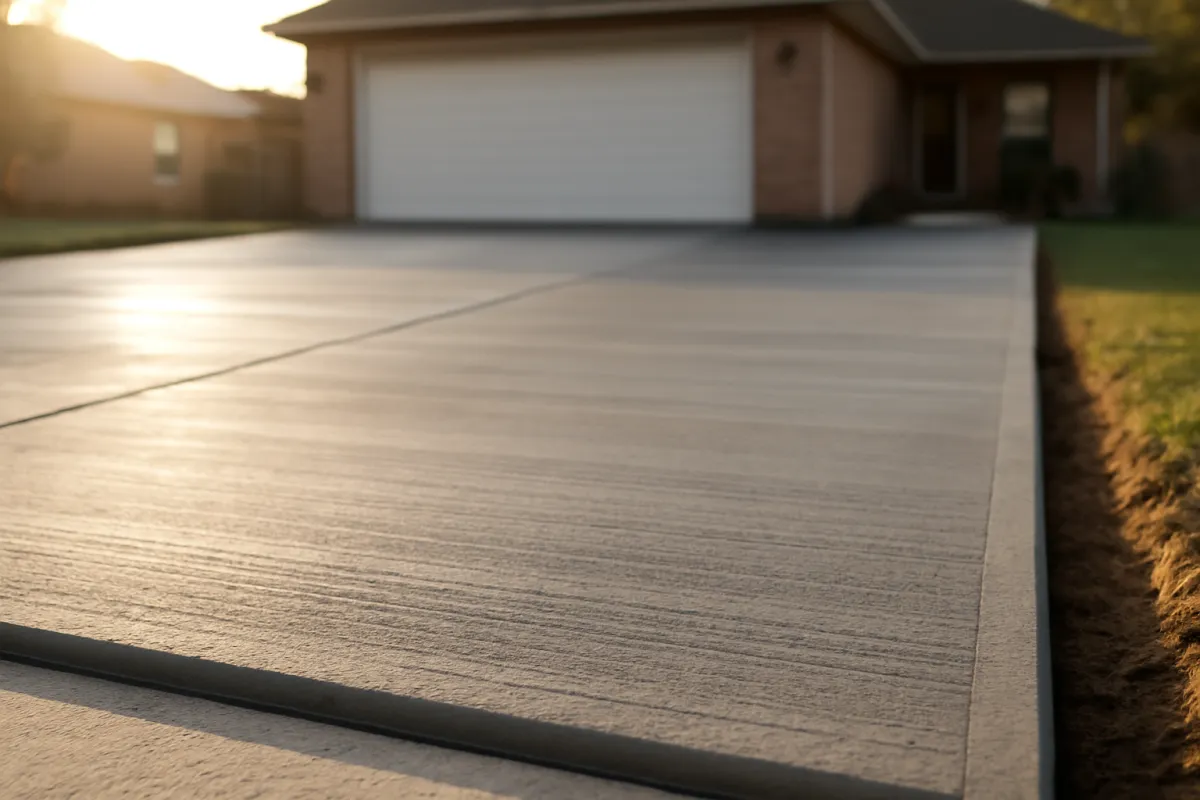
Timing and depth are the two ways joints fail. Depth first: a shallow scratch does not meaningfully weaken the section, so the slab ignores it and cracks somewhere else; a quarter of the thickness is the commonly cited minimum, meaning a full inch of cut in a 4 inch slab. Timing second: shrinkage stress starts building as soon as the concrete hardens, so joints must exist before the tension peaks. Tooled joints go in during finishing, pressed into the plastic concrete. Saw-cut joints commonly go in within roughly the first day, sooner in hot weather, at the earliest window where the saw cuts cleanly without raveling the edges. A joint cut on day three of a summer week is often a groove drawn next to a crack that already happened somewhere less convenient.
Joint spacing math: the 2 to 3 times rule
Where the joints go is arithmetic, and it is worth doing on paper before the pour. The commonly cited rule sets joint spacing, in feet, at 2 to 3 times the slab thickness in inches. A 4 inch patio slab wants joints roughly every 8 to 12 feet; a 5 inch driveway, every 10 to 15 feet; a thin 3 inch pad, as tight as every 6 to 9 feet. Use the closer spacing for mixes on the wet side, for slabs in punishing drying conditions, and whenever in doubt, because an extra joint is nearly free while an extra crack is forever. The companion runs this rule against your own slab dimensions as you read, and the estimator handles the volume side of the same pour.
Two refinements make the rule work in the real world. First, panels should stay close to square, with a commonly cited aspect ratio limit of about 1.5 to 1, because long skinny panels crack across their middles no matter how good the spacing looks in one direction; a 10 by 40 strip of 4 inch sidewalk needs cross-joints, not a single heroic run. Second, reentrant corners, the inside corners where a slab wraps a porch column or an L-shaped patio turns, concentrate stress like a notch in a piece of glass and will crack diagonally from the corner if no joint meets them; good jointing plans run a joint into every inside corner and around every penetration. Draw the panel grid before the truck comes, mark the lines, and the slab’s whole future crack map is settled in your favor.
Curing: the cheapest crack prevention there is
Curing is the step with the worst ratio of importance to effort in all of concrete work: it costs almost nothing, and skipping it undoes money already spent. To cure concrete is simply to keep it moist and reasonably warm after finishing so hydration keeps running. The crystals that give concrete its strength only grow while water is present; let the slab dry out early and hydration stalls, permanently, leaving the surface weaker, dustier, and more porous than the identical slab kept damp. A commonly cited practice is to cure slabs for about 7 days, by water misting, by covering with plastic sheeting or wet burlap, or by spraying a curing compound that seals moisture in.
The crack connection runs through the race between strength and stress. Drying shrinkage tension builds as water leaves; tensile strength builds as hydration proceeds. Curing holds water in, which simultaneously delays the shrinkage side and accelerates the strength side, so the slab meets its inevitable tension later and stronger. The uncured slab meets the same tension sooner and weaker, and the result is visible in every parking lot poured in a hot week and left bare: map cracking, dusting surfaces, and early joint failures. Cure discipline also owns the first defense against plastic shrinkage, since protection that goes on promptly ends the surface evaporation race early. Seven days of keeping a slab damp is the cheapest insurance in this entire explainer, and it is the step most commonly skipped entirely.
The subgrade: crack prevention below the slab
Every settlement crack was purchased before the concrete arrived, which makes the subgrade the highest-leverage prevention money on the job. The slab needs the same thing everywhere: uniform support. Note the word choice, uniform, not merely strong. A slab bridging between a rock-hard undisturbed section and a fluffy backfilled trench cracks along the boundary even though most of the base was excellent, because the stiffness change concentrates bending exactly there. The prep sequence in our slab pouring tutorial exists to manufacture uniformity: strip topsoil and organics, compact the subgrade, then place and compact a base commonly cited around 4 inches of angular gravel, in lifts, checked for even depth inside the forms.
The base earns its keep three times over. It spreads loads, it levels the stiffness of whatever mixed ground lies below, and it drains, keeping water from pooling under the slab where it can soften soil, wash out fines, or feed frost heave. Depth uniformity matters as much as the average: a base that humps in the middle leaves the slab thin over the hump, and thin sections crack first, a geometry problem covered from the gravel side in our gravel depth reference. Utility trenches deserve paranoia, compacted in lifts all the way up rather than topped off loose. None of this shows in the finished surface photo, which is exactly why it is where careful jobs and cracked jobs quietly diverge.
What rebar and mesh actually do
Reinforcing steel carries a mythology worth correcting, because homeowners routinely pay for rebar expecting a crack-free slab and feel cheated by the hairline that shows up anyway. Steel does not prevent shrinkage cracking. The tension that drying shrinkage builds is distributed through the whole slab, and the modest steel in a residential pour neither removes that tension nor adds enough tensile capacity to stop the first crack from forming. Reinforced slabs crack on roughly the same schedule as unreinforced ones.
What steel changes is everything after the crack. Bars or welded wire mesh crossing a crack hold the two faces in tight contact, so the crack stays hairline instead of widening, keeps the faces interlocked so loads transfer across, and prevents the vertical offset that turns a line into a trip hazard. In slabs that carry vehicles, over suspect ground, or in structural work, that is not optional value, it is the design. But the honest hierarchy for a homeowner’s patio puts steel after the fundamentals: a moderate water ratio, a compacted uniform base, correct joints, and real curing prevent more visible cracking per dollar than steel does, and steel positioned wrong, flat on the ground instead of within the slab’s depth, does close to nothing. Fibers blended into the mix, for their part, mainly help against early plastic shrinkage cracking; they are a supplement to the fundamentals, not a substitute either.
Reading a crack: width, pattern, and movement
Diagnosis is pattern matching, and three observations carry most of it. First, width, measured honestly with a ruler or feeler gauge rather than eyeballed: hairline and stable reads cosmetic; approaching a commonly cited quarter inch reads serious. Second, pattern: shallow parallel tears that stop short of edges say plastic shrinkage on a hot pour day; a fine allover network says crazing; straight hairlines months later, or cracks running along joints, say normal drying shrinkage; a crack tracking a line where a trench crosses says settlement; diagonal cracks radiating from inside corners say a missing joint at a reentrant corner; a line directly over where the rebar sits says plastic settlement.
Third, movement, which separates history from activity. Mark the crack’s ends with pencil, measure and note its width at a labeled spot, date both, and check monthly. A crack that never grows is an artifact of a finished process, whatever its origin, and becomes a sealing and cosmetics decision. A crack that lengthens or widens over weeks has a live cause still applying force, and live causes are what professionals are for. Vertical offset is the strongest single signal in the set: shrinkage does not lift one face above the other, but settlement and structural movement do. Ten minutes with a ruler, a pencil, and a calendar turns a worrying line into data, and data is what the repair decision runs on.
Hairline or structural: when to worry
Collapsing all of this into a homeowner’s triage: most cracks are fine, and the ones that are not announce themselves. On the fine side of the ledger sit hairline cracks in slab surfaces, crazing networks, short plastic shrinkage tears, cracks that follow control joints, and any old crack that measurement shows to be stable. These are maintenance items. Their real risk is not structural but hydraulic, water entering, freezing, and widening the crack or reaching steel, which is why even harmless cracks in exterior slabs are worth sealing, the case built in our driveway sealing manual.
On the worry side sit the screens this explainer keeps repeating because they are worth memorizing: width around a quarter inch or more, growth over weeks, vertical offset, stair-step patterns through block or brick, cracks in foundation walls or in slabs that carry vehicles, and cracks keeping company with sticking doors, gapping trim, or sloping floors. Any one of them is a reason for a professional assessment; combinations strengthen the signal. The cost asymmetry makes the decision easy: an evaluation is cheap against the price of a structural problem given years to compound, and a filler bead over an active crack buys nothing but delay. When in doubt, measure, date, and watch; when the watch shows movement, call.
When a crack needs repair
Once a crack has been read and lands on the cosmetic side, repair is a genuinely satisfying weekend job, and it has its own complete treatment in our concrete crack repair walkthrough: assess, clean and rout, match the filler to the width and movement, fill from the bottom up, cure, and seal. This explainer hands off there deliberately, because the repair only holds when the diagnosis in these sections came first. Filler in an unread crack is paint over a question mark.
The reason to repair even harmless cracks is water, and in freeze country the argument is compounding. An open hairline admits water; frozen water expands roughly a tenth of its volume; the ice wedges the crack fractionally wider; the wider crack admits more water for the next cycle. Add de-icing salt reaching embedded steel and the corrosion expansion that follows, and a cosmetic line can spend a decade slowly promoting itself. A flexible sealant sized to the crack, renewed as maintenance, interrupts the whole cascade for a few dollars a season. The one repair rule from this side of the handoff: never fill a crack you have not triaged, because a smooth patch over an active settlement or structural crack silences the only witness while the cause keeps working underneath it.
Weather on pour day: the other crack maker
Every mechanism in this explainer has a dial that the forecast turns. Hot, dry, windy days multiply surface evaporation, which is the entire cause of plastic shrinkage cracking and a stress test for curing discipline. Rain on a fresh surface adds unmeasured water exactly where the finish is forming, and rain before the pour can soften the subgrade that uniform support depends on. Cold slows hydration dramatically, stretching the vulnerable weak period, and a hard freeze in the first day or two can damage the concrete permanently, because water freezing inside an immature slab does its expansion trick before the material has strength to resist it.
Those dials are worth a full manual of their own, and they have one: our weather manual for rain and cold pours covers the commonly cited temperature thresholds, what actually happens when concrete freezes while curing, the blanket and accelerator playbook, the hot weather defenses, and what a rained-on or over-watered surface means for the finish. For this explainer’s purposes, the summary is that weather is a crack cause you schedule around rather than engineer around: the same slab, poured by the same hands, carries a different crack risk on a mild overcast morning than in a July afternoon wind or an October cold snap, and the pour date is a prevention lever exactly as real as the water ratio.
A worked example: jointing a 10 by 20 patio
Put the rules on one slab and watch them turn into a plan. The job: a 10 by 20 foot backyard patio, 4 inches thick, on compacted base, poured on a mild day. Volume first, since the truck needs a number: 10 by 20 by a third of a foot is roughly 67 cubic feet, about 2.5 cubic yards, call it 2.7 to 2.75 with a modest overage, arithmetic the estimator or our concrete volume manual confirms in seconds.
Now the crack plan. Spacing: 4 inches of thickness makes the commonly cited joint spacing 8 to 12 feet. The 20 foot length wants at least one cross joint; one cut at 10 feet makes two 10 by 10 panels, right at the top of the range, so a conservative plan cuts at roughly 6 foot 8 intervals, two joints, making three panels of about 6.7 by 10 feet. Check the aspect ratio: 10 divided by 6.7 is about 1.5, at the commonly cited limit, acceptable, though adding one long joint down the middle would bring every panel to a comfortable 5 by 6.7. Depth: a quarter of 4 inches means cuts a full inch deep, tooled during finishing or sawn within roughly the first day. Corners: the patio meets the house at an inside corner by the steps, so a joint runs into that corner. The same evening, curing starts, plastic sheeting weighted at the edges for 7 days. Total cost of the crack plan: an hour of thought and cutting. The companion below reruns every number here against your own dimensions.
Where crack prevention effort actually goes
Seen end to end, crack prevention is a budget, and the spending is lopsided in an instructive way. Here is an illustrative split of where the prevention effort on a typical residential slab pour actually lands.
An illustrative crack prevention budget
Share of prevention effort on a typical residential slab, by stage; illustrative, and the four segments sum to 100 percent.
The segments are illustrative shares of effort, not cost, and they sum to 100 percent. The striking feature is that the largest slice happens before any concrete exists and the second largest happens after the finishers leave; the pour itself is the shortest chapter of the crack story, which is exactly why cracks so often trace to the days around it rather than the day of it.
The chart’s real argument is about attention. Pour day gets all the ceremony, the truck, the crew, the wet shine, while the subgrade week before and the curing week after get none, and the crack record follows the neglect, not the ceremony. A budget-minded reading falls out too: compaction rental, a saw cut, and a roll of sheeting are trivial line items on a job priced by the yard, so nearly every crack prevention dollar is cheap insurance against repairs priced by the callback.
The crack prevention checklist
The whole explainer, compressed into the run-through before any pour.
- Plan the load honestly. Thickness and reinforcement matched to what will actually sit and drive on the slab; structural questions to a professional at design time, not repair time.
- Build uniform support. Organics stripped, subgrade compacted, roughly 4 inches of compacted angular base at even depth, trench crossings compacted in lifts, water drained away from the slab edge.
- Hold the water line. Mix to the design water content, add the last water gradually, and refuse the extra bucket that makes spreading easy; workability problems get plasticizer, not hose.
- Draw the joint map before the truck comes. Spacing at 2 to 3 times thickness in inches, in feet; panels near square, aspect ratio under about 1.5; a joint into every inside corner; depth a quarter of the slab.
- Cut on time. Tooled during finishing or sawn within roughly the first day, sooner in hot weather.
- Cure like it matters. Moist and covered for about 7 days: sheeting, wet coverings, or curing compound, starting as soon as the finish allows.
- Schedule around the sky. Hot wind, rain, and freezes each have their own playbook in the weather manual; the pour date is a prevention lever.
- Watch, then seal. Date and measure any crack that appears; stable hairlines get sealed against water, moving or offset cracks get a professional.
Run the list and the question that opened this explainer inverts: the slab still shrinks, but every crack it makes has a scheduled address.
The bottom line
Why does concrete crack? Because it shrinks as its surplus water leaves and its chemistry finishes, while the ground grips it and its own weak tensile strength gives way, roughly a sixteenth of an inch of movement per ten feet asking more of the material than it can answer. That mechanism wears four faces: plastic shrinkage tears in the first hours when the surface dries too fast, settlement cracks where the ground was never uniform, the slow near-universal drying shrinkage cracks of the first year, and the structural cracks that mean the load outran the spec. The first three are managed with cheap, unglamorous discipline: measured water, a compacted uniform base, control joints at 2 to 3 times the thickness in inches cut a quarter deep and on time, and 7 honest days of curing. The fourth is managed by design and by knowing the warning signs: width near a quarter inch, growth, offset, stair-steps. Concrete that never cracks is not on offer; concrete whose every crack sits invisibly under a straight, planned line is, and the difference is a day of preparation. When a crack has already arrived, our repair walkthrough picks up the story; when the forecast is the threat, the weather manual does; and the estimator stands ready for the volume math either way.
This explainer is educational reading on how and why concrete cracks, not an engineering opinion on any particular slab, wall, or foundation. Every figure in it, shrinkage allowances, joint spacing multiples, strength indexes, thicknesses, and timelines, is a commonly cited illustration that real mixes, soils, climates, and codes can move substantially. Crack diagnosis from a description or a photograph has hard limits; width, movement, and offset on your actual concrete are what matter, and any crack showing the structural warning signs described here, or any concrete that carries vehicles, supports a structure, or borders a foundation, deserves evaluation by a qualified concrete or structural professional rather than a self-assessment. Confirm mix, jointing, and curing specifics for your conditions with local practice and your supplier.
Frequently asked questions
Why does concrete crack after pouring?
Almost every crack in new concrete traces back to one physical fact: concrete shrinks as it dries and hardens, and shrinkage that gets restrained becomes tension the slab cannot carry. A commonly cited figure is that concrete shrinks around a sixteenth of an inch for every ten feet as it dries, and since the slab is gripped by the ground, its forms, and its own footings, that movement builds stress until something gives. The crack is where it gives. Other early causes pile on top of the same mechanism: too much mixing water increases shrinkage, fast surface drying causes plastic shrinkage cracks in the first hours, and soft spots in the subgrade let sections settle and snap. Prevention is about managing that shrinkage, not eliminating it.
What causes cement to crack?
The single biggest controllable cause is water. Cement only needs a fraction of the mix water to chemically harden; the rest exists to make the mix workable, and every extra gallon beyond the design ratio weakens the final material and increases how much it shrinks as that surplus water evaporates. A soupy, easy-to-spread mix is therefore a double penalty: lower strength and more shrinkage, which together mean more cracking. After water come the usual suspects: poor subgrade compaction, missing or late control joints, skipped curing, and drying too fast in sun and wind. A crack is usually several of these stacked, not one villain.
Is it normal for new concrete to crack?
Yes, within limits. Concrete shrinks as it dries, so hairline cracking is so expected that the industry's whole answer is not to prevent cracks but to decide where they happen, which is what control joints are: straight, tidy, pre-planned cracks. A fine hairline in a slab surface, or a crack that runs neatly along a joint, is normal behavior. What is not normal is a crack that is wide (commonly cited around a quarter inch or more), that keeps growing over weeks, that offsets vertically so one side sits higher, or that shows up within the first day as deep, parallel tears, which points at plastic shrinkage or settlement problems worth understanding before the next pour.
What are the main types of concrete cracks?
Four families cover most residential cracking. Plastic shrinkage cracks appear in the first hours, while the concrete is still soft, when sun and wind dry the surface faster than bleed water rises; they read as shallow, parallel tears. Settlement cracks come from the ground: a soft or poorly compacted spot under the slab gives way and the concrete above it snaps. Drying shrinkage cracks are the slow, near-universal kind that develop over weeks and months as the slab loses its surplus water. Structural cracks come from load or movement the slab was never specified for, such as vehicles on a thin slab, tree roots, or footing problems, and they are the family that earns a professional's eyes.
How do control joints stop concrete from cracking?
They do not stop cracking; they schedule it. A control joint is a deliberate groove, tooled into fresh concrete or saw-cut soon after finishing, that thins the slab along a straight line, commonly to about a quarter of the slab's depth. When drying shrinkage builds enough tension to crack the slab, the crack follows the weakest path, which is the joint, so the break happens underneath a clean straight line instead of wandering across the surface. Commonly cited spacing puts joints at 2 to 3 times the slab thickness in inches, expressed in feet: a 4 inch slab gets joints roughly every 8 to 12 feet, with panels kept close to square. Cut too late or too shallow, and the slab cracks where it pleases.
Does rebar stop concrete from cracking?
No, and this surprises people: reinforced slabs crack too. Steel rebar and welded wire mesh do not add enough tensile capacity to prevent shrinkage cracking in a slab; what they do is hold the cracked pieces tightly together so a crack stays hairline-tight, does not widen, and does not offset vertically. That is genuinely valuable, because a tight crack sheds water and stays flat underfoot, but it is crack control, not crack prevention. The prevention levers remain the same with or without steel: a moderate water content, a compacted uniform subgrade, correctly spaced and timed control joints, and proper curing.
When should I worry about a crack in concrete?
Use width, movement, and offset as the three screens. A crack commonly cited around a quarter inch or wider, a crack that measurably grows over weeks (pencil marks at the ends make this easy to check), or a crack where one side sits higher than the other are the signals worth a professional assessment, especially in a foundation wall, a garage slab that carries vehicles, or anywhere doors have started sticking. Stair-step cracking in block walls belongs in the same category. Fine hairlines in slab surfaces, crazing networks, and cracks running along control joints are the normal end of the spectrum and are usually a sealing and maintenance question rather than a structural one.
Can you pour concrete that never cracks?
Honestly, no, and any promise otherwise oversells. Shrinkage is built into the material: the surplus mixing water has to leave, and the slab has to get slightly smaller as it does, while friction with the ground restrains it. What a careful pour can achieve is concrete that never shows an uncontrolled crack: a moderate water-cement ratio to shrink less, a compacted uniform base so nothing settles, joints spaced and timed so shrinkage cracks form under the grooves, curing so the surface gains strength before drying stress peaks, and sensible weather timing. Slabs built with all five commonly look crack-free for decades because every crack they have is hiding in a straight line someone planned.